drain bolt YAMAHA KODIAK 700 2016 Owners Manual
[x] Cancel search | Manufacturer: YAMAHA, Model Year: 2016, Model line: KODIAK 700, Model: YAMAHA KODIAK 700 2016Pages: 180, PDF Size: 4.6 MB
Page 118 of 180
8-22
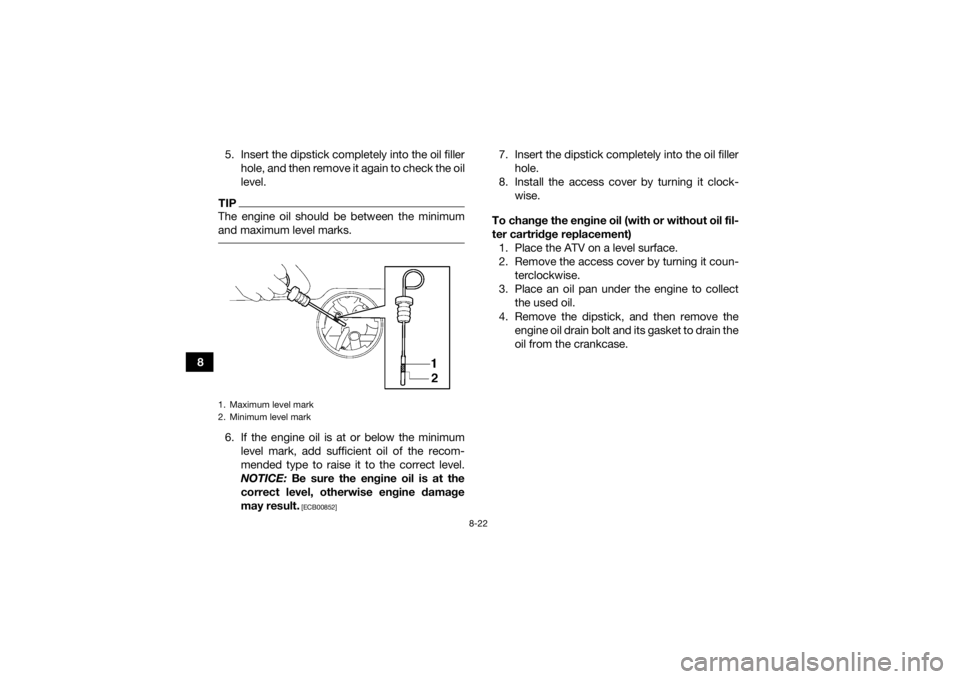
85. Insert the dipstick completely into the oil filler
hole, and then remove it again to check the oil
level.
TIPThe engine oil should be between the minimum
and maximum level marks. 6. If the engine oil is at or below the minimumlevel mark, add sufficient oil of the recom-
mended type to raise it to the correct level.
NOTICE: Be sure the engine oil is at the
correct level, otherwise engine damage
may result.
[ECB00852]
7. Insert the dipstick completely into the oil filler hole.
8. Install the access cover by turning it clock- wise.
To change the engine oil (with or without oil fil-
ter cartridge replacement) 1. Place the ATV on a level surface.
2. Remove the access cover by turning it coun- terclockwise.
3. Place an oil pan under the engine to collect the used oil.
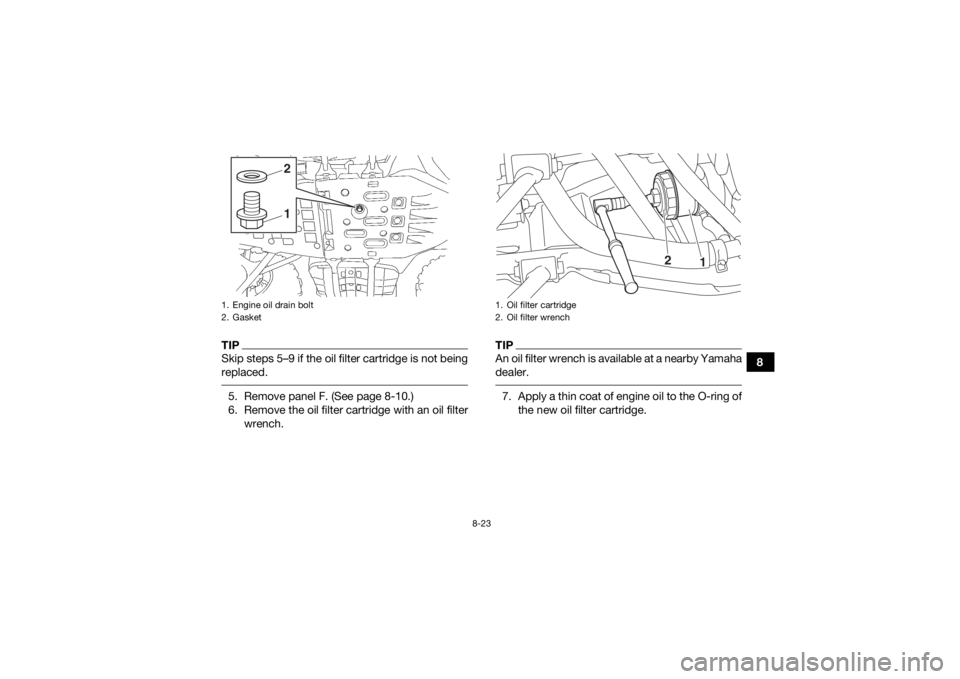
4. Remove the dipstick, and then remove the engine oil drain bolt and its gasket to drain the
oil from the crankcase.
1. Maximum level mark
2. Minimum level markUB1660E0.book Page 22 Thursday, February 26, 2015 4:01 PM
Page 119 of 180
8-23
8
TIPSkip steps 5–9 if the oil filter cartridge is not being
replaced. 5. Remove panel F. (See page 8-10.)
6. Remove the oil filter cartridge with an oil filterwrench.
TIPAn oil filter wrench is available at a nearby Yamaha
dealer. 7. Apply a thin coat of engine oil to the O-ring ofthe new oil filter cartridge.
1. Engine oil drain bolt
2. Gasket
12
1. Oil filter cartridge
2. Oil filter wrench
1
2
UB1660E0.book Page 23 Thursday, February 26, 2015 4:01 PM
Page 120 of 180
8-24
8
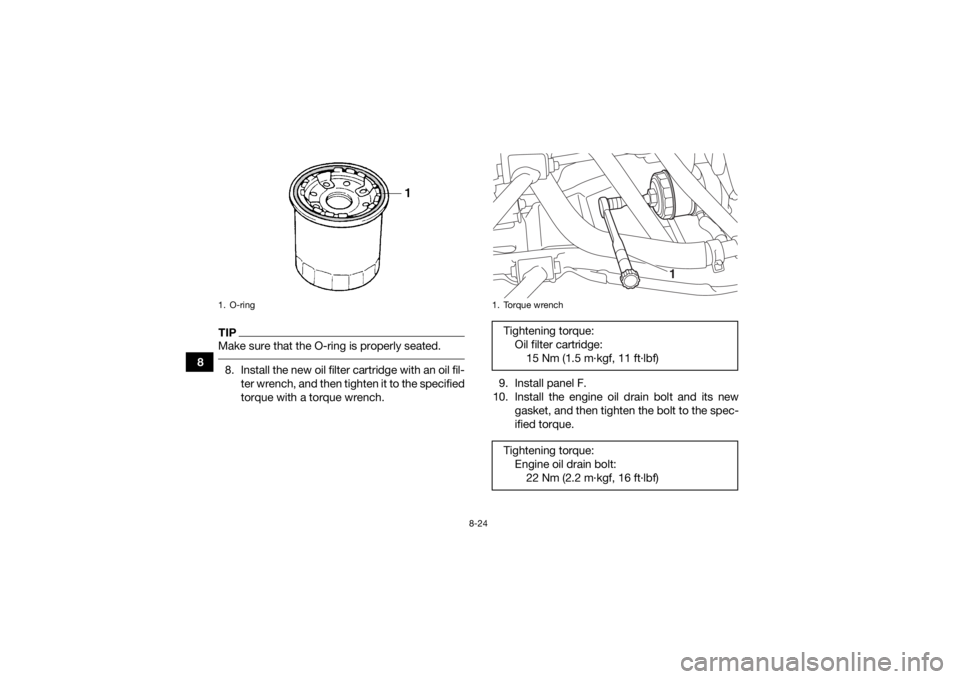
TIPMake sure that the O-ring is properly seated. 8. Install the new oil filter cartridge with an oil fil-ter wrench, and then tighten it to the specified
torque with a torque wrench. 9. Install panel F.
10. Install the engine oil drain bolt and its new gasket, and then tighten the bolt to the spec-
ified torque.1. O-ring
1. Torque wrenchTightening torque:Oil filter cartridge:15 Nm (1.5 m·kgf, 11 ft·lbf)
Tightening torque: Engine oil drain bolt:22 Nm (2.2 m·kgf, 16 ft·lbf)
1
UB1660E0.book Page 24 Thursday, February 26, 2015 4:01 PM
Page 123 of 180
8-27
8
To change the final gear oil
1. Place the ATV on a level surface.
2. Place an oil pan under the final gear case to collect the used oil.
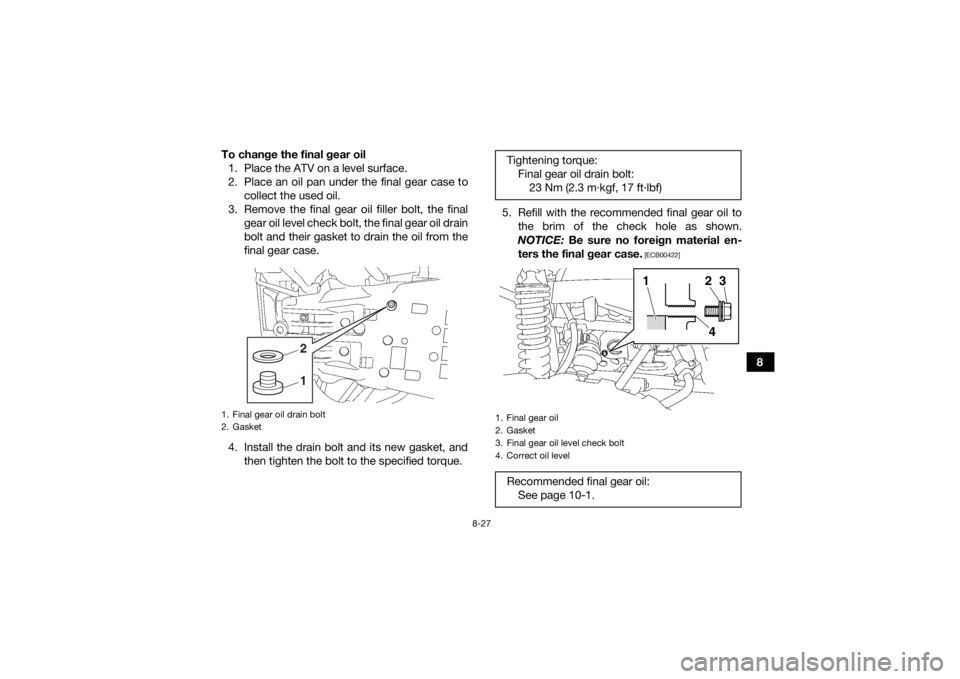
3. Remove the final gear oil filler bolt, the final gear oil level check bolt, the final gear oil drain
bolt and their gasket to drain the oil from the
final gear case.
4. Install the drain bolt and its new gasket, and then tighten the bolt to the specified torque. 5. Refill with the recommended final gear oil to
the brim of the check hole as shown.
NOTICE: Be sure no foreign material en-
ters the final gear case.
[ECB00422]
1. Final gear oil drain bolt
2. Gasket
12
Tightening torque: Final gear oil drain bolt:23 Nm (2.3 m·kgf, 17 ft·lbf)1. Final gear oil
2. Gasket
3. Final gear oil level check bolt
4. Correct oil levelRecommended final gear oil: See page 10-1.
1
243
UB1660E0.book Page 27 Thursday, February 26, 2015 4:01 PM
Page 125 of 180
8-29
8
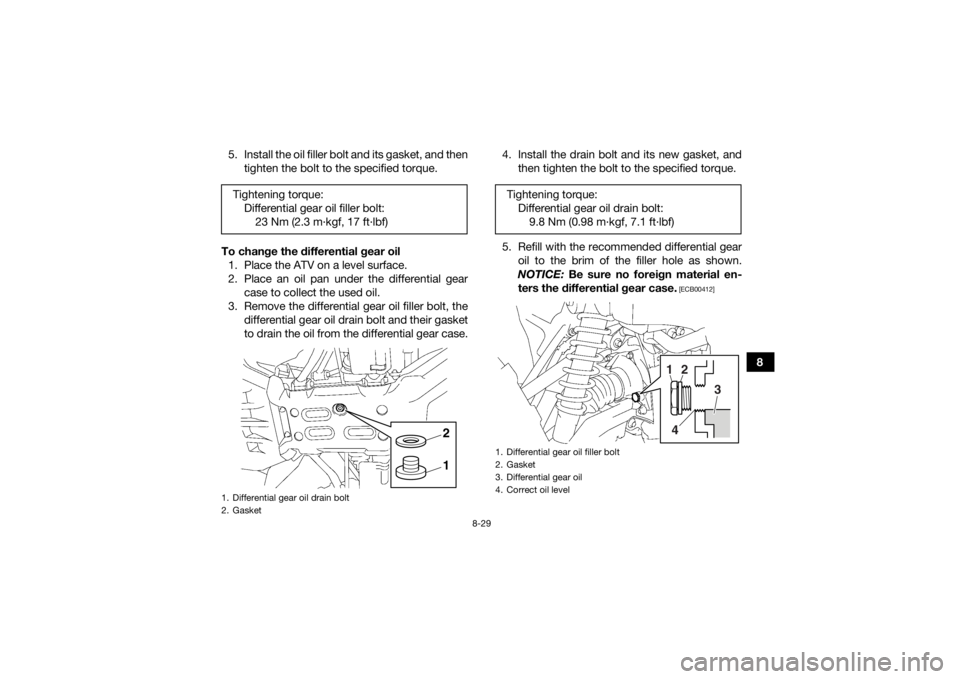
5. Install the oil filler bolt and its gasket, and then
tighten the bolt to the specified torque.
To change the differential gear oil 1. Place the ATV on a level surface.
2. Place an oil pan under the differential gear case to collect the used oil.
3. Remove the differential gear oil filler bolt, the differential gear oil drain bolt and their gasket
to drain the oil from the differential gear case. 4. Install the drain bolt and its new gasket, and
then tighten the bolt to the specified torque.
5. Refill with the recommended differential gear oil to the brim of the filler hole as shown.
NOTICE: Be sure no foreign material en-
ters the differential gear case.
[ECB00412]
Tightening torque: Differential gear oil filler bolt:23 Nm (2.3 m·kgf, 17 ft·lbf)1. Differential gear oil drain bolt
2. Gasket
12
Tightening torque: Differential gear oil drain bolt:9.8 Nm (0.98 m·kgf, 7.1 ft·lbf)1. Differential gear oil filler bolt
2. Gasket
3. Differential gear oil
4. Correct oil level
1
2
3
4
UB1660E0.book Page 29 Thursday, February 26, 2015 4:01 PM
Page 128 of 180
8-32
8
EBU34210To change the coolant
WARNING
EWB01891Wait for the engine and radiator to cool before
removing the radiator cap. You could be
burned by hot fluid and steam blown out under
pressure. Always place a thick rag over the cap
when opening. Allow any remaining pressure
to escape before completely removing the cap. 1. Park the ATV on a level surface.
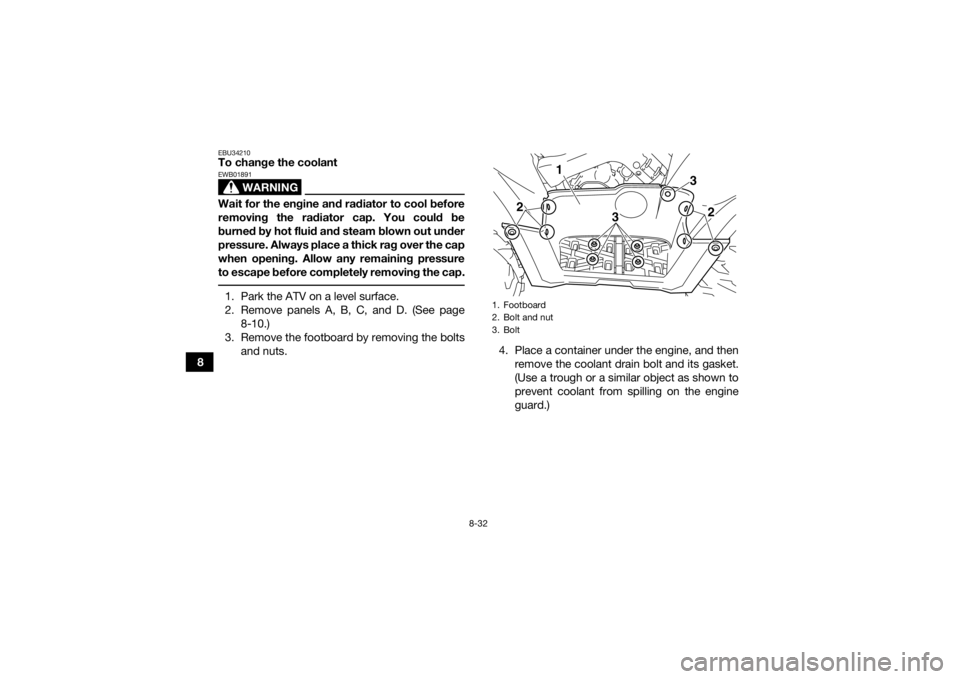
2. Remove panels A, B, C, and D. (See page8-10.)
3. Remove the footboard by removing the bolts and nuts. 4. Place a container under the engine, and then
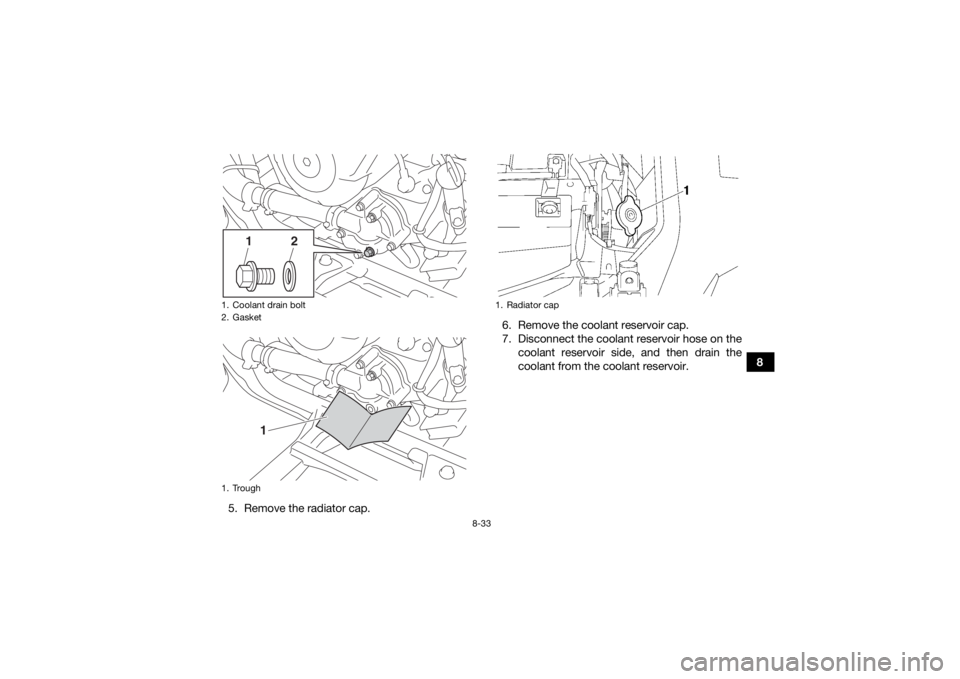
remove the coolant drain bolt and its gasket.
(Use a trough or a similar object as shown to
prevent coolant from spilling on the engine
guard.)
1. Footboard
2. Bolt and nut
3. Bolt
3
2
2
3
1
UB1660E0.book Page 32 Thursday, February 26, 2015 4:01 PM
Page 129 of 180
8-33
8
5. Remove the radiator cap. 6. Remove the coolant reservoir cap.
7. Disconnect the coolant reservoir hose on the
coolant reservoir side, and then drain the
coolant from the coolant reservoir.
1. Coolant drain bolt
2. Gasket
1. Trough
1
2
1
1. Radiator cap
UB1660E0.book Page 33 Thursday, February 26, 2015 4:01 PM
Page 130 of 180
8-34
88. After draining the coolant, thoroughly flush
the cooling system with clean tap water.
9. Install the coolant drain bolt and its new gas- ket, and then tighten the bolt to the specified
torque.
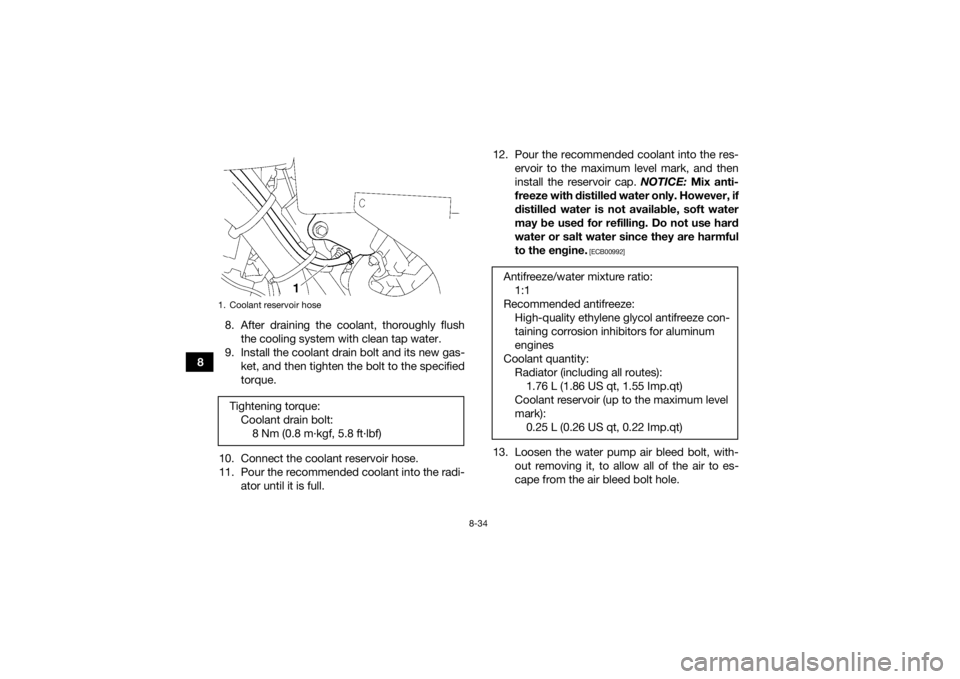
10. Connect the coolant reservoir hose.
11. Pour the recommended coolant into the radi- ator until it is full. 12. Pour the recommended coolant into the res-
ervoir to the maximum level mark, and then
install the reservoir cap. NOTICE: Mix anti-
freeze with distilled water only. However, if
distilled water is not available, soft water
may be used for refilling. Do not use hard
water or salt water since they are harmful
to the engine.
[ECB00992]
13. Loosen the water pump air bleed bolt, with- out removing it, to allow all of the air to es-
cape from the air bleed bolt hole.
1. Coolant reservoir hoseTightening torque:Coolant drain bolt:8 Nm (0.8 m·kgf, 5.8 ft·lbf)
Antifreeze/water mixture ratio:1:1
Recommended antifreeze: High-quality ethylene glycol antifreeze con-
taining corrosion inhibitors for aluminum
engines
Coolant quantity: Radiator (including all routes):1.76 L (1.86 US qt, 1.55 Imp.qt)
Coolant reservoir (up to the maximum level
mark): 0.25 L (0.26 US qt, 0.22 Imp.qt)
UB1660E0.book Page 34 Thursday, February 26, 2015 4:01 PM
Page 137 of 180
8-41
8
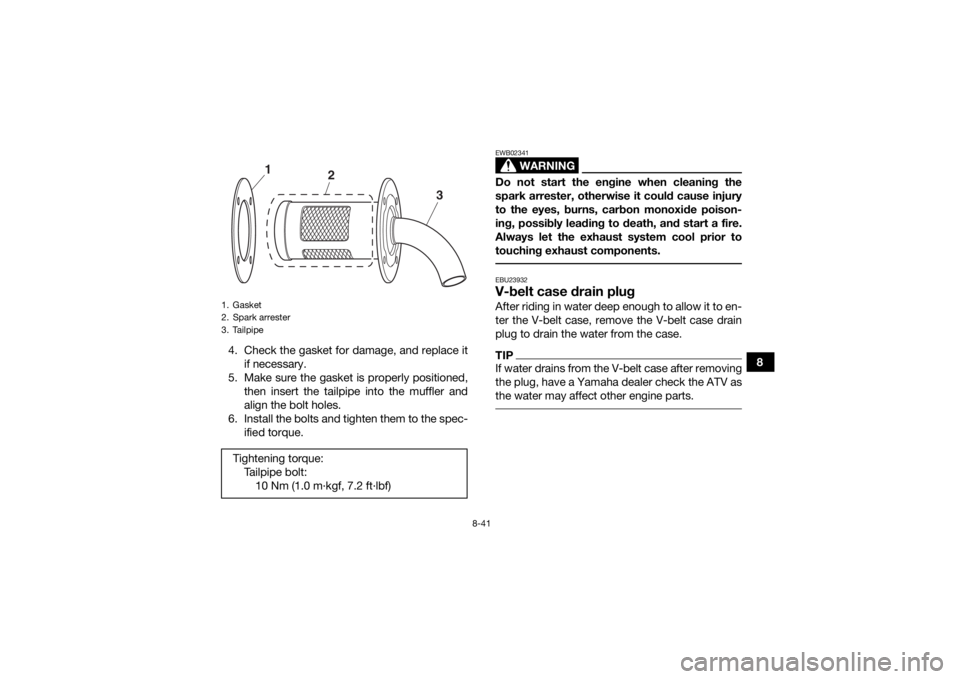
4. Check the gasket for damage, and replace it
if necessary.
5. Make sure the gasket is properly positioned, then insert the tailpipe into the muffler and
align the bolt holes.
6. Install the bolts and tighten them to the spec- ified torque.
WARNING
EWB02341Do not start the engine when cleaning the
spark arrester, otherwise it could cause injury
to the eyes, burns, carbon monoxide poison-
ing, possibly leading to death, and start a fire.
Always let the exhaust system cool prior to
touching exhaust components. EBU23932V-belt case drain plugAfter riding in water deep enough to allow it to en-
ter the V-belt case, remove the V-belt case drain
plug to drain the water from the case.TIPIf water drains from the V-belt case after removing
the plug, have a Yamaha dealer check the ATV as
the water may affect other engine parts.
1. Gasket
2. Spark arrester
3. TailpipeTightening torque:Tailpipe bolt:10 Nm (1.0 m·kgf, 7.2 ft·lbf)
3
2
1
UB1660E0.book Page 41 Thursday, February 26, 2015 4:01 PM
Page 138 of 180
8-42
8
EBU29703Adjusting the throttle lever free playThe throttle lever free play should be checked and,
if necessary, adjusted at the intervals specified in
the periodic maintenance and lubrication chart.
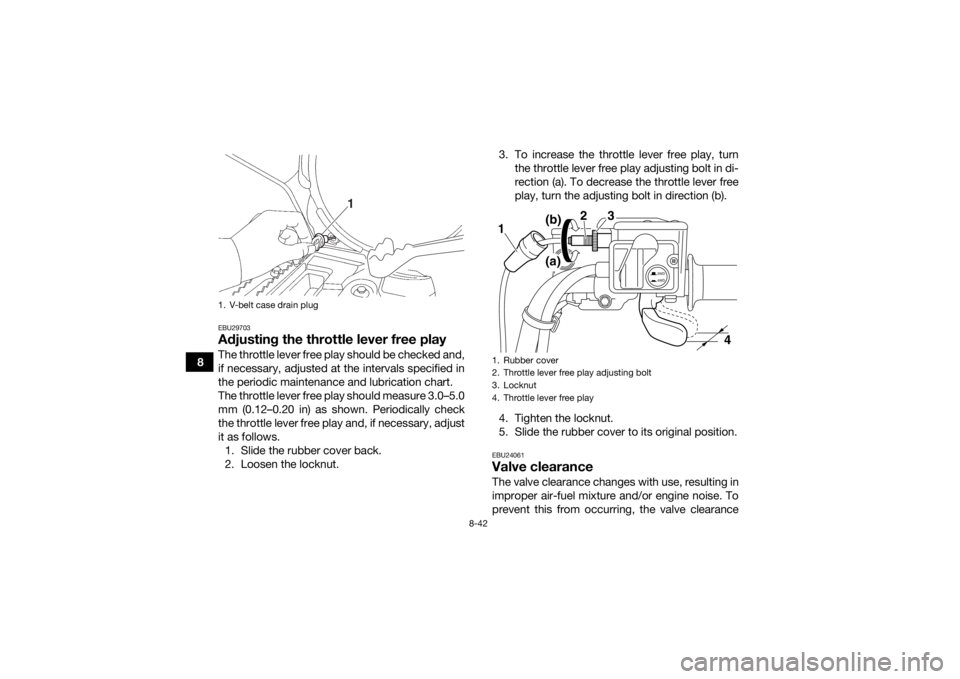
The throttle lever free play should measure 3.0–5.0
mm (0.12–0.20 in) as shown. Periodically check
the throttle lever free play and, if necessary, adjust
it as follows.1. Slide the rubber cover back.
2. Loosen the locknut. 3. To increase the throttle lever free play, turn
the throttle lever free play adjusting bolt in di-
rection (a). To decrease the throttle lever free
play, turn the adjusting bolt in direction (b).
4. Tighten the locknut.
5. Slide the rubber cover to its original position.
EBU24061Valve clearanceThe valve clearance changes with use, resulting in
improper air-fuel mixture and/or engine noise. To
prevent this from occurring, the valve clearance
1. V-belt case drain plug
1
1. Rubber cover
2. Throttle lever free play adjusting bolt
3. Locknut
4. Throttle lever free play
2WD
4WD
3
2
1
4
(b)
(a)
UB1660E0.book Page 42 Thursday, February 26, 2015 4:01 PM