torque YAMAHA MAJESTY 250 2003 Owners Manual
[x] Cancel search | Manufacturer: YAMAHA, Model Year: 2003, Model line: MAJESTY 250, Model: YAMAHA MAJESTY 250 2003Pages: 116, PDF Size: 2.07 MB
Page 53 of 116
6-2
PERIODIC MAINTENANCE AND MINOR REPAIR
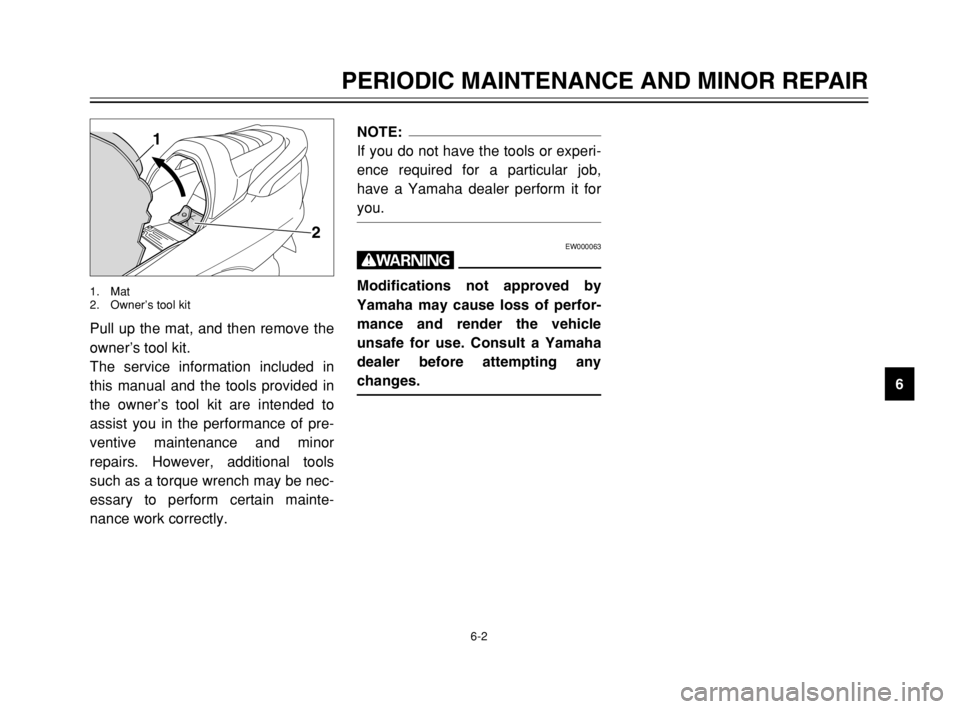
6 Pull up the mat, and then remove the
owner’s tool kit.
The service information included in
this manual and the tools provided in
the owner’s tool kit are intended to
assist you in the performance of pre-
ventive maintenance and minor
repairs. However, additional tools
such as a torque wrench may be nec-
essary to perform certain mainte-
nance work correctly.
2
1
1. Mat
2. Owner’s tool kit
NOTE:
If you do not have the tools or experi-
ence required for a particular job,
have a Yamaha dealer perform it for
you.
EW000063
w
Modifications not approved by
Yamaha may cause loss of perfor-
mance and render the vehicle
unsafe for use. Consult a Yamaha
dealer before attempting any
changes.
5SJ-28199-E1 7/11/02 11:03 AM Page 51
Page 64 of 116
6-13
PERIODIC MAINTENANCE AND MINOR REPAIR
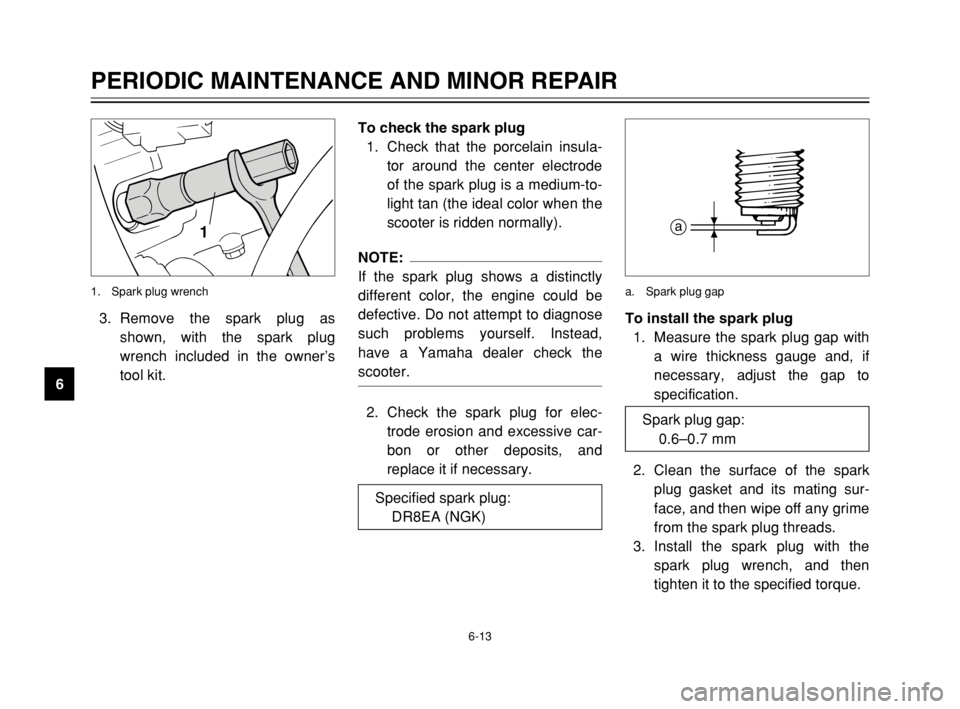
63. Remove the spark plug as
shown, with the spark plug
wrench included in the owner’s
tool kit.
1
1. Spark plug wrench
To install the spark plug
1. Measure the spark plug gap with
a wire thickness gauge and, if
necessary, adjust the gap to
specification.
2. Clean the surface of the spark
plug gasket and its mating sur-
face, and then wipe off any grime
from the spark plug threads.
3. Install the spark plug with the
spark plug wrench, and then
tighten it to the specified torque.
a
a. Spark plug gap
To check the spark plug
1. Check that the porcelain insula-
tor around the center electrode
of the spark plug is a medium-to-
light tan (the ideal color when the
scooter is ridden normally).
NOTE:
If the spark plug shows a distinctly
different color, the engine could be
defective. Do not attempt to diagnose
such problems yourself. Instead,
have a Yamaha dealer check the
scooter.
2. Check the spark plug for elec-
trode erosion and excessive car-
bon or other deposits, and
replace it if necessary.
Specified spark plug:
DR8EA (NGK)Spark plug gap:
0.6–0.7 mm
5SJ-28199-E1 7/11/02 11:03 AM Page 62
Page 65 of 116

6-14
PERIODIC MAINTENANCE AND MINOR REPAIR
6
NOTE:
If a torque wrench is not available
when installing a spark plug, a good
estimate of the correct torque is
1/4–1/2 turn past finger tight.
However, the spark plug should be
tightened to the specified torque as
soon as possible.
4. Install the spark plug cap.
5. Install the cowling.To check the engine oil level
1. Place the scooter on the center-
stand.
NOTE:
Make sure that the scooter is posi-
tioned straight up when checking the
oil level. A slight tilt to the side can
result in a false reading.
2. Start the engine, warm it up for
several minutes, and then turn it
off.
EAU04611
Engine oilEngine oilThe engine oil level should be
checked before each ride. In addition,
the oil must be changed at the inter-
vals specified in the periodic mainte-
nance and lubrication chart and when
the oil change indicator light comes
on. Tightening torque:
Spark plug:
17.5 Nm (1.75 m·kgf)
5SJ-28199-E1 7/11/02 11:03 AM Page 63
Page 67 of 116
6-16
PERIODIC MAINTENANCE AND MINOR REPAIR
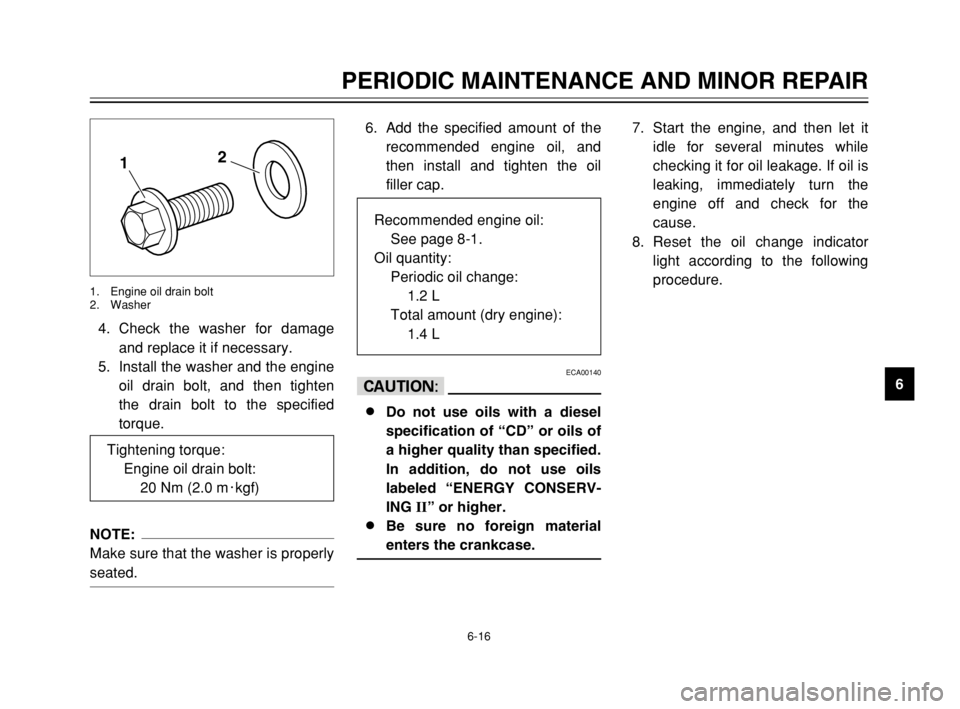
6 4. Check the washer for damage
and replace it if necessary.
5. Install the washer and the engine
oil drain bolt, and then tighten
the drain bolt to the specified
torque.
NOTE:
Make sure that the washer is properly
seated.
12
1. Engine oil drain bolt
2. Washer
7. Start the engine, and then let it
idle for several minutes while
checking it for oil leakage. If oil is
leaking, immediately turn the
engine off and check for the
cause.
8. Reset the oil change indicator
light according to the following
procedure. 6. Add the specified amount of the
recommended engine oil, and
then install and tighten the oil
filler cap.
ECA00140
cC
8
8
Do not use oils with a diesel
specification of “CD” or oils of
a higher quality than specified.
In addition, do not use oils
labeled “ENERGY CONSERV-
ING
II” or higher.
8 8
Be sure no foreign material
enters the crankcase.
Tightening torque:
Engine oil drain bolt:
20 Nm (2.0 m0kgf)
Recommended engine oil:
See page 8-1.
Oil quantity:
Periodic oil change:
1.2 L
Total amount (dry engine):
1.4 L
5SJ-28199-E1 7/11/02 11:03 AM Page 65
Page 69 of 116
6-18
PERIODIC MAINTENANCE AND MINOR REPAIR
6
EAU04228
Final transmission oilFinal transmission oilThe final transmission case must be
checked for oil leakage before each
ride. If any leakage is found, have a
Yamaha dealer check and repair the
scooter. In addition, the final trans-
mission oil must be changed as fol-
lows at the intervals specified in the
periodic maintenance and lubrication
chart.
1. Start the engine, warm it up by
riding the scooter for several
minutes, and then stop the
engine.
2. Place the scooter on the center-
stand.
3. Place an oil pan under the final
transmission case to collect the
used oil.
EWA00062
w
8 8
Make sure that no foreign
material enters the final trans-
mission case.
8 8
Make sure that no oil gets on
the tire or wheel.
1
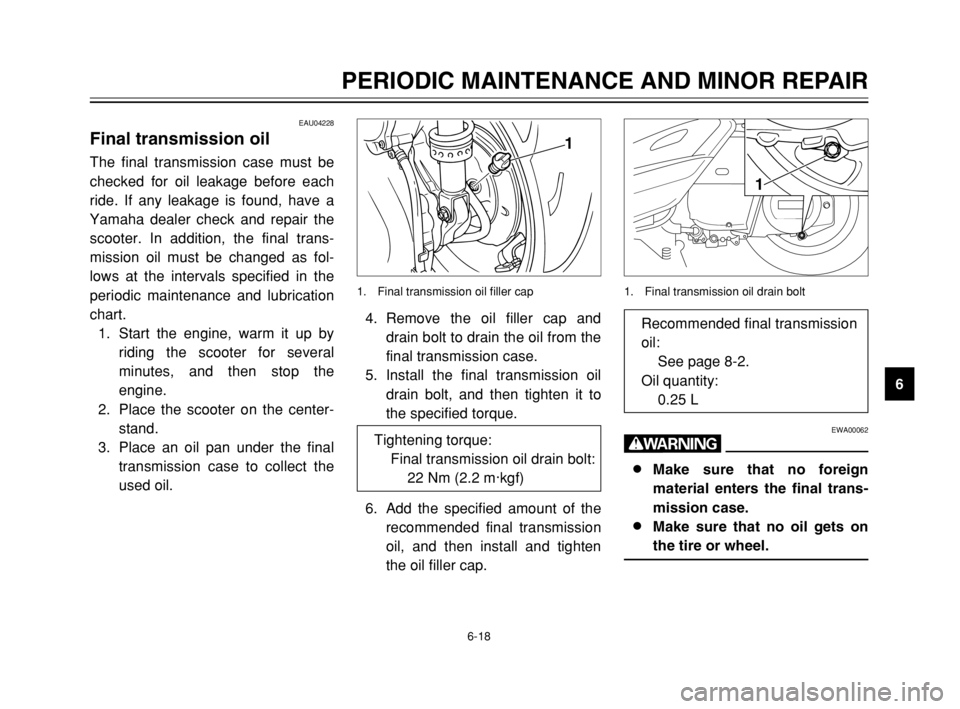
1. Final transmission oil drain bolt
4. Remove the oil filler cap and
drain bolt to drain the oil from the
final transmission case.
5. Install the final transmission oil
drain bolt, and then tighten it to
the specified torque.
6. Add the specified amount of the
recommended final transmission
oil, and then install and tighten
the oil filler cap.
1
1. Final transmission oil filler cap
Tightening torque:
Final transmission oil drain bolt:
22 Nm (2.2 m·kgf)
Recommended final transmission
oil:
See page 8-2.
Oil quantity:
0.25 L
5SJ-28199-E1 7/11/02 11:03 AM Page 67
Page 79 of 116
6-28
PERIODIC MAINTENANCE AND MINOR REPAIR
6
EAU00721
Checking the front and rear
brake pads
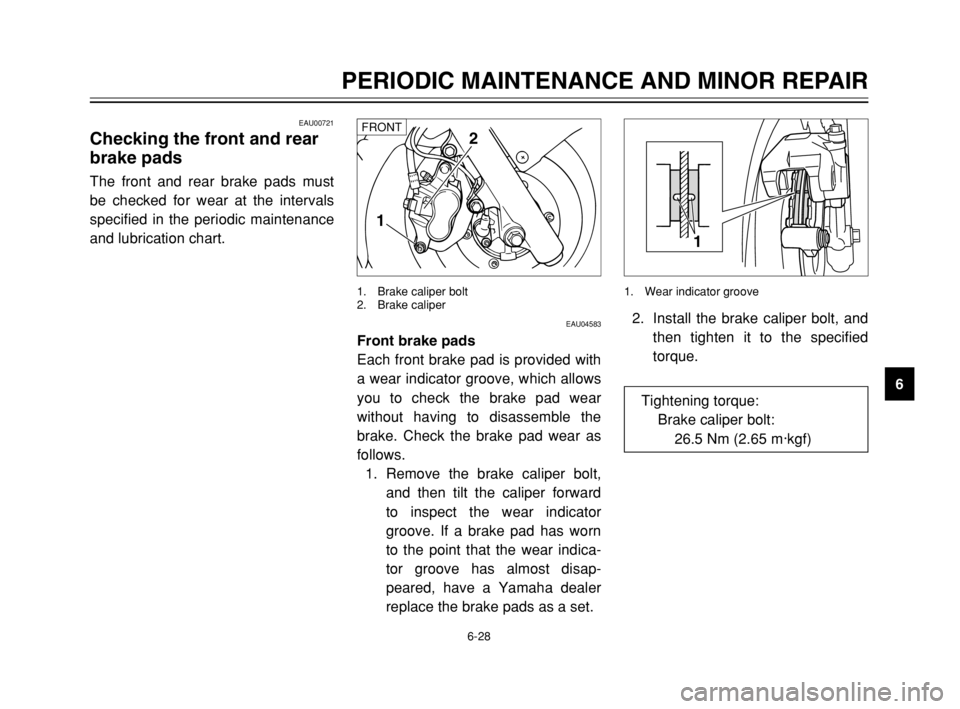
Front and rear brake pads, checkingThe front and rear brake pads must
be checked for wear at the intervals
specified in the periodic maintenance
and lubrication chart.
2. Install the brake caliper bolt, and
then tighten it to the specified
torque.
1
1. Wear indicator groove
EAU04583
Front brake pads
Each front brake pad is provided with
a wear indicator groove, which allows
you to check the brake pad wear
without having to disassemble the
brake. Check the brake pad wear as
follows.
1. Remove the brake caliper bolt,
and then tilt the caliper forward
to inspect the wear indicator
groove. If a brake pad has worn
to the point that the wear indica-
tor groove has almost disap-
peared, have a Yamaha dealer
replace the brake pads as a set.
1
2
1. Brake caliper bolt
2. Brake caliper
FRONT
Tightening torque:
Brake caliper bolt:
26.5 Nm (2.65 m·kgf)
5SJ-28199-E1 7/11/02 11:03 AM Page 77
Page 108 of 116
8-5
SPECIFICATIONS
8
EAU04513
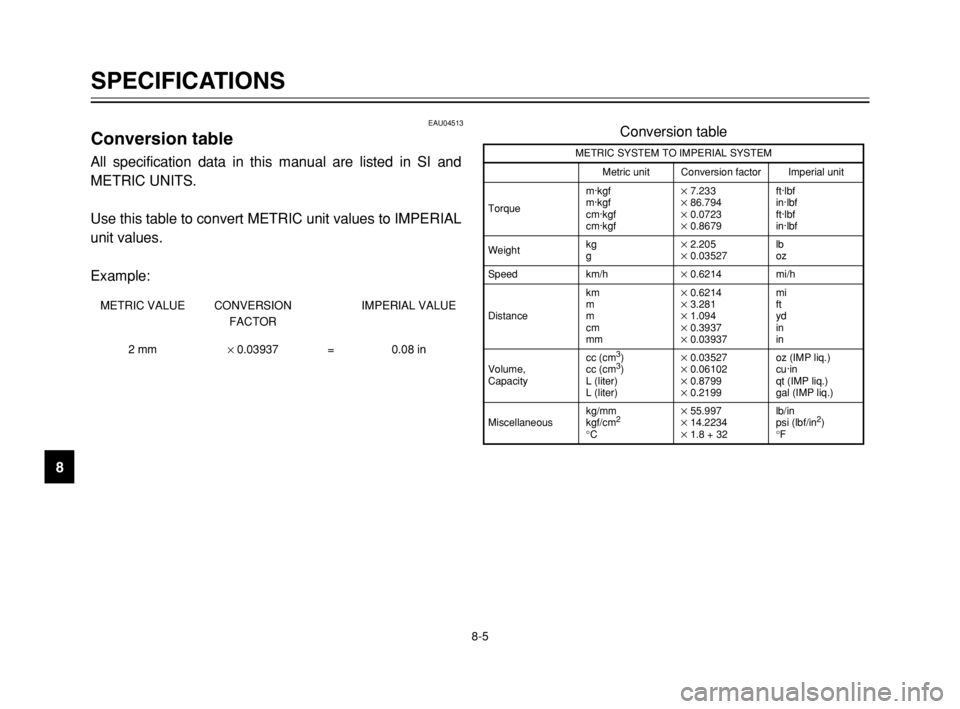
Conversion tableConversion tableAll specification data in this manual are listed in SI and
METRIC UNITS.
Use this table to convert METRIC unit values to IMPERIAL
unit values.
Example:
METRIC VALUE CONVERSION
FACTORIMPERIAL VALUE
2 mm× 0.03937 = 0.08 in
Conversion table
METRIC SYSTEM TO IMPERIAL SYSTEM
Metric unit Conversion factor Imperial unit
Torquem·kgf
m·kgf
cm·kgf
cm·kgf
× 7.233× 86.794× 0.0723× 0.8679ft·lbf
in·lbf
ft·lbf
in·lbf
Weightkg
g
× 2.205× 0.03527lb
oz
Speed km/h
× 0.6214 mi/h
Distancekm
m
m
cm
mm
× 0.6214× 3.281× 1.094× 0.3937× 0.03937mi
ft
yd
in
in
Volume,
Capacitycc (cm3)
cc (cm3)
L (liter)
L (liter)× 0.03527× 0.06102× 0.8799× 0.2199oz (IMP liq.)
cu·in
qt (IMP liq.)
gal (IMP liq.)
Miscellaneouskg/mm
kgf/cm
2
°C
× 55.997× 14.2234× 1.8 + 32 lb/in
psi (lbf/in
2)
°F
5SJ-28199-E1 7/11/02 11:03 AM Page 106