YAMAHA MT-09 2014 Workshop Manual
Manufacturer: YAMAHA, Model Year: 2014, Model line: MT-09, Model: YAMAHA MT-09 2014Pages: 110, PDF Size: 3.21 MB
Page 51 of 110

OPERATION AND IMPORTANT RIDING POINTS
5-5
5
1600 km (1000 mi) an
d b eyon d
The vehicle can now be operated nor-
mally.
NOTICE
ECA10311
Keep the en gine speed out of
the tachometer re d zone.
If any en gine trou ble shoul d oc-
cur durin g the en gine break-in
period , imme diately have a
Yamaha dealer check the vehi-
cle.
EAU17214
Parkin gWhen parking, stop the engine, and
then remove the key from the main
switch.
WARNING
EWA10312
Since the en gine an d exhaust
system can b ecome very hot,
park in a place where ped estri-
ans or chil dren are not likely to
touch them an d b e burne d.
Do not park on a slope or on soft
groun d, otherwise the vehicle
may overturn, increasin g the
risk of a fuel leak an d fire.
Do not park near grass or other
flamma ble materials which
mi ght catch fire.
U1RCELE0.book Page 5 Monday, May 12, 2014 8:51 AM
Page 52 of 110
PERIODIC MAINTENANCE AND ADJUSTMENT
6-1
6
EAU17245
Periodic inspection, adjustment, and
lubrication will keep your vehicle in the
safest and most efficient condition
possible. Safety is an obligation of the
vehicle owner/operator. The most im-
portant points of vehicle inspection,
adjustment, and lubrication are ex-
plained on the following pages.
The intervals given in the periodic
maintenance charts should be simply
considered as a general guide under
normal riding conditions. However, de-
pending on the weather, terrain, geo-
graphical location, and individual use,
the maintenance intervals may need to
be shortened.
WARNING
EWA10322
Failure to properly maintain the vehi-
cle or performing maintenance ac-
tivities incorrectly may increase
your risk of injury or death durin g
service or while usin g the vehicle. If
you are not familiar with vehicle ser-
vice, have a Yamaha d ealer perform
service.
WARNING
EWA15123
Turn off the en gine when performin g
maintenance unless otherwise
specified .
A runnin g en gine has movin g
parts that can catch on body
parts or clothin g an d electrical
parts that can cause shocks or
fires.
Runnin g the en gine while ser-
vicin g can lead to eye injury,
b urns, fire, or car bon monoxi de
poisonin g – possi bly lea din g to
d eath. See pag e 1-3 for more in-
formation a bout car bon monox-
i d e.
WARNING
EWA15461
Brake discs, calipers, drums, and
linin gs can b ecome very hot d uring
use. To avoi d possi ble burns, let
b rake components cool before
touchin g them.
EAU17303
Emission controls not only function to
ensure cleaner air, but are also vital to
proper engine operation and maximum
performance. In the following periodic
maintenance charts, the services relat-
ed to emissions control are grouped
separately. These services require
specialized data, knowledge, and
equipment. Maintenance, replace-
ment, or repair of the emission control
devices and systems may be per-
formed by any repair establishment or
individual that is certified (if applicable).
Yamaha dealers are trained and equipped to perform these particular
services.
U1RCELE0.book Page 1 Monday, May 12, 2014 8:51 AM
Page 53 of 110
PERIODIC MAINTENANCE AND ADJUSTMENT
6-2
6
EAU39692
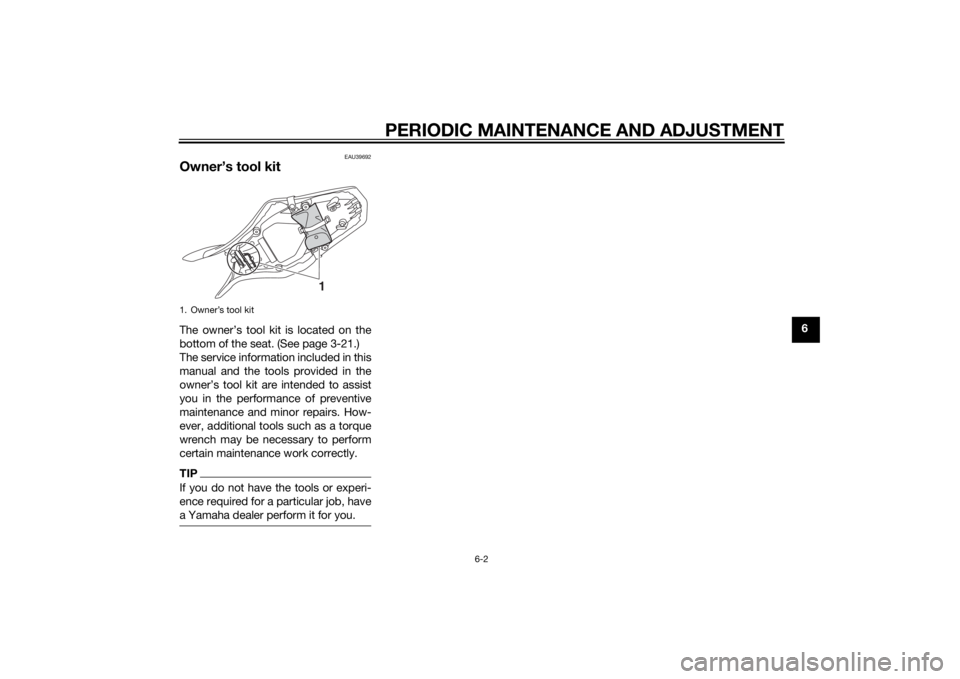
Owner’s tool kitThe owner’s tool kit is located on the
bottom of the seat. (See page 3-21.)
The service information included in this
manual and the tools provided in the
owner’s tool kit are intended to assist
you in the performance of preventive
maintenance and minor repairs. How-
ever, additional tools such as a torque
wrench may be necessary to perform
certain maintenance work correctly.TIPIf you do not have the tools or experi-
ence required for a particular job, have
a Yamaha dealer perform it for you.1. Owner’s tool kit
1
U1RCELE0.book Page 2 Monday, May 12, 2014 8:51 AM
Page 54 of 110

PERIODIC MAINTENANCE AND ADJUSTMENT
6-3
6
EAU46862
TIPThe annual checks must b e performed every year, except if a kilometer- based maintenance, or for the UK, a
milea ge- base d maintenance, is performe d instead .
From 50000 km (30000 mi), repeat the maintenance intervals starting from 10000 km (6000 mi).
Items marked with an asterisk should be performed by a Yamaha dealer as they require special tools, data and tech-
nical skills.
EAU46911
Perio dic maintenance chart for the emission control systemNO. ITEM CHECK OR MAINTENANCE JOB ODOMETER READING
ANNUAL
CHECK
1000 km
(600 mi) 10000 km
(6000 mi) 20000 km
(12000 mi) 30000 km
(18000 mi) 40000 km
(24000 mi)
1 *Fuel line • Check fuel hoses for cracks or
damage. √√√√√
2 *Spark plu gs • Check condition.
• Clean and regap.
√√
• Replace. √√
3 *Va l ve s • Check valve clearance.
•Adjust.
Every 40000 km (24000 mi)
4 *Fuel injection sys-
tem • Adjust synchronization.
√√√√√√
5 *Air in
duction sys-
tem • Check the air cut-off valve, reed
valve, and hose for damage.
• Replace any damaged parts if necessary. √√√√√
U1RCELE0.book Page 3 Monday, May 12, 2014 8:51 AM
Page 55 of 110

PERIODIC MAINTENANCE AND ADJUSTMENT
6-4
6
EAU1770K
General maintenance and lu brication chartNO. ITEM CHECK OR MAINTENANCE JOB ODOMETER READING
ANNUAL
CHECK
1000 km
(600 mi) 10000 km
(6000 mi) 20000 km
(12000 mi) 30000 km
(18000 mi) 40000 km
(24000 mi)
1 *Air filter element •Replace. √
2Clutch • Check operation.
•Adjust.
√√√√√
3 *Front brake • Check operation, fluid level and
vehicle for fluid leakage. √√√√√√
• Replace brake pads. Whenever worn to the limit
4 *Rear brake • Check operation, fluid level and
vehicle for fluid leakage. √√√√√√
• Replace brake pads. Whenever worn to the limit
5 *Brake hoses • Check for cracks or damage.
• Check for correct routing and
clamping. √√√√√
• Replace. Every 4 years
6 *Brake flui d • Replace. Every 2 years
7 *Wheels • Check runout and for damage. √√√√
8 *Tires • Check tread depth and for dam-
age.
• Replace if necessary.
• Check air pressure.
• Correct if necessary. √√√√√
9 *Wheel bearin gs • Check bearings for looseness or
damage. √√√√
U1RCELE0.book Page 4 Monday, May 12, 2014 8:51 AM
Page 56 of 110

PERIODIC MAINTENANCE AND ADJUSTMENT
6-5
6
10*Swin garm • Check operation and for exces-
sive play. √√√√
• Lubricate with lithium-soap- based grease. Every 50000 km (30000 mi)
11 Drive chain • Check chain slack, alignment and
condition.
• Adjust and lubricate chain with a special O-ring chain lubricant
thoroughly. Every 800 km (500 mi) and after washing the motorcycle, riding in the rain or
riding in wet areas
12 *Steerin g b earin gs • Check bearing play and steering
for roughness. √√√√√
• Lubricate with lithium-soap- based grease. Every 20000 km (12000 mi)
13 *Chassis fasteners • Make sure that all nuts, bolts and
screws are properly tightened. √√√√√
14 Brake lever pivot
shaft • Lubricate with silicone grease.
√√√√√
15 Brake ped
al pivot
shaft • Lubricate with lithium-soap-
based grease. √√√√√
16 Clutch lever pivot
shaft • Lubricate with lithium-soap-
based grease. √√√√√
17 Shift pe
dal pivot
shaft • Lubricate with lithium-soap-
based grease. √√√√√
18 Si destan d • Check operation.
• Lubricate with lithium-soap-
based grease. √√√√√
19 *Sidestan d switch • Check operation. √√√√√√
NO. ITEM CHECK OR MAINTENANCE JOB
ODOMETER READING
ANNUAL
CHECK
1000 km
(600 mi) 10000 km
(6000 mi) 20000 km
(12000 mi) 30000 km
(18000 mi) 40000 km
(24000 mi)U1RCELE0.book Page 5 Monday, May 12, 2014 8:51 AM
Page 57 of 110

PERIODIC MAINTENANCE AND ADJUSTMENT
6-6
6
20*Front fork • Check operation and for oil leak-
age. √√√√
21 *Shock a
bsor ber as-
sem bly • Check operation and shock ab-
sorber for oil leakage. √√√√
22 *Rear suspension re-
lay arm an
d con-
nectin g arm
pivotin g points • Check operation.
√√√√
23 En gine oil • Change.
• Check oil level and vehicle for oil
leakage. √√√√√√
24 En
gine oil filter car-
tri dg e •Replace.
√√√
25 *Coolin g system • Check coolant level and vehicle
for coolant leakage. √√√√√
• Change coolant. Every 3 years
26 *Front an
d rear
b rake switches • Check operation.
√√√√√√
27 Movin
g parts an d
ca bles • Lubricate.
√√√√√
28 *Throttle g rip • Check operation.
• Check throttle grip free play, and
adjust if necessary.
• Lubricate cable and grip housing. √√√√√
29 *Li
ghts, si gnals an d
switches • Check operation.
• Adjust headlight beam.
√√√√√√
NO. ITEM CHECK OR MAINTENANCE JOB
OD OMETER READING
ANNUAL
CHECK
1000 km
(600 mi) 10000 km
(6000 mi) 20000 km
(12000 mi) 30000 km
(18000 mi) 40000 km
(24000 mi)
U1RCELE0.book Page 6 Monday, May 12, 2014 8:51 AM
Page 58 of 110
PERIODIC MAINTENANCE AND ADJUSTMENT
6-7
6
EAU18681
TIPAir filter
• This model’s air filter is equipped with a disposable oil-coated paper element, which must not be cleaned with com- pressed air to avoid damaging it.
• The air filter element needs to be replaced more frequently when riding in unusually wet or dusty areas.
Hydraulic brake service
• Regularly check and, if necessary, correct the brake fluid level.
• Every two years replace the internal components of the brake master cylinders and calipers, and change the brake fluid.
• Replace the brake hoses every four years and if cracked or damaged.
U1RCELE0.book Page 7 Monday, May 12, 2014 8:51 AM
Page 59 of 110
PERIODIC MAINTENANCE AND ADJUSTMENT
6-8
6
EAU19653
Checking the spark plug sThe spark plugs are important engine
components, which should be
checked periodically, preferably by a
Yamaha dealer. Since heat and depos- its will cause any spark plug to slowly
erode, they should be removed and
checked in accordance with the peri-
odic maintenance and lubrication
chart. In addition, the condition of the
spark plugs can reveal the condition of
the engine.
The porcelain insulator around the
center electrode of each spark plug
should be a medium-to-light tan (the
ideal color when the vehicle is ridden
normally), and all spark plugs installed
in the engine should have the same
color. If any spark plug shows a dis-
tinctly different color, the engine could
be operating improperly. Do not at-
tempt to diagnose such problems
yourself. Instead, have a Yamaha deal-
er check the vehicle.
If a spark plug shows signs of elec-
trode erosion and excessive carbon or
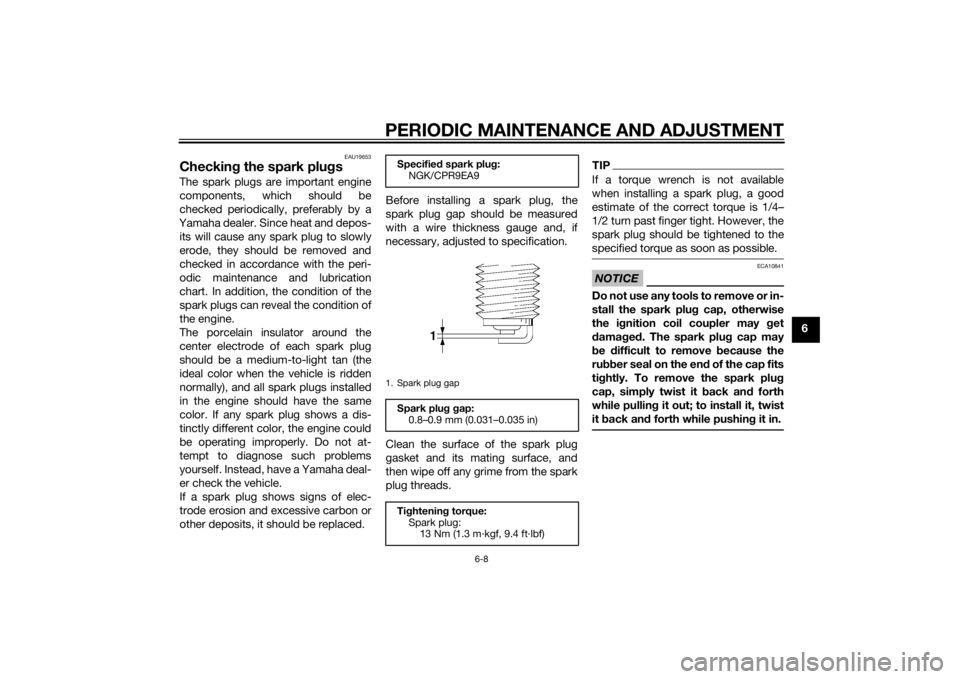
other deposits, it should be replaced. Before installing a spark plug, the
spark plug gap should be measured
with a wire thickness gauge and, if
necessary, adjusted to specification.
Clean the surface of the spark plug
gasket and its mating surface, and
then wipe off any grime from the spark
plug threads.
TIPIf a torque wrench is not available
when installing a spark plug, a good
estimate of the correct torque is 1/4–
1/2 turn past finger tight. However, the
spark plug should be tightened to the
specified torque as soon as possible.NOTICE
ECA10841
Do not use any tools to remove or in-
stall the spark plu
g cap, otherwise
the i gnition coil coupler may get
d amag ed . The spark plu g cap may
b e difficult to remove because the
ru bber seal on the en d of the cap fits
ti g htly. To remove the spark plu g
cap, simply twist it back an d forth
while pullin g it out; to install it, twist
it back an d forth while pushin g it in.
Specified spark plu g:
NGK/CPR9EA9
1. Spark plug gap
Spark plu g g ap:
0.8–0.9 mm (0.031–0.035 in)
Ti ghtenin g torque:
Spark plug: 13 Nm (1.3 m·kgf, 9.4 ft·lbf)
U1RCELE0.book Page 8 Monday, May 12, 2014 8:51 AM
Page 60 of 110
PERIODIC MAINTENANCE AND ADJUSTMENT
6-9
6
EAU19909
Engine oil an d oil filter car-
tri dgeThe engine oil level should be checked
before each ride. In addition, the oil
must be changed and the oil filter car-
tridge replaced at the intervals speci-
fied in the periodic maintenance and
lubrication chart.
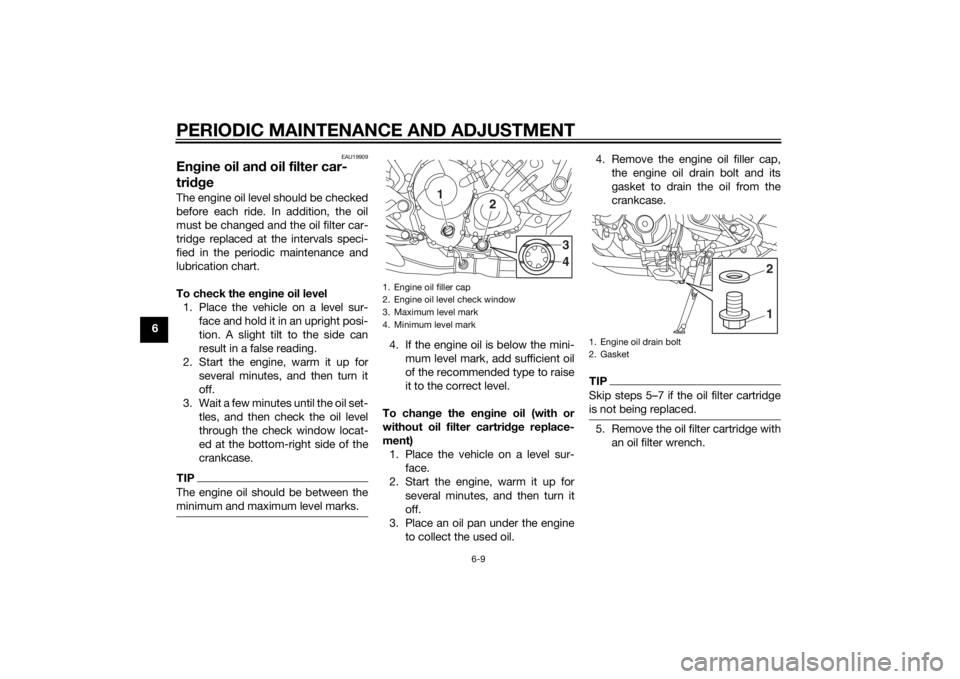
To check the en gine oil level
1. Place the vehicle on a level sur- face and hold it in an upright posi-
tion. A slight tilt to the side can
result in a false reading.
2. Start the engine, warm it up for several minutes, and then turn it
off.
3. Wait a few minutes until the oil set- tles, and then check the oil level
through the check window locat-
ed at the bottom-right side of the
crankcase.TIPThe engine oil should be between the
minimum and maximum level marks.
4. If the engine oil is below the mini-mum level mark, add sufficient oil
of the recommended type to raise
it to the correct level.
To chan ge the en gine oil (with or
without oil filter cartri dge replace-
ment) 1. Place the vehicle on a level sur- face.
2. Start the engine, warm it up for several minutes, and then turn it
off.
3. Place an oil pan under the engine to collect the used oil. 4. Remove the engine oil filler cap,
the engine oil drain bolt and its
gasket to drain the oil from the
crankcase.
TIPSkip steps 5–7 if the oil filter cartridge
is not being replaced.5. Remove the oil filter cartridge withan oil filter wrench.
1. Engine oil filler cap
2. Engine oil level check window
3. Maximum level mark
4. Minimum level mark
1
2
34
1. Engine oil drain bolt
2. Gasket
12
U1RCELE0.book Page 9 Monday, May 12, 2014 8:51 AM