clock reset YAMAHA MT-09 2014 Owners Manual
[x] Cancel search | Manufacturer: YAMAHA, Model Year: 2014, Model line: MT-09, Model: YAMAHA MT-09 2014Pages: 110, PDF Size: 3.21 MB
Page 21 of 110

INSTRUMENT AND CONTROL FUNCTIONS
3-6
3
EAU58054
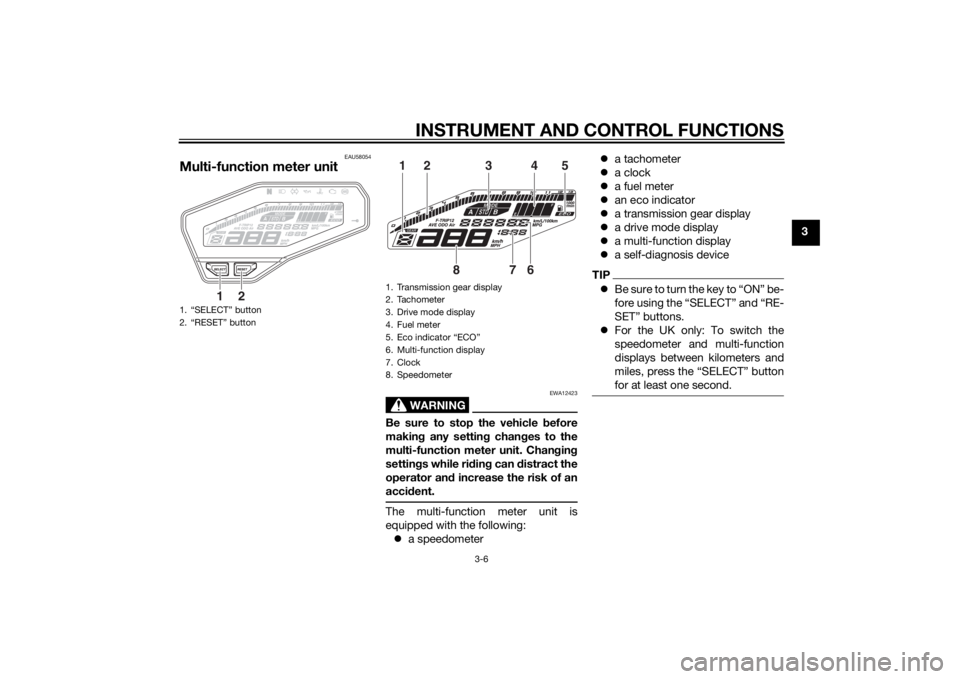
Multi-function meter unit
WARNING
EWA12423
Be sure to stop the vehicle before
makin g any settin g chan ges to the
multi-function meter unit. Chan gin g
settin gs while ri din g can distract the
operator an d increase the risk of an
acci dent.The multi-function meter unit is
equipped with the following:
a speedometer
a tachometer
a clock
a fuel meter
an eco indicator
a transmission gear display
a drive mode display
a multi-function display
a self-diagnosis device
TIPBe sure to turn the key to “ON” be-
fore using the “SELECT” and “RE-
SET” buttons.
For the UK only: To switch the
speedometer and multi-function
displays between kilometers and
miles, press the “SELECT” button
for at least one second.
1. “SELECT” button
2. “RESET” button
2
1
1. Transmission gear display
2. Tachometer
3. Drive mode display
4. Fuel meter
5. Eco indicator “ECO”
6. Multi-function display
7. Clock
8. Speedometer
1
2
3
4
5
6
7
8
U1RCELE0.book Page 6 Monday, May 12, 2014 8:51 AM
Page 22 of 110

INSTRUMENT AND CONTROL FUNCTIONS
3-7
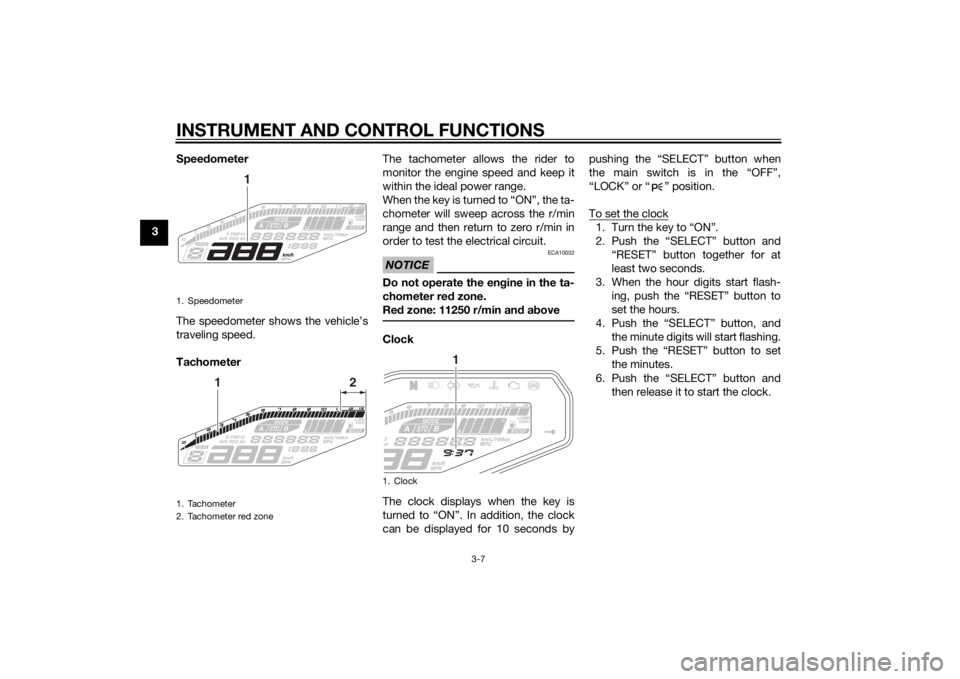
3Speed
ometer
The speedometer shows the vehicle’s
traveling speed.
Tachometer The tachometer allows the rider to
monitor the engine speed and keep it
within the ideal power range.
When the key is turned to “ON”, the ta-
chometer will sweep across the r/min
range and then return to zero r/min in
order to test the electrical circuit.
NOTICE
ECA10032
Do not operate the en
gine in the ta-
chometer red zone.
Re d zone: 11250 r/min an d a boveClock
The clock displays when the key is
turned to “ON”. In addition, the clock
can be displayed for 10 seconds by pushing the “SELECT” button when
the main switch is in the “OFF”,
“LOCK” or “ ” position.
To set the clock
1. Turn the key to “ON”.
2. Push the “SELECT” button and
“RESET” button together for at
least two seconds.
3. When the hour digits start flash- ing, push the “RESET” button to
set the hours.
4. Push the “SELECT” button, and the minute digits will start flashing.
5. Push the “RESET” button to set the minutes.
6. Push the “SELECT” button and then release it to start the clock.
1. Speedometer
1. Tachometer
2. Tachometer red zone
1
2
1
1. Clock
1
U1RCELE0.book Page 7 Monday, May 12, 2014 8:51 AM