coolant temperature YAMAHA MT07 TRACER 2020 Owners Manual
[x] Cancel search | Manufacturer: YAMAHA, Model Year: 2020, Model line: MT07 TRACER, Model: YAMAHA MT07 TRACER 2020Pages: 98, PDF Size: 4.6 MB
Page 18 of 98

Instrument and control functions
3-3
3
TIPIf the steering will not lock, try turning
the handlebars back to the right slight-
ly.To unlock the steeringPush the key in and turn it to “OFF”.
EAU4939J
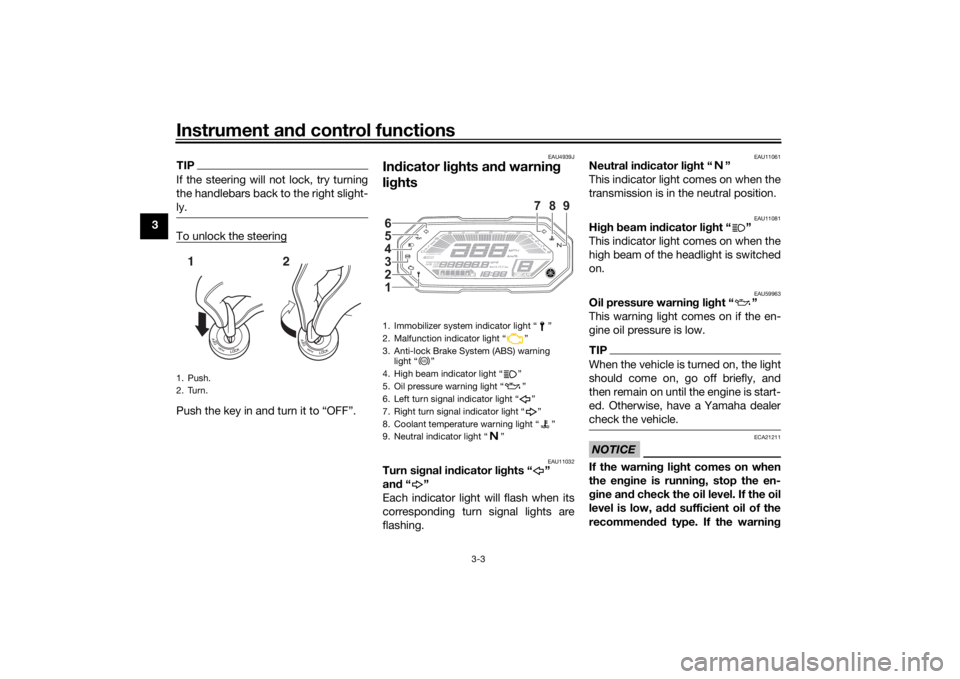
In dicator li ghts an d warnin g
li g hts
EAU11032
Turn si gnal in dicator li ghts “ ”
an d“”
Each indicator light will flash when its
corresponding turn signal lights are
flashing.
EAU11061
Neutral in dicator li ght “ ”
This indicator light comes on when the
transmission is in the neutral position.
EAU11081
Hi gh beam in dicator li ght “ ”
This indicator light comes on when the
high beam of the headlight is switched
on.
EAU59963
Oil pressure warnin g li ght “ ”
This warning light comes on if the en-
gine oil pressure is low.TIPWhen the vehicle is turned on, the light
should come on, go off briefly, and
then remain on until the engine is start-
ed. Otherwise, have a Yamaha dealer
check the vehicle.NOTICE
ECA21211
If the warnin g li ght comes on when
the en gine is runnin g, stop the en-
g ine an d check the oil level. If the oil
level is low, a dd sufficient oil of the
recommen ded type. If the warnin g
1. Push.
2. Turn.12
1. Immobilizer system indicator light “ ”
2. Malfunction indicator light “ ”
3. Anti-lock Brake System (ABS) warning
light “ ”
4. High beam indicator light “ ”
5. Oil pressure warning light “ ”
6. Left turn signal indicator light “ ”
7. Right turn signal indicator light “ ”
8. Coolant temperature warning light “ ”
9. Neutral indicator light “ ”1 2
3
4
5
6
789
ABS
UB4TE0E0.book Page 3 Monday, December 9, 2019 3:53 PM
Page 19 of 98

Instrument and control functions
3-4
3
lig
ht remains on after addin g oil,
stop the en gine an d have a Yamaha
d ealer check the vehicle.
EAU11449
Coolant temperature warnin g
lig ht “ ”
This warning light comes on when the
engine is overheating. If this occurs,
stop the engine immediately and allow
the engine to cool. (See page 6-36.)
For vehicles with a radiator fan, the ra-
diator fan(s) automatically switch on or
off according to the coolant tempera-
ture.TIPWhen the vehicle is turned on, the light
will come on for a few seconds, and
then go off. If the light does not come
on, or if the light remains on, have a
Yamaha dealer check the vehicle. NOTICE
ECA10022
Do not continue to operate the en-
g ine if it is overheatin g.
EAU88330
Malfunction in dicator li ght
(MIL) “ ”
This light comes on or flashes if a prob-
lem is detected in the engine or other
vehicle control system. If this occurs,
have a Yamaha dealer check the on-
board diagnostic system. The electri-
cal circuit of the warning light can be
checked by vehicle power on. The light
should come on for a few seconds,
and then go off. If the light does not
come on initially when the vehicle pow-
er on, or if the light remains on, have a
Yamaha dealer check the vehicle.NOTICE
ECA26820
If the MIL starts flashin g, re duce en-
g ine spee d to prevent exhaust sys-
tem damag e.TIPThe engine is sensitively controlled for
the on-board diagnostic system to de-
tect deterioration and malfunction of
the emission control system. Due to
this specification, the MIL may come
on or flash for vehicle modifications,
lack of maintenance, or excessive or improper use of the motorcycle. To
prevent this, observe these precau-
tions.
Do not attempt to modify the soft-
ware of the engine control unit.
Do not add any electrical acces-
sories that interfere with engine
control.
Do not use aftermarket accesso-
ries or parts such as suspension,
spark plugs, injectors, exhaust
system, etc.
Do not change drivetrain specifi-
cations (chain, sprockets, wheels,
tires, etc.).
Do not remove or alter the O2 sen-
sor, air induction system, or ex-
haust parts (catalysts or EXUP,
etc.).
Maintain proper drive chain.
Maintain correct tire pressure.
Maintain proper brake pedal
height to prevent rear brake from
dragging.
Do not operate the vehicle in an
extreme manner. For example, re-
peated or excessive opening and
UB4TE0E0.book Page 4 Monday, December 9, 2019 3:53 PM
Page 23 of 98

Instrument and control functions
3-8
3
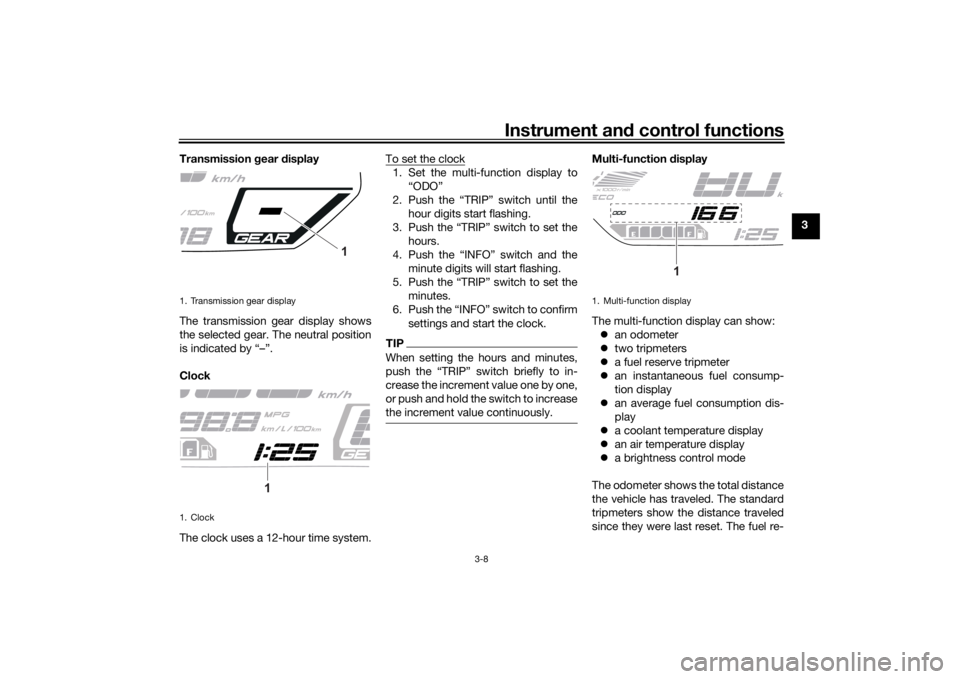
Transmission
gear display
The transmission gear display shows
the selected gear. The neutral position
is indicated by “–”.
Clock
The clock uses a 12-hour time system. To set the clock
1. Set the multi-function display to
“ODO”
2. Push the “TRIP” switch until the hour digits start flashing.
3. Push the “TRIP” switch to set the hours.
4. Push the “INFO” switch and the minute digits will start flashing.
5. Push the “TRIP” switch to set the minutes.
6. Push the “INFO” switch to confirm settings and start the clock.TIPWhen setting the hours and minutes,
push the “TRIP” switch briefly to in-
crease the increment value one by one,
or push and hold the switch to increase
the increment value continuously.
Multi-function display
The multi-function display can show: an odometer
two tripmeters
a fuel reserve tripmeter
an instantaneous fuel consump-
tion display
an average fuel consumption dis-
play
a coolant temperature display
an air temperature display
a brightness control mode
The odometer shows the total distance
the vehicle has traveled. The standard
tripmeters show the distance traveled
since they were last reset. The fuel re-
1. Transmission gear display
1. Clock
1
1
1. Multi-function display
1
UB4TE0E0.book Page 8 Monday, December 9, 2019 3:53 PM
Page 25 of 98

Instrument and control functions
3-10
3
The instantaneous fuel consumption
display can be set to either “km/L”,
“L/100 km” when using kilometers.
To switch the the fuel consumption
units, push the “TRIP” switch until the
measurement units change. When us-
ing miles, the fuel consumption unit is
“MPG”.
“km/L”: The distance that can be
traveled on 1.0 L of fuel under the
current riding conditions is shown.
“L/100 km”: The amount of fuel
necessary to travel 100 km under
the current riding conditions is
shown.
“MPG”: The distance that can be
traveled on 1.0 Imp.gal of fuel un-
der the current riding conditions is
shown.
To switch the instantaneous fuel con-
sumption settings, push and hold
“TRIP” switch until the display chang-
es.
TIPIf traveling at speeds under 20 km/h
(12 mi/h), “_ _._” is displayed.
Avera ge fuel consumption
This display shows the average fuel
consumption since it was last reset.
The average fuel consumption can be
set to either “AVE_ _._ km/L”, “AVE_
_._ L/100 km” when using kilometers.
To switch the fuel consumption units,
when the display is steady, push the
“TRIP” switch until the measurement
units change. When using miles, the
fuel consumption is “AVE_ _._ MPG”. “AVE_ _._ km/L”: The average dis-
tance that can be traveled on 1.0 L
of fuel is shown.
“AVE_ _._ L/100 km”: The average
amount of fuel necessary to travel
100 km is shown.
“AVE_ _._ MPG”: The average dis-
tance that can be traveled on
1.0 Imp.gal of fuel is shown.
To reset the average fuel consumption,
select it and while the digits are flash-
ing push the “TRIP” switch until it is re-
set.
TIPAfter resetting the average fuel con-
sumption, “_ _._” will be shown until
the vehicle has traveled 1 km (0.6 mi).Coolant temperature
This display shows the coolant tem-
perature from 40 °C to 116 °C in 1 °C
increments.
1. Average fuel consumption display
1
1. Coolant temperature display
1
UB4TE0E0.book Page 10 Monday, December 9, 2019 3:53 PM
Page 26 of 98

Instrument and control functions
3-11
3 If the message “Hi” flashes, stop the
vehicle, then stop the engine, and let it
cool. (See page 6-36.)
TIP
When the coolant temperature is
below 40 °C, “Lo” will be dis-
played.
The coolant temperature varies
with changes in the weather and
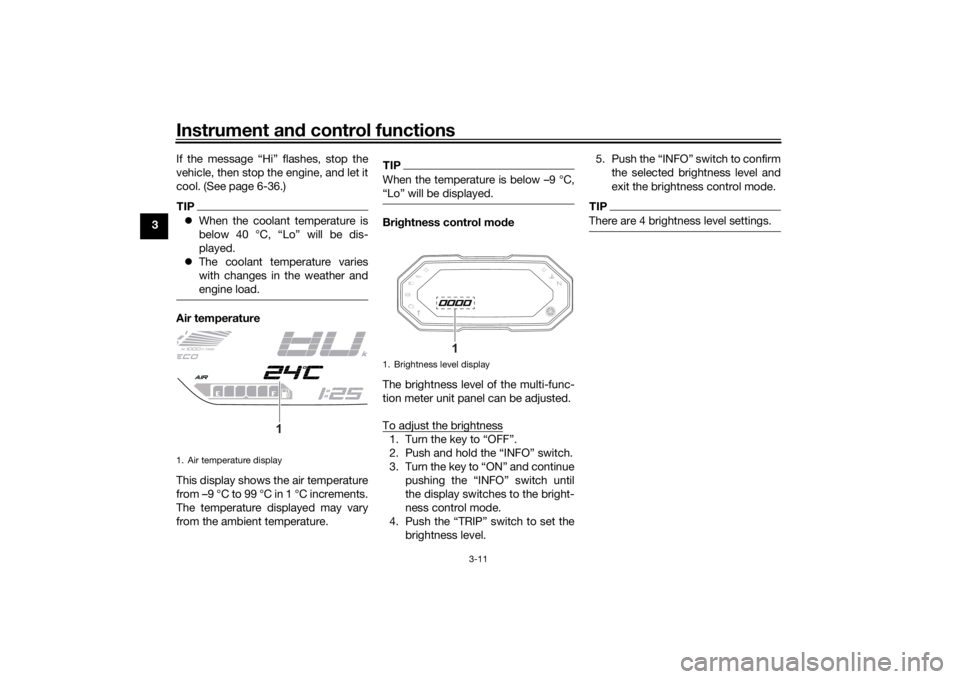
engine load.Air temperature
This display shows the air temperature
from –9 °C to 99 °C in 1 °C increments.
The temperature displayed may vary
from the ambient temperature.
TIPWhen the temperature is below –9 °C,
“Lo” will be displayed.Brig htness control mo de
The brightness level of the multi-func-
tion meter unit panel can be adjusted.
To adjust the brightness1. Turn the key to “OFF”.
2. Push and hold the “INFO” switch.
3. Turn the key to “ON” and continue pushing the “INFO” switch until
the display switches to the bright-
ness control mode.
4. Push the “TRIP” switch to set the brightness level. 5. Push the “INFO” switch to confirm
the selected brightness level and
exit the brightness control mode.
TIPThere are 4 brightness level settings.
1. Air temperature display
1
1. Brightness level display
1
UB4TE0E0.book Page 11 Monday, December 9, 2019 3:53 PM
Page 61 of 98

Periodic maintenance an d a djustment
6-13
6
NOTICE
ECA20860
If the oil pressure warnin g li ght flick-
ers or remains on even if the oil level
is correct, immed iately turn the en-
g ine off an d have a Yamaha d ealer
check the vehicle.13. Turn the engine off, wait a few mi- nutes for the oil level to settle for
an accurate reading, and then
check the oil level and correct it if
necessary.
EAU85450
Why Yamalu beYAMALUBE oil is a Genuine YAMAHA
Part born of the engineers’ passion
and belief that engine oil is an impor-
tant liquid engine component. We form
teams of specialists in the fields of me-
chanical engineering, chemistry, elec-
tronics and track testing, and have
them develop the engine together with
the oil it will use. Yamalube oils take full
advantage of the base oil’s qualities
and blend in the ideal balance of addi-
tives to make sure the final oil clears
our performance standards. Thus,
Yamalube mineral, semisynthetic and
synthetic oils have their own distinct
characters and value. Yamaha’s expe-
rience gained over many years of re-
search and development into oil since
the 1960’s helps make Yamalube the
best choice for your Yamaha engine.
EAUS1203
CoolantThe coolant level should be checked
regularly. In addition, the coolant must
be changed at the intervals specified in
the periodic maintenance chart.TIPIf genuine Yamaha coolant is not avail-
able, use an ethylene glycol antifreeze
containing corrosion inhibitors for alu-
minum engines and mix with distilled
water at a 1:1 ratio.
EAU20097
To check the coolant level
Since the coolant level varies with en-
gine temperature, check when the en-
gine is cold.
1. Park the vehicle on a level surface.
Recommen ded coolant:
YAMALUBE coolant
Coolant quantity: Coolant reservoir (max level mark): 0.25 L (0.26 US qt, 0.22 Imp.qt)
Radiator (including all routes): 1.60 L (1.69 US qt, 1.41 Imp.qt)
UB4TE0E0.book Page 13 Monday, December 9, 2019 3:53 PM
Page 94 of 98

10-1
10
IndexAABS ....................................................... 3-14
ABS warning light ................................... 3-5
Air filter element and check hose,
replacing and cleaning ....................... 6-15
Auxiliary DC connector ......................... 3-24BBattery .................................................. 6-29
Brake and clutch levers, checking and
lubricating ........................................... 6-26
Brake and shift pedals, checking and lubricating ........................................... 6-26
Brake fluid, changing ............................ 6-22
Brake fluid level, checking .................... 6-21
Brake lever ............................................ 3-14
Brake lever free play, checking............. 6-19
Brake light switches.............................. 6-20
Brake pedal........................................... 3-14CCables, checking and lubricating ......... 6-25
Canister................................................. 6-10
Care ........................................................ 7-1
Catalytic converter ................................ 3-18
Clutch lever ........................................... 3-13
Clutch lever free play, adjusting ........... 6-19
Coolant ................................................. 6-13
Coolant temperature warning light ......... 3-4DData recording, vehicle ........................... 9-2
Diagnostic connector.............................. 9-2
Dimmer switch ...................................... 3-12
Drive chain, cleaning and lubricating .... 6-24
Drive chain slack................................... 6-23
EEngine break-in ...................................... 5-1
Engine oil and oil filter cartridge ........... 6-10
Engine overheating ............................... 6-36
Engine serial number .............................. 9-1FFront and rear brake pads, checking ... 6-20
Front fork, adjusting ............................. 3-21
Front fork, checking ............................. 6-28
Fuel ....................................................... 3-16
Fuel consumption, tips for reducing ...... 5-4
Fuel tank breather hose and overflow
hose ................................................... 3-18
Fuel tank cap ........................................ 3-15
Fuses, replacing ................................... 6-31HHandlebar switches .............................. 3-12
Hazard lights switch ............................. 3-12
Helmet holding cable ........................... 3-19
High beam indicator light ....................... 3-3
Horn switch .......................................... 3-12IIdentification numbers ............................ 9-1
Ignition circuit cut-off system ............... 3-25
Immobilizer system ................................ 3-1
Immobilizer system indicator light .......... 3-5
Indicator lights and warning lights ......... 3-3
Info switch ............................................ 3-13LLicense plate light bulb, replacing........ 6-32
Luggage strap holders ......................... 3-24MMain switch/steering lock....................... 3-2
Maintenance and lubrication, periodic ... 6-5 Maintenance, emission control
system ..................................................6-3
Malfunction indicator light (MIL)..............3-4
Matte color, caution ................................7-1
Model label .............................................9-1
Multi-function meter unit .........................3-6
NNeutral indicator light ..............................3-3OOil pressure warning light .......................3-3PParking ....................................................5-4
Part locations ..........................................2-1
Pass switch ...........................................3-12RRear suspension, lubricating ................6-27SSafety information ...................................1-1
Seat .......................................................3-19
Shifting ....................................................5-3
Shift pedal .............................................3-13
Shock absorber assembly, adjusting ....3-22
Sidestand ..............................................3-25
Sidestand, checking and lubricating.....6-27
Spark plugs, checking ............................6-9
Specifications .........................................8-1
Start/Engine stop switch .......................3-12
Starting the engine ..................................5-2
Steering, checking ................................6-29
Storage ...................................................7-3
Storage compartment ...........................3-20
Supporting the motorcycle ...................6-33
Swingarm pivots, lubricating ................6-28
UB4TE0E0.book Page 1 Monday, December 9, 2019 3:53 PM