key battery YAMAHA NMAX 125 2021 Owners Manual
[x] Cancel search | Manufacturer: YAMAHA, Model Year: 2021, Model line: NMAX 125, Model: YAMAHA NMAX 125 2021Pages: 114, PDF Size: 10.63 MB
Page 8 of 114
Table of contentsSafety information............................ 1-1
Further safe-riding points ............... 1-5
Description....................................... 2-1
Left view ......................................... 2-1
Right view ....................................... 2-2
Controls and instruments ............... 2-3
Smart key system ........................... 3-1
Smart key system ........................... 3-1
Operating range of the smart key
system......................................... 3-2
Handling of the smart key and
mechanical keys ......................... 3-3
Smart key ....................................... 3-4
Replacing the smart key battery..... 3-6
Main switch .................................... 3-7
Stop and Start System..................... 4-1
Stop and Start System ................... 4-1
Stop and Start System operation ... 4-1
Special features .............................. 5-1
CCU (Communication Control
Unit) ............................................. 5-1
Instrument and control functions... 6-1
Indicator lights and warning
lights............................................ 6-1
Multi-function meter unit ................ 6-3
Handlebar switches ........................ 6-9Front brake lever ........................... 6-11
Rear brake lever ............................ 6-11
ABS ............................................... 6-11
Traction control system ................ 6-12
Fuel tank cap ................................ 6-14
Fuel ............................................... 6-15
Fuel tank overflow hose ................ 6-16
Catalytic converter ........................ 6-16
Seat ............................................... 6-17
Helmet holders .............................. 6-17
Storage compartments ................. 6-18
Adjusting the shock absorber
assemblies ................................. 6-19
Power outlet ................................. 6-20
Sidestand ...................................... 6-21
Ignition circuit cut-off system ....... 6-22
For your safety – pre-operation
checks............................................... 7-1
Operation and important riding
points................................................. 8-1
Engine break-in ............................... 8-1
Starting the engine .......................... 8-2
Starting off ...................................... 8-2
Acceleration and deceleration ........ 8-3
Braking ............................................ 8-3
Tips for reducing fuel
consumption ................................ 8-3
Parking ........................................... 8-4Periodic maintenance and
adjustment........................................ 9-1
Tool kit ............................................ 9-1
Periodic maintenance chart for
the emission control system ....... 9-2
General maintenance and
lubrication chart .......................... 9-3
Removing and installing panels ...... 9-7
Checking the spark plug................. 9-9
Canister ........................................ 9-11
Engine oil and oil strainer ............. 9-11
Why Yamalube.............................. 9-13
Final transmission oil .................... 9-13
Coolant ......................................... 9-15
Air filter and V-belt case air filter
elements .................................... 9-16
Checking the throttle grip
free play..................................... 9-19
Valve clearance............................. 9-19
Tires .............................................. 9-19
Cast wheels .................................. 9-21
Checking the front and rear
brake lever free play .................. 9-21
Checking the front and rear
brake pads ................................ 9-22
Checking the brake fluid level ...... 9-23
Changing the brake fluid .............. 9-24
Checking the V-belt ...................... 9-24
Checking and lubricating the
cables ........................................ 9-25UBALE0E0.book Page 1 Wednesday, September 30, 2020 1:37 PM
Page 20 of 114
Smart key system
3-2
3You are carrying or using com-
munication equipment such as
radios or mobile phones in
close proximity of the smart key
The smart key is in contact with
or covered by a metallic object
Other vehicles equipped with a
smart key system are nearby
In such situations, move the smart
key to another location and perform
the operation again. If it still does
not work, operate the vehicle in
emergency mode. (See page 9-38.)
TIPTo preserve vehicle battery power, the
smart key system turns off approxi-
mately 9 days after the vehicle was last
used (the answer-back function is dis-
abled). In this situation, simply push
the main switch knob to turn the smart
key system back on.
EAU76453
Operating range of the smart
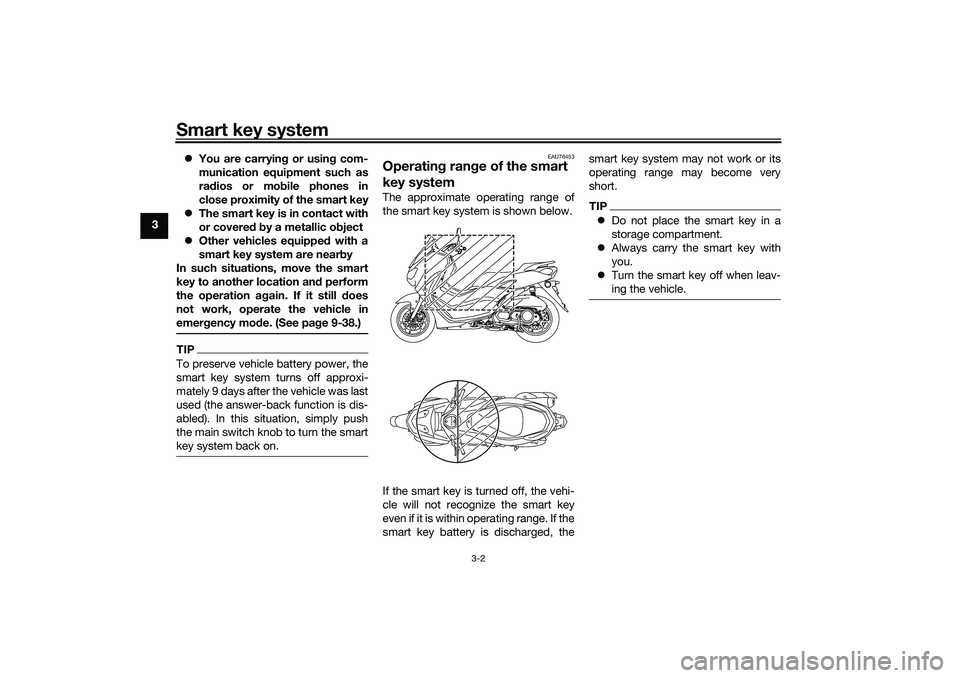
key systemThe approximate operating range of
the smart key system is shown below.
If the smart key is turned off, the vehi-
cle will not recognize the smart key
even if it is within operating range. If the
smart key battery is discharged, thesmart key system may not work or its
operating range may become very
short.
TIPDo not place the smart key in a
storage compartment.
Always carry the smart key with
you.
Turn the smart key off when leav-
ing the vehicle.
UBALE0E0.book Page 2 Wednesday, September 30, 2020 1:37 PM
Page 21 of 114
Smart key system
3-3
3
EAUN2460
Handling of the smart key and
mechanical keys
WARNING
EWA17952
The smart key should be carried
with you. Do not store it on the
vehicle.
When the smart key is within
operating range, exercise due
care because other people not
carrying the smart key can start
the engine and operate the vehi-
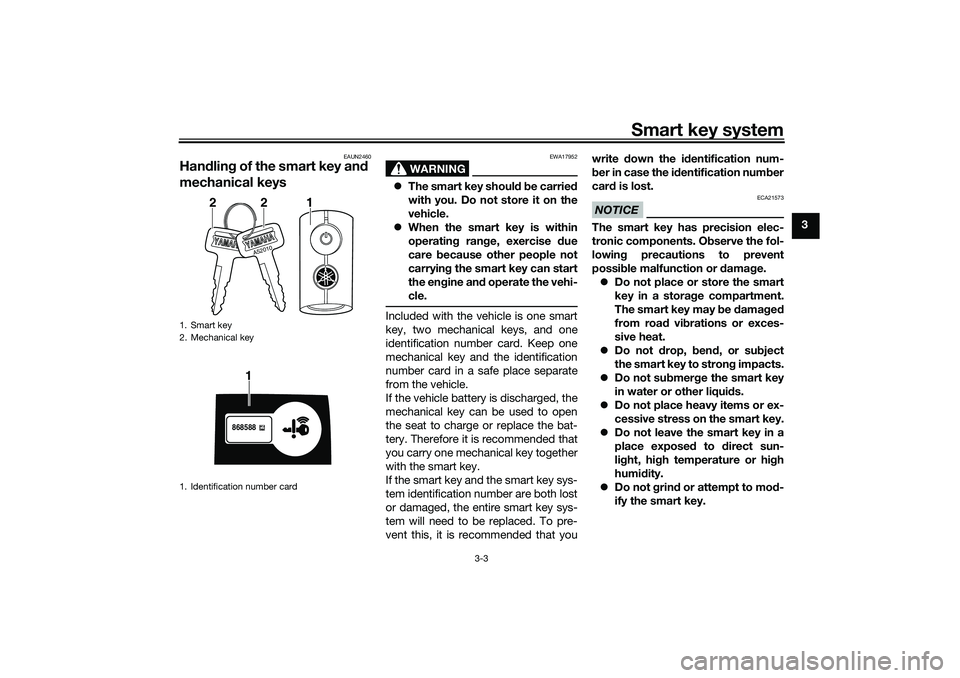
cle.Included with the vehicle is one smart
key, two mechanical keys, and one
identification number card. Keep one
mechanical key and the identification
number card in a safe place separate
from the vehicle.
If the vehicle battery is discharged, the
mechanical key can be used to open
the seat to charge or replace the bat-
tery. Therefore it is recommended that
you carry one mechanical key together
with the smart key.
If the smart key and the smart key sys-
tem identification number are both lost
or damaged, the entire smart key sys-
tem will need to be replaced. To pre-
vent this, it is recommended that youwrite down the identification num-
ber in case the identification number
card is lost.
NOTICE
ECA21573
The smart key has precision elec-
tronic components. Observe the fol-
lowing precautions to prevent
possible malfunction or damage.
Do not place or store the smart
key in a storage compartment.
The smart key may be damaged
from road vibrations or exces-
sive heat.
Do not drop, bend, or subject
the smart key to strong impacts.
Do not submerge the smart key
in water or other liquids.
Do not place heavy items or ex-
cessive stress on the smart key.
Do not leave the smart key in a
place exposed to direct sun-
light, high temperature or high
humidity.
Do not grind or attempt to mod-
ify the smart key.
1. Smart key
2. Mechanical key
1. Identification number card
A52010
221
868588
1
UBALE0E0.book Page 3 Wednesday, September 30, 2020 1:37 PM
Page 22 of 114
Smart key system
3-4
3Keep the smart key away from
strong magnetic fields and
magnetic objects such as key
holders, TVs, and computers.
Keep the smart key away from
electric medical equipment.
Do not allow oils, polishing
agents, fuel, or any strong
chemicals to come in contact
with the smart key. The smart
key body may become discol-
ored or cracked.
TIPThe smart key battery life is ap-
proximately two years, but this
may vary according to operating
conditions.
Replace the smart key battery
when the smart key system indi-
cator light flashes for 20 seconds
when the vehicle is turned on, or
when the smart key indicator light
does not come on when the smart
key button is pushed. (See page
3-6.) After changing the smart key
battery, if the smart key systemstill does not operate, check the
vehicle battery and then have a
Yamaha dealer check the vehicle.
If the smart key continually re-
ceives radio waves, the smart key
battery will discharge quickly. (For
example, when placed in the vicin-
ity of electrical products such as
televisions, radios, or computers.)
You can register up to six smart
keys for the same vehicle. See a
Yamaha dealer regarding spare
smart keys.
If a smart key is lost, contact a
Yamaha dealer immediately to
prevent the vehicle from being
stolen, etc.
EAU76474
Smart key
WARNING
EWA17952
The smart key should be carried
with you. Do not store it on the
vehicle.
When the smart key is within
operating range, exercise due
care because other people not
carrying the smart key can start
the engine and operate the vehi-
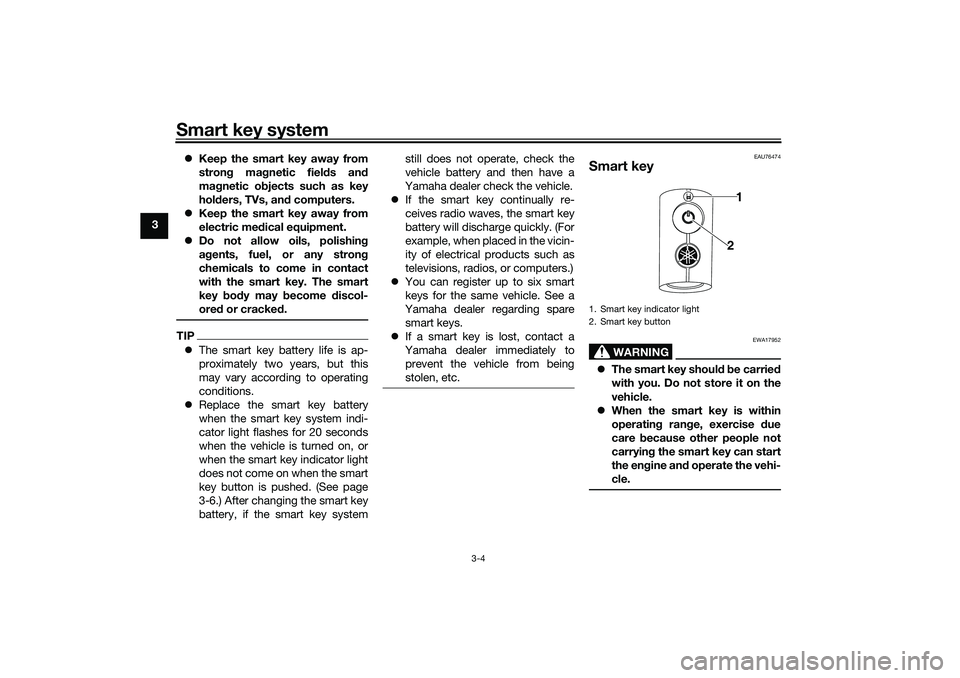
cle.1. Smart key indicator light
2. Smart key button
1
2
UBALE0E0.book Page 4 Wednesday, September 30, 2020 1:37 PM
Page 24 of 114
Smart key system
3-6
3
EAUN2712
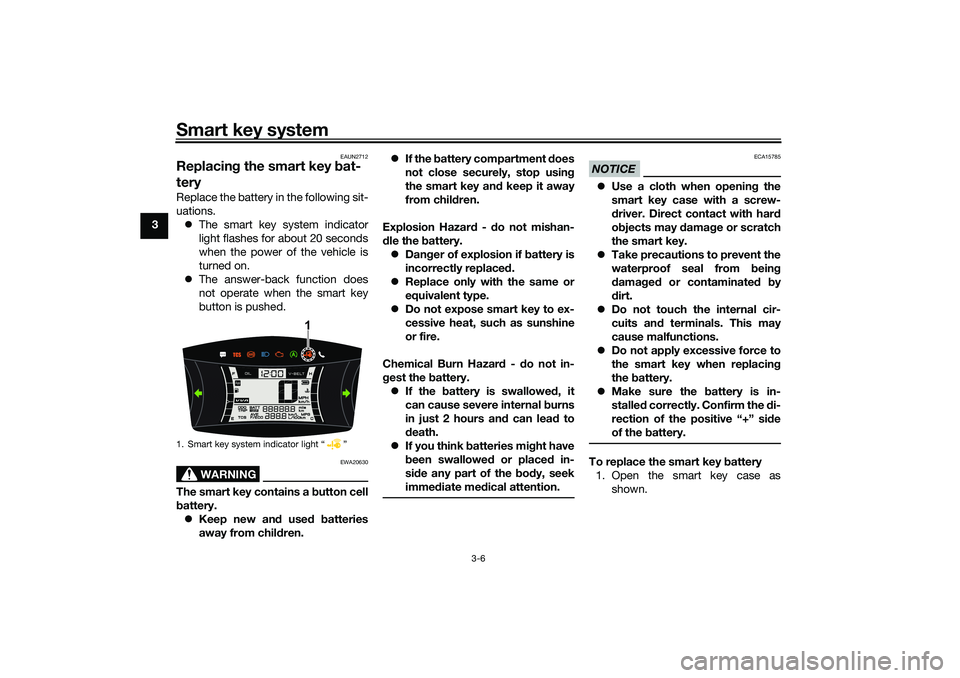
Replacing the smart key bat-
teryReplace the battery in the following sit-
uations.
The smart key system indicator
light flashes for about 20 seconds
when the power of the vehicle is
turned on.
The answer-back function does
not operate when the smart key
button is pushed.
WARNING
EWA20630
The smart key contains a button cell
battery.
Keep new and used batteries
away from children.If the battery compartment does
not close securely, stop using
the smart key and keep it away
from children.
Explosion Hazard - do not mishan-
dle the battery.
Danger of explosion if battery is
incorrectly replaced.
Replace only with the same or
equivalent type.
Do not expose smart key to ex-
cessive heat, such as sunshine
or fire.
Chemical Burn Hazard - do not in-
gest the battery.
If the battery is swallowed, it
can cause severe internal burns
in just 2 hours and can lead to
death.
If you think batteries might have
been swallowed or placed in-
side any part of the body, seek
immediate me
dical attention.
NOTICE
ECA15785
Use a cloth when opening the
smart key case with a screw-
driver. Direct contact with hard
objects may damage or scratch
the smart key.
Take precautions to prevent the
waterproof seal from being
damaged or contaminated by
dirt.
Do not touch the internal cir-
cuits and terminals. This may
cause malfunctions.
Do not apply excessive force to
the smart key when replacing
the battery.
Make sure the battery is in-
stalled correctly. Confirm the di-
rection of the positive “+” side
of the battery.To replace the smart key battery
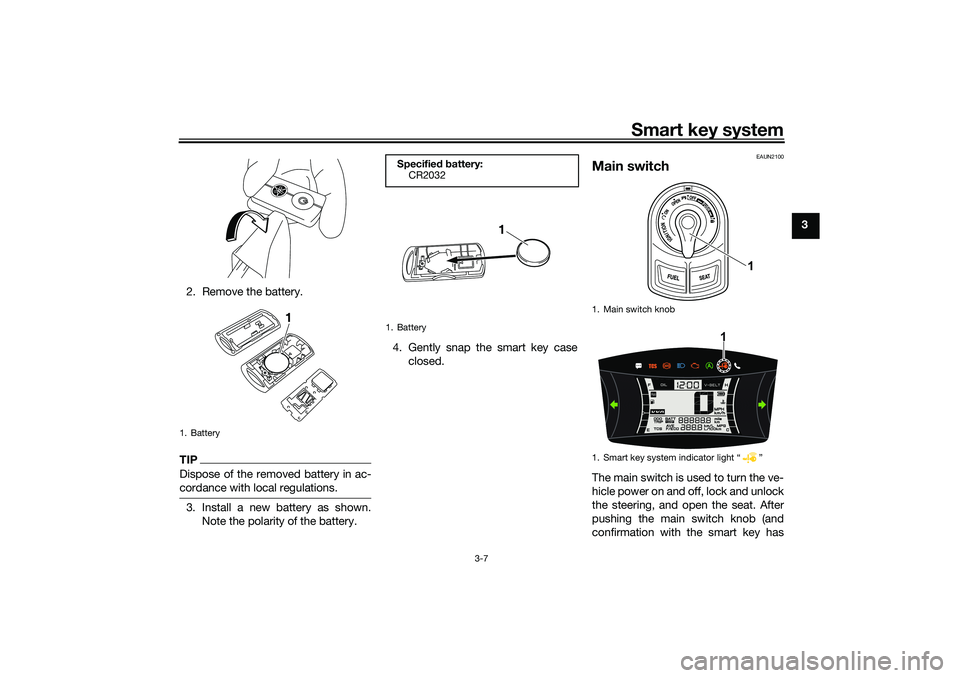
1. Open the smart key case as
shown.
1. Smart key system indicator light “ ”
1
UBALE0E0.book Page 6 Wednesday, September 30, 2020 1:37 PM
Page 25 of 114
Smart key system
3-7
3
2. Remove the battery.
TIPDispose of the removed battery in ac-
cordance with local regulations.3. Install a new battery as shown.
Note the polarity of the battery.4. Gently snap the smart key case
closed.
EAUN2100
Main switchThe main switch is used to turn the ve-
hicle power on and off, lock and unlock
the steering, and open the seat. After
pushing the main switch knob (and
confirmation with the smart key has
1. Battery
1
Specified battery:
CR2032
1. Battery
1
1. Main switch knob
1. Smart key system indicator light Ž
1
1
UBALE0E0.book Page 7 Wednesday, September 30, 2020 1:37 PM
Page 26 of 114
Smart key system
3-8
3taken place), the main switch can be
turned while the smart key system indi-
cator light is on (approximately 4 sec-
onds).
WARNING
EWA18720
Never turn the main switch to
“OFF”, “ ”, or “OPEN” while the ve-
hicle is moving. Otherwise the elec-
trical systems will be switched off,
which may result in loss of control or
an accident.TIPDo not push the main switch knob re-
peatedly or turn the main switch back
and forth excessively (beyond normal
use). To protect the main switch from
damage, the smart key system will
temporarily disable, and the smart key
system indicator light will flash. If this
occurs, wait until the indicator light
stops flashing, and then operate the
main switch.The main switch positions are de-
scribed below.
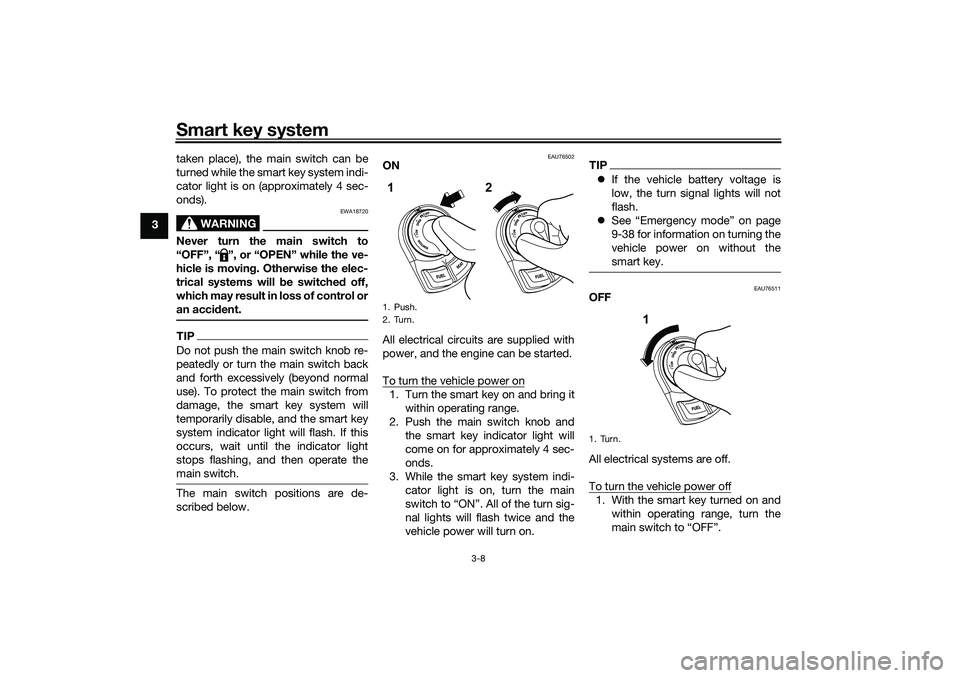
EAU76502
ON
All electrical circuits are supplied with
power, and the engine can be started.
To turn the vehicle power on1. Turn the smart key on and bring it
within operating range.
2. Push the main switch knob and
the smart key indicator light will
come on for approximately 4 sec-
onds.
3. While the smart key system indi-
cator light is on, turn the main
switch to “ON”. All of the turn sig-
nal lights will flash twice and the
vehicle power will turn on.
TIPIf the vehicle battery voltage is
low, the turn signal lights will not
flash.
See “Emergency mode” on page
9-38 for information on turning the
vehicle power on without the
smart key.
EAU76511
OFF
All electrical systems are off.
To turn the vehicle power off1. With the smart key turned on and
within operating range, turn the
main switch to “OFF”.
1. Push.
2. Turn.1
2
1. Turn.
1
UBALE0E0.book Page 8 Wednesday, September 30, 2020 1:37 PM
Page 63 of 114
Operation and important riding points
8-4
8
EAUW4891
Parking When parking, turn off the Stop and
Start System and then stop the engine.
After turning off the main switch, be
sure to turn off the smart key and take
it with you.
WARNING
EWA18840
Since the engine and exhaust
system can become very hot,
park in a place where pedestri-
ans or children are not likely to
touch them and be burned.
Do not park on a slope or on soft
ground, otherwise the vehicle
may overturn, increasing the
risk of a fuel leak and fire.
Do not park near grass or other
flammable materials which
might catch fire.
If the Stop and Start System is
left turned on, the battery could
become discharged and it may
not be possible to restart the
engine due to insufficient bat-
tery voltage.
TIPEven when the vehicle is parked in a lo-
cation partitioned by a fence or the
glass window of a shop, if the smart
key is within operating range, other
people will be able to start the engine
and operate the vehicle. Please turn
the smart key off when leaving the ve-
hicle. (See page 3-8.)
UBALE0E0.book Page 4 Wednesday, September 30, 2020 1:37 PM
Page 96 of 114
Periodic maintenance and adjustment
9-33
910. Close the seat.
EAU60701
TroubleshootingAlthough Yamaha vehicles receive a
thorough inspection before shipment
from the factory, trouble may occur
during operation. Any problem in the
fuel, compression, or ignition systems,
for example, can cause poor starting
and loss of power.
The following troubleshooting charts
represent quick and easy procedures
for checking these vital systems your-
self. However, should your vehicle re-
quire any repair, take it to a Yamaha
dealer, whose skilled technicians have
the necessary tools, experience, and
know-how to service the vehicle prop-
erly.
Use only genuine Yamaha replace-
ment parts. Imitation parts may look
like Yamaha parts, but they are often
inferior, have a shorter service life and
can lead to expensive repair bills.
WARNING
EWA15142
When checking the fuel system, do
not smoke, and make sure there are
no open flames or sparks in the ar-
ea, including pilot lights from waterheaters or furnaces. Gasoline or
gasoline vapors can ignite or ex-
plode, causing severe injury or prop-
erty damage.
EAU76551
Smart key system troubleshooting
Please check the following items when
the smart key system does not work.
Is the smart key turned on? (See
page 3-4.)
Is the smart key battery dis-
charged? (See page 3-6.)
Is the smart key battery installed
correctly? (See page 3-6.)
Is the smart key being used in a lo-
cation with strong radio waves or
other electromagnetic noise? (See
page 3-1.)
Are you using the smart key that is
registered to the vehicle?
Is the vehicle battery discharged?
When the vehicle battery is dis-
charged, the smart key system will
not operate. Please have the vehi-
cle battery charged or replaced.
(See page 9-28.)
Tightening torque:
Grab bar bolt:
17 N·m (1.7 kgf·m, 13 lb·ft)
UBALE0E0.book Page 33 Wednesday, September 30, 2020 1:37 PM
Page 101 of 114
Periodic maintenance and adjustment
9-38
9
EAU76561
Emergency mode When the smart key is lost or dam-
aged, or its battery has discharged, the
vehicle can still be turned on and the
engine started. You will need the smart
key system identification number.
To operate the vehicle in emergency
mode
1. Stop the vehicle in a safe place
and turn the main switch to “OFF”.
2. Push the main switch knob for 5
seconds until the smart key sys-
tem indicator light flashes once,
then release it. Repeat two more
times. The smart key system indi-
cator light will come on for three
seconds to indicate the transition
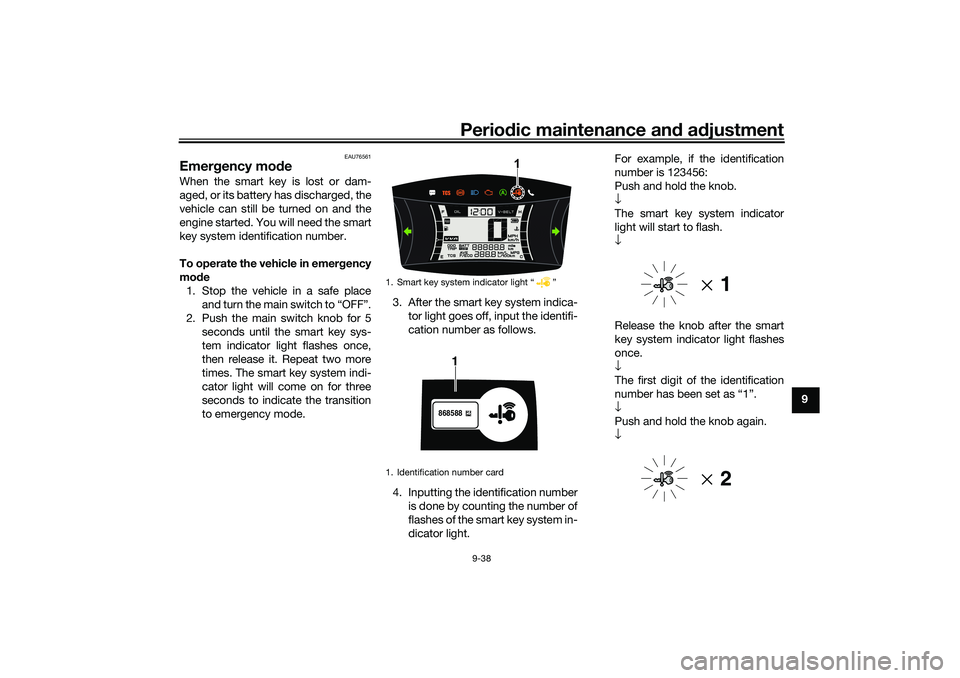
to emergency mode.3. After the smart key system indica-
tor light goes off, input the identifi-
cation number as follows.
4. Inputting the identification number
is done by counting the number of
flashes of the smart key system in-
dicator light.For example, if the identification
number is 123456:
Push and hold the knob.
↓
The smart key system indicator
light will start to flash.
↓
Release the knob after the smart
key system indicator light flashes
once.
↓
The first digit of the identification
number has been set as “1”.
↓
Push and hold the knob again.
↓
1. Smart key system indicator light “ ”
1. Identification number card
1
868588
1
UBALE0E0.book Page 38 Wednesday, September 30, 2020 1:37 PM