ESP YAMAHA PW50 2013 Owners Manual
[x] Cancel search | Manufacturer: YAMAHA, Model Year: 2013, Model line: PW50, Model: YAMAHA PW50 2013Pages: 76, PDF Size: 1.67 MB
Page 4 of 76
EAU48173
Read this manual carefully before operating this vehicle. This manual should stay with this vehicle if it is sold.
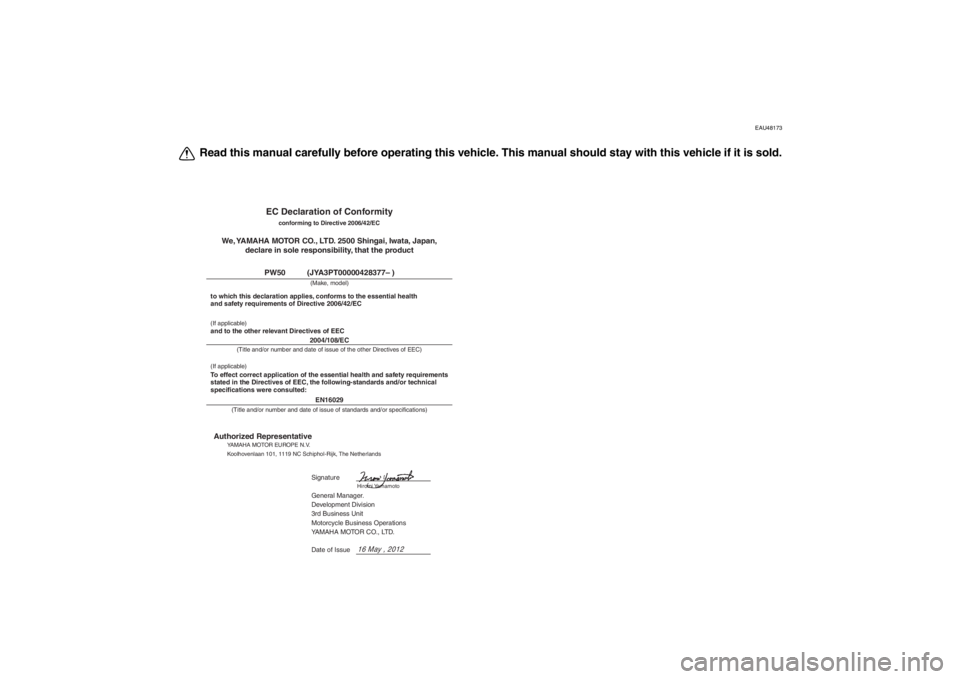
EC Declaration of Conformity
conforming to Directive 2006/42/EC
We, YAMAHA MOTOR CO., LTD. 2500 Shingai, Iwata, Japan,declare in sole responsibility, that the product
PW50 (JYA3PT00000428377– )
(Make, model)
to which this declaration applies, conforms to the essential health
and safety requirements of Directive 2006/42/EC(If applicable)and to the other relevant Directives of EEC
2004/108/EC
(Title and/or number and date of issue of the other Directives of EEC)
(If applicable)
To effect correct application of the essential health and safety requirements
stated in the Directives of EEC, the following-standards and/or technical
specifications were consulted:
(Title and/or number and date of issue of standards and/or specifications)
Authorized Representative
YAMAHA MOTOR EUROPE N.V.
Koolhovenlaan 101, 1119 NC Schiphol-Rijk, The Netherlands
Signature
Hiromi Yamamoto
General Manager.
Development Division
3rd Business Unit
Motorcycle Business Operations
YAMAHA MOTOR CO., LTD.
Date of Issue
16 May , 2012
EN16029
U5PG8BE0.book Page 1 Wednesday, June 27, 2012 2:53 PM
Page 13 of 76
LOCATION OF IMPORTANT LABELS1-3
1
For Canada
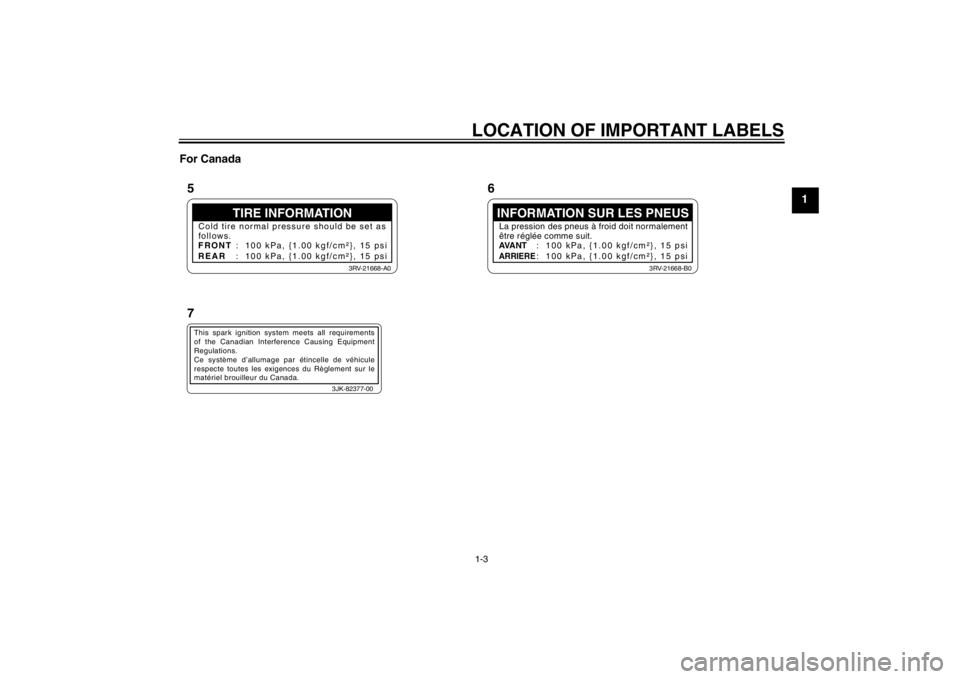
TIRE INFORMATION
Cold tire normal pressure should be set as
follows.
FRONT
REAR : 100 kPa, {1.00 kgf/cm²}, 15 psi
: 100 kPa, {1.00 kgf/cm²}, 15 psi
3RV-21668-A0
INFORMATION SUR LES PNEUSLa pression des pneus à froid doit normalement
être réglée comme suit.
AVANTARRIERE
: 100 kPa, {1.00 kgf/cm²}, 15 psi
: 100 kPa, {1.00 kgf/cm²}, 15 psi
3RV-21668-B0
3JK-82377-00
This spark ignition system meets all requirements
of the Canadian Interference Causing Equipment
Regulations.
Ce système d’allumage par étincelle de véhicule
respecte toutes les exigences du Règlement sur le
matériel brouilleur du Canada.56
7
U5PG8BE0.book Page 3 Wednesday, June 27, 2012 2:53 PM
Page 20 of 76

2-1
2
SAFETY INFORMATION
EAU4093B
Be a Responsible Owner
As the vehicle’s owner, you are respon-
sible for the safe and proper operation
of your motorcycle.
Motorcycles are single-track vehicles.
Their safe use and operation are de-
pendent upon the use of proper riding
techniques as well as the expertise of
the operator. Every operator should
know the following requirements before
riding this motorcycle.
He or she should:●
Obtain thorough instructions from
a competent source on all aspects
of motorcycle operation.
●
Observe the warnings and mainte-
nance requirements in this Own-
er’s Manual.
●
Obtain qualified training in safe
and proper riding techniques.
●
Obtain professional technical ser-
vice as indicated in this Owner’s
Manual and/or when made neces-
sary by mechanical conditions.
●
Never operate a motorcycle with-
out proper training or instruction.
Take a training course. Beginners
should receive training from a cer-
tified instructor. Contact an autho-
rized motorcycle dealer to find out
about the training courses nearest
you.
Safe Riding
Perform the pre-operation checks each
time you use the vehicle to make sure it
is in safe operating condition. Failure to
inspect or maintain the vehicle properly
increases the possibility of an accident
or equipment damage. See page 5-1
for a list of pre-operation checks.
●
This motorcycle is designed for off-
road use only, therefore, it is illegal
to operate it on public streets,
roads, or highways, even a dirt or
gravel one. Off-road use on public
lands may be illegal. Please check
local regulations before riding.
●
This motorcycle is designed to car-
ry the operator only. No passen-
gers.
●
The failure of motorists to detect
and recognize motorcycles in traf-
fic is the predominating cause of
automobile/motorcycle accidents.
Many accidents have been caused
by an automobile driver who did
not see the motorcycle. Making
yourself conspicuous appears to
be very effective in reducing the
chance of this type of accident.
Therefore: Wear a brightly colored jacket.
Use extra caution when you are approaching and passing
through intersections, since in-
tersections are the most likely
places for motorcycle accidents
to occur.
Ride where other motorists can see you. Avoid riding in another
motorist’s blind spot.
Never maintain a motorcycle without proper knowledge. Con-
tact an authorized motorcycle
dealer to inform you on basic
motorcycle maintenance. Cer-
tain maintenance can only be
carried out by certified staff.
U5PG8BE0.book Page 1 Wednesday, June 27, 2012 2:53 PM
Page 23 of 76

SAFETY INFORMATION
2-4
2
ucts or having other modifications per-
formed to your vehicle that change any
of the vehicle’s design or operation
characteristics can put you and others
at greater risk of serious injury or death.
You are responsible for injuries related
to changes in the vehicle.
Keep the following guidelines in mind,
as well as those provided under “Load-
ing” when mounting accessories.
●
Never install accessories that
would impair the performance of
your motorcycle. Carefully inspect
the accessory before using it to
make sure that it does not in any
way reduce ground clearance or
cornering clearance, limit suspen-
sion travel, steering travel or con-
trol operation.
Accessories fitted to the handle- bar or the front fork area can
create instability due to improper
weight distribution. If accesso-
ries are added to the handlebar
or front fork area, they must be
as lightweight as possible and
should be kept to a minimum. Bulky or large accessories may
seriously affect the stability of
the motorcycle. Wind may at-
tempt to lift the motorcycle, or
the motorcycle may become un-
stable in cross winds.
Certain accessories can dis- place the operator from his or
her normal riding position. This
improper position limits the free-
dom of movement of the opera-
tor and may limit control ability,
therefore, such accessories are
not recommended.
●
Use caution when adding electri-
cal accessories. If electrical acces-
sories exceed the capacity of the
motorcycle’s electrical system, an
electric failure could result, which
could cause a dangerous loss of
lights or engine power.
Aftermarket Tires and Rims
The tires and rims that came with your
motorcycle were designed to match the
performance capabilities and to provide
the best combination of handling, brak-
ing, and comfort. Other tires, rims, siz-
es, and combinations may not be appropriate. Refer to page 7-12 for tire
specifications and more information on
replacing your tires.
Transporting the Motorcycle
Be sure to observe following instruc-
tions before transporting the motorcy-
cle in another vehicle.
●
Remove all loose items from the
motorcycle.
●
Check that the fuel cock is in the
“S” (stop) position and that there
are no fuel leaks.
●
Point the front wheel straight
ahead on the trailer or in the truck
bed, and choke it in a rail to pre-
vent movement.
●
Shift the transmission in gear (for
models with a manual transmis-
sion).
●
Secure the motorcycle with tie-
downs or suitable straps that are
attached to solid parts of the mo-
torcycle, such as the frame or up-
per front fork triple clamp (and not,
for example, to rubber-mounted
handlebars or turn signals, or parts
that could break). Choose the lo-
U5PG8BE0.book Page 4 Wednesday, June 27, 2012 2:53 PM
Page 38 of 76
OPERATION AND IMPORTANT RIDING POINTS
6-1
6
EAU15951
Read the Owner’s Manual carefully to
become familiar with all controls. If
there is a control or function you do not
understand, ask your Yamaha dealer.
WARNING
EWA10271
Failure to familiarize yourself with
the controls can lead to loss of con-
trol, which could cause an accident
or injury.
EAU40889
Starting and warming up a
cold engine 1. Turn the fuel cock lever to “O” (on).
2. Set the engine stop switch to“START”.
3. Turn the starter (choke) on and completely close the throttle. (See
page 4-7.)
4. While applying the front or rear brake, start the engine by pushing
the kickstarter lever down.
5. After starting the engine, move the starter (choke) back halfway.
6. When the engine is warm, turn the starter (choke) off and set the en-
gine stop switch to “RUN”.TIPThe engine is warm when it responds
quickly to the throttle with the starter
(choke) turned off.NOTICE
ECA11042
For maximum engine life, never ac-
celerate hard when the engine is
cold!
EAU16660
Starting a warm engine Follow the same procedure as for start-
ing a cold engine with the exception
that the starter (choke) is not required
when the engine is warm. Instead, start
the engine with the throttle slightly
open.TIPIf the engine does not start after several
kicks, try again with the throttle 1/4 to
1/2 open.
U5PG8BE0.book Page 1 Wednesday, June 27, 2012 2:53 PM
Page 39 of 76

OPERATION AND IMPORTANT RIDING POINTS
6-2
6
EAU41002
Starting off 1. While applying the rear brake le-ver, push the motorcycle off the
centerstand.
2. Completely close the throttle.
3. Set the engine stop switch to “RUN”.
4. Check for oncoming off-road vehi- cles, and then slowly turn the throt-
tle grip in order to take off.
EAU16780
Acceleration a nd deceleration The speed can be adjusted by opening
and closing the throttle. To increase the
speed, turn the throttle grip in direction
(a). To reduce the speed, turn the throt-
tle grip in direction (b).
EAU41012
Braking
WARNING
EWA14571
●
Avoid braking hard or suddenly
(especially when leaning over to
one side), otherwise the motor-
cycle may skid or overturn.
●
Keep in mind that braking on
wet surfaces is much more diffi-
cult.
●
Ride slowly down a hill, as brak-
ing downhill can be very diffi-
cult.
1. Close the throttle completely.
2. Apply both front and rear brakes
simultaneously while gradually in-
creasing the pressure.
Front
(a) (b)
U5PG8BE0.book Page 2 Wednesday, June 27, 2012 2:53 PM
Page 40 of 76
OPERATION AND IMPORTANT RIDING POINTS
6-3
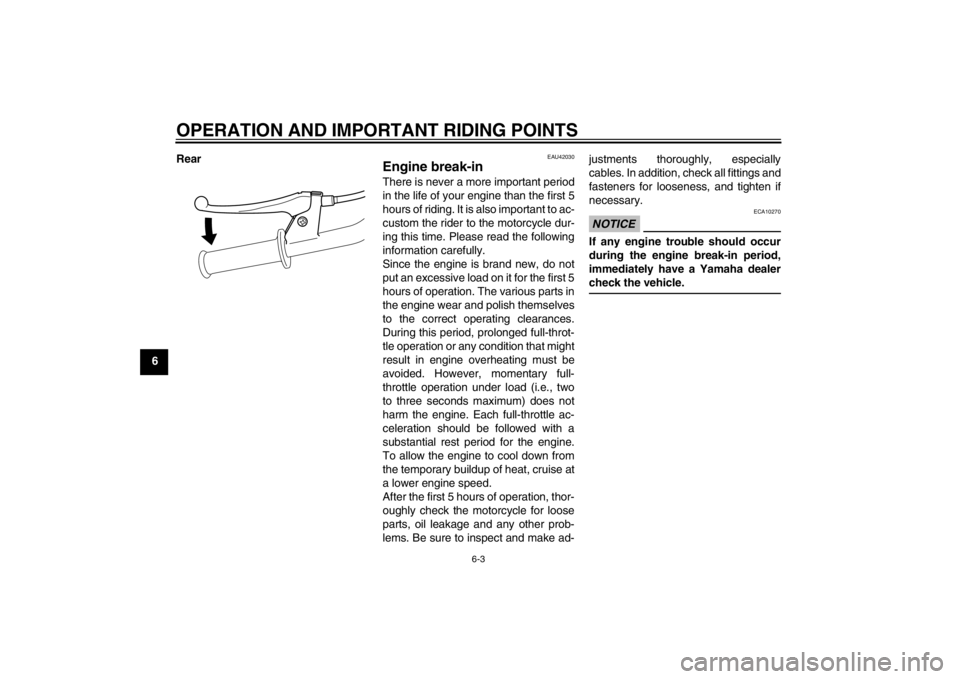
6Rear
EAU42030
Engine break-in There is never a more important period
in the life of your engine than the first 5
hours of riding. It is also important to ac-
custom the rider to the motorcycle dur-
ing this time. Please read the following
information carefully.
Since the engine is brand new, do not
put an excessive load on it for the first 5
hours of operation. The various parts in
the engine wear and polish themselves
to the correct operating clearances.
During this period, prolonged full-throt-
tle operation or any condition that might
result in engine overheating must be
avoided. However, momentary full-
throttle operation under load (i.e., two
to three seconds maximum) does not
harm the engine. Each full-throttle ac-
celeration should be followed with a
substantial rest period for the engine.
To allow the engine to cool down from
the temporary buildup of heat, cruise at
a lower engine speed.
After the first 5 hours of operation, thor-
oughly check the motorcycle for loose
parts, oil leakage and any other prob-
lems. Be sure to inspect and make ad- justments thoroughly, especially
cables. In addition, check all fittings and
fasteners for looseness, and tighten if
necessary.
NOTICE
ECA10270
If any engine trouble should occur
during the engine break-in period,
immediately have a Yamaha dealer
check the vehicle.
U5PG8BE0.book Page 3 Wednesday, June 27, 2012 2:53 PM
Page 47 of 76
PERIODIC MAINTENANCE AND ADJUSTMENT
7-6
7
EAU19604
Checking the spark plug The spark plug is an important engine
component, which is easy to check.
Since heat and deposits will cause any
spark plug to slowly erode, the spark
plug should be removed and checked
in accordance with the periodic mainte-
nance and lubrication chart. In addition,
the condition of the spark plug can re-
veal the condition of the engine.
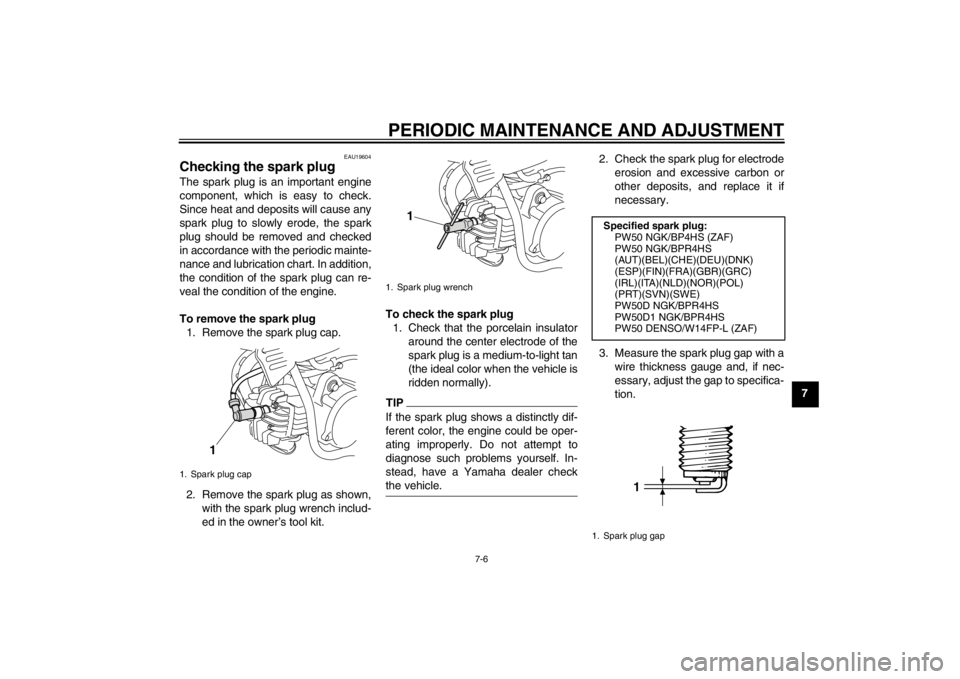
To remove the spark plug1. Remove the spark plug cap.
2. Remove the spark plug as shown, with the spark plug wrench includ-
ed in the owner’s tool kit. To check the spark plug
1. Check that the porcelain insulator around the center electrode of the
spark plug is a medium-to-light tan
(the ideal color when the vehicle is
ridden normally).
TIPIf the spark plug shows a distinctly dif-
ferent color, the engine could be oper-
ating improperly. Do not attempt to
diagnose such problems yourself. In-
stead, have a Yamaha dealer check
the vehicle.
2. Check the spark plug for electrodeerosion and excessive carbon or
other deposits, and replace it if
necessary.
3. Measure the spark plug gap with a wire thickness gauge and, if nec-
essary, adjust the gap to specifica-
tion.
1. Spark plug cap
1
1. Spark plug wrench
1
Specified spark plug:PW50 NGK/BP4HS (ZAF)
PW50 NGK/BPR4HS
(AUT)(BEL)(CHE)(DEU)(DNK)
(ESP)(FIN)(FRA)(GBR)(GRC)
(IRL)(ITA)(NLD)(NOR)(POL)
(PRT)(SVN)(SWE)
PW50D NGK/BPR4HS
PW50D1 NGK/BPR4HS
PW50 DENSO/W14FP-L (ZAF)
1. Spark plug gap
1
U5PG8BE0.book Page 6 Wednesday, June 27, 2012 2:53 PM
Page 63 of 76
PERIODIC MAINTENANCE AND ADJUSTMENT
7-22
7
10. Pull the wheel to the right to sepa-
rate it from the final gear case, and
then remove the wheel.
EAU41523
To install the rear wheel1. Apply a light coating of lithium- soap-based grease to the splines
of the final gear case and wheel
hub.
2. Install the wheel by inserting it into the wheel hub.
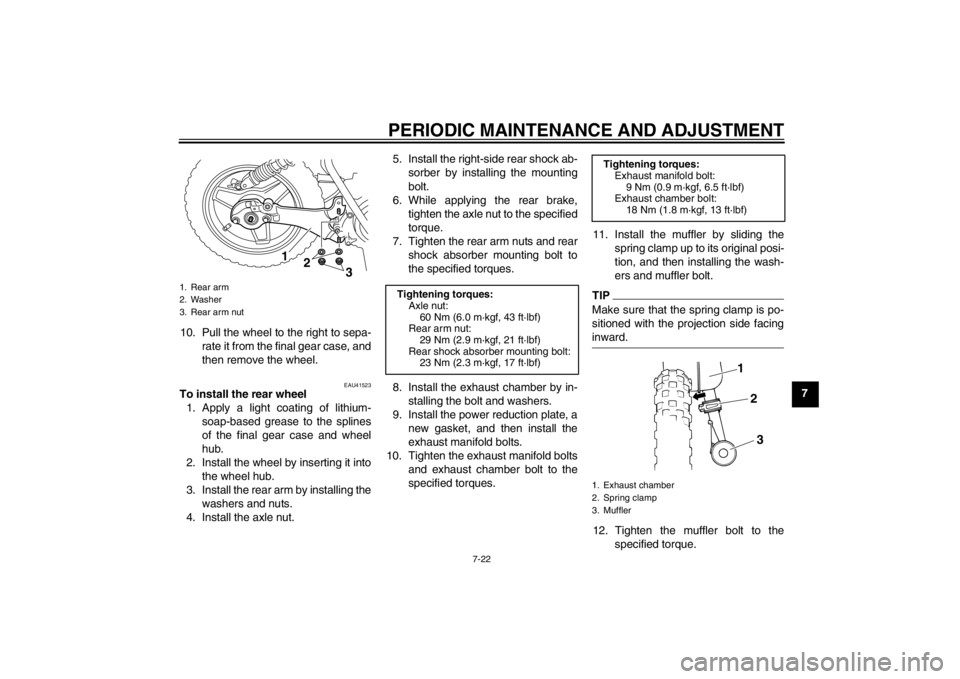
3. Install the rear arm by installing the washers and nuts.
4. Install the axle nut. 5. Install the right-side rear shock ab-
sorber by installing the mounting
bolt.
6. While applying the rear brake, tighten the axle nut to the specified
torque.
7. Tighten the rear arm nuts and rear shock absorber mounting bolt to
the specified torques.
8. Install the exhaust chamber by in- stalling the bolt and washers.
9. Install the power reduction plate, a new gasket, and then install the
exhaust manifold bolts.
10. Tighten the exhaust manifold bolts and exhaust chamber bolt to the
specified torques. 11. Install the muffler by sliding the
spring clamp up to its original posi-
tion, and then installing the wash-
ers and muffler bolt.
TIPMake sure that the spring clamp is po-
sitioned with the projection side facing
inward.12. Tighten the muffler bolt to thespecified torque.
1. Rear arm
2. Washer
3. Rear arm nut
12
3
Tightening torques:
Axle nut:60 Nm (6.0 m·kgf, 43 ft·lbf)
Rear arm nut:
29 Nm (2.9 m·kgf, 21 ft·lbf)
Rear shock absorber mounting bolt: 23 Nm (2.3 m·kgf, 17 ft·lbf)
Tightening torques:Exhaust manifold bolt:
9 Nm (0.9 m·kgf, 6.5 ft·lbf)
Exhaust chamber bolt:
18 Nm (1.8 m·kgf, 13 ft·lbf)
1. Exhaust chamber
2. Spring clamp
3. Muffler
1
2
3
U5PG8BE0.book Page 22 Wednesday, June 27, 2012 2:53 PM
Page 66 of 76
MOTORCYCLE CARE AND STORAGE
8-1
8
EAU37833
Matte color caution NOTICE
ECA15192
Some models are equipped with
matte colored finished parts. Be
sure to consult a Yamaha dealer for
advice on what products to use be-
fore cleaning the vehicle. Using a
brush, harsh chemical products or
cleaning compounds when cleaning
these parts will scratch or damage
their surface. Wax also should not
be applied to any matte colored fin-
ished parts.
EAU40635
Care While the open design of a motorcycle
reveals the attractiveness of the tech-
nology, it also makes it more vulnera-
ble. Rust and corrosion can develop
even if high-quality components are
used. A rusty exhaust pipe may go un-
noticed on a car, however, it detracts
from the overall appearance of a motor-
cycle. Frequent and proper care does
not only comply with the terms of the
warranty, but it will also keep your mo-
torcycle looking good, extend its life
and optimize its performance.
Before cleaning1. Cover the muffler outlet with a plastic bag after the engine has
cooled down.
2. Make sure that all caps and covers as well as all electrical couplers
and connectors, including the
spark plug cap, are tightly in-
stalled.
3. Remove extremely stubborn dirt, like oil burnt onto the crankcase,
with a degreasing agent and a
brush, but never apply such prod- ucts onto seals, gaskets and wheel
axles. Always rinse the dirt and de-
greaser off with water.
Cleaning
NOTICE
ECA17110
●
Avoid using strong acidic wheel
cleaners, especially on spoked
wheels. If such products are
used on hard-to-remove dirt, do
not leave the cleaner on the af-
fected area any longer than in-
structed. Also, thoroughly rinse
the area off with water, immedi-
ately dry it, and then apply a cor-
rosion protection spray.
●
Improper cleaning can damage
plastic parts (such as cowlings,
panels, etc.) and the mufflers.
Use only a soft, clean cloth or
sponge with water to clean plas-
tic. However, if the plastic parts
cannot be thoroughly cleaned
with water, diluted mild deter-
gent with water may be used. Be
sure to rinse off any detergent
residue using plenty of water, as
it is harmful to plastic parts.
U5PG8BE0.book Page 1 Wednesday, June 27, 2012 2:53 PM