check YAMAHA RHINO 700 2010 User Guide
[x] Cancel search | Manufacturer: YAMAHA, Model Year: 2010, Model line: RHINO 700, Model: YAMAHA RHINO 700 2010Pages: 498, PDF Size: 11.87 MB
Page 88 of 498
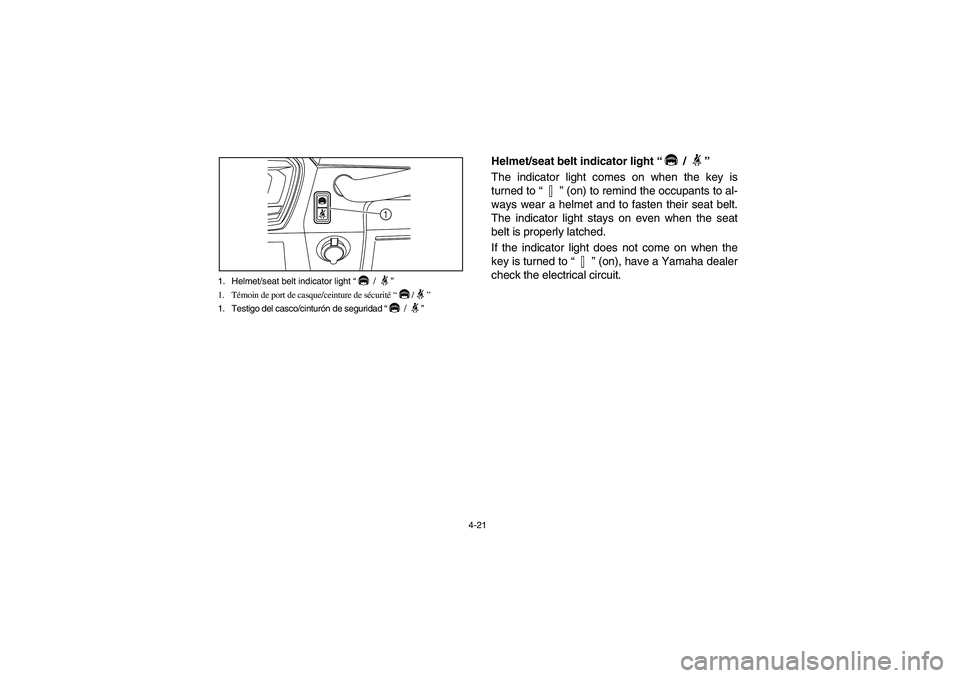
4-21 1. Helmet/seat belt indicator light “ / ”
1. Témoin de port de casque/ceinture de sécurité “/”
1. Testigo del casco/cinturón de seguridad “ / ”
1
Helmet/seat belt indicator light “ / ”
The indicator light comes on when the key is
turned to “” (on) to remind the occupants to al-
ways wear a helmet and to fasten their seat belt.
The indicator light stays on even when the seat
belt is properly latched.
If the indicator light does not come on when the
key is turned to “” (on), have a Yamaha dealer
check the electrical circuit.
EE.book Page 21 Monday, January 19, 2009 5:30 PM
Page 96 of 498
4-29
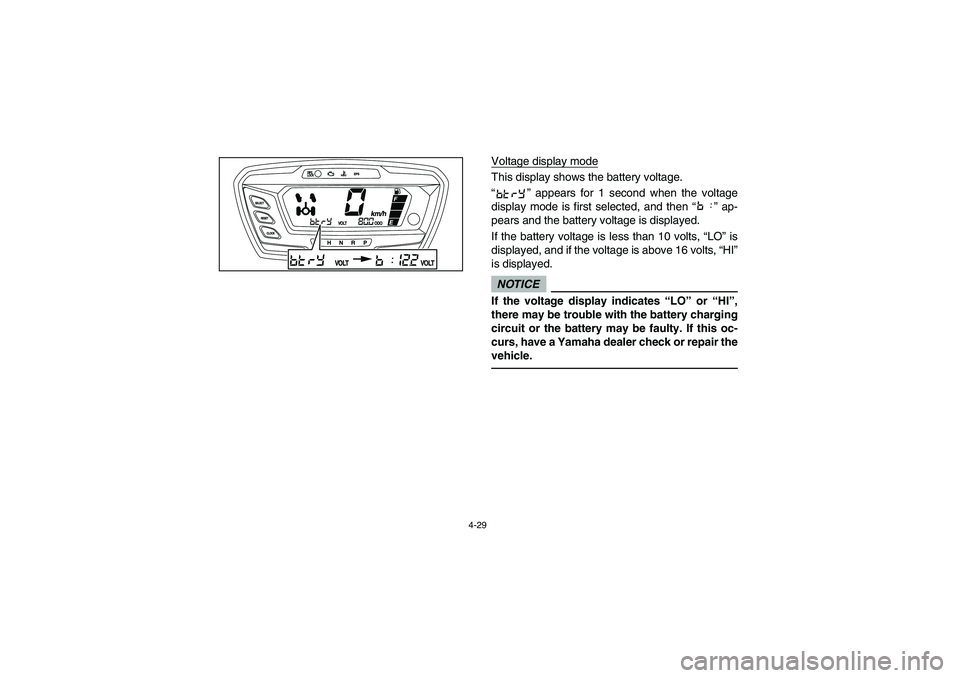
Voltage display modeThis display shows the battery voltage.
“” appears for 1 second when the voltage
display mode is first selected, and then “” ap-
pears and the battery voltage is displayed.
If the battery voltage is less than 10 volts, “LO” is
displayed, and if the voltage is above 16 volts, “HI”
is displayed. NOTICEIf the voltage display indicates “LO” or “HI”,
there may be trouble with the battery charging
circuit or the battery may be faulty. If this oc-
curs, have a Yamaha dealer check or repair the
vehicle.
EE.book Page 29 Monday, January 19, 2009 5:30 PM
Page 100 of 498
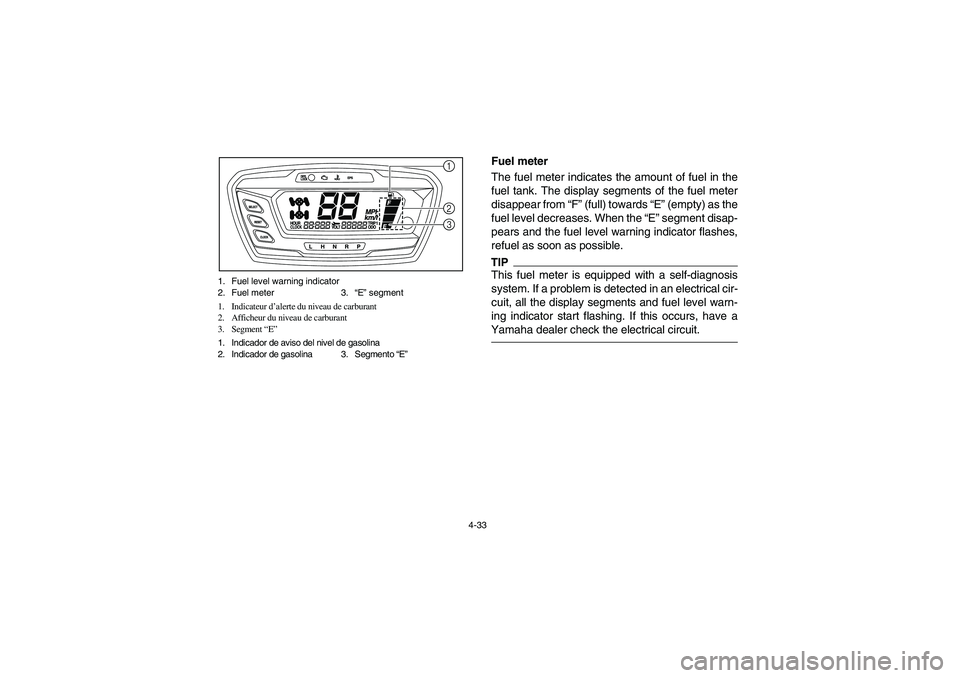
4-33 1. Fuel level warning indicator
2. Fuel meter 3.“E” segment
1. Indicateur d’alerte du niveau de carburant
2. Afficheur du niveau de carburant
3. Segment “E”
1. Indicador de aviso del nivel de gasolina
2. Indicador de gasolina 3. Segmento “E”
231
Fuel meter
The fuel meter indicates the amount of fuel in the
fuel tank. The display segments of the fuel meter
disappear from “F” (full) towards “E” (empty) as the
fuel level decreases. When the “E” segment disap-
pears and the fuel level warning indicator flashes,
refuel as soon as possible.TIPThis fuel meter is equipped with a self-diagnosis
system. If a problem is detected in an electrical cir-
cuit, all the display segments and fuel level warn-
ing indicator start flashing. If this occurs, have a
Yamaha dealer check the electrical circuit.
EE.book Page 33 Monday, January 19, 2009 5:30 PM
Page 102 of 498
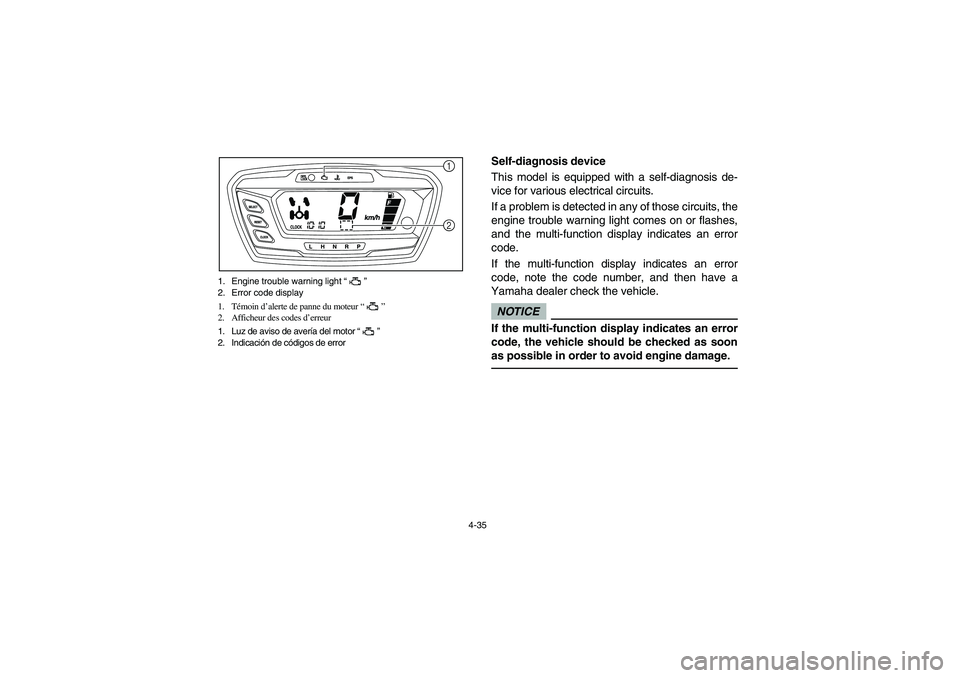
4-35 1. Engine trouble warning light “”
2. Error code display
1. Témoin d’alerte de panne du moteur “”
2. Afficheur des codes d’erreur
1. Luz de aviso de avería del motor “”
2. Indicación de códigos de error
21
Self-diagnosis device
This model is equipped with a self-diagnosis de-
vice for various electrical circuits.
If a problem is detected in any of those circuits, the
engine trouble warning light comes on or flashes,
and the multi-function display indicates an error
code.
If the multi-function display indicates an error
code, note the code number, and then have a
Yamaha dealer check the vehicle.NOTICEIf the multi-function display indicates an error
code, the vehicle should be checked as soon
as possible in order to avoid engine damage.
EE.book Page 35 Monday, January 19, 2009 5:30 PM
Page 108 of 498
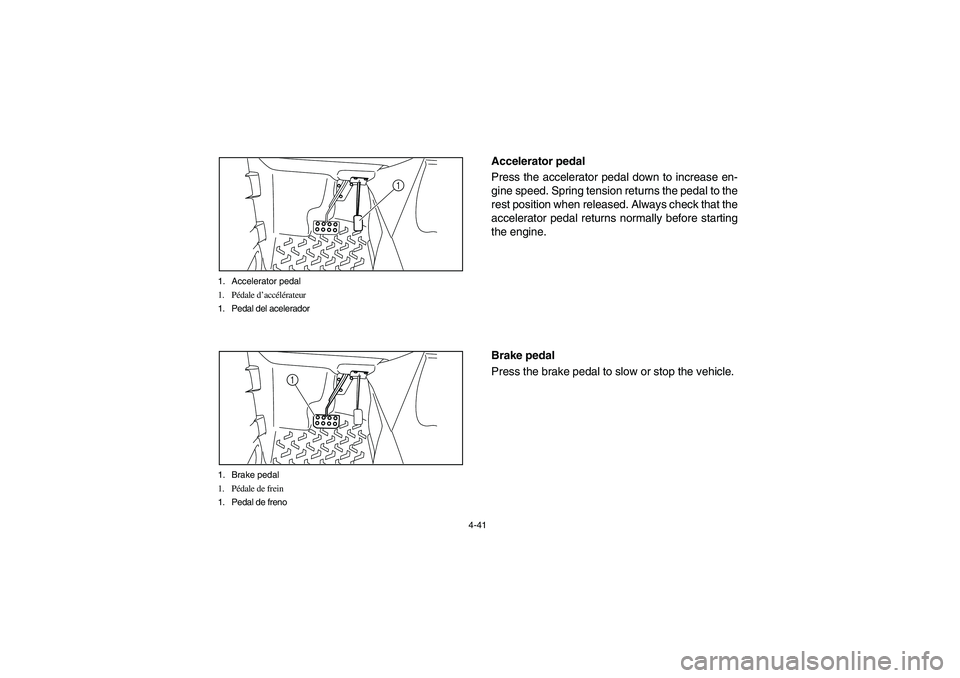
4-41 1. Accelerator pedal
1. Pédale d’accélérateur
1. Pedal del acelerador
1
1. Brake pedal
1. Pédale de frein
1. Pedal de freno
1
EVU00260
Accelerator pedal
Press the accelerator pedal down to increase en-
gine speed. Spring tension returns the pedal to the
rest position when released. Always check that the
accelerator pedal returns normally before starting
the engine.
EVU00270
Brake pedal
Press the brake pedal to slow or stop the vehicle.
EE.book Page 41 Monday, January 19, 2009 5:30 PM
Page 156 of 498
5-1
EVU01200
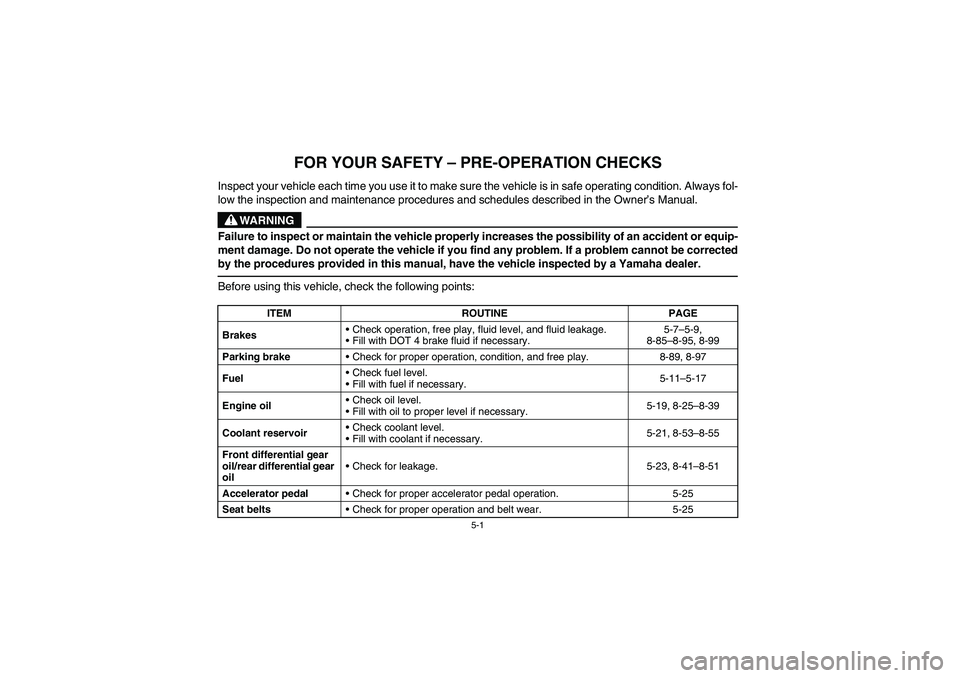
1 -FOR YOUR SAFETY – PRE-OPERATION CHECKS
Inspect your vehicle each time you use it to make sure the vehicle is in safe operating condition. Always fol-
low the inspection and maintenance procedures and schedules described in the Owner’s Manual.
WARNING
Failure to inspect or maintain the vehicle properly increases the possibility of an accident or equip-
ment damage. Do not operate the vehicle if you find any problem. If a problem cannot be corrected
by the procedures provided in this manual, have the vehicle inspected by a Yamaha dealer.Before using this vehicle, check the following points:
ITEM ROUTINE PAGE
BrakesCheck operation, free play, fluid level, and fluid leakage.
Fill with DOT 4 brake fluid if necessary.5-7–5-9,
8-85–8-95, 8-99
Parking brakeCheck for proper operation, condition, and free play. 8-89, 8-97
FuelCheck fuel level.
Fill with fuel if necessary.5-11–5-17
Engine oilCheck oil level.
Fill with oil to proper level if necessary.5-19, 8-25–8-39
Coolant reservoirCheck coolant level.
Fill with coolant if necessary.5-21, 8-53–8-55
Front differential gear
oil/rear differential gear
oilCheck for leakage. 5-23, 8-41–8-51
Accelerator pedalCheck for proper accelerator pedal operation. 5-25
Seat beltsCheck for proper operation and belt wear. 5-25
EE.book Page 1 Monday, January 19, 2009 5:30 PM
Page 157 of 498
5-2
5
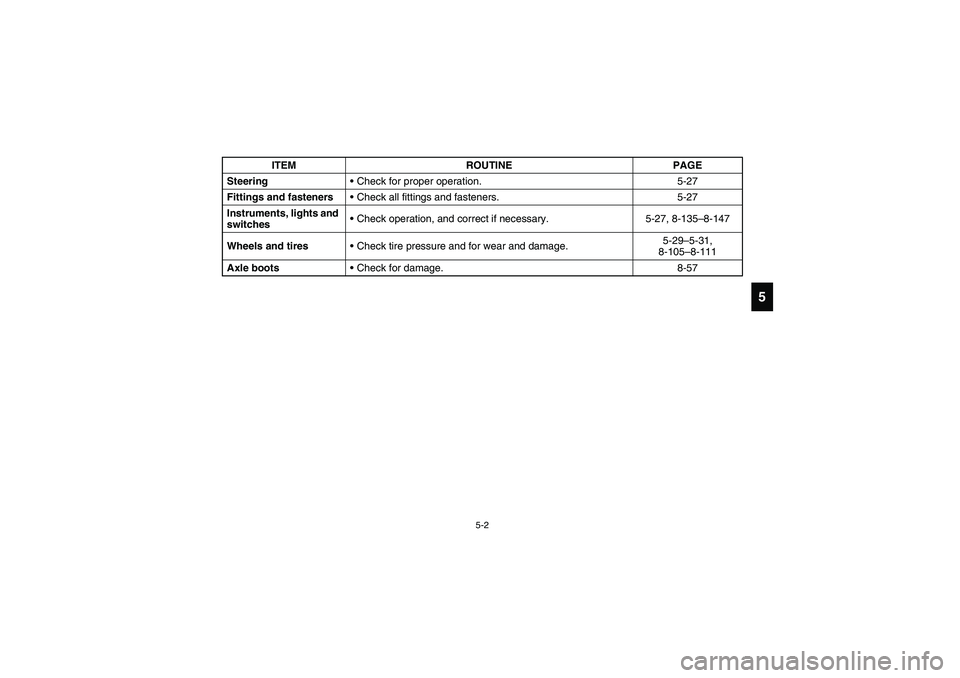
SteeringCheck for proper operation. 5-27
Fittings and fastenersCheck all fittings and fasteners. 5-27
Instruments, lights and
switchesCheck operation, and correct if necessary. 5-27, 8-135–8-147
Wheels and tiresCheck tire pressure and for wear and damage.5-29–5-31,
8-105–8-111
Axle bootsCheck for damage. 8-57 ITEM ROUTINE PAGE
EE.book Page 2 Monday, January 19, 2009 5:30 PM
Page 162 of 498
5-7
EVU00390
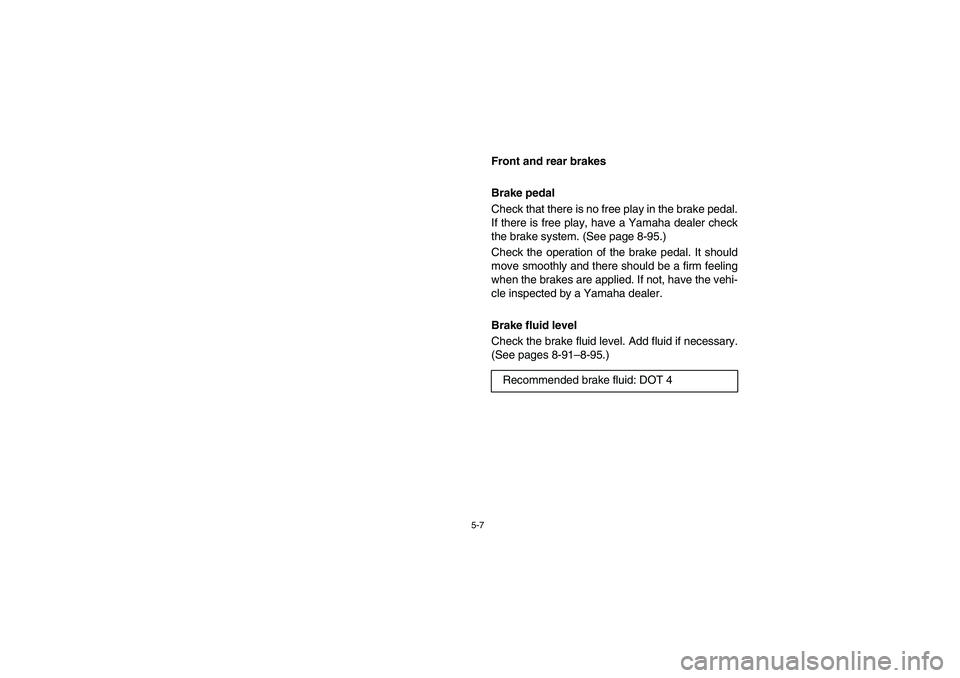
Front and rear brakes
Brake pedal
Check that there is no free play in the brake pedal.
If there is free play, have a Yamaha dealer check
the brake system. (See page 8-95.)
Check the operation of the brake pedal. It should
move smoothly and there should be a firm feeling
when the brakes are applied. If not, have the vehi-
cle inspected by a Yamaha dealer.
Brake fluid level
Check the brake fluid level. Add fluid if necessary.
(See pages 8-91–8-95.)
Recommended brake fluid: DOT 4
EE.book Page 7 Monday, January 19, 2009 5:30 PM
Page 164 of 498
5-9
Brake fluid leakage
Check to see if any brake fluid is leaking out of the
pipe joints or the brake fluid reservoir. Apply the
brakes firmly for one minute. If there is any leak-
age, have the vehicle inspected by a Yamaha
dealer.
Brake operation
Check the operation of the brakes at the start of
every ride. Test the brakes at slow speed after
starting out to make sure they are working proper-
ly. If the brakes do not provide proper braking per-
formance, inspect the brake system. (See pages
8-85–8-87, 8-91–8-95.)
EE.book Page 9 Monday, January 19, 2009 5:30 PM
Page 176 of 498
5-21
EVU00420
Coolant
Check the coolant level in the coolant reservoir
when the engine is cold (the coolant level will vary
with engine temperature).
The coolant level is satisfactory if it is between the
minimum and maximum level marks on the cool-
ant reservoir. If the coolant level is at or below the
minimum level mark, add additional coolant to
bring the level up to maximum level mark. If cool-
ant is not available, add distilled water. Change the
coolant every two years. (See pages 8-53–8-55 for
details.)NOTICEHard water or salt water is harmful to the en-
gine. You may use soft water if you cannot get
distilled water.
Coolant reservoir capacity
(up to the maximum level mark):
0.34 L (0.36 US qt, 0.30 Imp.qt)
EE.book Page 21 Monday, January 19, 2009 5:30 PM