torque YAMAHA RHINO 700 2012 Manuale de Empleo (in Spanish)
[x] Cancel search | Manufacturer: YAMAHA, Model Year: 2012, Model line: RHINO 700, Model: YAMAHA RHINO 700 2012Pages: 492, tamaño PDF: 12.99 MB
Page 124 of 492
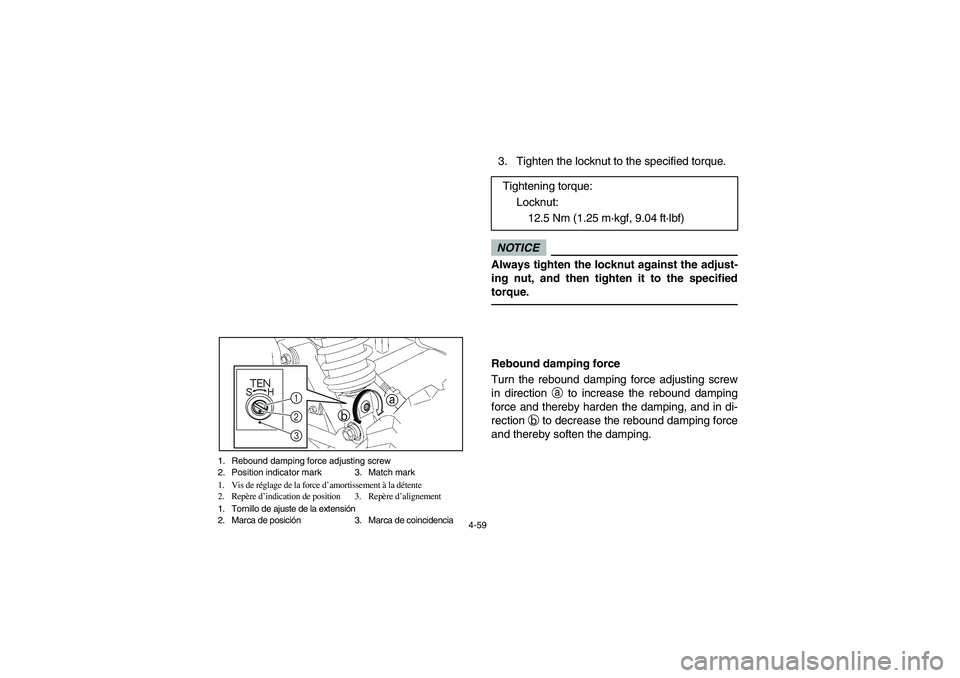
4-59 1. Rebound damping force adjusting screw
2. Position indicator mark 3. Match mark
1. Vis de réglage de la force d’amortissement à la détente
2. Repère d’indication de position 3. Repère d’alignement
1. Tornillo de ajuste de la extensión
2. Marca de posición 3. Marca de coincidencia
123b
a
3. Tighten the locknut to the specified torque.NOTICEAlways tighten the locknut against the adjust-
ing nut, and then tighten it to the specified
torque.Rebound damping force
Turn the rebound damping force adjusting screw
in direction a to increase the rebound damping
force and thereby harden the damping, and in di-
rection b to decrease the rebound damping force
and thereby soften the damping.Tightening torque:
Locknut:
12.5 Nm (1.25 m·kgf, 9.04 ft·lbf)
1RB60-EE.book Page 59 Thursday, April 7, 2011 10:43 AM
Page 136 of 492
4-71
3. Tighten the locknut to the specified torque.NOTICEAlways tighten the locknut against the adjust-
ing nut, and then tighten it to the specified
torque.
Spring preload setting:
Minimum (soft):
Distance A = 63.5 mm (2.50 in)
Standard:
Distance A = 63.5 mm (2.50 in)
Maximum (hard):
Distance A = 78.5 mm (3.09 in)
Tightening torque:
Locknut:
42 Nm (4.2 m·kgf, 30 ft·lbf)
1RB60-EE.book Page 71 Thursday, April 7, 2011 10:43 AM
Page 174 of 492
5-27
A crash can damage the restraint systems in your
vehicle. A damaged restraint system may not
properly protect the person using it, resulting in se-
rious injury or death in a crash. To help make sure
your restraint systems are working properly after a
crash, have them inspected and any necessary re-
placements made as soon as possible.
EVU01230
Steering
Park on level ground. Turn the steering wheel right
and left. Check for excessive free play, abnormal
noises, or a rough feeling. Have a Yamaha dealer
repair as necessary for proper operation.
EVU00470
Fittings and fasteners
Always check the tightness of chassis fittings and
fasteners before a ride. Take the vehicle to a
Yamaha dealer or refer to the Service Manual for
correct tightening torque.
EVU00480
1RB60-EE.book Page 27 Thursday, April 7, 2011 10:43 AM
Page 296 of 492
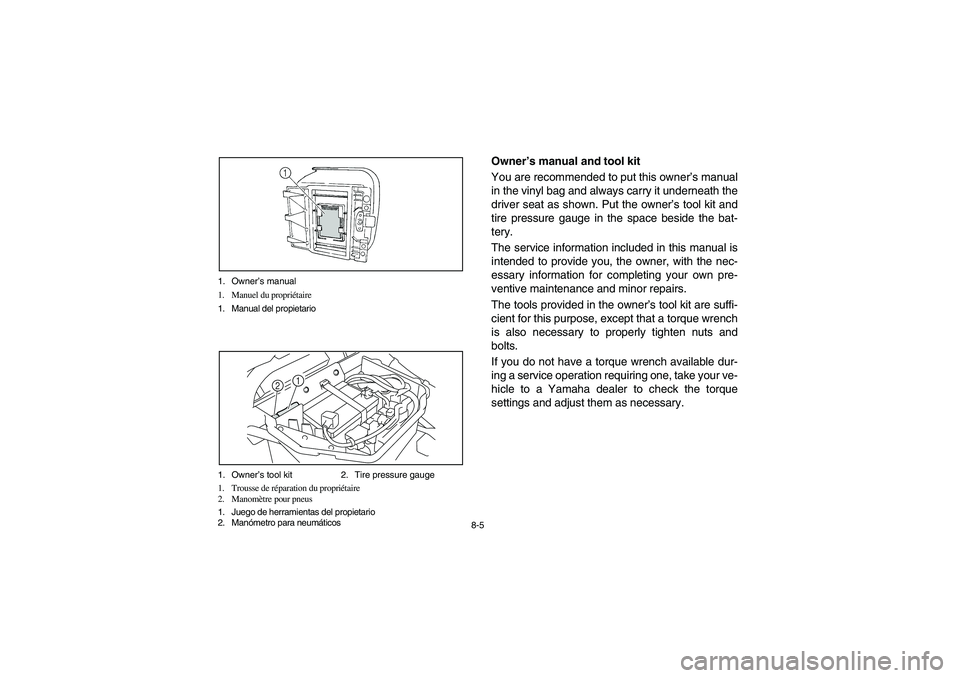
8-5 1. Owner’s manual
1. Manuel du propriétaire
1. Manual del propietario
1. Owner’s tool kit 2. Tire pressure gauge
1. Trousse de réparation du propriétaire
2. Manomètre pour pneus
1. Juego de herramientas del propietario
2. Manómetro para neumáticos
21
EVU00660
Owner’s manual and tool kit
You are recommended to put this owner’s manual
in the vinyl bag and always carry it underneath the
driver seat as shown. Put the owner’s tool kit and
tire pressure gauge in the space beside the bat-
tery.
The service information included in this manual is
intended to provide you, the owner, with the nec-
essary information for completing your own pre-
ventive maintenance and minor repairs.
The tools provided in the owner’s tool kit are suffi-
cient for this purpose, except that a torque wrench
is also necessary to properly tighten nuts and
bolts.
If you do not have a torque wrench available dur-
ing a service operation requiring one, take your ve-
hicle to a Yamaha dealer to check the torque
settings and adjust them as necessary.
1RB60-EE.book Page 5 Thursday, April 7, 2011 10:43 AM
Page 324 of 492
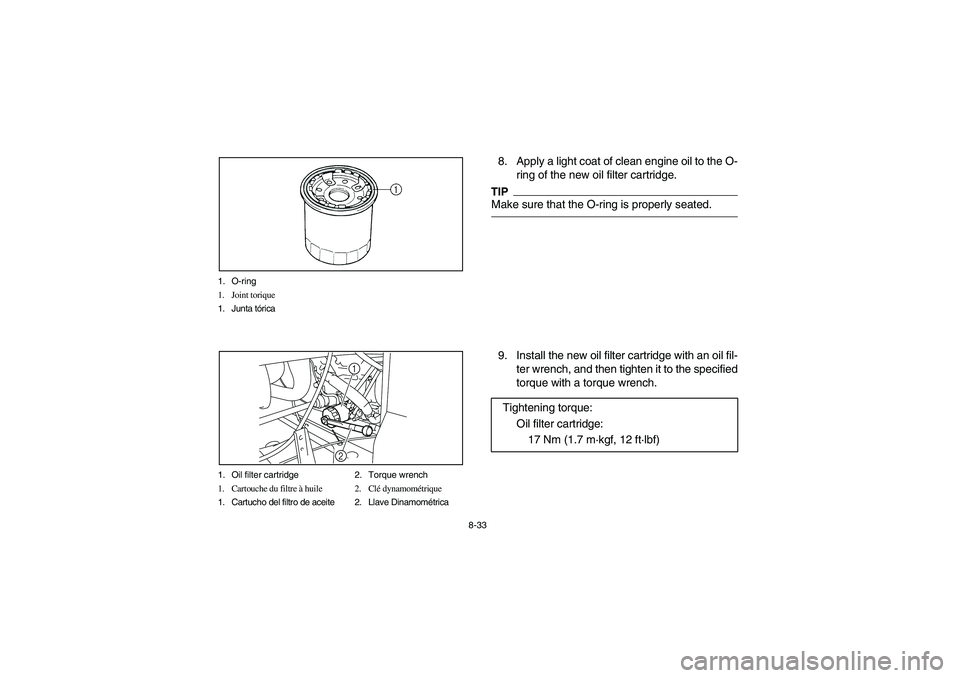
8-33 1. O-ring
1. Joint torique
1. Junta tórica
1. Oil filter cartridge 2. Torque wrench
1. Cartouche du filtre à huile 2. Clé dynamométrique
1. Cartucho del filtro de aceite 2. Llave Dinamométrica
1
2
8. Apply a light coat of clean engine oil to the O-
ring of the new oil filter cartridge.TIPMake sure that the O-ring is properly seated.9. Install the new oil filter cartridge with an oil fil-
ter wrench, and then tighten it to the specified
torque with a torque wrench.
Tightening torque:
Oil filter cartridge:
17 Nm (1.7 m·kgf, 12 ft·lbf)
1RB60-EE.book Page 33 Thursday, April 7, 2011 10:43 AM
Page 326 of 492
8-35
10. Lower the cargo bed.
11. Reinstall the engine oil drain bolt and its new
gasket, and then tighten the bolt to the speci-
fied torque.
12. Refill with the specified amount of recom-
mended engine oil, and then insert the dip-
stick completely into the oil filler hole.TIPBe sure to wipe off spilled oil on any parts after the
engine and exhaust system have cooled down.
Tightening torque:
Engine oil drain bolt:
30 Nm (3.0 m·kgf, 22 ft·lbf)
Recommended engine oil:
See pages 10-1–10-2.
Oil quantity:
Without oil filter cartridge replacement:
2.00 L (2.11 US qt, 1.76 Imp.qt)
With oil filter cartridge replacement:
2.10 L (2.22 US qt,1.85 Imp.qt)
1RB60-EE.book Page 35 Thursday, April 7, 2011 10:43 AM
Page 330 of 492
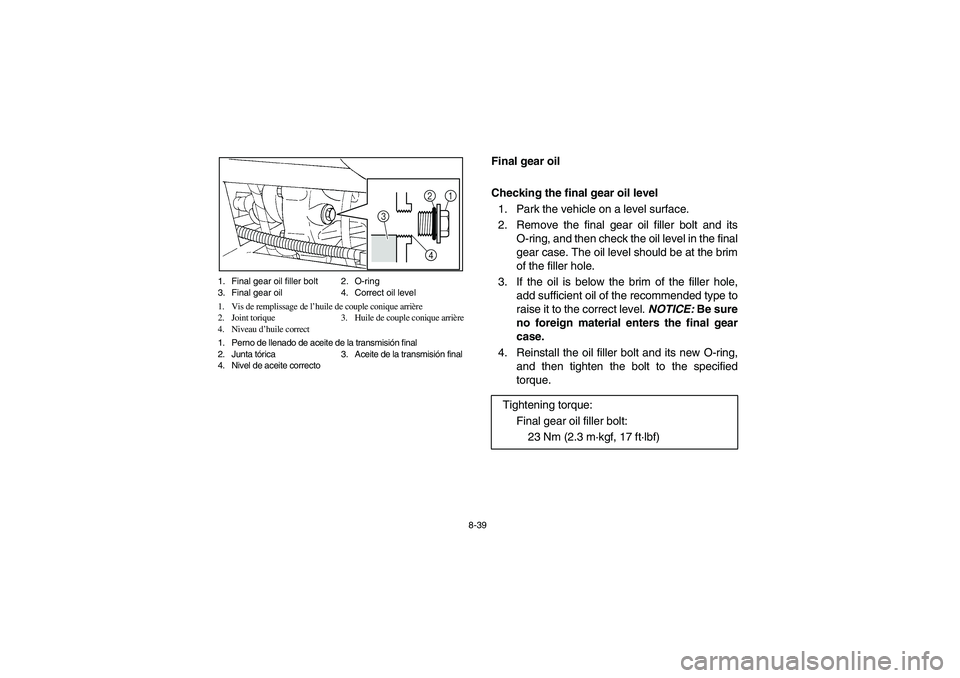
8-39 1. Final gear oil filler bolt 2. O-ring
3. Final gear oil 4. Correct oil level
1. Vis de remplissage de l’huile de couple conique arrière
2. Joint torique 3. Huile de couple conique arrière
4. Niveau d’huile correct
1. Perno de llenado de aceite de la transmisión final
2. Junta tórica 3. Aceite de la transmisión final
4. Nivel de aceite correcto
1
2
3
4
5B410013
Final gear oil
Checking the final gear oil level
1. Park the vehicle on a level surface.
2. Remove the final gear oil filler bolt and its
O-ring, and then check the oil level in the final
gear case. The oil level should be at the brim
of the filler hole.
3. If the oil is below the brim of the filler hole,
add sufficient oil of the recommended type to
raise it to the correct level. NOTICE: Be sure
no foreign material enters the final gear
case.
4. Reinstall the oil filler bolt and its new O-ring,
and then tighten the bolt to the specified
torque.
Tightening torque:
Final gear oil filler bolt:
23 Nm (2.3 m·kgf, 17 ft·lbf)
1RB60-EE.book Page 39 Thursday, April 7, 2011 10:43 AM
Page 332 of 492
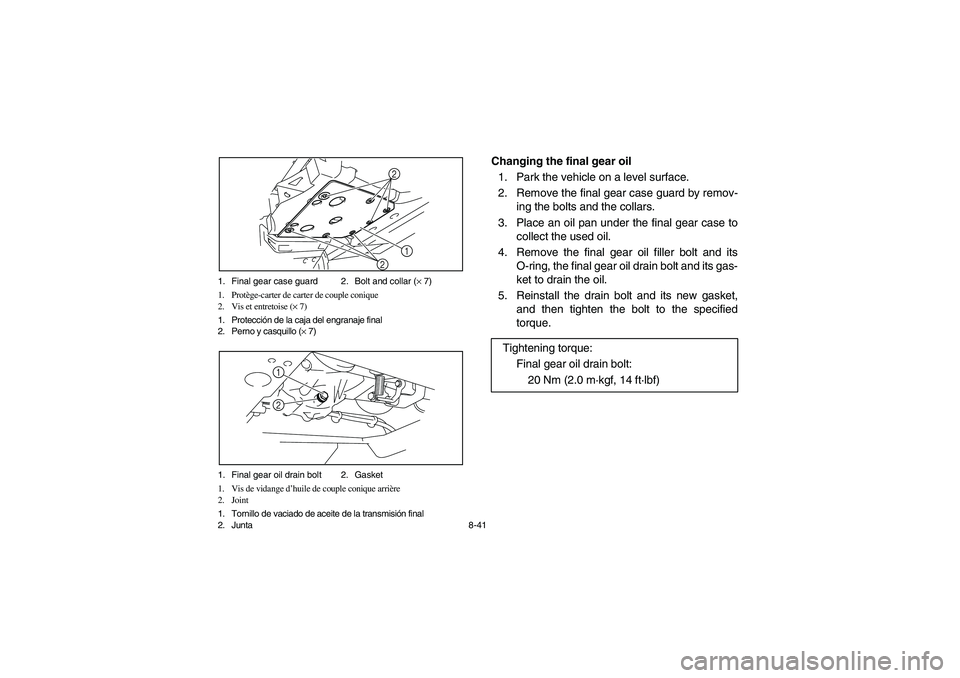
8-41 1. Final gear case guard 2. Bolt and collar (× 7)
1. Protège-carter de carter de couple conique
2. Vis et entretoise (× 7)
1. Protección de la caja del engranaje final
2. Perno y casquillo (× 7)
2
1
2
1. Final gear oil drain bolt 2. Gasket
1. Vis de vidange d’huile de couple conique arrière
2. Joint
1. Tornillo de vaciado de aceite de la transmisión final
2. Junta
12
Changing the final gear oil
1. Park the vehicle on a level surface.
2. Remove the final gear case guard by remov-
ing the bolts and the collars.
3. Place an oil pan under the final gear case to
collect the used oil.
4. Remove the final gear oil filler bolt and its
O-ring, the final gear oil drain bolt and its gas-
ket to drain the oil.
5. Reinstall the drain bolt and its new gasket,
and then tighten the bolt to the specified
torque.
Tightening torque:
Final gear oil drain bolt:
20 Nm (2.0 m·kgf, 14 ft·lbf)
1RB60-EE.book Page 41 Thursday, April 7, 2011 10:43 AM
Page 334 of 492
8-43
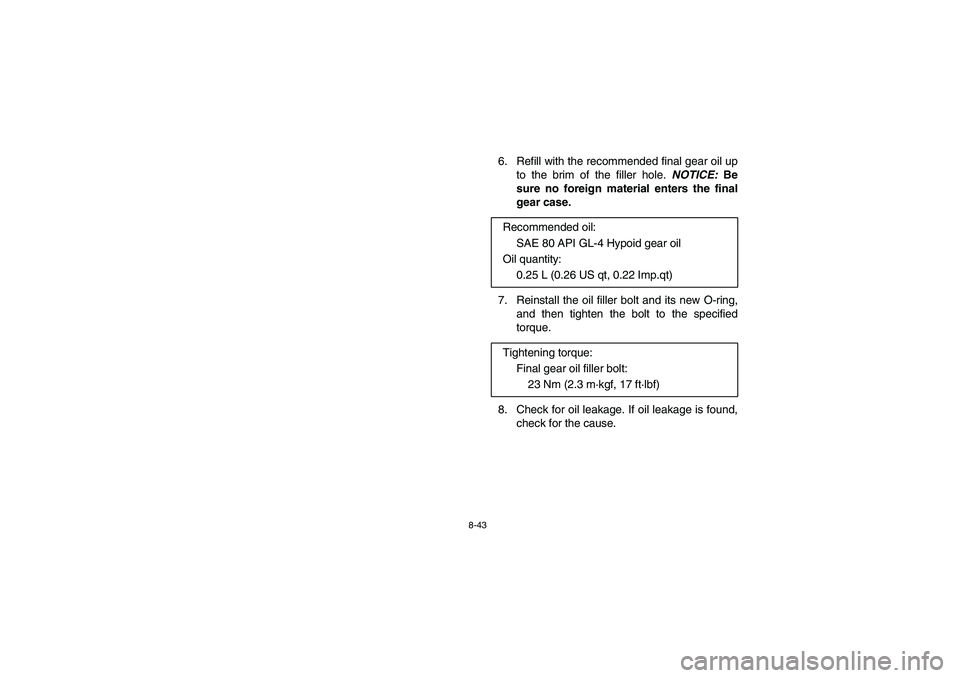
6. Refill with the recommended final gear oil up
to the brim of the filler hole. NOTICE: Be
sure no foreign material enters the final
gear case.
7. Reinstall the oil filler bolt and its new O-ring,
and then tighten the bolt to the specified
torque.
8. Check for oil leakage. If oil leakage is found,
check for the cause. Recommended oil:
SAE 80 API GL-4 Hypoid gear oil
Oil quantity:
0.25 L (0.26 US qt, 0.22 Imp.qt)
Tightening torque:
Final gear oil filler bolt:
23 Nm (2.3 m·kgf, 17 ft·lbf)
1RB60-EE.book Page 43 Thursday, April 7, 2011 10:43 AM
Page 336 of 492
8-45
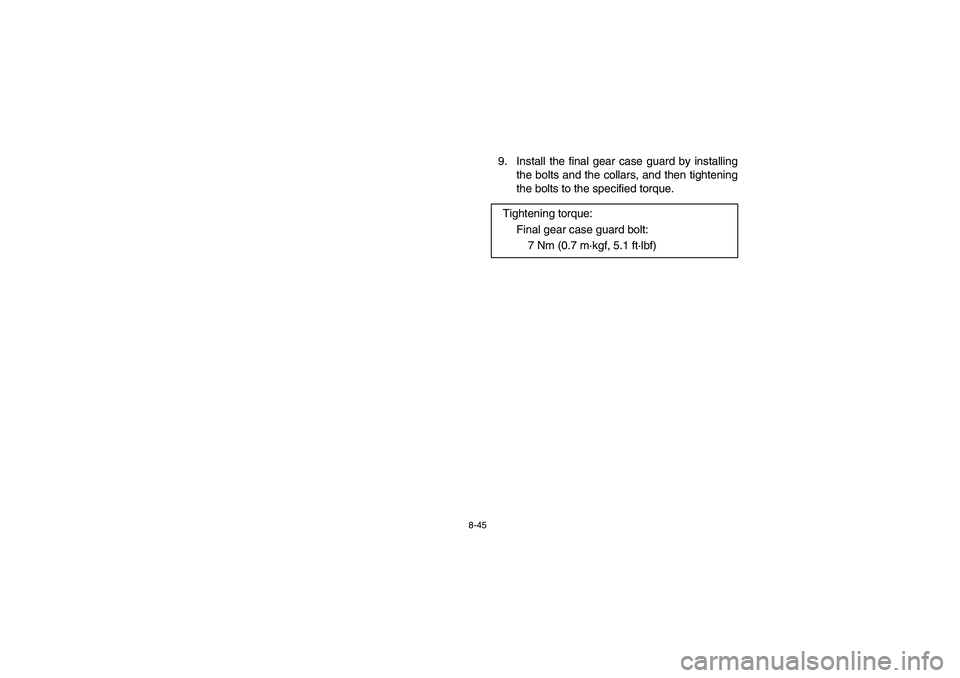
9. Install the final gear case guard by installing
the bolts and the collars, and then tightening
the bolts to the specified torque.
Tightening torque:
Final gear case guard bolt:
7 Nm (0.7 m·kgf, 5.1 ft·lbf)
1RB60-EE.book Page 45 Thursday, April 7, 2011 10:43 AM