check engine light YAMAHA T105 2002 Owners Manual
[x] Cancel search | Manufacturer: YAMAHA, Model Year: 2002, Model line: T105, Model: YAMAHA T105 2002Pages: 75, PDF Size: 1.75 MB
Page 3 of 75

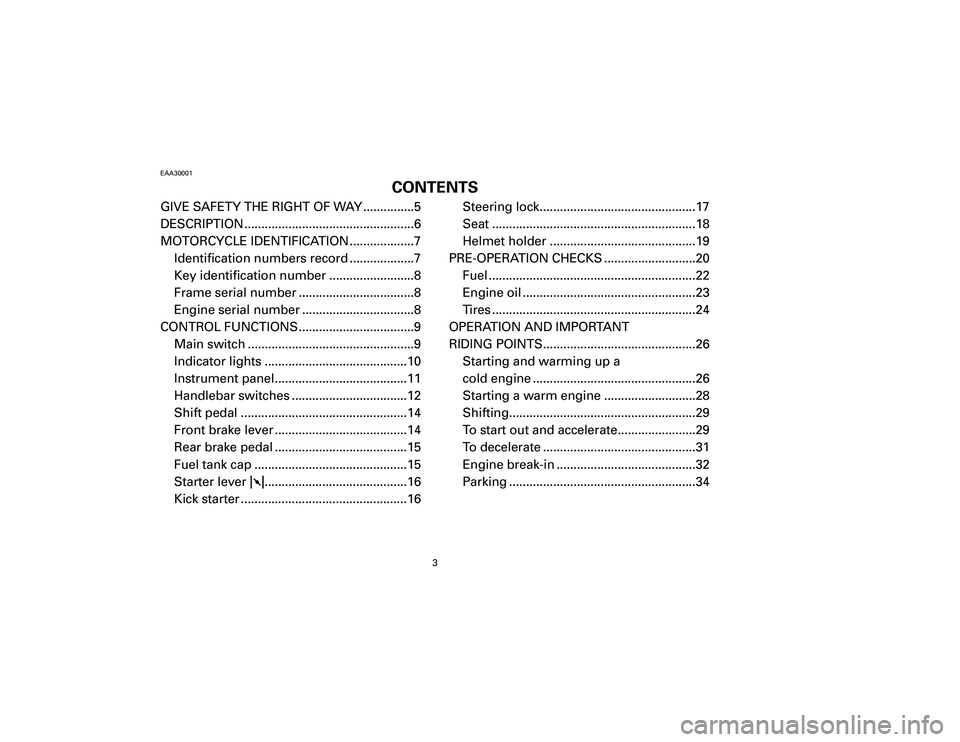
GIVE SAFETY THE RIGHT OF WAY ...............5
DESCRIPTION ..................................................6
MOTORCYCLE IDENTIFICATION ...................7
Identification numbers record ...................7
Key identification number .........................8
Frame serial number ..................................8
Engine serial number .................................8
CONTROL FUNCTIONS ..................................9
Main switch .................................................9
Indicator lights ..........................................10
Instrument panel.......................................11
Handlebar switches ..................................12
Shift pedal .................................................14
Front brake lever .......................................14
Rear brake pedal .......................................15
Fuel tank cap .............................................15
Starter lever 1..........................................16
Kick starter .................................................16Steering lock..............................................17
Seat ............................................................18
Helmet holder ...........................................19
PRE-OPERATION CHECKS ...........................20
Fuel .............................................................22
Engine oil ...................................................23
Tires ............................................................24
OPERATION AND IMPORTANT
RIDING POINTS.............................................26
Starting and warming up a
cold engine ................................................26
Starting a warm engine ...........................28
Shifting.......................................................29
To start out and accelerate.......................29
To decelerate .............................................31
Engine break-in .........................................32
Parking .......................................................34
3
EAA30001
CONTENTS
5SD O/M-1 9/4/01 2:49 PM Page 3 (1,1)
Page 4 of 75

4
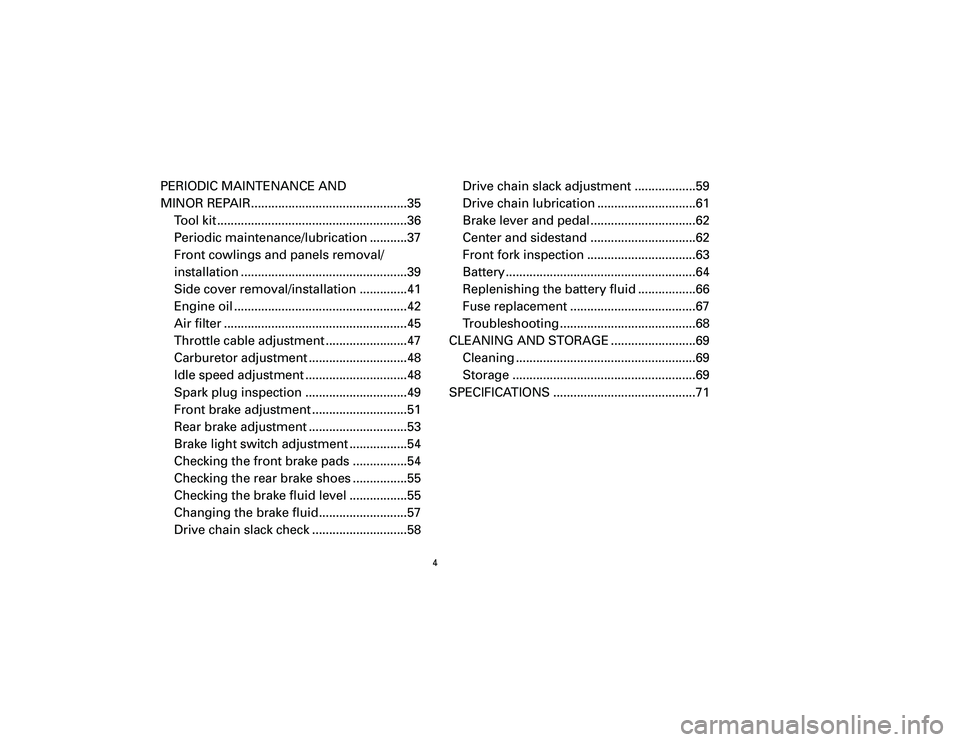
PERIODIC MAINTENANCE AND
MINOR REPAIR..............................................35
Tool kit ........................................................36
Periodic maintenance/lubrication ...........37
Front cowlings and panels removal/
installation .................................................39
Side cover removal/installation ..............41
Engine oil ...................................................42
Air filter ......................................................45
Throttle cable adjustment ........................47
Carburetor adjustment .............................48
Idle speed adjustment ..............................48
Spark plug inspection ..............................49
Front brake adjustment ............................51
Rear brake adjustment .............................53
Brake light switch adjustment .................54
Checking the front brake pads ................54
Checking the rear brake shoes ................55
Checking the brake fluid level .................55
Changing the brake fluid..........................57
Drive chain slack check ............................58Drive chain slack adjustment ..................59
Drive chain lubrication .............................61
Brake lever and pedal ...............................62
Center and sidestand ...............................62
Front fork inspection ................................63
Battery ........................................................64
Replenishing the battery fluid .................66
Fuse replacement .....................................67
Troubleshooting ........................................68
CLEANING AND STORAGE .........................69
Cleaning .....................................................69
Storage ......................................................69
SPECIFICATIONS ..........................................71
5SD O/M-1 9/4/01 2:49 PM Page 4 (1,1)
Page 20 of 75

20
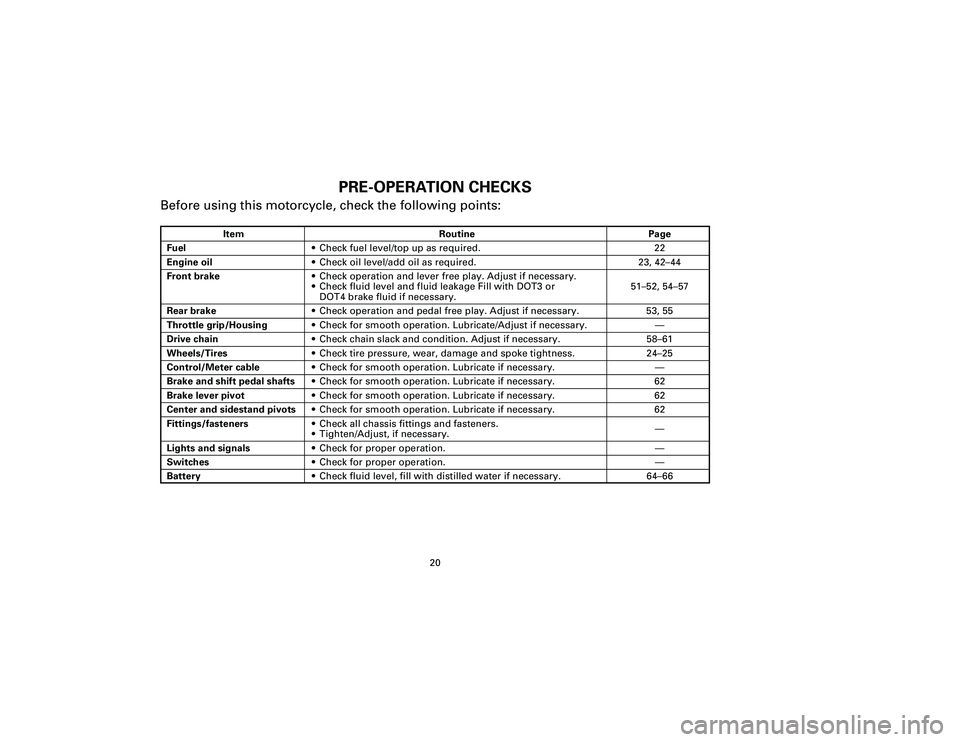
PRE-OPERATION CHECKS
Before using this motorcycle, check the following points:
Item Routine Page
Fuel9Check fuel level/top up as required. 22Engine oil9Check oil level/add oil as required. 23, 42–44Front brake9Check operation and lever free play. Adjust if necessary.
9Check fluid level and fluid leakage Fill with DOT3 or 51–52, 54–57
DOT4 brake fluid if necessary.Rear brake9Check operation and pedal free play. Adjust if necessary. 53, 55Throttle grip/Housing9Check for smooth operation. Lubricate/Adjust if necessary. —Drive chain9Check chain slack and condition. Adjust if necessary. 58–61Wheels/Tires9Check tire pressure, wear, damage and spoke tightness. 24–25Control/Meter cable9Check for smooth operation. Lubricate if necessary. —Brake and shift pedal shafts9Check for smooth operation. Lubricate if necessary. 62Brake lever pivot9Check for smooth operation. Lubricate if necessary. 62Center and sidestand pivots9Check for smooth operation. Lubricate if necessary. 62Fittings/fasteners9Check all chassis fittings and fasteners.
—
9Tighten/Adjust, if necessary.Lights and signals9Check for proper operation. —Switches9Check for proper operation. —Battery9Check fluid level, fill with distilled water if necessary. 64–66
5SD O/M-1 9/4/01 2:49 PM Page 20 (1,1)
Page 42 of 75

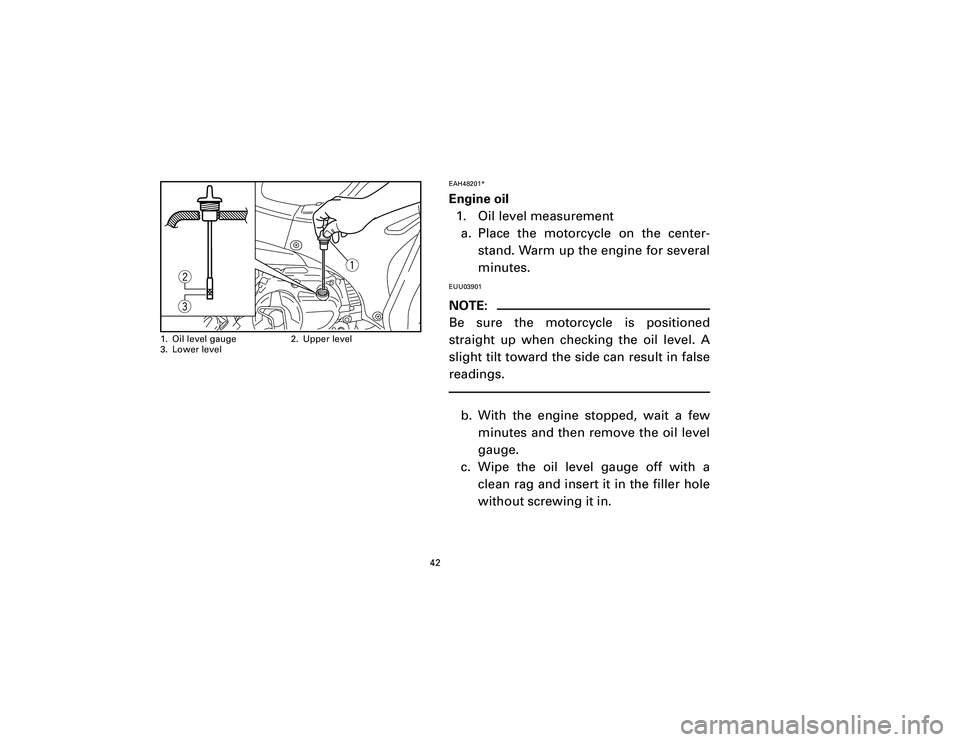
EAH48201*Engine oil
1. Oil level measurement
a. Place the motorcycle on the center-
stand. Warm up the engine for several
minutes.EUU03901NOTE:
Be sure the motorcycle is positioned
straight up when checking the oil level. A
slight tilt toward the side can result in false
readings.b. With the engine stopped, wait a few
minutes and then remove the oil level
gauge.
c. Wipe the oil level gauge off with a
clean rag and insert it in the filler hole
without screwing it in.
42
q
w
e
1. Oil level gauge 2. Upper level
3. Lower level
5SD O/M-2 9/4/01 3:02 PM Page 42 (1,1)
Page 60 of 75

EC000096cCImproper drive chain slack will overload
the engine and other vital parts and can
lead to chain slippage or breakage. Keep
the drive chain slack within the specified
limits.4. Tighten both locknuts, and then tight-
en the axle nut to the specified torque.
5. Adjust the brake pedal free play. (See
page 53 for adjustment procedure.)
EW000103wAfter adjusting the brake pedal free play,
check the operation of the brake light.
60
Tightening torque:
Axle nut:
60 Nm (6.0 m•kg)
5SD O/M-3 9/4/01 2:50 PM Page 60 (1,1)