engine YAMAHA TDM 850 2000 Owner's Manual
[x] Cancel search | Manufacturer: YAMAHA, Model Year: 2000, Model line: TDM 850, Model: YAMAHA TDM 850 2000Pages: 99, PDF Size: 10.69 MB
Page 49 of 99

PERIODIC MAINTENANCE AND MINOR REPAIR
6-3
6
12
*Swingarm• Check swingarm pivoting point for play.
• Correct if necessary.
• Lubricate with molybdenum disulfide grease every 24,000 km
or 24 months (whichever comes first).ÖÖ
13 Drive chain• Check chain slack.
• Adjust if necessary. Make sure that the rear wheel is properly aligned.
• Clean and lubricate. Every 500 km and after washing the
motorcycle or riding in the rain
14*Steering bearings• Check bearing play and steering for roughness.
• Correct accordingly.
• Lubricate with lithium soap base grease every 24,000 km
or 24 months (whichever comes first).ÖÖ
15*Chassis fasteners• Make sure that all nuts, bolts and screws are properly tightened.
• Tighten if necessary.ÖÖ
16 Sidestand• Check operation.
• Lubricate and repair if necessary.ÖÖ
17*Sidestand switch• Check operation.
• Replace if necessary.ÖÖÖ
18*Front fork• Check operation and for oil leakage.
• Correct accordingly.ÖÖ
19*Rear shock absorber
assembly• Check operation and shock absorber for oil leakage.
• Replace shock absorber assembly if necessary. ÖÖ
20*Rear shock absorber
assembly pivoting points• Check operation.
• Lubricate with molybdenum disulfide grease every 24,000 km
or 24 months (whichever comes first).ÖÖ
21*Carburetors• Check engine idling speed, synchronization and starter operation.
• Adjust if necessary.ÖÖÖ
22 Engine oil• Check oil level and vehicle for oil leakage.
• Correct if necessary.
• Change. (Warm engine before draining.)ÖÖÖ
23 Engine oil filter element
• Replace.ÖÖ NO. ITEM CHECKS AND MAINTENANCE JOBSINITIAL
(1,000 km)EVERY
6,000 km
or
6 months
(whichever
comes first)12,000 km
or
12 months
(whichever
comes first)
E_4tx_Periodic.fm Page 3 Saturday, October 16, 1999 9:37 AM
Page 52 of 99

PERIODIC MAINTENANCE AND MINOR REPAIR
6-6
6
EAU01691*
Panels A and BTo remove
1. Remove the seat. (See page 3-12
for removal and installation proce-
dures.)
2. Remove the screw.
To install
1. Place the panels in the original po-
sition and install the screw.
2. Install the seat.
EAU01668*
Spark plugsRemoval
1. Remove cowlings A and B. (See
page 6-5 for removal and installa-
tion procedures.)
2. Remove the spark plug caps.
3. Use the spark plug wrench in the
tool kit to remove the spark plugs
as shown.Inspection
The spark plug is an important engine
component and is easy to inspect. The
condition of the spark plug can indicate
the condition of the engine.
Normally, all spark plugs from the
same engine should have the same
color on the white insulator around the
center electrode. The ideal color at this
point is a medium-to-light tan color for a
motorcycle that is being ridden normal-
ly. If one spark plug shows a distinctly
different color, there could be some-
thing wrong with the engine.
1. Screw
1. Spark plug cap
1. Spark plug wrench
E_4tx_Periodic.fm Page 6 Saturday, October 16, 1999 9:37 AM
Page 54 of 99

PERIODIC MAINTENANCE AND MINOR REPAIR
6-8
6
EAU01692
Engine oilOil level inspection
1. Place the motorcycle on a level
place. Warm up the engine at idle
for 15 minutes.NOTE:@ Be sure the motorcycle is positioned
straight up when checking the oil level.
A slight tilt toward the side can result in
false readings. @
2. The oil tank is located behind the
engine cylinders. With the engine
stopped, check the oil level
through the level window located
on the right side of the oil tank.
3. The oil level should be between
the maximum and minimum
marks. If the level is low, fill engine
with sufficient oil to raise it to the
specified level.Engine oil and oil filter element re-
placement
1. Warm up the engine for a few min-
utes.
2. Stop the engine. Place an oil pan
under the engine and remove the
oil filler cap.
3. Remove the drain bolts and drain
the oil.
4. Remove the oil filter cover bolts
and oil filter.
1. Oil level window
2. Minimum level mark
3. Maximum level mark
1. Engine oil filler cap
1. Engine oil drain bolt a
E_4tx_Periodic.fm Page 8 Saturday, October 16, 1999 9:37 AM
Page 55 of 99

PERIODIC MAINTENANCE AND MINOR REPAIR
6-9
65. Install the drain bolts and tighten
them to the specified torque.
6. Install the new oil filter, O-rings
and the filter cover. Tighten the oil
filter cover bolts to the specified
torque.
NOTE:@ Make sure the O-rings are seated prop-
erly. @7. Fill engine with oil. Install the oil fill-
er cap and tighten.
EC000066
CAUTION:@ l
Do not put in any chemical addi-
tives. Engine oil also lubricates
the clutch and additives could
cause clutch slippage.
l
Be sure no foreign material en-
ters the crankcase.
@
1. Engine oil drain bolt b
2. Oil filter cover bolt (´ 5)
3. Oil filter coverTightening torque:
Drain bolt
a:
35 Nm (3.5 m·kg)
Drain bolt
b:
30 Nm (3.0 m·kg)
1. Oil filter
2. O-ring (´ 2)
Tightening torque:
Oil filter cover bolt:
10 Nm (1.0 m·kg)
Recommended oil:
See page 8-1.
Oil quantity:
Total amount:
4.2 L
Periodic oil change:
3.5 L
With oil filter replacement:
3.6 L
E_4tx_Periodic.fm Page 9 Saturday, October 16, 1999 9:37 AM
Page 56 of 99
PERIODIC MAINTENANCE AND MINOR REPAIR
6-10
6 8. Start the engine and warm up for a
few minutes. While warming up,
check for oil leakage. If oil leakage
is found, stop the engine immedi-
ately and check for the cause.
9. Stop the engine and check the oil
level.
EAU03024*
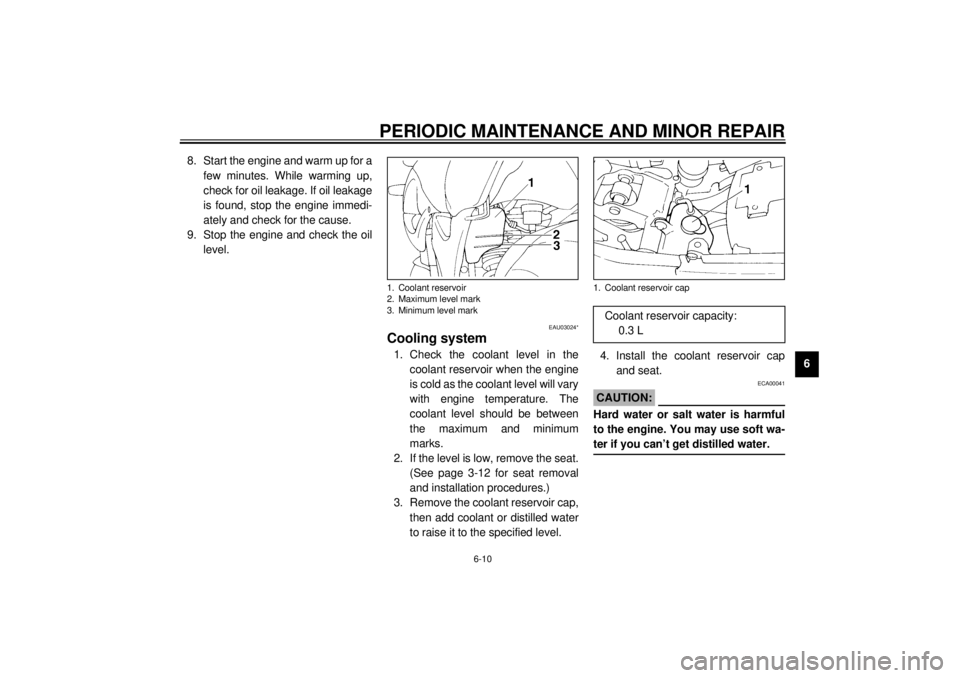
Cooling system1. Check the coolant level in the
coolant reservoir when the engine
is cold as the coolant level will vary
with engine temperature. The
coolant level should be between
the maximum and minimum
marks.
2. If the level is low, remove the seat.
(See page 3-12 for seat removal
and installation procedures.)
3. Remove the coolant reservoir cap,
then add coolant or distilled water
to raise it to the specified level.4. Install the coolant reservoir cap
and seat.
ECA00041
CAUTION:@ Hard water or salt water is harmful
to the engine. You may use soft wa-
ter if you can’t get distilled water. @
1. Coolant reservoir
2. Maximum level mark
3. Minimum level mark
1. Coolant reservoir capCoolant reservoir capacity:
0.3 L
E_4tx_Periodic.fm Page 10 Saturday, October 16, 1999 9:37 AM
Page 57 of 99
PERIODIC MAINTENANCE AND MINOR REPAIR
6-11
6
NOTE:@ l
If water is added, have a Yamaha
dealer check the antifreeze con-
tent of the coolant as soon as pos-
sible.
l
The radiator fan operation is com-
pletely automatic. It is switched on
or off according to the coolant tem-
perature in the radiator.
@5. If your motorcycle overheats, see
page 6-34 for details.
EAU01176*
Changing the coolant1. Put the motorcycle on a level
place.
2. Remove cowling B. (See page 6-5
for cowling removal and installa-
tion procedures.)
3. Place a container under the en-
gine.
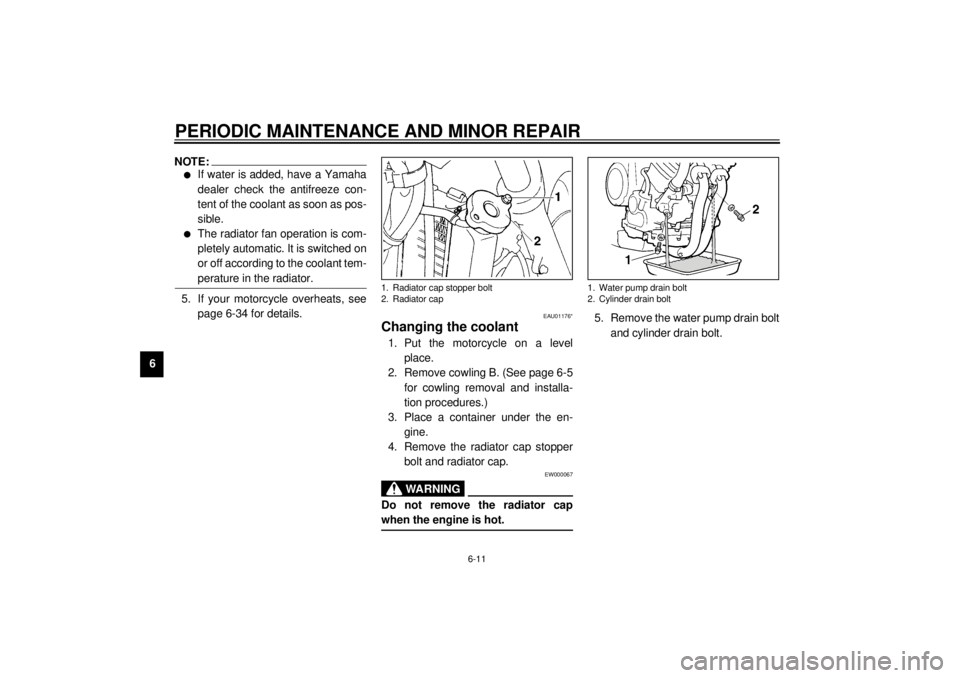
4. Remove the radiator cap stopper
bolt and radiator cap.
EW000067
WARNING
@ Do not remove the radiator cap
when the engine is hot. @
5. Remove the water pump drain bolt
and cylinder drain bolt.
1. Radiator cap stopper bolt
2. Radiator cap
1. Water pump drain bolt
2. Cylinder drain bolt
E_4tx_Periodic.fm Page 11 Saturday, October 16, 1999 9:37 AM
Page 58 of 99
PERIODIC MAINTENANCE AND MINOR REPAIR
6-12
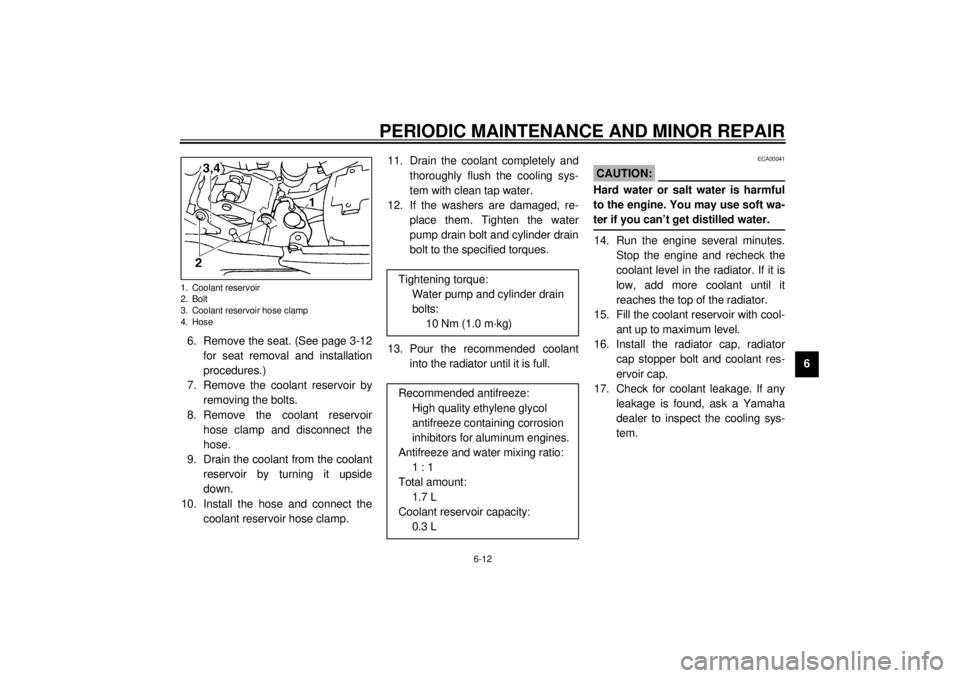
6 6. Remove the seat. (See page 3-12
for seat removal and installation
procedures.)
7. Remove the coolant reservoir by
removing the bolts.
8. Remove the coolant reservoir
hose clamp and disconnect the
hose.
9. Drain the coolant from the coolant
reservoir by turning it upside
down.
10. Install the hose and connect the
coolant reservoir hose clamp. 11. Drain the coolant completely and
thoroughly flush the cooling sys-
tem with clean tap water.
12. If the washers are damaged, re-
place them. Tighten the water
pump drain bolt and cylinder drain
bolt to the specified torques.
13. Pour the recommended coolant
into the radiator until it is full.
ECA00041
CAUTION:@ Hard water or salt water is harmful
to the engine. You may use soft wa-
ter if you can’t get distilled water. @14. Run the engine several minutes.
Stop the engine and recheck the
coolant level in the radiator. If it is
low, add more coolant until it
reaches the top of the radiator.
15. Fill the coolant reservoir with cool-
ant up to maximum level.
16. Install the radiator cap, radiator
cap stopper bolt and coolant res-
ervoir cap.
17. Check for coolant leakage. If any
leakage is found, ask a Yamaha
dealer to inspect the cooling sys-
tem.
1. Coolant reservoir
2. Bolt
3. Coolant reservoir hose clamp
4. Hose
Tightening torque:
Water pump and cylinder drain
bolts:
10 Nm (1.0 m·kg)
Recommended antifreeze:
High quality ethylene glycol
antifreeze containing corrosion
inhibitors for aluminum engines.
Antifreeze and water mixing ratio:
1 : 1
Total amount:
1.7 L
Coolant reservoir capacity:
0.3 L
E_4tx_Periodic.fm Page 12 Saturday, October 16, 1999 9:37 AM
Page 61 of 99
PERIODIC MAINTENANCE AND MINOR REPAIR
6-15
6
EC000082
CAUTION:@ l
Make sure the air filter is prop-
erly seated in the air filter case.
l
The engine should never be run
without the air filter installed.
Excessive piston and/or cylin-
der wear may result.
@
EAU00630
Carburetor adjustmentThe carburetors are important parts of
the engine and require very sophisti-
cated adjustment. Most adjustments
should be left to a Yamaha dealer who
has the professional knowledge and
experience to do so. However, the idle
speed may be adjusted by the owner
as part of routine maintenance.
EC000095
CAUTION:@ The carburetors were set at the
Yamaha factory after many tests. If
they are changed, poor engine per-
formance and damage may result. @
EAU00632
Idle speed adjustment1. Start the engine and warm it up for
a few minutes at approximately
1,000 to 2,000 r/min. Occasionally
rev the engine to 4,000 to
5,000 r/min. The engine is warm
when it quickly responds to the
throttle.
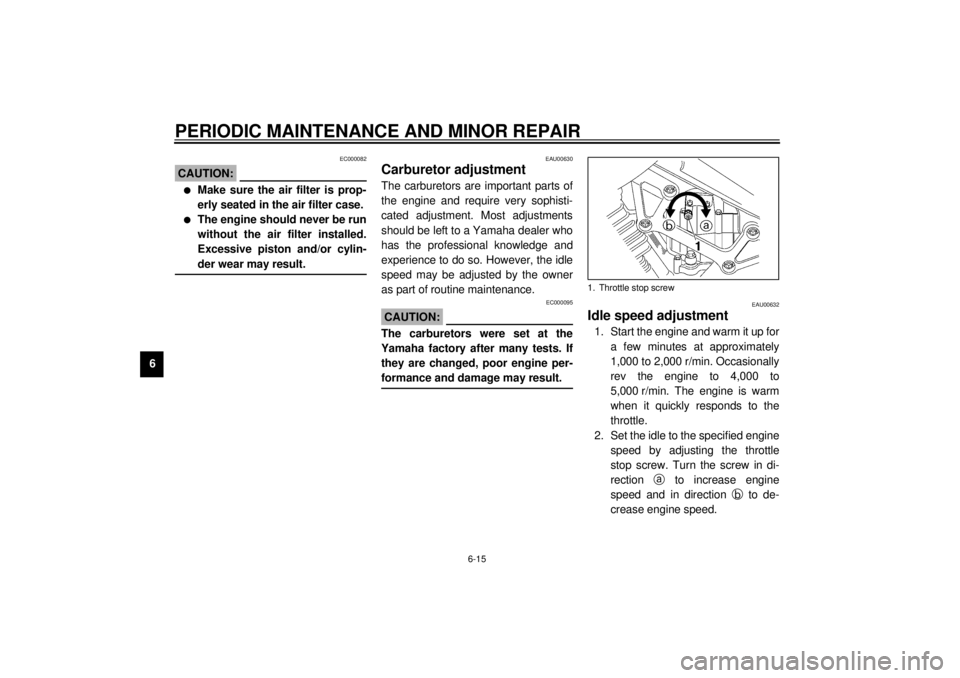
2. Set the idle to the specified engine
speed by adjusting the throttle
stop screw. Turn the screw in di-
rection
a to increase engine
speed and in direction
b to de-
crease engine speed.1. Throttle stop screw
E_4tx_Periodic.fm Page 15 Saturday, October 16, 1999 9:37 AM
Page 62 of 99
PERIODIC MAINTENANCE AND MINOR REPAIR
6-16
6
NOTE:@ If the specified idle speed cannot be
obtained by performing the above ad-
justment, consult a Yamaha dealer. @
EAU00635
Throttle cable free play
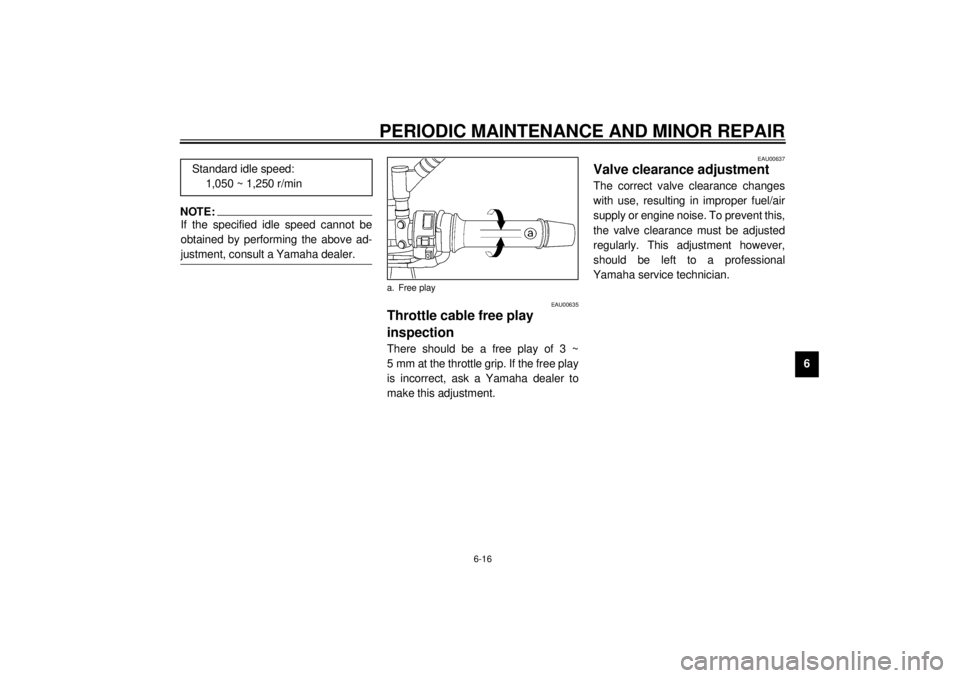
inspectionThere should be a free play of 3 ~
5 mm at the throttle grip. If the free play
is incorrect, ask a Yamaha dealer to
make this adjustment.
EAU00637
Valve clearance adjustmentThe correct valve clearance changes
with use, resulting in improper fuel/air
supply or engine noise. To prevent this,
the valve clearance must be adjusted
regularly. This adjustment however,
should be left to a professional
Yamaha service technician. Standard idle speed:
1,050 ~ 1,250 r/min
a. Free play
E_4tx_Periodic.fm Page 16 Saturday, October 16, 1999 9:37 AM
Page 70 of 99
PERIODIC MAINTENANCE AND MINOR REPAIR
6-24
6
EC000096
CAUTION:@ Too little chain slack will overload
the engine and other vital parts.
Keep the slack within the specified
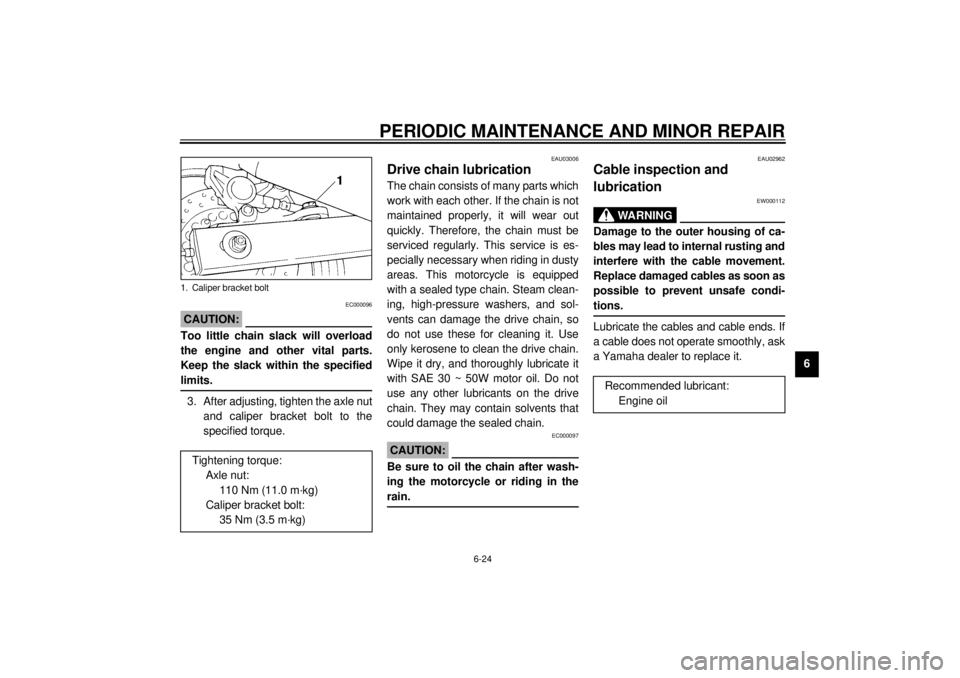
limits. @3. After adjusting, tighten the axle nut
and caliper bracket bolt to the
specified torque.
EAU03006
Drive chain lubricationThe chain consists of many parts which
work with each other. If the chain is not
maintained properly, it will wear out
quickly. Therefore, the chain must be
serviced regularly. This service is es-
pecially necessary when riding in dusty
areas. This motorcycle is equipped
with a sealed type chain. Steam clean-
ing, high-pressure washers, and sol-
vents can damage the drive chain, so
do not use these for cleaning it. Use
only kerosene to clean the drive chain.
Wipe it dry, and thoroughly lubricate it
with SAE 30 ~ 50W motor oil. Do not
use any other lubricants on the drive
chain. They may contain solvents that
could damage the sealed chain.
EC000097
CAUTION:@ Be sure to oil the chain after wash-
ing the motorcycle or riding in the
rain. @
EAU02962
Cable inspection and
lubrication
EW000112
WARNING
@ Damage to the outer housing of ca-
bles may lead to internal rusting and
interfere with the cable movement.
Replace damaged cables as soon as
possible to prevent unsafe condi-
tions. @Lubricate the cables and cable ends. If
a cable does not operate smoothly, ask
a Yamaha dealer to replace it.
1. Caliper bracket bolt
Tightening torque:
Axle nut:
110 Nm (11.0 m·kg)
Caliper bracket bolt:
35 Nm (3.5 m·kg)
Recommended lubricant:
Engine oil
E_4tx_Periodic.fm Page 24 Saturday, October 16, 1999 9:37 AM