coolant reservoir YAMAHA TDR 125 2000 Owners Manual
[x] Cancel search | Manufacturer: YAMAHA, Model Year: 2000, Model line: TDR 125, Model: YAMAHA TDR 125 2000Pages: 104, PDF Size: 4.88 MB
Page 13 of 104
DESCRIPTION
1
2
3
4
5
6
7
8
9
2-2
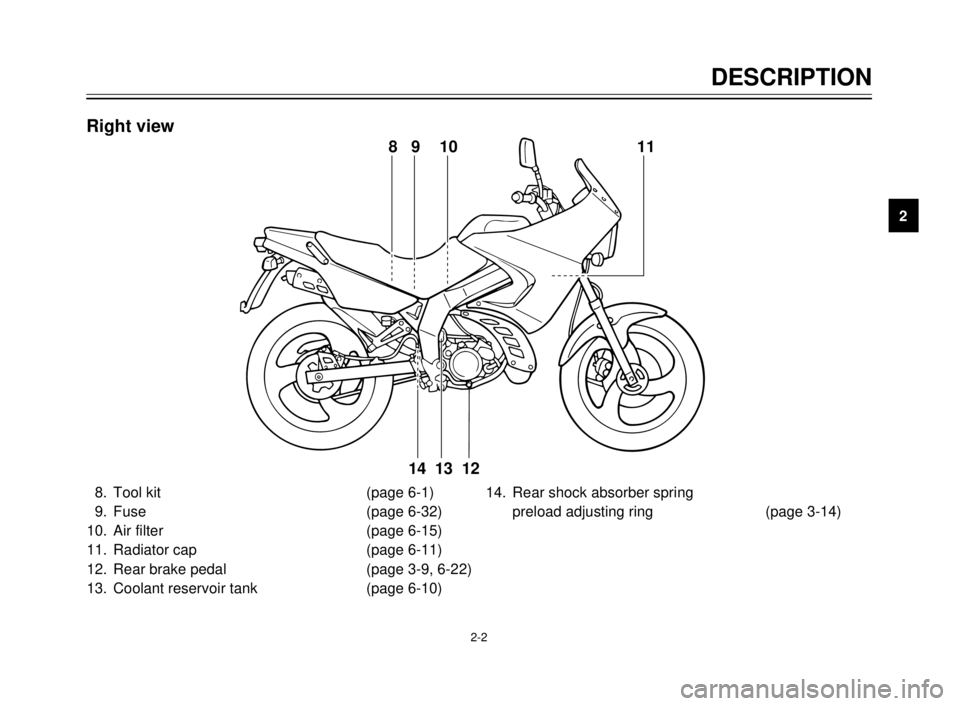
8. Tool kit (page 6-1)
9. Fuse (page 6-32)
10. Air filter (page 6-15)
11. Radiator cap (page 6-11)
12. Rear brake pedal (page 3-9, 6-22)
13. Coolant reservoir tank (page 6-10)14. Rear shock absorber spring
preload adjusting ring (page 3-14)
8 9 10 11
12
13 14
Right view
5AE-9-E3 (ENG) 4/11/0 11:06 AM Page 11
Page 55 of 104
6-10
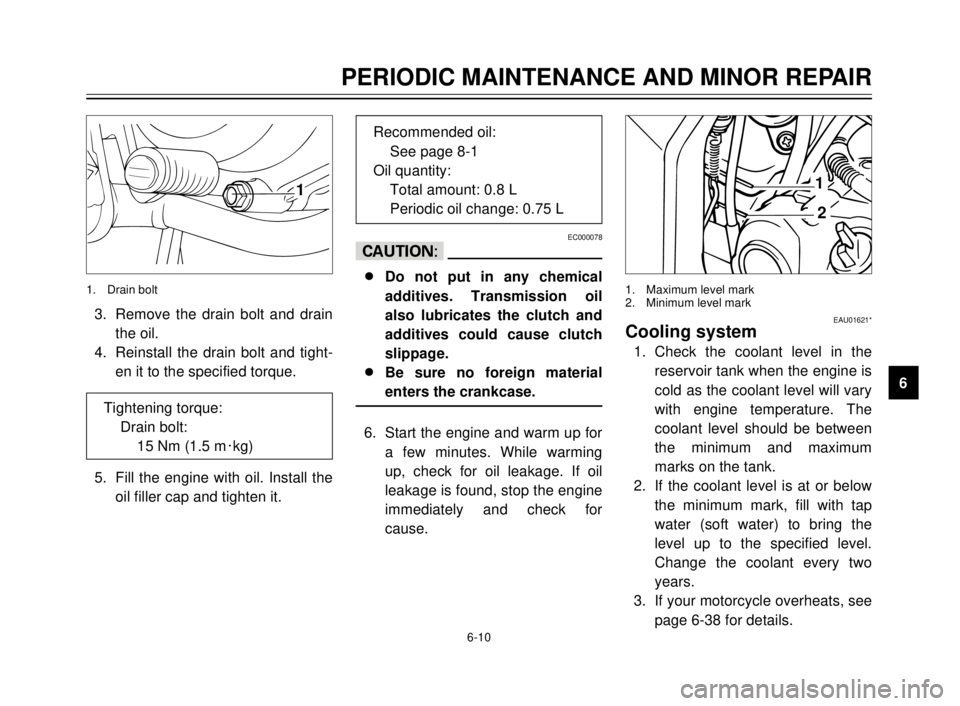
1
3. Remove the drain bolt and drain
the oil.
4. Reinstall the drain bolt and tight-
en it to the specified torque.
5. Fill the engine with oil. Install the
oil filler cap and tighten it.
EC000078
cC
8
8
Do not put in any chemical
additives. Transmission oil
also lubricates the clutch and
additives could cause clutch
slippage.
8 8
Be sure no foreign material
enters the crankcase.
6. Start the engine and warm up for
a few minutes. While warming
up, check for oil leakage. If oil
leakage is found, stop the engine
immediately and check for
cause.
1. Drain bolt
PERIODIC MAINTENANCE AND MINOR REPAIR
1
2
3
4
5
6
7
8
9 Tightening torque:
Drain bolt:
15 Nm (1.5 m0kg)
Recommended oil:
See page 8-1
Oil quantity:
Total amount: 0.8 L
Periodic oil change: 0.75 L
1
2
1. Maximum level mark
2. Minimum level mark
EAU01621*Cooling system
1. Check the coolant level in the
reservoir tank when the engine is
cold as the coolant level will vary
with engine temperature. The
coolant level should be between
the minimum and maximum
marks on the tank.
2. If the coolant level is at or below
the minimum mark, fill with tap
water (soft water) to bring the
level up to the specified level.
Change the coolant every two
years.
3. If your motorcycle overheats, see
page 6-38 for details.
5AE-9-E3 (ENG) 4/11/0 11:06 AM Page 53
Page 57 of 104
6-12
PERIODIC MAINTENANCE AND MINOR REPAIR
1
2
3
4
5
6
7
8
9
1
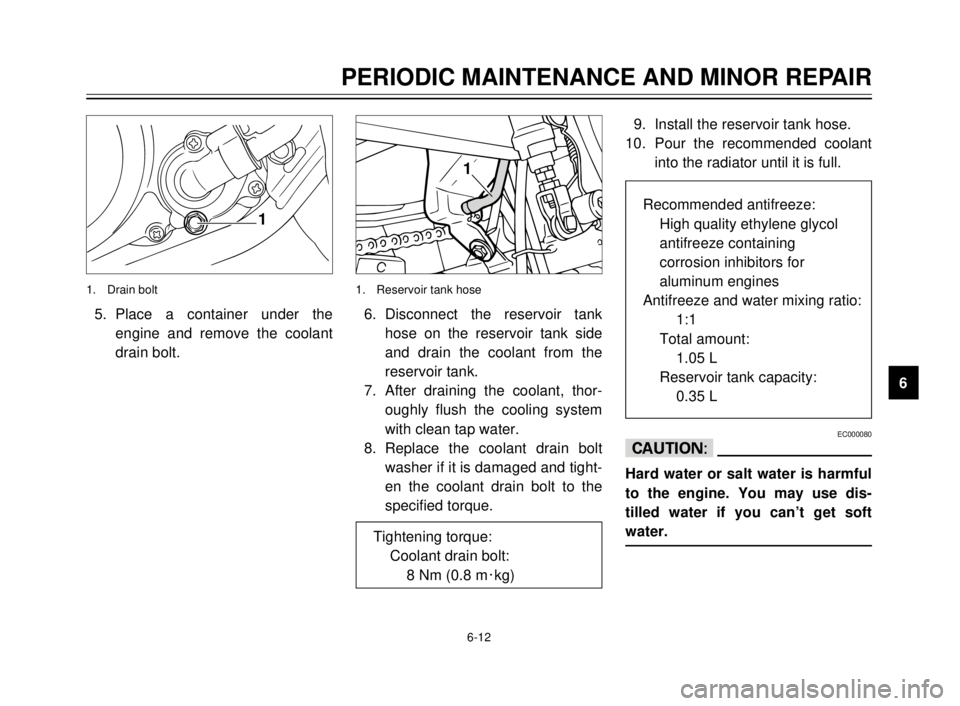
5. Place a container under the
engine and remove the coolant
drain bolt.
1. Drain bolt
1
6. Disconnect the reservoir tank
hose on the reservoir tank side
and drain the coolant from the
reservoir tank.
7. After draining the coolant, thor-
oughly flush the cooling system
with clean tap water.
8. Replace the coolant drain bolt
washer if it is damaged and tight-
en the coolant drain bolt to the
specified torque.
1. Reservoir tank hose
Tightening torque:
Coolant drain bolt:
8 Nm (0.8 m0kg)
9. Install the reservoir tank hose.
10. Pour the recommended coolant
into the radiator until it is full.
EC000080
cC
Hard water or salt water is harmful
to the engine. You may use dis-
tilled water if you can’t get soft
water.
Recommended antifreeze:
High quality ethylene glycol
antifreeze containing
corrosion inhibitors for
aluminum engines
Antifreeze and water mixing ratio:
1:1
Total amount:
1.05 L
Reservoir tank capacity:
0.35 L
5AE-9-E3 (ENG) 4/11/0 11:06 AM Page 55
Page 58 of 104
6-13
PERIODIC MAINTENANCE AND MINOR REPAIR
1
2
3
4
5
6
7
8
9
2
1
4
5
3
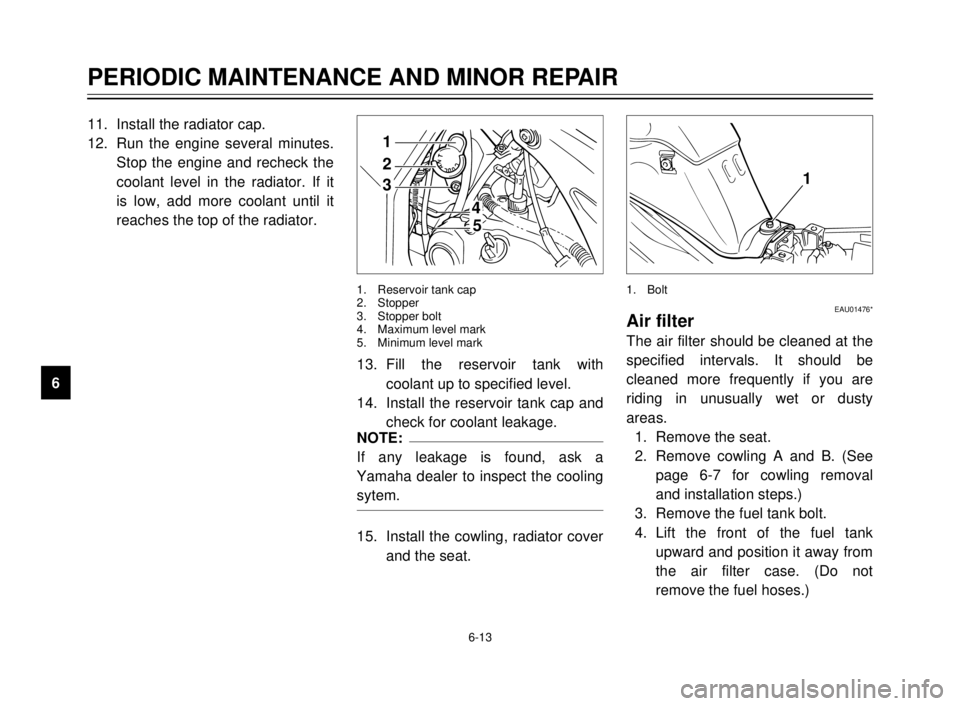
1. Reservoir tank cap
2. Stopper
3. Stopper bolt
4. Maximum level mark
5. Minimum level mark
11. Install the radiator cap.
12. Run the engine several minutes.
Stop the engine and recheck the
coolant level in the radiator. If it
is low, add more coolant until it
reaches the top of the radiator.
13. Fill the reservoir tank with
coolant up to specified level.
14. Install the reservoir tank cap and
check for coolant leakage.
NOTE:
If any leakage is found, ask a
Yamaha dealer to inspect the cooling
sytem.
15. Install the cowling, radiator cover
and the seat.
1
EAU01476*Air filter
The air filter should be cleaned at the
specified intervals. It should be
cleaned more frequently if you are
riding in unusually wet or dusty
areas.
1. Remove the seat.
2. Remove cowling A and B. (See
page 6-7 for cowling removal
and installation steps.)
3. Remove the fuel tank bolt.
4. Lift the front of the fuel tank
upward and position it away from
the air filter case. (Do not
remove the fuel hoses.)
1. Bolt
5AE-9-E3 (ENG) 4/11/0 11:06 AM Page 56
Page 83 of 104
6-38
PERIODIC MAINTENANCE AND MINOR REPAIR
1
2
3
4
5
6
7
8
9
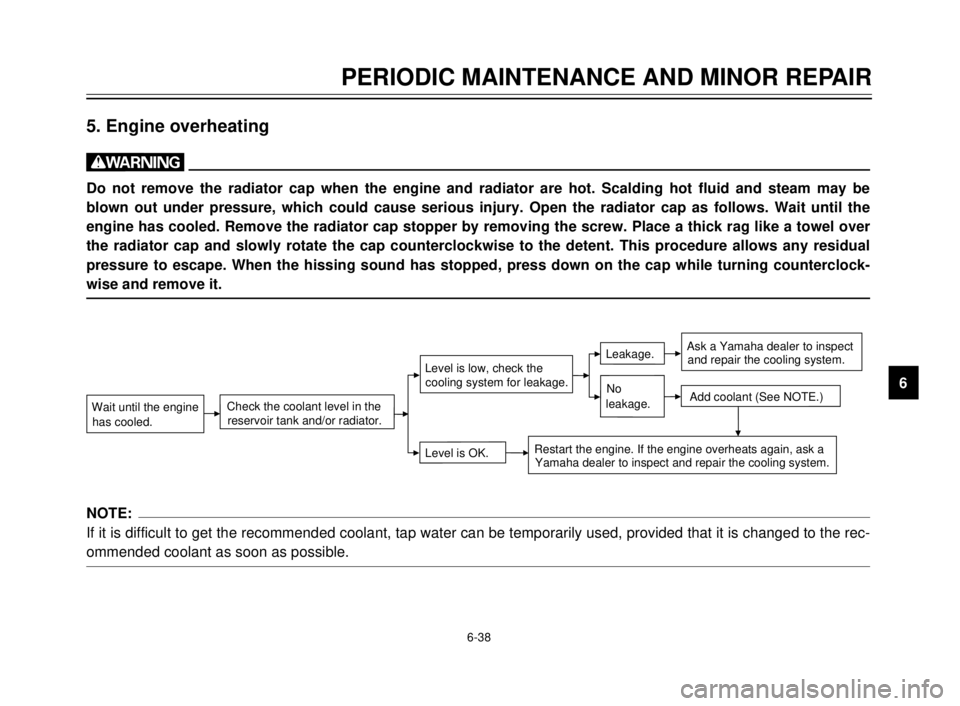
5. Engine overheating
w
Do not remove the radiator cap when the engine and radiator are hot. Scalding hot fluid and steam may be
blown out under pressure, which could cause serious injury. Open the radiator cap as follows. Wait until the
engine has cooled. Remove the radiator cap stopper by removing the screw. Place a thick rag like a towel over
the radiator cap and slowly rotate the cap counterclockwise to the detent. This procedure allows any residual
pressure to escape. When the hissing sound has stopped, press down on the cap while turning counterclock-
wise and remove it.
NOTE:
If it is difficult to get the recommended coolant, tap water can be temporarily used, provided that it is changed to the rec-
ommended coolant as soon as possible.
Level is OK.
Wait until the engine
has cooled.
Restart the engine. If the engine overheats again, ask a
Yamaha dealer to inspect and repair the cooling system. Check the coolant level in the
reservoir tank and/or radiator.
Add coolant (See NOTE.)
Level is low, check thecooling system for leakage.Leakage.No
leakage.Ask a Yamaha dealer to inspect
and repair the cooling system.
5AE-9-E3 (ENG) 4/11/0 11:06 AM Page 81