ABS YAMAHA TENERE 700 2020 Owners Manual
[x] Cancel search | Manufacturer: YAMAHA, Model Year: 2020, Model line: TENERE 700, Model: YAMAHA TENERE 700 2020Pages: 102, PDF Size: 10.31 MB
Page 6 of 102

Table of contentsSafety information............................ 1-1
Description....................................... 2-1
Left view ......................................... 2-1
Right view ....................................... 2-2
Controls and instruments ............... 2-3
Instrument and control functions... 3-1
Immobilizer system......................... 3-1
Main switch/steering lock............... 3-2
Indicator lights and warning
lights............................................ 3-3
Multi-function meter unit ................ 3-5
Handlebar switches ...................... 3-12
Clutch lever .................................. 3-14
Shift pedal .................................... 3-14
Brake lever.................................... 3-15
Brake pedal .................................. 3-15
ABS .............................................. 3-15
Fuel tank cap ................................ 3-16
Fuel ............................................... 3-17
Fuel tank overflow hose ............... 3-19
Catalytic converter ....................... 3-19
Seats ............................................ 3-19
Adjusting the headlight beams ..... 3-21
Adjusting the front fork ................. 3-21
Front fork bleeding ....................... 3-23
Adjusting the shock absorber
assembly ................................... 3-23
Luggage strap holders ................. 3-25
Front fender ................................. 3-26DC power outlets .......................... 3-26
Sidestand ...................................... 3-27
Ignition circuit cut-off system ....... 3-28
For your safety – pre-operation
checks............................................... 4-1
Operation and important riding
points................................................. 5-1
Engine break-in ............................... 5-1
Starting the engine .......................... 5-2
Shifting ............................................ 5-3
Tips for reducing fuel
consumption ................................ 5-4
Parking ............................................ 5-4
Periodic maintenance and
adjustment........................................ 6-1
Tool kit ............................................ 6-2
Periodic maintenance charts .......... 6-3
Periodic maintenance chart for the
emission control system .............. 6-3
General maintenance and
lubrication chart ........................... 6-5
Removing and installing cowlings... 6-9
Checking the spark plugs ............... 6-9
Canister ......................................... 6-10
Engine oil and oil filter cartridge.... 6-11
Why Yamalube .............................. 6-14
Coolant.......................................... 6-14Replacing the air filter element
and cleaning the check hose .... 6-15
Checking the throttle grip free
play ............................................ 6-17
Valve clearance............................. 6-17
Tires .............................................. 6-17
Spoke wheels ............................... 6-19
Adjusting the clutch lever free
play ............................................ 6-19
Checking the brake lever free
play ............................................ 6-20
Brake light switches ..................... 6-21
Checking the front and rear brake
pads .......................................... 6-21
Checking the brake fluid level ...... 6-22
Changing the brake fluid .............. 6-23
Drive chain slack........................... 6-23
Cleaning and lubricating the drive
chain.......................................... 6-25
Checking and lubricating the
cables ........................................ 6-26
Checking and lubricating the
throttle grip and cable ............... 6-26
Checking and lubricating the
brake and shift pedals............... 6-26
Checking and lubricating the
brake and clutch levers ............. 6-27
Checking and lubricating the
sidestand................................... 6-28
Lubricating the rear suspension ... 6-28UBW3E0E0.book Page 1 Friday, May 24, 2019 11:01 AM
Page 13 of 102
Description
2-1
2
EAU10411
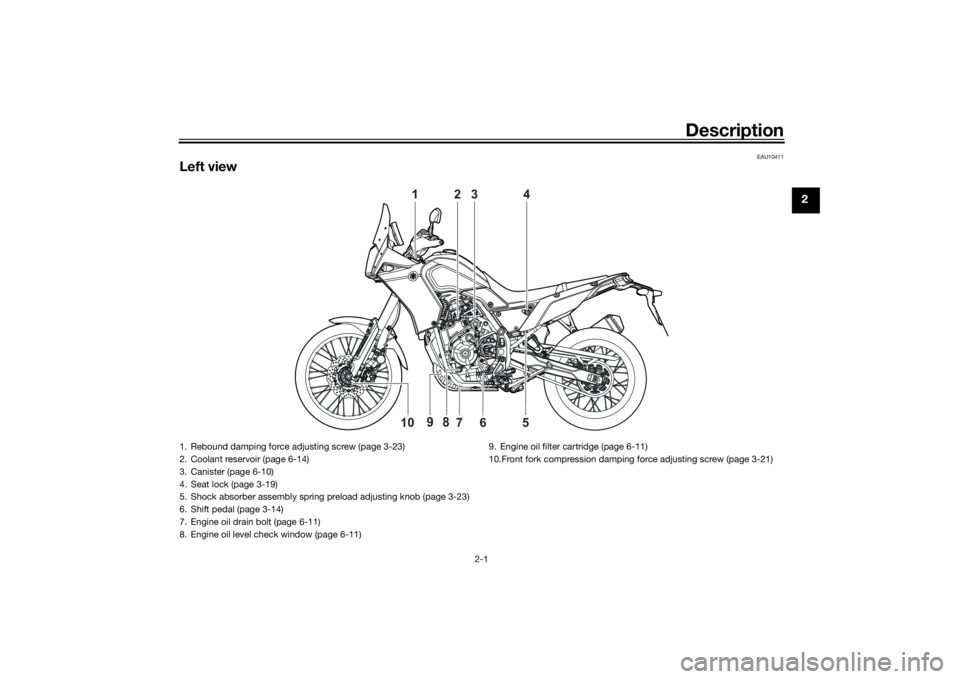
Left view
1
2
3
4
6
5 10
7
9
8
1. Rebound damping force adjusting screw (page 3-23)
2. Coolant reservoir (page 6-14)
3. Canister (page 6-10)
4. Seat lock (page 3-19)
5. Shock absorber assembly spring preload adjusting knob (page 3-23)
6. Shift pedal (page 3-14)
7. Engine oil drain bolt (page 6-11)
8. Engine oil level check window (page 6-11)9. Engine oil filter cartridge (page 6-11)
10.Front fork compression damping force adjusting screw (page 3-21)
UBW3E0E0.book Page 1 Friday, May 24, 2019 11:01 AM
Page 18 of 102

Instrument and control functions
3-3
3To unlock the steering
From the “LOCK” position, push the
key in and turn it to “OFF”.
EAU59680
(Parking)
The hazard lights and turn signal lights
can be turned on, but all other electri-
cal systems are off. The key can be re-
moved.
The steering must be locked before the
key can be turned to “ ”.
NOTICE
ECA20760
Using the hazard or turn signal lights
for an extended length of time may
cause the battery to discharge.
EAU4939H
Indicator lights and warning
lights
EAU11032
Turn signal indicator lights “ ”
and“”
Each indicator light will flash when its
corresponding turn signal lights are
flashing.
EAU11061
Neutral indicator light “ ”
This indicator light comes on when the
transmission is in the neutral position.
EAU11081
High beam indicator light “ ”
This indicator light comes on when the
high beam of the headlight is switched
on.
EAU59963
Oil pressure warning light “ ”
This warning light comes on if the en-
gine oil pressure is low.TIPWhen the vehicle is turned on, the light
should come on, go off briefly, and
then remain on until the engine is start-
ed. Otherwise, have a Yamaha dealer
check the vehicle.
1. Push.
2. Turn.12
1. Left turn signal indicator light Ž
2. Anti-lock Brake System (ABS) warning
light Ž
3. Engine trouble warning light Ž
4. Oil pressure warning light Ž
5. Coolant temperature warning light Ž
6.
7. Right turn signal indicator light Ž
8. Neutral indicator light Ž
9. High beam indicator light Ž
10.Immobilizer system indicator light Ž
11.Anti-lock Brake System (ABS OFF) warning
light Ž
1
2
3
4
57
8
9
10
11
6
ABSABS
UBW3E0E0.book Page 3 Friday, May 24, 2019 11:01 AM
Page 19 of 102

Instrument and control functions
3-4
3
NOTICE
ECA21211
If the warning light comes on when
the engine is running, stop the en-
gine and check the oil level. If the oil
level is low, add sufficient oil of the
recommended type. If the warning
light remains on after adding oil,
stop the engine and have a Yamaha
dealer check the vehicle.
EAU11449
Coolant temperature warning
light “ ”
This warning light comes on when the
engine is overheating. If this occurs,
stop the engine immediately and allow
the engine to cool. (See page 6-37.)
For vehicles with a radiator fan, the ra-
diator fan(s) automatically switch on or
off according to the coolant tempera-
ture.TIPWhen the vehicle is turned on, the light
will come on for a few seconds, and
then go off. If the light does not come
on, or if the light remains on, have a
Yamaha dealer check the vehicle.
NOTICE
ECA10022
Do not continue to operate the en-
gine if it is overheating.
EAU73172
Engine trouble warning light “ ”
This warning light comes on if a prob-
lem is detected in the engine or other
vehicle control system. If this occurs,
have a Yamaha dealer check the on-
board diagnostic system.TIPWhen the vehicle is turned on, the light
will come on for a few seconds and
then go off. If the light does not come
on, or if the light remains on, have a
Yamaha dealer check the vehicle.
EAU69895
ABS warning light “ ”
This warning light comes on when the
vehicle is first turned on, and goes off
after starting riding. If the warning light
comes on while riding, the anti-lock
brake system may not work correctly.
WARNING
EWA16043
If the ABS warning light does not
turn off after reaching 10 km/h (6
mi/h), or if the warning light comes
on while riding:
Use extra caution to avoid pos-
sible wheel lock during emer-
gency braking.
Have a Yamaha dealer check
the vehicle as soon as possible.
EAUM4080
ABS warning light “ ”
This warning light comes on when the
anti-lock brake system has been man-
ually disabled, the “OFF-ROAD” indi-
cator comes on at the same time.
WARNING
EWAM1050
Always ride on paved roads with the
ABS turned on. Riding on public
roads with the ABS disabled may be
illegal and void your insurance. Turn
the ABS off only when riding on non-
paved surfaces.
ABS
ABS
UBW3E0E0.book Page 4 Friday, May 24, 2019 11:01 AM
Page 20 of 102
Instrument and control functions
3-5
3
EAUM3622
Immobilizer system indicator
light “ ”
When the vehicle is turned off and 30
seconds have passed, the indicator
light will flash steadily to indicate the
immobilizer system is enabled. After 24
hours have passed, the indicator light
will stop flashing, however the immobi-
lizer system is still enabled.TIPWhen the vehicle is turned on, the light
will come on for a few seconds, and go
off. Otherwise, have a Yamaha dealer
check the vehicle.Troubleshooting
If a problem is detected in the immobi-
lizer system, the light will flash in a pat-
tern. If the immobilizer system
indicator light flashes in the pattern,
slowly 5 times then quickly 2 times, this
could be caused by transponder inter-
ference. If this occurs, try the following.
1. Make sure there are no other im-
mobilizer keys close to the main
switch. Other immobilizer systemkeys may cause signal interfer-
ence and prevent the engine from
starting.
2. Use the code re-registering key to
start the engine.
3. If the engine starts, turn it off, and
try starting the engine with the
standard keys.
4. If one or more of the standard
keys do not start the engine, take
the vehicle and all keys to a
Yamaha dealer to have the stan-
dard keys re-registered.
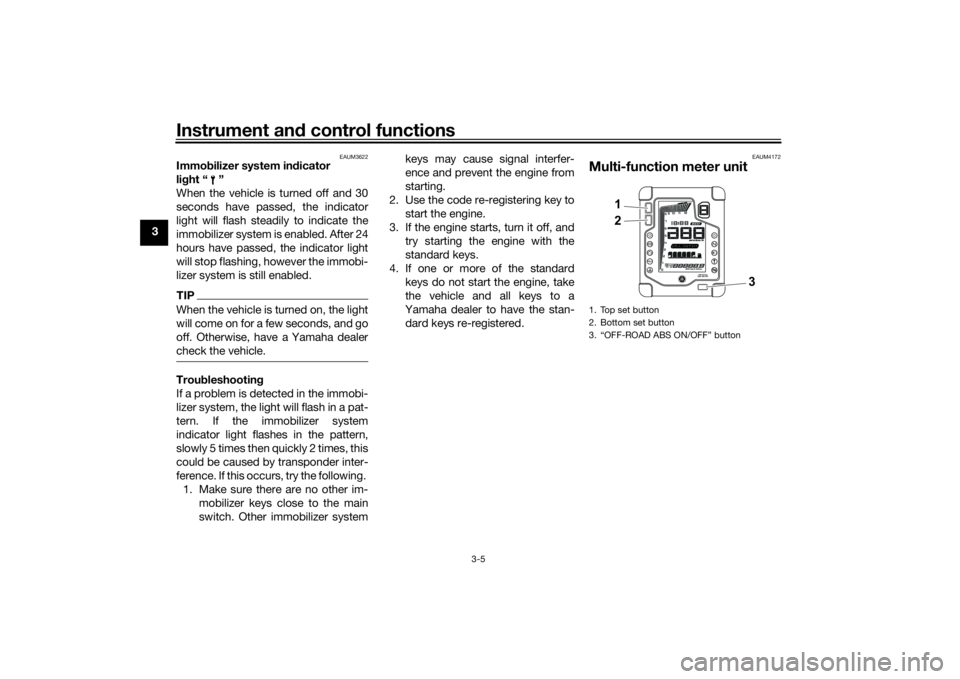
EAUM4172
Multi-function meter unit1. Top set button
2. Bottom set button
3. “OFF-ROAD ABS ON/OFF” button
1
2
3
UBW3E0E0.book Page 5 Friday, May 24, 2019 11:01 AM
Page 23 of 102
Instrument and control functions
3-8
3 The clock uses a 12-hour time system.
TIPWhen the main switch is turned off, the
clock can be viewed by pushing the
top set button.To set the clock1.
2. Push the bottom set button and
top set button together until the
hour digits start flashing.
3. Push the bottom set button to set
the hours.
4. Push the top set button and the
minute digits will start flashing.
5. Push the bottom set button to set
the minutes.
6. Push the top set button to confirm
settings and start the clock.TIPWhen setting the hours and minutes,
push the bottom set button briefly to
increase the increment value one by
one, or push and hold the button to in-
crease the increment value continu-
ously.
OFF-ROAD Indicator
This indicator comes on when the ABS
has been manually disabled.
To switch off the ABS1. Turn the key to “ON”.
2. The vehicle being stationary, push
the “OFF-ROAD ABS ON/OFF”
button until the “ABS OFF” warn-
ing light starts flashing, then re-
lease the button.
3. The “ABS OFF” warning light and
“OFF-ROAD” indicator will come
on simultaneously.TIPThe ABS will be disabled until the key
switch is turned to Ž (stop) when
the engine is running or you stop the
ROADŽ indicator will turn off.
WARNING
EWAM1050
Always ride on paved roads with the
ABS turned on. Riding on public
roads with the ABS disabled may beillegal and void your insurance. Turn
the ABS off only when riding on non-
paved surfaces.
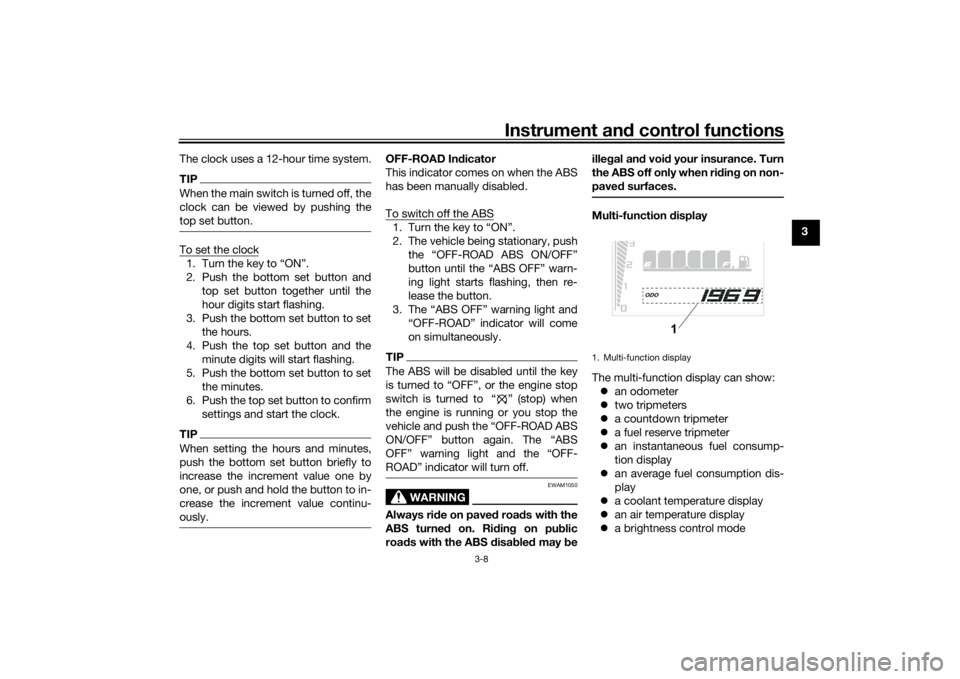
Multi-function display
The multi-function display can show:
an odometer
two tripmeters
a countdown tripmeter
a fuel reserve tripmeter
an instantaneous fuel consump-
tion display
an average fuel consumption dis-
play
a coolant temperature display
an air temperature display
a brightness control mode1. Multi-function display
1
UBW3E0E0.book Page 8 Friday, May 24, 2019 11:01 AM
Page 30 of 102
Instrument and control functions
3-15
3
EAU26827
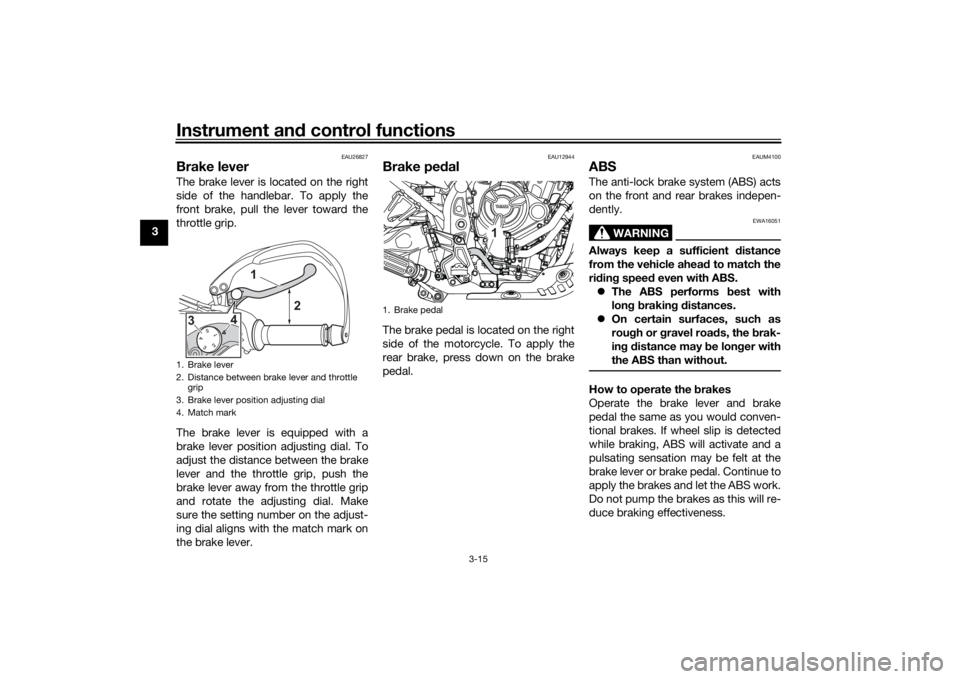
Brake leverThe brake lever is located on the right
side of the handlebar. To apply the
front brake, pull the lever toward the
throttle grip.
The brake lever is equipped with a
brake lever position adjusting dial. To
adjust the distance between the brake
lever and the throttle grip, push the
brake lever away from the throttle grip
and rotate the adjusting dial. Make
sure the setting number on the adjust-
ing dial aligns with the match mark on
the brake lever.
EAU12944
Brake pedalThe brake pedal is located on the right
side of the motorcycle. To apply the
rear brake, press down on the brake
pedal.
EAUM4100
ABSThe anti-lock brake system (ABS) acts
on the front and rear brakes indepen-
dently.
WARNING
EWA16051
Always keep a sufficient distance
from the vehicle ahead to match the
riding speed even with ABS.
The ABS performs best with
long braking distances.
On certain surfaces, such as
rough or gravel roads, the brak-
ing distance may be longer with
the ABS than without.How to operate the brakes
Operate the brake lever and brake
pedal the same as you would conven-
tional brakes. If wheel slip is detected
while braking, ABS will activate and a
pulsating sensation may be felt at the
brake lever or brake pedal. Continue to
apply the brakes and let the ABS work.
Do not pump the brakes as this will re-
duce braking effectiveness.
1. Brake lever
2. Distance between brake lever and throttle
grip
3. Brake lever position adjusting dial
4. Match mark
1
4
3
2
1. Brake pedal
1
UBW3E0E0.book Page 15 Friday, May 24, 2019 11:01 AM
Page 31 of 102
Instrument and control functions
3-16
3 The ABS performs a self-check
when you first start off. During this
time a clicking noise from the hy-
draulic unit may be audible, and if
the brake lever or brake pedal is
applied a vibration can be felt, but
this is not a malfunction.
The brake system will revert to a
conventional brake system in case
of ABS malfunction.
NOTICE
ECA20100
Be careful not to damage the wheel
sensor or wheel sensor rotor; other-
wise, improper performance of the
ABS will result.
TIPWhen riding off-road, the ABS can be
disabled. (See page 3-8.)
WARNING
EWAM1050
Always ride on paved roads with the
ABS turned on. Riding on public
roads with the ABS disabled may be
illegal and void your insurance. Turn
the ABS off only when riding on non-
paved surfaces.
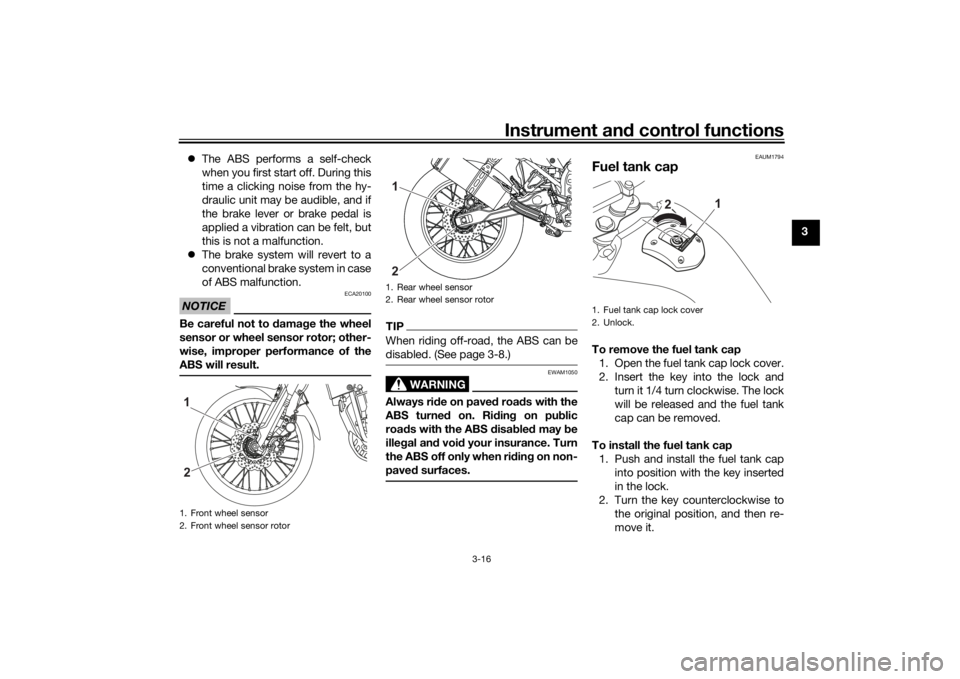
EAUM1794
Fuel tank capTo remove the fuel tank cap
1. Open the fuel tank cap lock cover.
2. Insert the key into the lock and
turn it 1/4 turn clockwise. The lock
will be released and the fuel tank
cap can be removed.
To install the fuel tank cap
1. Push and install the fuel tank cap
into position with the key inserted
in the lock.
2. Turn the key counterclockwise to
the original position, and then re-
move it.
1. Front wheel sensor
2. Front wheel sensor rotor21
1. Rear wheel sensor
2. Rear wheel sensor rotor12
1. Fuel tank cap lock cover
2. Unlock.
1
2
UBW3E0E0.book Page 16 Friday, May 24, 2019 11:01 AM
Page 38 of 102
Instrument and control functions
3-23
3
EAU14796
Front fork bleedingWhen riding in extremely rough condi-
tions, the air temperature and pressure
in the front fork will rise and harden the
suspension. If this occurs, bleed the air
from each fork leg.
WARNING
EWA10201
Always bleed both fork legs, other-
wise poor handling and loss of sta-
bility may result.1. If possible, elevate the vehicle so
the front wheel is off the ground.
(See page 6-34.)TIPWhen bleeding the front fork, do not
apply any pressure or weight on the
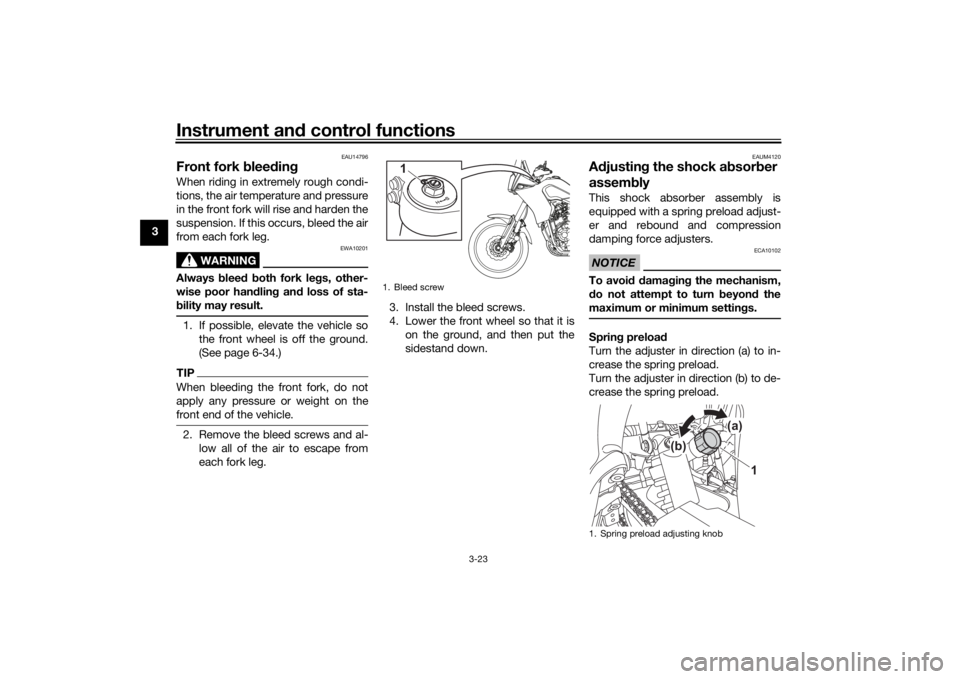
front end of the vehicle.2. Remove the bleed screws and al-
low all of the air to escape from
each fork leg.3. Install the bleed screws.
4. Lower the front wheel so that it is
on the ground, and then put the
sidestand down.
EAUM4120
Adjusting the shock absorber
assemblyThis shock absorber assembly is
equipped with a spring preload adjust-
er and rebound and compression
damping force adjusters.NOTICE
ECA10102
To avoid damaging the mechanism,
do not attempt to turn beyond the
maximum or minimum settings.Spring preload
Turn the adjuster in direction (a) to in-
crease the spring preload.
Turn the adjuster in direction (b) to de-
crease the spring preload.
1. Bleed screw
1
1. Spring preload adjusting knob
1
(b)(a)
UBW3E0E0.book Page 23 Friday, May 24, 2019 11:01 AM
Page 40 of 102
Instrument and control functions
3-25
3
TIPWhen turning the damping force
adjuster in direction (a), the 0 click
position and the 1 click position
may be the same.
When turning the damping force
adjuster in direction (b), it may
click beyond the stated specifica-
tions, however such adjustments
are ineffective and may damage
the suspension.
WARNING
EWA10222
This shock absorber assembly con-
tains highly pressurized nitrogen
gas. Read and understand the fol-
lowing information before handling
the shock absorber assembly.Do not tamper with or attempt
to open the cylinder assembly.
Do not subject the shock ab-
sorber assembly to an open
flame or other high heat source.
This may cause the unit to ex-
plode due to excessive gas
pressure.
Do not deform or damage the
cylinder in any way. Cylinder
damage will result in poor
damping performance.
Do not dispose of a damaged or
worn-out shock ab
sorber as-
sembly yourself. Take the shock
absorber assembly to a Yamaha
dealer for any service.
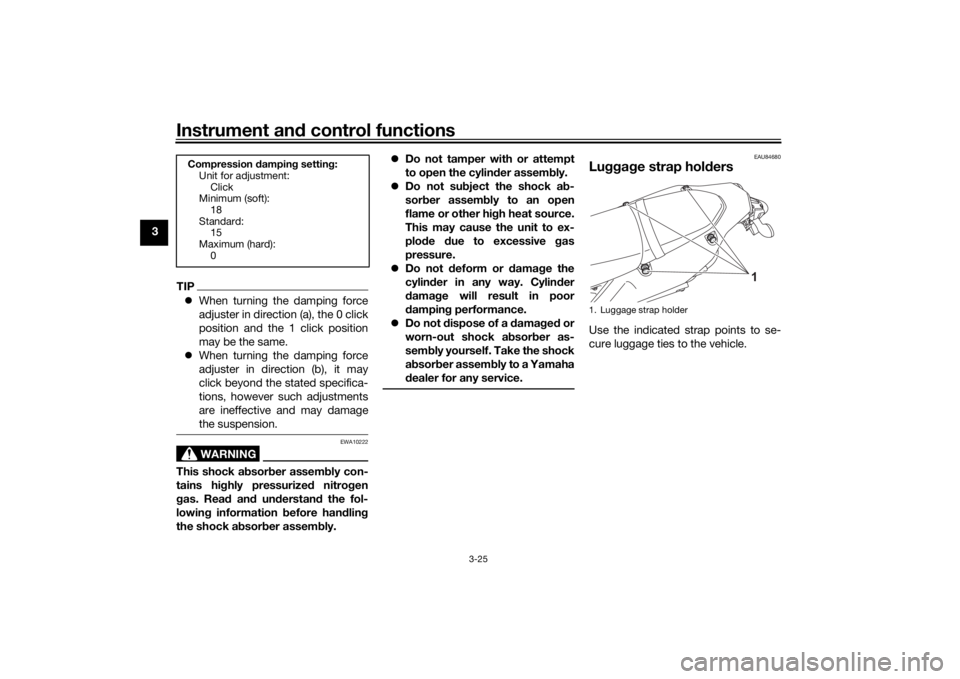
EAU84680
Luggage strap holdersUse the indicated strap points to se-
cure luggage ties to the vehicle.
Compression damping setting:
Unit for adjustment:
Click
Minimum (soft):
18
Standard:
15
Maximum (hard):
0
1. Luggage strap holder
1
UBW3E0E0.book Page 25 Friday, May 24, 2019 11:01 AM