tire pressure YAMAHA TENERE 700 2020 Owners Manual
[x] Cancel search | Manufacturer: YAMAHA, Model Year: 2020, Model line: TENERE 700, Model: YAMAHA TENERE 700 2020Pages: 102, PDF Size: 10.31 MB
Page 46 of 102

For your safety – pre-operation checks
4-2
4
Rear brake• Check operation.
• If soft or spongy, have Yamaha dealer bleed hydraulic system.
• Check brake pads for wear.
• Replace if necessary.
• Check fluid level in reservoir.
• If necessary, add specified brake fluid to specified level.
• Check hydraulic system for leakage.6-21, 6-22
Clutch• Check operation.
• Lubricate cable if necessary.
• Check lever free play.
• Adjust if necessary.6-19
Throttle grip• Make sure that operation is smooth.
• Check throttle grip free play.
• If necessary, have Yamaha dealer adjust throttle grip free play and lubricate ca-
ble and grip housing.6-17, 6-26
Control cables• Make sure that operation is smooth.
• Lubricate if necessary.6-26
Drive chain• Check chain slack.
• Adjust if necessary.
• Check chain condition.
• Lubricate if necessary.6-23, 6-25
Wheels and tires•Check for damage.
• Check tire condition and tread depth.
• Check air pressure.
• Correct if necessary.6-17, 6-19
Brake and shift pedals• Make sure that operation is smooth.
• Lubricate pedal pivoting points if necessary.6-26
Brake and clutch levers• Make sure that operation is smooth.
• Lubricate lever pivoting points if necessary.6-27
Sidestand• Make sure that operation is smooth.
• Lubricate pivot if necessary.6-28 ITEM CHECKS PAGE
UBW3E0E0.book Page 2 Friday, May 24, 2019 11:01 AM
Page 56 of 102

Periodic maintenance and adjustment
6-5
6
EAU71352
General maintenance and lubrication chartNO. ITEM CHECK OR MAINTENANCE JOBODOMETER READING
ANNUAL
CHECK 1000 km
(600 mi)10000 km
(6000 mi)20000 km
(12000 mi)30000 km
(18000 mi)40000 km
(24000 mi)
1*Diagnostic system
check• Perform dynamic inspection us-
ing Yamaha diagnostic tool.
• Check the error codes.√√√√√√
2*Air filter element• Replace.√√
3Air filter case check
hose• Clean.√√√√√
4Clutch• Check operation.
•Adjust.√√√√√
5*Front brake• Check operation, fluid level, and
for fluid leakage.
• Replace brake pads if necessary.√√√√√√
6*Rear brake• Check operation, fluid level, and
for fluid leakage.
• Replace brake pads if necessary.√√√√√√
7*Brake hoses• Check for cracks or damage.√√√√√
• Replace. Every 4 years
8*Brake fluid• Change. Every 2 years
9*Wheels• Check runout, spoke tightness
and for damage.
• Tighten spokes if necessary.√√√√√
10*Tires• Check tread depth and for dam-
age.
• Replace if necessary.
• Check air pressure.
• Correct if necessary.√√√√√
UBW3E0E0.book Page 5 Friday, May 24, 2019 11:01 AM
Page 68 of 102

Periodic maintenance and adjustment
6-17
6
EAU21386
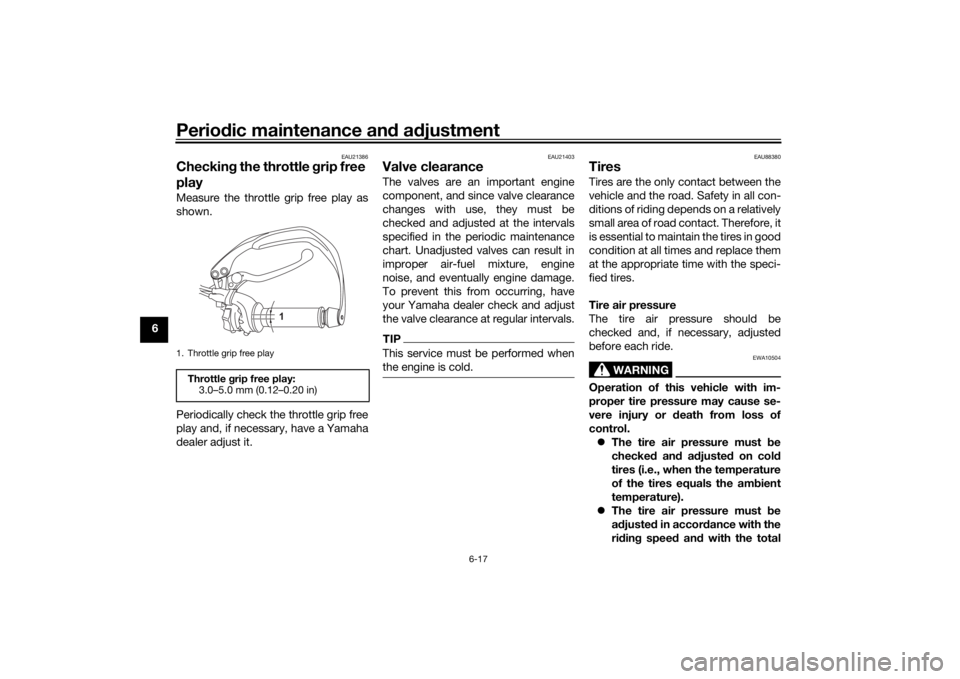
Checking the throttle grip free
playMeasure the throttle grip free play as
shown.
Periodically check the throttle grip free
play and, if necessary, have a Yamaha
dealer adjust it.
EAU21403
Valve clearanceThe valves are an important engine
component, and since valve clearance
changes with use, they must be
checked and adjusted at the intervals
specified in the periodic maintenance
chart. Unadjusted valves can result in
improper air-fuel mixture, engine
noise, and eventually engine damage.
To prevent this from occurring, have
your Yamaha dealer check and adjust
the valve clearance at regular intervals.TIPThis service must be performed when
the engine is cold.
EAU88380
TiresTires are the only contact between the
vehicle and the road. Safety in all con-
ditions of riding depends on a relatively
small area of road contact. Therefore, it
is essential to maintain the tires in good
condition at all times and replace them
at the appropriate time with the speci-
fied tires.
Tire air pressure
The tire air pressure should be
checked and, if necessary, adjusted
before each ride.
WARNING
EWA10504
Operation of this vehicle with im-
proper tire pressure may cause se-
vere injury or death from loss of
control.
The tire air pressure must be
checked and adjusted on cold
tires (i.e., when the temperature
of the tires equals the ambient
temperature).
The tire air pressure must be
adjusted in accordance with the
riding speed and with the total
1. Throttle grip free playThrottle grip free play:
3.0–5.0 mm (0.12–0.20 in)
1
UBW3E0E0.book Page 17 Friday, May 24, 2019 11:01 AM
Page 69 of 102

Periodic maintenance and adjustment
6-18
6 weight of rider, passenger, car-
go, and accessories approved
for this model.
WARNING
EWA10512
Never overload your vehicle. Opera-
tion of an overloaded vehicle could
cause an accident.
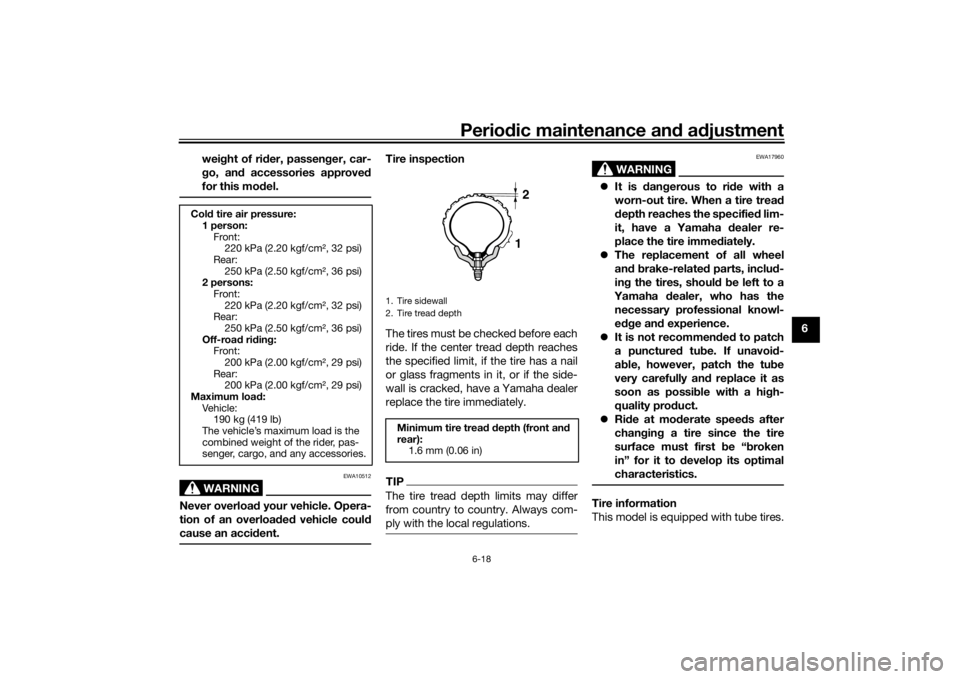
Tire inspection
The tires must be checked before each
ride. If the center tread depth reaches
the specified limit, if the tire has a nail
or glass fragments in it, or if the side-
wall is cracked, have a Yamaha dealer
replace the tire immediately.TIPThe tire tread depth limits may differ
from country to country. Always com-
ply with the local regulations.
WARNING
EWA17960
It is dangerous to ride with a
worn-out tire. When a tire tread
depth reaches the specified lim-
it, have a Yamaha dealer re-
place the tire immediately.
The replacement of all wheel
and brake-related parts, includ-
ing the tires, should be left to a
Yamaha dealer, who has the
necessary professional knowl-
edge and experience.
It is not recommended to patch
a punctured tube. If unavoid-
able, however, patch the tube
very carefully and replace it as
soon as possible with a high-
quality product.
Ride at moderate speeds after
changing a tire since the tire
surface must first be “broken
in” for it to develop its optimal
characteristics.Tire information
This model is equipped with tube tires.
Cold tire air pressure:
1 person:
Front:
220 kPa (2.20 kgf/cm², 32 psi)
Rear:
250 kPa (2.50 kgf/cm², 36 psi)
2 persons:
Front:
220 kPa (2.20 kgf/cm², 32 psi)
Rear:
250 kPa (2.50 kgf/cm², 36 psi)
Off-road riding:
Front:
200 kPa (2.00 kgf/cm², 29 psi)
Rear:
200 kPa (2.00 kgf/cm², 29 psi)
Maximum load:
Veh ic le:
190 kg (419 lb)
The vehicle’s maximum load is the
combined weight of the rider, pas-
senger, cargo, and any accessories.
1. Tire sidewall
2. Tire tread depth
Minimum tire tread depth (front and
rear):
1.6 mm (0.06 in)
12
UBW3E0E0.book Page 18 Friday, May 24, 2019 11:01 AM
Page 90 of 102

Motorcycle care and storage
7-2
7chemicals such as, solvents,
gasoline, rust removers, brake
fluid, or antifreeze, etc.
Before washing
1. Park the vehicle out of direct sun-
light and allow it to cool. This will
help avoid water spots.
2. Make sure all caps, covers, elec-
trical couplers and connectors are
tightly installed.
3. Cover the muffler end with a plas-
tic bag and a strong rubber band.
4. Pre-soak stubborn stains like in-
sects or bird droppings with a wet
towel for a few minutes.
5. Remove road grime and oil stains
with a quality degreasing agent
and a plastic-bristle brush or
sponge. NOTICE: Do not use
degreasing agent on areas re-
quiring lubrication such as
seals, gaskets, and wheel axles.
Follow product instructions.
[ECA26290]
Washing
1. Rinse off any degreaser and spray
down the vehicle with a garden
hose. Use only enough pressure
to do the job. Avoid spraying wa-
ter directly into the muffler, instru-
ment panel, air inlet, or other inner
areas such as underseat storage
compartments.
2. Wash the vehicle with a quality au-
tomotive-type detergent mixed
with cool water and a soft, clean
towel or sponge. Use an old tooth-
brush or plastic-bristle brush for
hard-to-reach places. NOTICE:
Use cold water if the vehicle has
been exposed to salt. Warm wa-
ter will increase salt’s corrosive
properties.
[ECA26301]
3. For windshield-equipped vehicles:
Clean the windshield with a soft
towel or sponge dampened with
water and a pH neutral detergent.
If necessary, use a high-quality
windshield cleaner or polish for
motorcycles. NOTICE: Never use
any strong chemicals to clean
the windshield. Additionally,
some cleaning compounds forplastic may scratch the wind-
shield, so be sure to test all
cleaning products before gen-
eral application.
[ECA26310]
4. Rinse off thoroughly with clean
water. Be sure to remove all deter-
gent residues, as they can be
harmful to plastic parts.
After washing
1. Dry the vehicle with a chamois or
absorbent towel, preferably mi-
crofiber terrycloth.
2. For drive chain-equipped models:
Dry and then lubricate the drive
chain to prevent rust.
3. Use a chrome polish to shine
chrome, aluminum, and stainless
steel parts. Often the thermally in-
duced discoloring of stainless
steel exhaust systems can be re-
moved through polishing.
4. Apply a corrosion protection spray
on all metal parts including
chrome or nickel-plated surfaces.
WARNING! Do not apply sili-
cone or oil spray to seats, hand
grips, rubber foot pegs or tire
treads. Otherwise these parts
UBW3E0E0.book Page 2 Friday, May 24, 2019 11:01 AM
Page 92 of 102

Motorcycle care and storage
7-4
71. Make all necessary repairs and
perform any outstanding mainte-
nance.
2. Follow all instructions in the Care
section of this chapter.
3. Fill up the fuel tank, adding fuel
stabilizer according to product in-
structions. Run the engine for 5
minutes to distribute treated fuel
through the fuel system.
4. For vehicles equipped with a fuel
cock: Turn the fuel cock lever to
the off position.
5. For vehicles with a carburetor: To
prevent fuel deposits from build-
ing up, drain the fuel in the carbu-
retor float chamber into a clean
container. Retighten the drain bolt
and pour the fuel back into the fuel
tank.
6. Use a quality engine fogging oil
according to product instructions
to protect internal engine compo-
nents from corrosion. If engine
fogging oil is not available, per-
form the following steps for each
cylinder:
a. Remove the spark plug cap
and spark plug.b. Pour a teaspoonful of engine
oil into the spark plug bore.
c. Install the spark plug cap onto
the spark plug, and then place
the spark plug on the cylinder
head so that the electrodes are
grounded. (This will limit spark-
ing during the next step.)
d. Turn the engine over several
times with the starter. (This will
coat the cylinder wall with oil.)
WARNING! To prevent dam-
age or injury from sparking,
make sure to ground the
spark plug electrodes while
turning the engine over.
[EWA10952]
e. Remove the spark plug cap
from the spark plug, and then
install the spark plug and the
spark plug cap.
7. Lubricate all control cables, piv-
ots, levers and pedals, as well as
the sidestand and centerstand (if
equipped).
8. Check and correct the tire air
pressure, and then lift the vehicle
so that all wheels are off the
ground. Otherwise, turn thewheels a little once a month in or-
der to prevent the tires from be-
coming degraded in one spot.
9. Cover the muffler outlet with a
plastic bag to prevent moisture
from entering it.
10. Remove the battery and fully
charge it, or attach a maintenance
charger to keep the battery opti-
mally charged. NOTICE: Confirm
that the battery and its charger
are compatible. Do not charge a
VRLA battery with a convention-
al charger.
[ECA26330]
TIPIf the battery will be removed,
charge it once a month and store
it in a temperate location between
0-30 °C (32-90 °F).
See page 6-30 for more informa-
tion on charging and storing the
battery.
UBW3E0E0.book Page 4 Friday, May 24, 2019 11:01 AM