headlight bulb YAMAHA TMAX 2004 Owners Manual
[x] Cancel search | Manufacturer: YAMAHA, Model Year: 2004, Model line: TMAX, Model: YAMAHA TMAX 2004Pages: 84, PDF Size: 2.39 MB
Page 7 of 84

TABLE OF CONTENTS
Checking and lubricating the
centerstand and sidestand .... 6-25
Checking the front fork ............ 6-25
Checking the steering ............. 6-26
Checking the wheel
bearings ................................ 6-27
Battery ..................................... 6-27
Replacing the fuses ................. 6-28
Replacing the headlight
bulb ....................................... 6-30
Troubleshooting ...................... 6-31
Troubleshooting charts ............ 6-32
SCOOTER CARE AND
STORAGE .................................... 7-1
Care .......................................... 7-1
Storage ...................................... 7-3
SPECIFICATIONS ....................... 8-1
CONSUMER INFORMATION ....... 9-1
Identification numbers ............... 9-1
Page 70 of 84

PERIODIC MAINTENANCE AND MINOR REPAIR
6-30
1
2
3
4
5
6
7
8
9
check if the device operates.
4. If the fuse immediately blows
again, have a Yamaha dealer
check the electrical system.
EAU23760
Replacing the headlight bulb
This model is equipped with a quartz
bulb headlight. If the headlight bulb
burns out, replace it as follows.
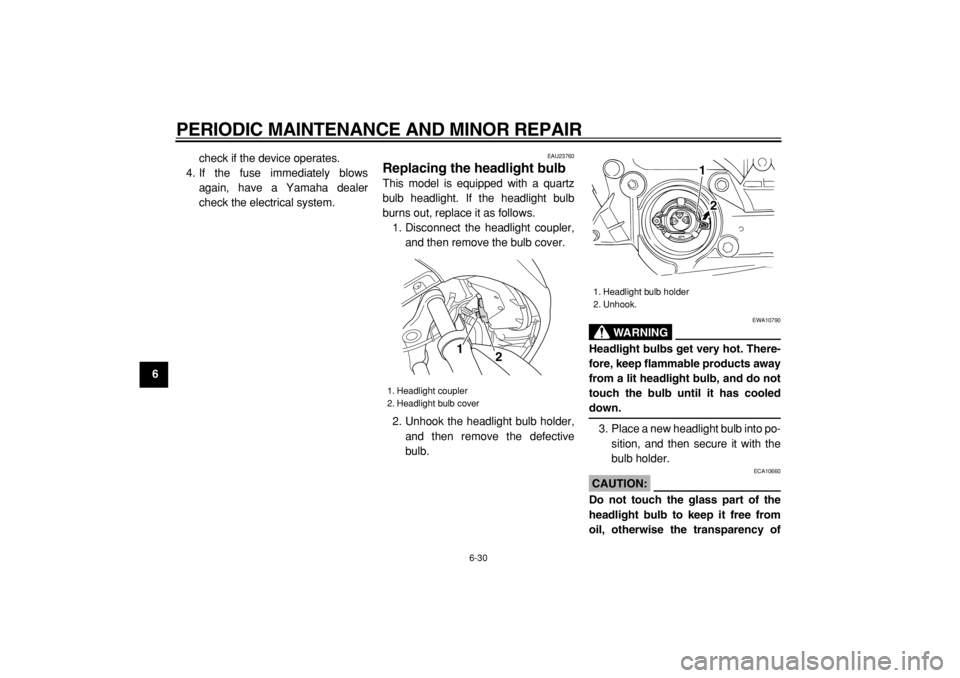
1. Disconnect the headlight coupler,
and then remove the bulb cover.
2. Unhook the headlight bulb holder,
and then remove the defective
bulb.
WARNING
EWA10790
Headlight bulbs get very hot. There-
fore, keep flammable products away
from a lit headlight bulb, and do not
touch the bulb until it has cooled
down.
3. Place a new headlight bulb into po-
sition, and then secure it with the
bulb holder.
CAUTION:
ECA10660
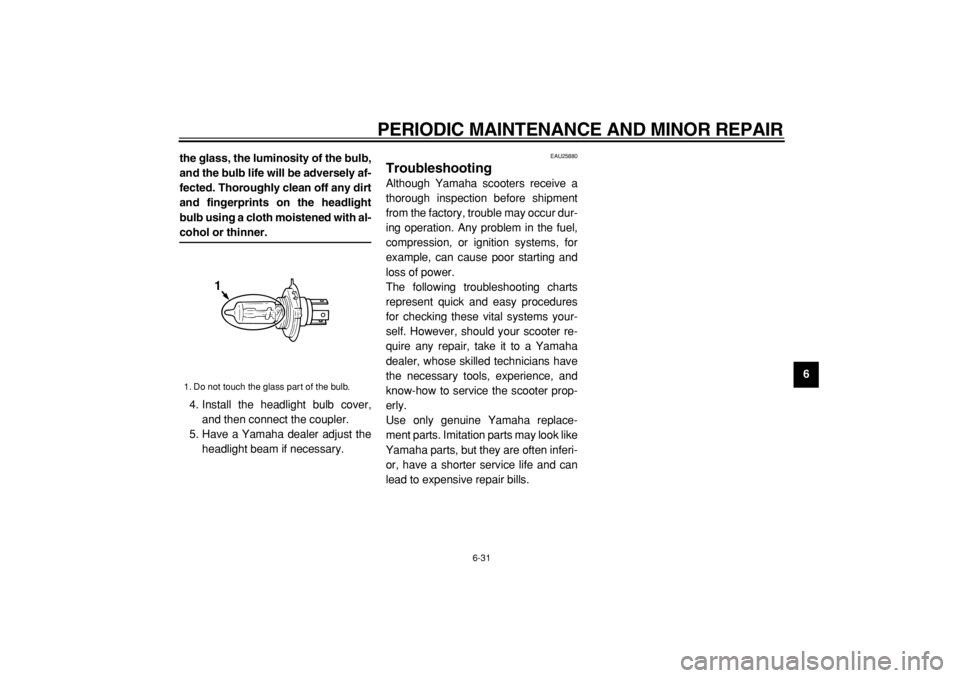
Do not touch the glass part of the
headlight bulb to keep it free from
oil, otherwise the transparency of
1. Headlight coupler
2. Headlight bulb cover1
2
1. Headlight bulb holder
2. Unhook.
1
2
Page 71 of 84

PERIODIC MAINTENANCE AND MINOR REPAIR
6-31
2
3
4
5
67
8
9 the glass, the luminosity of the bulb,
and the bulb life will be adversely af-
fected. Thoroughly clean off any dirt
and fingerprints on the headlight
bulb using a cloth moistened with al-
cohol or thinner.
4. Install the headlight bulb cover,
and then connect the coupler.
5. Have a Yamaha dealer adjust the
headlight beam if necessary.
EAU25880
Troubleshooting
Although Yamaha scooters receive a
thorough inspection before shipment
from the factory, trouble may occur dur-
ing operation. Any problem in the fuel,
compression, or ignition systems, for
example, can cause poor starting and
loss of power.
The following troubleshooting charts
represent quick and easy procedures
for checking these vital systems your-
self. However, should your scooter re-
quire any repair, take it to a Yamaha
dealer, whose skilled technicians have
the necessary tools, experience, and
know-how to service the scooter prop-
erly.
Use only genuine Yamaha replace-
ment parts. Imitation parts may look like
Yamaha parts, but they are often inferi-
or, have a shorter service life and can
lead to expensive repair bills.
1. Do not touch the glass part of the bulb.
1
Page 80 of 84

SPECIFICATIONS
8-3
1
2
3
4
5
6
7
8
9Headlight:
Bulb type:
Halogen bulb
Bulb voltage, wattage x quantity:
Headlight:
12 V, 60 W/55.0 W
×
1
Headlight:
12 V, 55.0 W
×
1
Tail/brake light:
12 V, 5.0/21.0 W
×
2
Front turn signal/position light:
12 V, 21 W/5.0 W
×
2
Rear turn signal light:
12 V, 21.0 W
×
2
Auxiliary light:
12 V, 5.0 W
×
2
Licence plate light:
12 V, 5.0 W
×
1
Meter lighting:
14 V, 2.0 W
×
3
High beam indicator light:
14 V, 1.4 W
×
1
Turn signal indicator light:
14 V, 1.4 W
×
1
Engine trouble warning light:
14 V, 1.4 W
×
1
Immobilizer system indicator light:
LED
Fuses:
Main fuse:
30.0 A
Headlight fuse:
15.0 A Signaling system fuse:
20.0 A
Ignition fuse:
10.0 A
Parking lighting fuse:
10.0 A
Radiator fan fuse:
15.0 A
Electronic fuel injection fuse:
10.0 A
Backup fuse:
10.0 A