stop start YAMAHA TRACER 900 GT 2018 User Guide
[x] Cancel search | Manufacturer: YAMAHA, Model Year: 2018, Model line: TRACER 900 GT, Model: YAMAHA TRACER 900 GT 2018Pages: 120, PDF Size: 9.6 MB
Page 81 of 120

Periodic maintenance an d a djustment
6-13
6
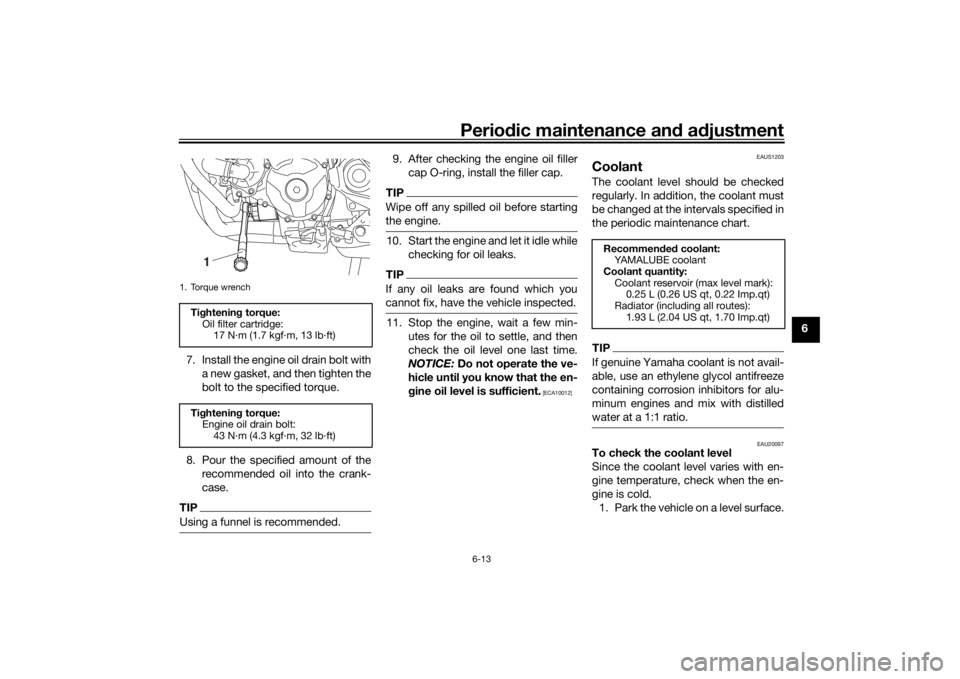
7. Install the engine oil drain bolt with a new gasket, and then tighten the
bolt to the specified torque.
8. Pour the specified amount of the recommended oil into the crank-
case.
TIPUsing a funnel is recommended.
9. After checking the engine oil fillercap O-ring, install the filler cap.TIPWipe off any spilled oil before starting
the engine.10. Start the engine and let it idle while checking for oil leaks.TIPIf any oil leaks are found which you
cannot fix, have the vehicle inspected.11. Stop the engine, wait a few min-utes for the oil to settle, and then
check the oil level one last time.
NOTICE: Do not operate the ve-
hicle until you know that the en-
g ine oil level is sufficient.
[ECA10012] EAUS1203
CoolantThe coolant level should be checked
regularly. In addition, the coolant must
be changed at the intervals specified in
the periodic maintenance chart.TIPIf genuine Yamaha coolant is not avail-
able, use an ethylene glycol antifreeze
containing corrosion inhibitors for alu-
minum engines and mix with distilled
water at a 1:1 ratio.
EAU20097
To check the coolant level
Since the coolant level varies with en-
gine temperature, check when the en-
gine is cold.
1. Park the vehicle on a level surface.
1. Torque wrenchTi ghtenin g torque:
Oil filter cartridge: 17 N·m (1.7 kgf·m, 13 lb·ft)
Ti ghtenin g torque:
Engine oil drain bolt:
43 N·m (4.3 kgf·m, 32 lb·ft)
1
Recommen ded coolant:
YAMALUBE coolant
Coolant quantity: Coolant reservoir (max level mark): 0.25 L (0.26 US qt, 0.22 Imp.qt)
Radiator (including all routes): 1.93 L (2.04 US qt, 1.70 Imp.qt)
UB1JE0E0.book Page 13 Tuesday, February 13, 2018 9:12 AM
Page 105 of 120

Periodic maintenance an d a djustment
6-37
6
En
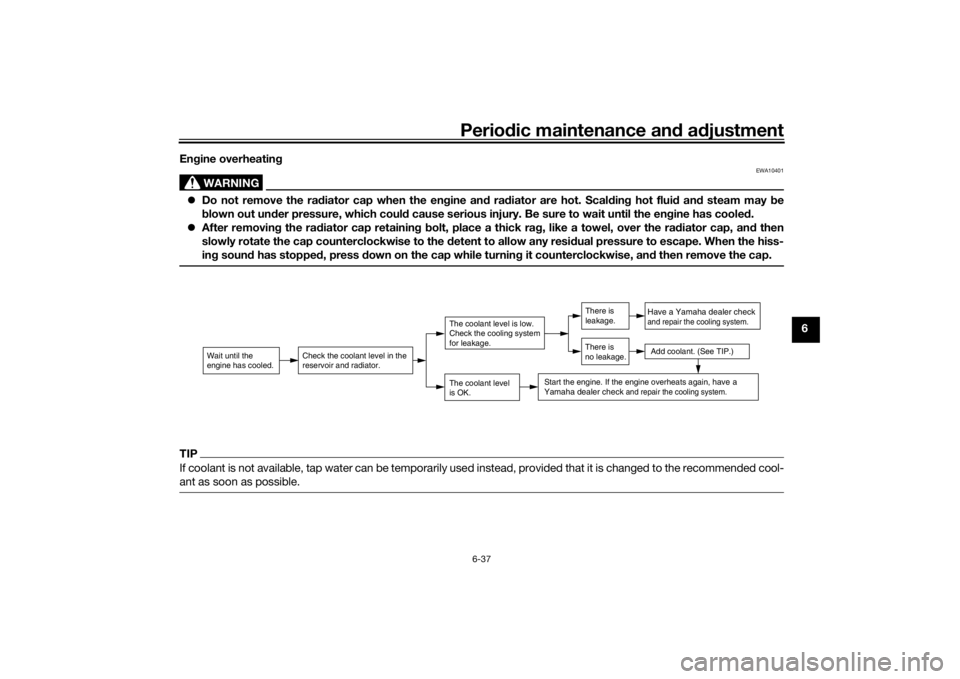
gine overheatin g
WARNING
EWA10401
Do not remove the ra diator cap when the en gine an d ra diator are hot. Scal din g hot flui d an d steam may be
b lown out un der pressure, which coul d cause serious injury. Be sure to wait until the en gine has coole d.
After removin g the ra diator cap retainin g b olt, place a thick ra g, like a towel, over the ra diator cap, an d then
slowly rotate the cap counterclockwise to the detent to allow any resi dual pressure to escape. When the hiss-
in g soun d has stoppe d, press down on the cap while turnin g it counterclockwise, an d then remove the cap.TIPIf coolant is not available, tap water can be temporarily used instead, provided that it is changed to the recommended cool-
ant as soon as possible.
Wait until the
engine has cooled.
Check the coolant level in the
reservoir and radiator.
The coolant level
is OK.The coolant level is low.
Check the cooling system
for leakage.
Have a Yamaha dealer checkand repair the cooling system.Add coolant. (See TIP.)
Start the engine. If the engine overheats again,
have a
Yamaha dealer check
and repair the cooling system.
There is
leakage.
There is
no leakage.
UB1JE0E0.book Page 37 Tuesday, February 13, 2018 9:12 AM
Page 117 of 120

Index
10-2
10
Spark plugs, checking .......................... 6-10
Specifications ......................................... 8-1
Starting the engine ................................. 5-1
Steering, checking ................................ 6-29
Stop/Run/Start switch ............................ 3-4
Storage ................................................... 7-4
Storage compartment .......................... 3-38
Swingarm pivots, lubricating ................ 6-28TTCS switch ............................................. 3-4
Throttle grip and cable, checking and
lubricating........................................... 6-25
Throttle grip free play, checking ........... 6-15
Tires ...................................................... 6-16
Tool kit .................................................... 6-2
Traction control system ........................ 3-28
Traction control system indicator light ... 3-6
Troubleshooting.................................... 6-35
Troubleshooting charts......................... 6-36
Turn signal indicator lights ..................... 3-5
Turn signal light bulb, replacing ........... 6-34
Turn signal switch................................... 3-4VValve clearance .................................... 6-16
Vehicle identification number ................. 9-1WWheel bearings, checking .................... 6-29
Wheels .................................................. 6-18
Windshield ............................................ 3-38
UB1JE0E0.book Page 2 Tuesday, February 13, 2018 9:12 AM