Fuel tank YAMAHA TRACER 900 GT 2018 Owners Manual
[x] Cancel search | Manufacturer: YAMAHA, Model Year: 2018, Model line: TRACER 900 GT, Model: YAMAHA TRACER 900 GT 2018Pages: 120, PDF Size: 9.6 MB
Page 6 of 120

Table of contentsSafety information ............................ 1-1
Description ....................................... 2-1
Left view ......................................... 2-1
Right view ....................................... 2-2
Controls and instruments ............... 2-3
Instrument an d control functions ... 3-1
Immobilizer system......................... 3-1
Main switch/steering lock............... 3-2
Handlebar switches ........................ 3-3
Indicator lights and warning lights............................................ 3-5
Cruise control system..................... 3-8
Display .......................................... 3-11
MENU screen ............................... 3-15
D-mode (drive mode).................... 3-25
Clutch lever .................................. 3-25
Shift pedal .................................... 3-26
Quick shift system ........................ 3-26
Brake lever.................................... 3-26
Brake pedal .................................. 3-27
ABS .............................................. 3-27
Traction control system ................ 3-28
Fuel tank cap ................................ 3-30
Fuel ............................................... 3-31
Fuel tank overflow hose ............... 3-33
Catalytic converter ....................... 3-33
Seats ............................................ 3-34
Adjusting the rider seat height...... 3-35
Helmet holder ............................... 3-37 Storage compartment ................... 3-38
Windshield ................................... 3-38
Adjusting the headlight beams ..... 3-38
Handlebar position ....................... 3-39
Adjusting the front fork ................. 3-39
Adjusting the shock absorber
assembly.................................... 3-41
Auxiliary DC jack ........................... 3-43
Auxiliary DC connector ................. 3-44
Sidestand ...................................... 3-44
Ignition circuit cut-off system ....... 3-45
For your safety – pre-operation
checks ............................................... 4-1
Operation an d important ri din g
points ................................................. 5-1
Starting the engine .......................... 5-1
Shifting ............................................ 5-2
Tips for reducing fuel consumption ................................ 5-3
Engine break-in ............................... 5-3
Parking ............................................ 5-4
Perio dic maintenance an d
a d justment ........................................ 6-1
Tool kit ............................................ 6-2
Periodic maintenance charts .......... 6-3
Periodic maintenance chart for the emission control system .............. 6-3 General maintenance and
lubrication chart .......................... 6-5
Removing and installing the panel............................................ 6-9
Checking the spark plugs ............. 6-10
Canister ........................................ 6-11
Engine oil ...................................... 6-11
Coolant ......................................... 6-13
Air filter element ............................ 6-15
Checking the engine idling speed ........................................ 6-15
Checking the throttle grip free play ............................................ 6-15
Valve clearance............................. 6-16
Tires .............................................. 6-16
Cast wheels .................................. 6-18
Adjusting the clutch lever free
play ............................................ 6-19
Checking the brake lever free play ............................................ 6-19
Brake light switches ..................... 6-20
Checking the front and rear brake pads ................................ 6-20
Checking the brake fluid level ...... 6-21
Changing the brake fluid .............. 6-22
Drive chain slack........................... 6-23
Cleaning and lubricating the drive chain ................................. 6-24
Checking and lubricating the
cables ........................................ 6-25UB1JE0E0.book Page 1 Tuesday, February 13, 2018 9:12 AM
Page 14 of 120
Description
2-2
2
EAU10421
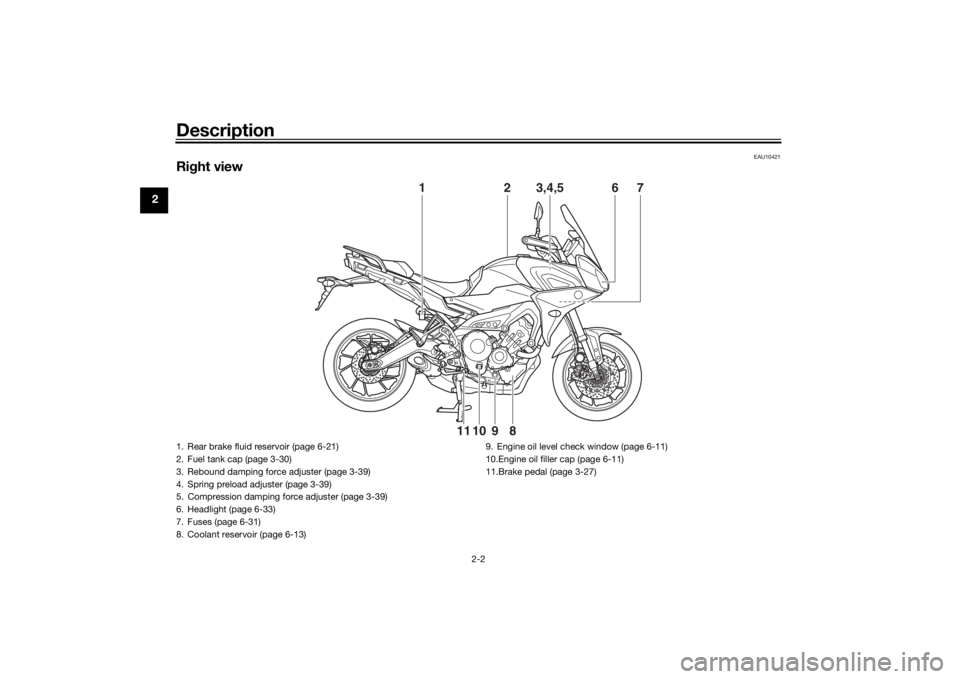
Right view
1
2
3,4,5
6
7
8
9
10
11
1. Rear brake fluid reservoir (page 6-21)
2. Fuel tank cap (page 3-30)
3. Rebound damping force adjuster (page 3-39)
4. Spring preload adjuster (page 3-39)
5. Compression damping force adjuster (page 3-39)
6. Headlight (page 6-33)
7. Fuses (page 6-31)
8. Coolant reservoir (page 6-13) 9. Engine oil level check window (page 6-11)
10.Engine oil filler cap (page 6-11)
11.Brake pedal (page 3-27)UB1JE0E0.book Page 2 Tuesday, February 13, 2018 9:12 AM
Page 27 of 120
Instrument and control functions
3-12
3
WARNING
EWA18210
Stop the vehicle before makin g any
settin g chan ges. Chan gin g settin gs
while ri din g can distract the opera-
tor an d increase the risk of an acci-
d ent.Spee dometer
The speedometer shows the vehicle’s
traveling speed.TIPThe display can be set to miles or kilo-
meters. Use the “Unit” module on the
MENU screen.Tachometer
The tachometer shows the engine
speed, as measured by the rotational
velocity of the crankshaft, in revolu-
tions per minute (r/min). When the ve-
hicle is first powered on, the
tachometer will sweep across the r/min
range and then return to zero.
TIPThe tachometer can be color-adjusted
and has a revolution peak hold indica-
tor which can be turned on or off.NOTICE
ECA10032
Do not operate the en gine in the ta-
chometer red zone.
Re d zone: 11250 r/min an d a boveFuel meter
The fuel meter indicates the amount of
fuel in the fuel tank. The display seg-
ments of the fuel meter disappear from
“F” (full) towards “E” (empty) as the fuel
level decreases.
When the last segment starts flashing
and the fuel level warning icon comes
on, refuel as soon as possible.TIPIf all the fuel meter display segments
flash repeatedly, have a Yamaha deal-
er check the related circuits.Clock
The clock uses a 12-hour time system. Information
display
This section of the main screen is used
to show additional riding related infor-
mation such as air and coolant temper-
ature readings, tripmeters, and fuel
consumption statistics. The informa-
tion display items can be set into four
groups via the MENU screen.
The information display items are:
A.TEMP: air temperature
C.TEMP: coolant temperature
TRIP-1: tripmeter 1
TRIP-2: tripmeter 2
F-TRIP: fuel tripmeter
ODO: odometer
FUEL CON: the amount of fuel con-
sumed
FUEL AVG: average fuel consumption
CRNT FUEL: current fuel consumption
TIP ODO will lock at 999999.
TRIP-1 and TRIP-2 will reset and
continue counting after 9999.9
has been reached.
UB1JE0E0.book Page 12 Tuesday, February 13, 2018 9:12 AM
Page 28 of 120

Instrument and control functions
3-13
3
When the fuel tank reserve level
has been reached, F-TRIP ap-
pears automatically and begins
recording distance traveled from
that point.
After refueling and traveling some
distance, F-TRIP will automatically
disappear.
See “Unit” on page 3-16 to
change the fuel consumption
units, set the clock, and switch
between miles and kilometers,
etc.
TRIP-1, TRIP-2, F-TRIP, FUEL CON,
and FUEL AVG items can be individu-
ally reset.
To reset information display items1. Use the wheel switch to scroll
through the display items until the
item you want to reset appears.
2. Short push the wheel switch and the item will flash for five seconds.
If both items are resettable items,
the top item will flash first. Scroll
down to select the bottom item. 3. While the item is flashing, press
and hold the wheel switch for one
second.
Transmission gear display
This shows which gear the transmis-
sion is in. This model has 6 gears and a
neutral position. The neutral position is
indicated by the neutral indicator
light “ ” and by the transmission gear
display “ ”.
Revolution peak hol d in dicator
This small bar momentarily appears
within the tachometer to mark the most
recent peak r/min speed of the engine.
TIPThe indicator comes on momentarily
only if the peak engine speed is 7000
r/min or higher.QS in dicator
When the key is turned to “ON”, the
quick shift system (page 3-26) turns on
and this indicator comes on.
TIPIf a problem is detected in the quick
shift system, this indicator will turn off
and the quick shift system will be un-
available. Have a Yamaha dealer check
the vehicle.Eco in dicator
This indicator comes on when the vehi-
cle is being operated in an environ-
mentally friendly, fuel-efficient manner.
The indicator goes off when the vehicle
is stopped.TIPConsider the following tips to reduce
fuel consumption: Avoid high engine speeds during
acceleration.
Travel at a constant speed.
Select the transmission gear that
is appropriate for the vehicle
speed.Drive mo de display
This display indicates which drive
mode has been selected: “STD”, “A” or
“B”. (See page 3-25.)
UB1JE0E0.book Page 13 Tuesday, February 13, 2018 9:12 AM
Page 30 of 120
Instrument and control functions
3-15
3 En
gine oil warnin g“”
This icon comes on when the engine oil
level is low. Stop the vehicle and cor-
rect the engine oil level.
When the vehicle is turned on, this icon
will come on for a few seconds, and
then go off.
If a malfunction is detected, the oil level
warning icon will flash repeatedly.
Have a Yamaha dealer check the vehi-
cle.
NOTICE
ECA26400
Do not continue to operate the en-
g ine if the oil level is low.Fuel level warnin g“”
This icon comes on when approxi-
mately 2.6 L (0.69 US gal, 0.57 Imp.gal)
of fuel remains in the tank.
If a malfunction is detected, the fuel
level warning icon will flash repeatedly.
Have a Yamaha dealer check the vehi-
cle.
EAU84311
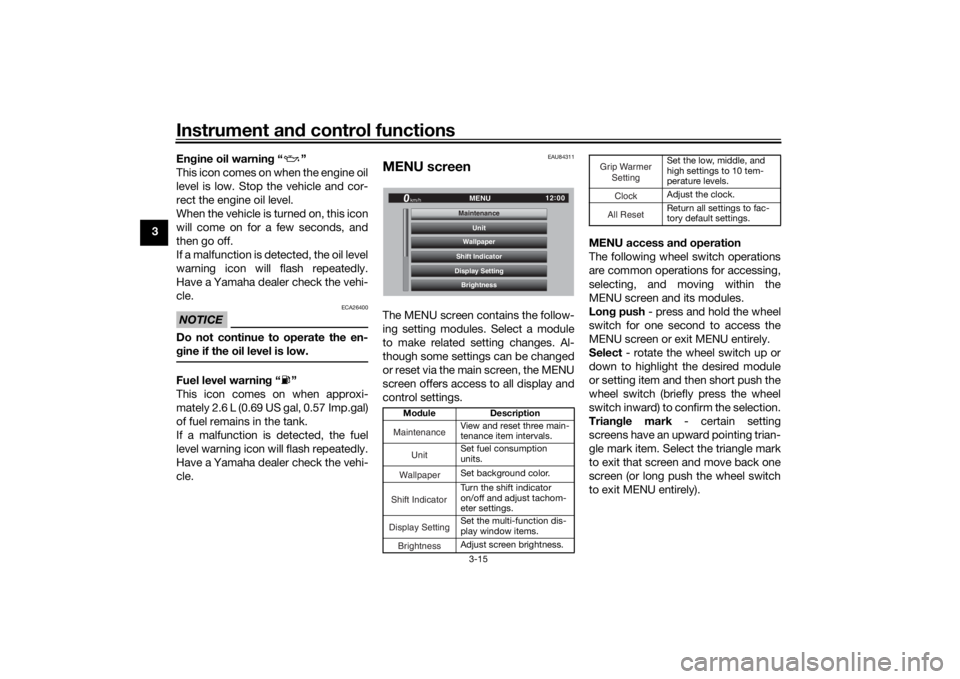
MENU screenThe MENU screen contains the follow-
ing setting modules. Select a module
to make related setting changes. Al-
though some settings can be changed
or reset via the main screen, the MENU
screen offers access to all display and
control settings. MENU access an
d operation
The following wheel switch operations
are common operations for accessing,
selecting, and moving within the
MENU screen and its modules.
Lon g push - press and hold the wheel
switch for one second to access the
MENU screen or exit MENU entirely.
Select - rotate the wheel switch up or
down to highlight the desired module
or setting item and then short push the
wheel switch (briefly press the wheel
switch inward) to confirm the selection.
Trian gle mark - certain setting
screens have an upward pointing trian-
gle mark item. Select the triangle mark
to exit that screen and move back one
screen (or long push the wheel switch
to exit MENU entirely).
Mo dule Description
View and reset three main-
tenance item intervals.
Set fuel consumption
units.
Set background color.
Turn the shift indicator
on/off and adjust tachom-
eter settings.
Set the multi-function dis-
play window items.
Adjust screen brightness.
12:
00
MENU
km/h
BrightnessDisplay SettingShift IndicatorWallpaperUnit
MaintenanceMaintenance
Maintenance
Unit
WallpaperShift IndicatorDisplay SettingBrightness
Set the low, middle, and
high settings to 10 tem-
perature levels.
Adjust the clock.
Return all settings to fac-
tory default settings.
Grip Warmer
Setting
ClockAll Reset
UB1JE0E0.book Page 15 Tuesday, February 13, 2018 9:12 AM
Page 45 of 120
Instrument and control functions
3-30
3
Should this occur, try resetting the sys-
tem as follows. 1. Stop the vehicle and turn the key to “OFF”.
2. Wait a few seconds and then turn the key back to “ON”.
3. The “ ” indicator light should turn off and the system be en-
abled.
TIPIf the “ ” indicator light remains on af-
ter resetting, the vehicle may still be
ridden; however, have a Yamaha deal-
er check the vehicle as soon as possi-
ble.
4. Have a Yamaha dealer check thevehicle and turn off the “ ”
warning light.
EAU13076
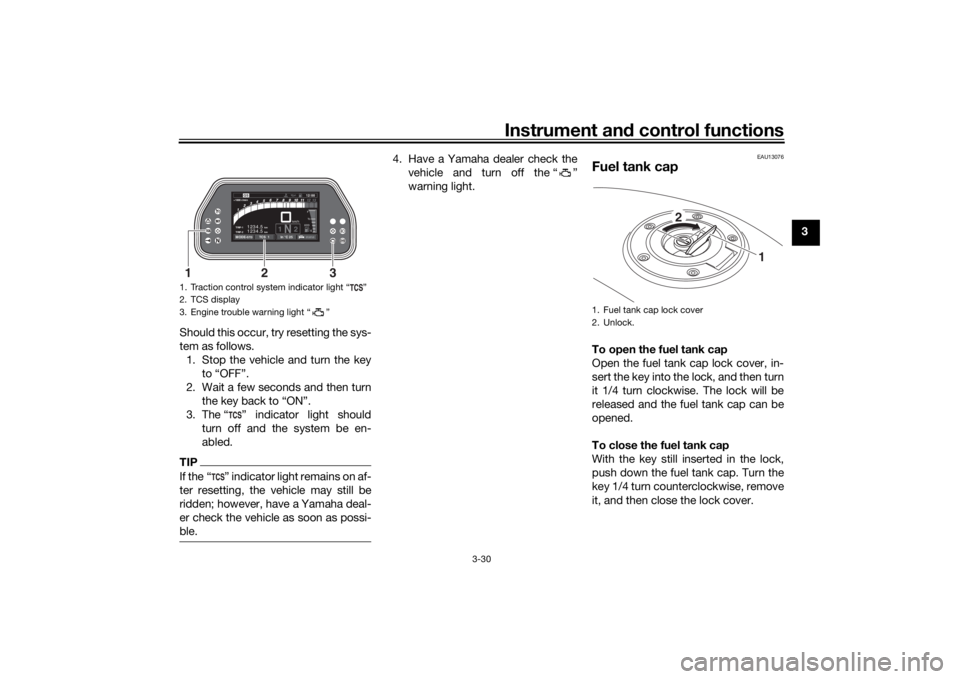
Fuel tank capTo open the fuel tank cap
Open the fuel tank cap lock cover, in-
sert the key into the lock, and then turn
it 1/4 turn clockwise. The lock will be
released and the fuel tank cap can be
opened.
To close the fuel tank cap
With the key still inserted in the lock,
push down the fuel tank cap. Turn the
key 1/4 turn counterclockwise, remove
it, and then close the lock cover.
1. Traction control system indicator light “ ”
2. TCS display
3. Engine trouble warning light “ ”
km
TRIP-2 TRIP-1
1234.5 1234.5
km
1N2km/h
1000 r/minQS
12:
00 EECOF2/1
MODE-STD
TCS 1
In °C 25
3
1
2
1. Fuel tank cap lock cover
2. Unlock.
1
2
UB1JE0E0.book Page 30 Tuesday, February 13, 2018 9:12 AM
Page 46 of 120
Instrument and control functions
3-31
3
TIPThe fuel tank cap cannot be closed un-
less the key is in the lock. In addition,
the key cannot be removed if the cap is
not properly closed and locked.
WARNING
EWA11092
Make sure that the fuel tank cap is
properly close d after fillin g fuel.
Leakin g fuel is a fire hazar d.
EAU13222
FuelMake sure there is sufficient gasoline in
the tank.
WARNING
EWA10882
Gasoline an d g asoline vapors are
extremely flamma ble. To avoi d fires
an d explosions an d to re duce the
risk of injury when refuelin g, follow
these instructions.1. Before refueling, turn off the en- gine and be sure that no one is sit-
ting on the vehicle. Never refuel
while smoking, or while in the vi-
cinity of sparks, open flames, or
other sources of ignition such as
the pilot lights of water heaters
and clothes dryers.
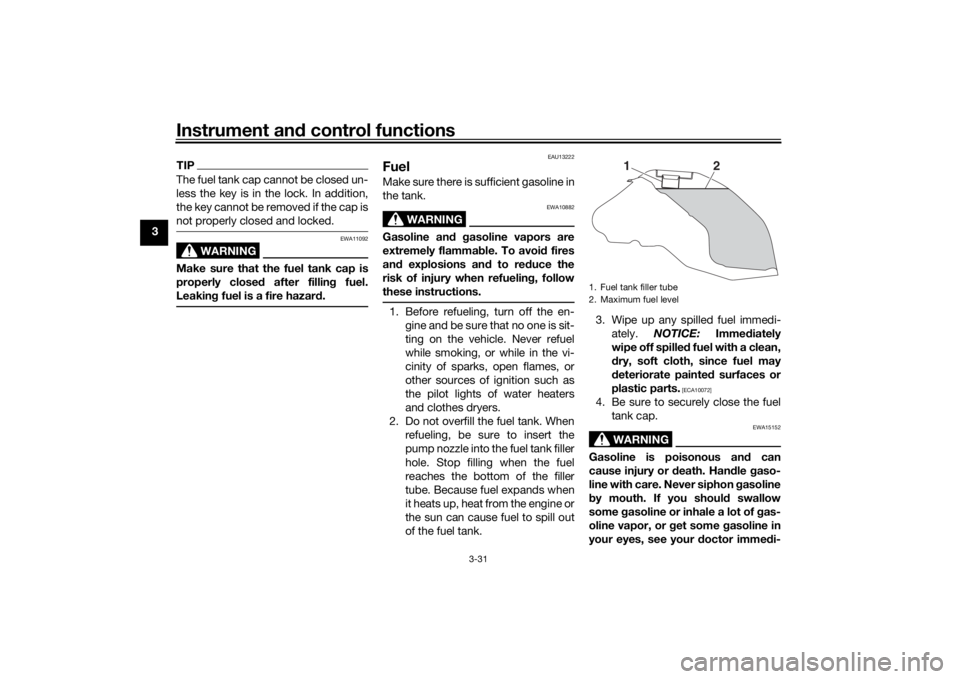
2. Do not overfill the fuel tank. When refueling, be sure to insert the
pump nozzle into the fuel tank filler
hole. Stop filling when the fuel
reaches the bottom of the filler
tube. Because fuel expands when
it heats up, heat from the engine or
the sun can cause fuel to spill out
of the fuel tank. 3. Wipe up any spilled fuel immedi-
ately. NOTICE: Immediately
wipe off spille d fuel with a clean,
d ry, soft cloth, since fuel may
d eteriorate painted surfaces or
plastic parts.
[ECA10072]
4. Be sure to securely close the fuel tank cap.
WARNING
EWA15152
Gasoline is poisonous an d can
cause injury or death. Han dle gaso-
line with care. Never siphon gasoline
b y mouth. If you shoul d swallow
some gasoline or inhale a lot of g as-
oline vapor, or g et some gasoline in
your eyes, see your doctor imme di-1. Fuel tank filler tube
2. Maximum fuel level
1
2
UB1JE0E0.book Page 31 Tuesday, February 13, 2018 9:12 AM
Page 47 of 120
Instrument and control functions
3-32
3
ately. If g
asoline spills on your skin,
wash with soap an d water. If gaso-
line spills on your clothin g, chan ge
your clothes.
EAU75300
NOTICE
ECA11401
Use only unlea ded g asoline. The use
of lead ed g asoline will cause severe
d amag e to internal en gine parts,
such as the valves an d piston rin gs,
as well as to the exhaust system.
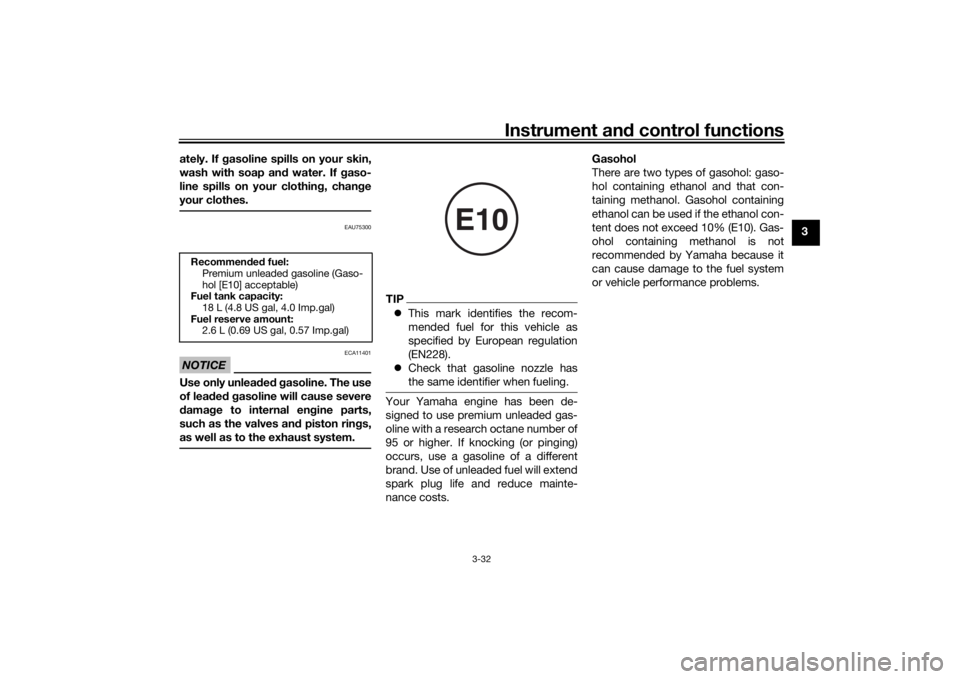
TIP This mark identifies the recom-
mended fuel for this vehicle as
specified by European regulation
(EN228).
Check that gasoline nozzle has
the same identifier when fueling.Your Yamaha engine has been de-
signed to use premium unleaded gas-
oline with a research octane number of
95 or higher. If knocking (or pinging)
occurs, use a gasoline of a different
brand. Use of unleaded fuel will extend
spark plug life and reduce mainte-
nance costs. Gasohol
There are two types of gasohol: gaso-
hol containing ethanol and that con-
taining methanol. Gasohol containing
ethanol can be used if the ethanol con-
tent does not exceed 10% (E10). Gas-
ohol containing methanol is not
recommended by Yamaha because it
can cause damage to the fuel system
or vehicle performance problems.
Recommen
ded fuel:
Premium unleaded gasoline (Gaso-
hol [E10] acceptable)
Fuel tank capacity:
18 L (4.8 US gal, 4.0 Imp.gal)
Fuel reserve amount: 2.6 L (0.69 US gal, 0.57 Imp.gal)
E10
UB1JE0E0.book Page 32 Tuesday, February 13, 2018 9:12 AM
Page 48 of 120
Instrument and control functions
3-33
3
EAU72972
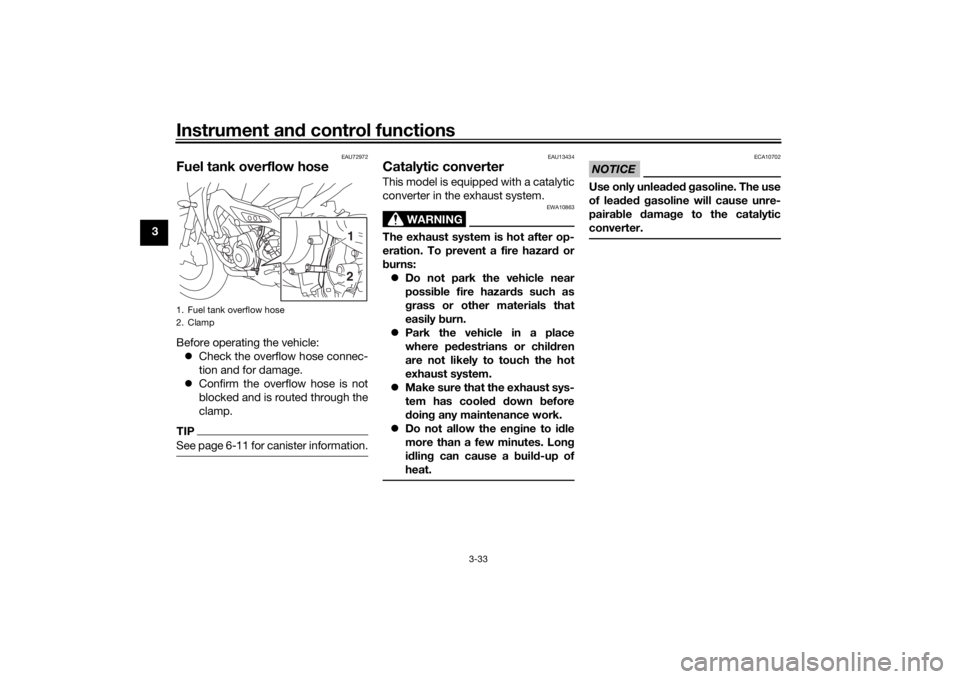
Fuel tank overflow hoseBefore operating the vehicle:
Check the overflow hose connec-
tion and for damage.
Confirm the overflow hose is not
blocked and is routed through the
clamp.TIPSee page 6-11 for canister information.
EAU13434
Catalytic converterThis model is equipped with a catalytic
converter in the exhaust system.
WARNING
EWA10863
The exhaust system is hot after op-
eration. To prevent a fire hazar d or
b urns:
Do not park the vehicle near
possi ble fire hazard s such as
g rass or other materials that
easily burn.
Park the vehicle in a place
where ped estrians or chil dren
are not likely to touch the hot
exhaust system.
Make sure that the exhaust sys-
tem has coole d down before
d oin g any maintenance work.
Do not allow the en gine to i dle
more than a few minutes. Lon g
i d lin g can cause a b uild-up of
heat.
NOTICE
ECA10702
Use only unlea ded g asoline. The use
of lead ed g asoline will cause unre-
pairab le damag e to the catalytic
converter.
1. Fuel tank overflow hose
2. Clamp
21
UB1JE0E0.book Page 33 Tuesday, February 13, 2018 9:12 AM
Page 62 of 120
For your safety – pre-operation checks
4-1
4
EAU15599
Inspect your vehicle each time you use it to make sure the vehicle is in safe operating condition. Always follow the inspection
and maintenance procedures and schedules described in the Owner’s Manual.
WARNING
EWA11152
Failure to inspect or maintain the vehicle properly increases the possibility of an acci dent or equipment damag e.
Do not operate the vehicle if you fin d any pro blem. If a pro blem cannot be corrected b y the proce dures provi ded in
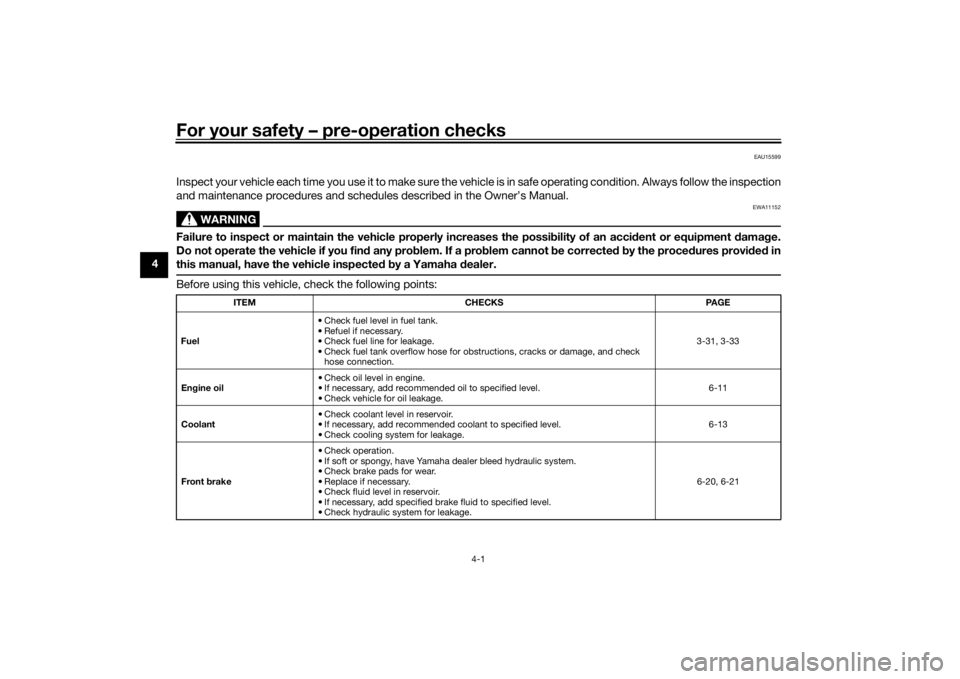
this manual, have the vehicle inspecte d b y a Yamaha dealer.Before using this vehicle, check the following points:
ITEM CHECKS PAGE
Fuel • Check fuel level in fuel tank.
• Refuel if necessary.
• Check fuel line for leakage.
• Check fuel tank overflow hose for obstructions, cracks or damage, and check
hose connection. 3-31, 3-33
En gine oil • Check oil level in engine.
• If necessary, add recommended oil to specified level.
• Check vehicle for oil leakage. 6-11
Coolant • Check coolant level in reservoir.
• If necessary, add recommended coolant to specified level.
• Check cooling system for leakage. 6-13
Front brake • Check operation.
• If soft or spongy, have Yamaha dealer bleed hydraulic system.
• Check brake pads for wear.
• Replace if necessary.
• Check fluid level in reservoir.
• If necessary, add specified brake fluid to specified level.
• Check hydraulic system for leakage. 6-20, 6-21
UB1JE0E0.book Page 1 Tuesday, February 13, 2018 9:12 AM