belt YAMAHA TRICITY 2015 Owners Manual
[x] Cancel search | Manufacturer: YAMAHA, Model Year: 2015, Model line: TRICITY, Model: YAMAHA TRICITY 2015Pages: 86, PDF Size: 2.6 MB
Page 6 of 86

TABLE OF CONTENTSSAFETY INFORMATION.................. 1-1
Further safe-riding points ............... 1-5
DESCRIPTION .................................. 2-1
Left view ......................................... 2-1
Right view ....................................... 2-2
Controls and instruments ............... 2-3
INSTRUMENT AND CONTROL
FUNCTIONS ...................................... 3-1
Main switch/steering lock............... 3-1
Keyhole shutter .............................. 3-2
Indicator lights and warning lights............................................ 3-2
Self-diagnosis device .................... 3-4
Multi-function meter unit ................ 3-4
Handlebar switches ........................ 3-8
Front brake lever ............................ 3-9
Rear brake lever ............................. 3-9
ABS .............................................. 3-10
Fuel tank cap ................................ 3-11
Fuel ............................................... 3-12
Catalytic converter ....................... 3-13
Seat .............................................. 3-14
Passenger footrest ....................... 3-14
Storage compartment .................. 3-15
Luggage hook............................... 3-16
Sidestand ..................................... 3-16
Ignition circuit cut-off system ....... 3-17
Auxiliary DC connector ................. 3-19 FOR YOUR SAFETY –
PRE-OPERATION CHECKS
............. 4-1
OPERATION AND IMPORTANT
RIDING POINTS ................................ 5-1
Starting the engine .......................... 5-1
Starting off ...................................... 5-2
Acceleration and deceleration ........ 5-2
Braking ............................................ 5-3
Tips for reducing fuel consumption ................................ 5-3
Engine break-in ............................... 5-3
Parking ............................................ 5-4
PERIODIC MAINTENANCE AND
ADJUSTMENT ................................... 6-1
Owner’s tool kit ............................... 6-2
Periodic maintenance chart for
the emission control system ........ 6-3
General maintenance and
lubrication chart ........................... 6-4
Removing and installing the panel ............................................ 6-8
Checking the spark plug ................. 6-8
Engine oil and oil strainer .............. 6-10
Final transmission oil..................... 6-12
Coolant.......................................... 6-13
Air filter and V-belt case air filter elements .................................... 6-14
Checking the throttle grip free play ..................................... 6-16 Valve clearance............................. 6-16
Tires .............................................. 6-17
Cast wheels .................................. 6-18
Checking the front brake lever
free play..................................... 6-19
Checking the rear brake lever free play..................................... 6-19
Checking the front and rear
brake pads ................................ 6-20
Checking the brake fluid level ...... 6-20
Changing the brake fluid .............. 6-22
Checking and lubricating the cables ........................................ 6-22
Checking and lubricating the
throttle grip and cable ............... 6-22
Lubricating the front and rear brake levers ............................... 6-23
Checking and lubricating the centerstand and sidestand........ 6-23
Checking the front fork ................. 6-24
Checking the steering................... 6-25
Checking the wheel bearings ....... 6-25
Checking the steering tie rod ....... 6-25
Checking the leaning system ....... 6-26
Battery .......................................... 6-26
Replacing the fuses ...................... 6-27
Replacing the headlight bulb ........ 6-29
Auxiliary light ................................ 6-30
Tail/brake light .............................. 6-30
Turn signal light bulb .................... 6-30
Troubleshooting............................ 6-31U2CME1E0.book Page 1 Tuesday, December 9, 2014 4:12 PM
Page 14 of 86
DESCRIPTION
2-1
2
EAU10411
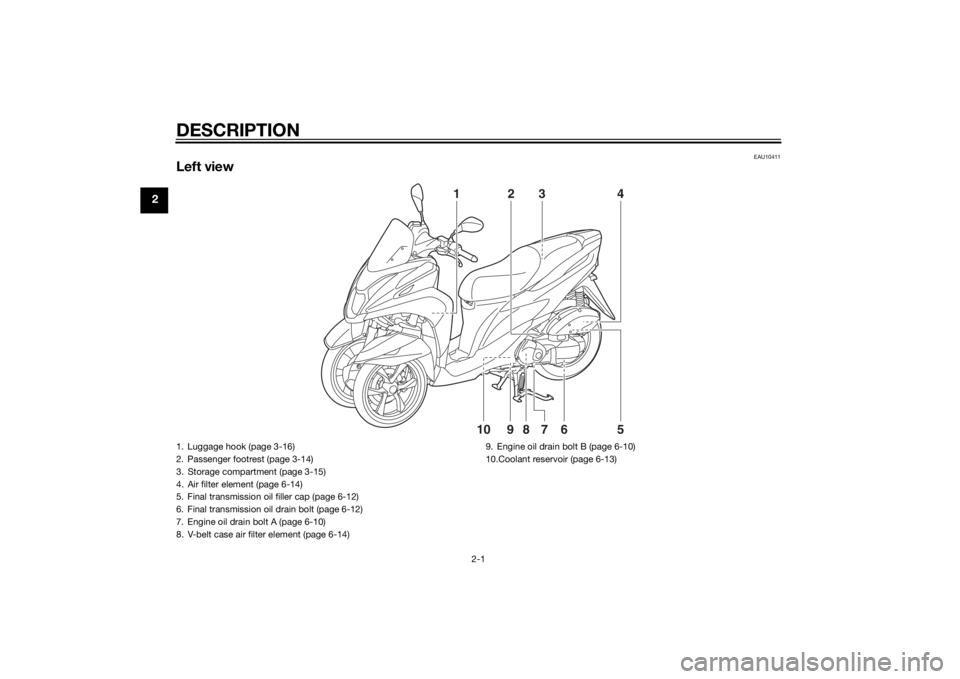
Left view
1
23 45
678910
1. Luggage hook (page 3-16)
2. Passenger footrest (page 3-14)
3. Storage compartment (page 3-15)
4. Air filter element (page 6-14)
5. Final transmission oil filler cap (page 6-12)
6. Final transmission oil drain bolt (page 6-12)
7. Engine oil drain bolt A (page 6-10)
8. V-belt case air filter element (page 6-14) 9. Engine oil drain bolt B (page 6-10)
10.Coolant reservoir (page 6-13)U2CME1E0.book Page 1 Tuesday, December 9, 2014 4:12 PM
Page 20 of 86
INSTRUMENT AND CONTROL FUNCTIONS
3-4
3b
le wheel lock during emer gency
b rakin g. Have a Yamaha d ealer
check the brake system an d electri-
cal circuits as soon as possi ble.
TIPThe ABS warning light may come on
while accelerating the engine with the
vehicle on its centerstand, but this
does not indicate a malfunction.
EAU12096
Self- dia gnosis device This model is equipped with a self-di-
agnosis device for various electrical
circuits.
If a problem is detected in any of those
circuits, the engine trouble warning
light will come on or flash. If this oc-
curs, have a Yamaha dealer check the
vehicle.NOTICE
ECA11171
To prevent en gine damag e, be sure
to consult a Yamaha d ealer as soon
as possi ble if this occurs.
EAUU1730
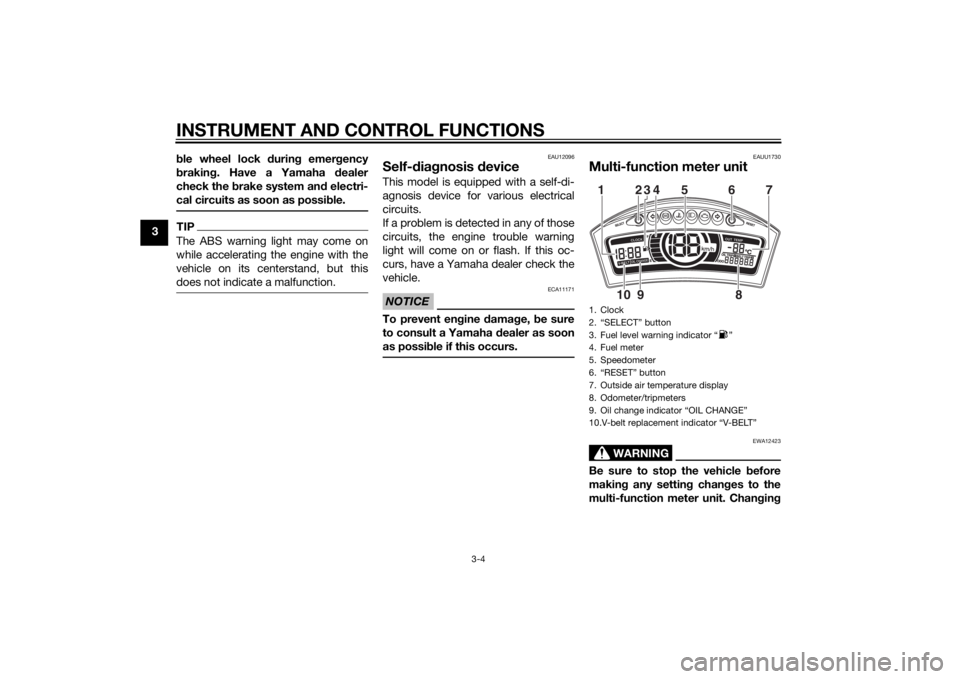
Multi-function meter unit
WARNING
EWA12423
Be sure to stop the vehicle before
makin g any settin g chan ges to the
multi-function meter unit. Chan gin g1. Clock
2. “SELECT” button
3. Fuel level warning indicator “ ”
4. Fuel meter
5. Speedometer
6. “RESET” button
7. Outside air temperature display
8. Odometer/tripmeters
9. Oil change indicator “OIL CHANGE”
10.V-belt replacement indicator “V-BELT”12345 6
8
910 7
U2CME1E0.book Page 4 Tuesday, December 9, 2014 4:12 PM
Page 21 of 86
INSTRUMENT AND CONTROL FUNCTIONS
3-5
3
settin
gs while ri din g can distract the
operator an d increase the risk of an
acci dent.
The multi-function meter unit is
equipped with the following:
a speedometer
a fuel meter
a clock
an outside air temperature display
an odometer
two tripmeters
a fuel reserve tripmeter
an oil change tripmeter
a V-belt replacement tripmeter
an oil change indicator
a V-belt replacement indicatorTIPBe sure to turn the key to “ON” be-
fore using the “SELECT” and “RE-
SET” buttons.
For the UK only: To switch the
speedometer and odometer/trip-
meter displays between kilome-
ters and miles, press the
“SELECT” button for at least one
second.
If the coolant temperature warning
light and engine trouble warning
light remain on during the initial
display mode, have the battery
charged by a Yamaha dealer.
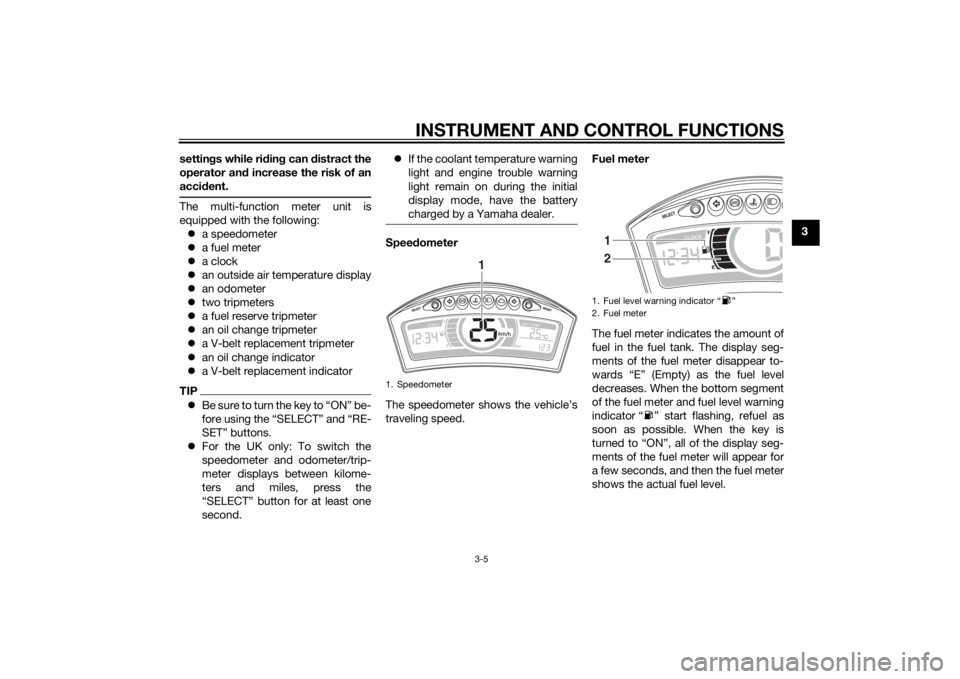
Speed ometer
The speedometer shows the vehicle’s
traveling speed. Fuel meter
The fuel meter indicates the amount of
fuel in the fuel tank. The display seg-
ments of the fuel meter disappear to-
wards “E” (Empty) as the fuel level
decreases. When the bottom segment
of the fuel meter and fuel level warning
indicator “ ” start flashing, refuel as
soon as possible. When the key is
turned to “ON”, all of the display seg-
ments of the fuel meter will appear for
a few seconds, and then the fuel meter
shows the actual fuel level.1. Speedometer
1
1. Fuel level warning indicator “ ”
2. Fuel meter
1
2
U2CME1E0.book Page 5 Tuesday, December 9, 2014 4:12 PM
Page 23 of 86
INSTRUMENT AND CONTROL FUNCTIONS
3-7
3
Push the “SELECT” button to switch
the display between the odometer
mode “ODO”, the tripmeter modes
“TRIP 1” and “TRIP 2”, the oil change
tripmeter mode “OIL TRIP” and the V-
belt replacement tripmeter mode
“BELT TRIP” in the following order:
ODO
→ TRIP 1 → TRIP 2 → OIL TRIP
→ BELT TRIP → ODO
When approximately 1.6 L (0.42 US
gal, 0.35 Imp.gal) of fuel remains in the
fuel tank, the bottom segment of the
fuel meter and fuel level warning indi-
cator will start flashing, and the display
will automatically change to the fuel re-
serve tripmeter mode “F” and start
counting the distance traveled from
that point. In this case, pushing the
“SELECT” button switches the display
between the various tripmeter and
odometer modes in the following or-
der:
F → TRIP 1 → TRIP 2 → OIL TRIP →
BELT TRIP → ODO → F
To reset tripmeters 1, 2, or the fuel re-
serve tripmeter, select it by pushing the
“SELECT” button, and then push the
“RESET” button for at least one sec-
ond. If you do not reset the fuel reserve tripmeter manually, it will reset itself
automatically and the display will re-
turn to the prior mode after refueling
and traveling 5 km (3 mi).
To reset the oil change tripmeter or V-
belt replacement tripmeter, select it by
pushing the “SELECT” button, and
then push the “RESET” button for
three to four seconds.
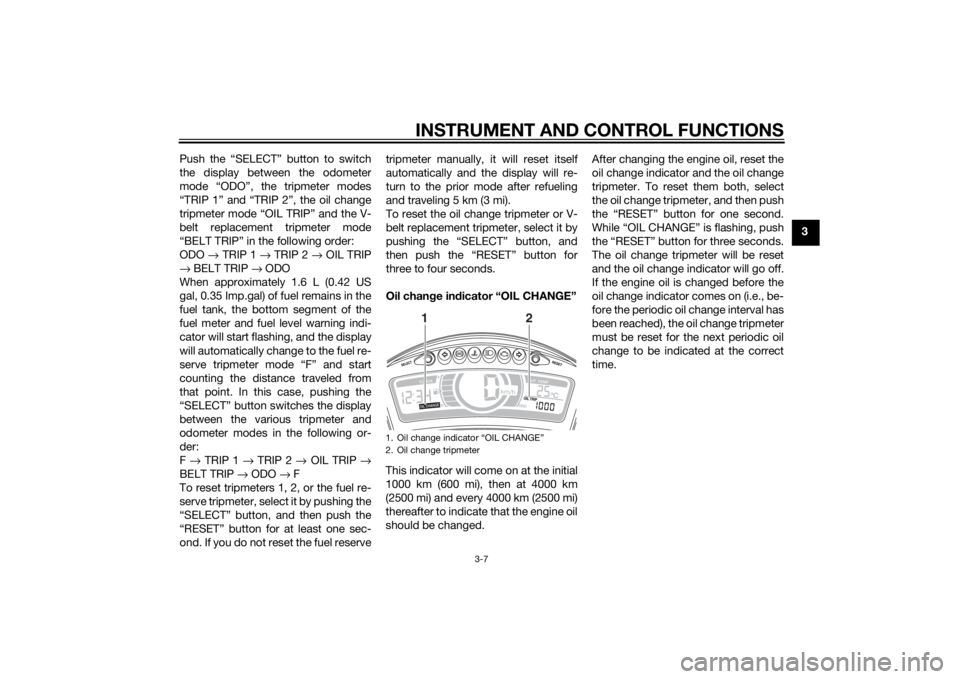
Oil chan
ge in dicator “OIL CHANGE”
This indicator will come on at the initial
1000 km (600 mi), then at 4000 km
(2500 mi) and every 4000 km (2500 mi)
thereafter to indicate that the engine oil
should be changed. After changing the engine oil, reset the
oil change indicator and the oil change
tripmeter. To reset them both, select
the oil change tripmeter, and then push
the “RESET” button for one second.
While “OIL CHANGE” is flashing, push
the “RESET” button for three seconds.
The oil change tripmeter will be reset
and the oil change indicator will go off.
If the engine oil is changed before the
oil change indicator comes on (i.e., be-
fore the periodic oil change interval has
been reached), the oil change tripmeter
must be reset for the next periodic oil
change to be indicated at the correct
time.
1. Oil change indicator “OIL CHANGE”
2. Oil change tripmeter
12
U2CME1E0.book Page 7 Tuesday, December 9, 2014 4:12 PM
Page 24 of 86
INSTRUMENT AND CONTROL FUNCTIONS
3-8
3V-
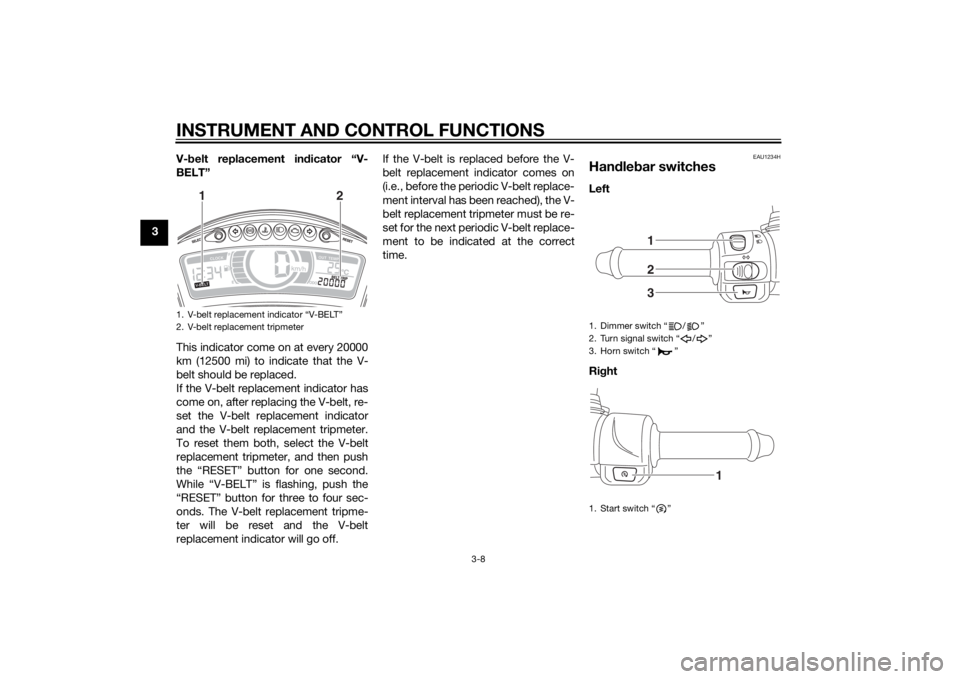
belt replacement in dicator “V-
BELT”
This indicator come on at every 20000
km (12500 mi) to indicate that the V-
belt should be replaced.
If the V-belt replacement indicator has
come on, after replacing the V-belt, re-
set the V-belt replacement indicator
and the V-belt replacement tripmeter.
To reset them both, select the V-belt
replacement tripmeter, and then push
the “RESET” button for one second.
While “V-BELT” is flashing, push the
“RESET” button for three to four sec-
onds. The V-belt replacement tripme-
ter will be reset and the V-belt
replacement indicator will go off. If the V-belt is replaced before the V-
belt replacement indicator comes on
(i.e., before the periodic V-belt replace-
ment interval has been reached), the V-
belt replacement tripmeter must be re-
set for the next periodic V-belt replace-
ment to be indicated at the correct
time.
EAU1234H
Han
dle bar switchesLeft
Ri ght
1. V-belt replacement indicator “V-BELT”
2. V-belt replacement tripmeter
12
1. Dimmer switch “ / ”
2. Turn signal switch “ / ”
3. Horn switch “ ”
1. Start switch “ ”
123
1
U2CME1E0.book Page 8 Tuesday, December 9, 2014 4:12 PM
Page 45 of 86

PERIODIC MAINTENANCE AND ADJUSTMENT
6-4
6
EAU62100
General maintenance and lu brication chartNO. ITEM CHECK OR MAINTENANCE JOB ODOMETER READING
ANNUAL
CHECK
1000 km
(600 mi) 4000 km
(2400 mi) 8000 km
(4800 mi) 12000 km
(7200 mi) 16000 km
(9600 mi)
1 Air filter element • Replace. Every 20000 km (12500 mi)
2 Air filter check hose • Clean. √√√√√
3 *V-
belt case air filter
element • Clean.
• Replace if necessary.
√√√√
4 *Front brake • Check operation, fluid level and
vehicle for fluid leakage. √√√√√√
• Replace brake pads. Whenever worn to the limit
5 *Rear brake • Check operation, fluid level and
vehicle for fluid leakage.
• Check brake lever free play, and adjust if necessary. √√√√√√
• Replace brake pads. Whenever worn to the limit
6 *Brake hoses • Check for cracks or damage.
• Check for correct routing and
clamping. √√√√√
• Replace. Every 4 years
7 *Brake fluid • Replace. Every 2 years
8 *Wheels • Check runout and for damage.
√√√√
• Balance the front wheels. Whenever the tires or wheels have been changed or replaced
9 *Tires • Check tread depth and for dam-
age.
• Replace if necessary.
• Check air pressure.
• Correct if necessary. √√√√√
U2CME1E0.book Page 4 Tuesday, December 9, 2014 4:12 PM
Page 47 of 86

PERIODIC MAINTENANCE AND ADJUSTMENT
6-6
6
20*Shock a
bsor ber as-
sem blies • Check operation and shock ab-
sorbers for oil leakage. √√√√
21 En gine oil • Change.
• Check oil level and vehicle for oil
leakage. √√√√√
22 En gine oil strainer • Clean. √√√√√
23 *Coolin g system • Check coolant level and vehicle
for coolant leakage. √√√√
• Change coolant. Every 3 years
24 Final transmission
oil • Check vehicle for oil leakage.
√√√√√
• Change. √Every 12000 km (7200 mi)
25 *V-belt • Replace. Every 20000 km (12000 mi)
26 *Front an
d rear
b rake switches • Check operation.
√√√√√√
27 Movin
g parts an d
ca bles • Lubricate.
√√√√√
28 *Throttle g rip • Check operation.
• Check throttle grip free play, and
adjust if necessary.
• Lubricate cable and grip housing. √√√√√
29 *Li
ghts, si gnals an d
switches • Check operation.
• Adjust headlight beam.
√√√√√√
NO. ITEM CHECK OR MAINTENANCE JOB
ODOMETER READING
ANNUAL
CHECK
1000 km
(600 mi) 4000 km
(2400 mi) 8000 km
(4800 mi) 12000 km
(7200 mi) 1600
0 km
(9600 mi)
U2CME1E0.book Page 6 Tuesday, December 9, 2014 4:12 PM
Page 48 of 86
PERIODIC MAINTENANCE AND ADJUSTMENT
6-7
6
EAU38263
TIPEngine air filter and V-belt air filters
• This model’s engine air filter is equipped with a disposable oil-coated paper element, which must not be cleaned with compressed air to avoid damaging it.
• The engine air filter element needs to be replaced and the V-belt air filter elements need to be serviced more fre- quently when riding in unusually wet or dusty areas.
Hydraulic brake service
• After disassembling the brake master cylinders and calipers, always change the fluid. Regularly check the brake fluid levels and fill the reservoirs as required.
• Every two years replace the internal components of the brake master cylinders and calipers, and change the brake fluid.
• Replace the brake hoses every four years and if cracked or damaged.
U2CME1E0.book Page 7 Tuesday, December 9, 2014 4:12 PM
Page 55 of 86
PERIODIC MAINTENANCE AND ADJUSTMENT
6-14
6
EAU60992
Air filter and V- belt case air fil-
ter elementsThe air filter element should be re-
placed and the V-belt case air filter el-
ement should be cleaned at the
intervals specified in the periodic main-
tenance and lubrication chart. Service
the air filter elements more frequently if
you are riding in unusually wet or dusty
areas. The air filter check hose and V-
belt case air filter check hose must be
frequently checked and cleaned if nec-
essary.
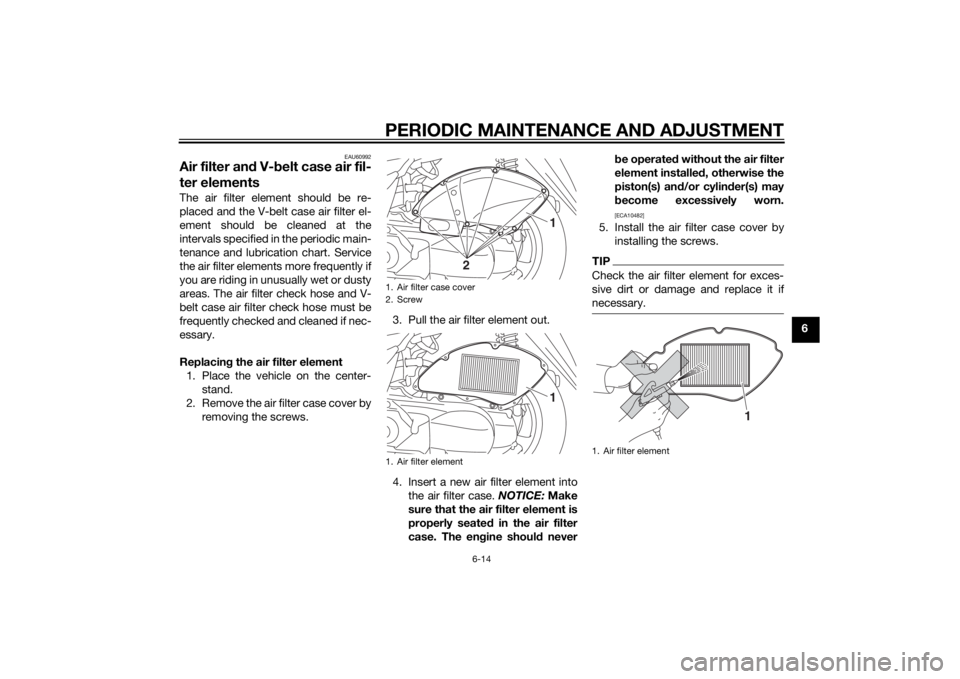
Replacin g the air filter element
1. Place the vehicle on the center- stand.
2. Remove the air filter case cover by removing the screws. 3. Pull the air filter element out.
4. Insert a new air filter element into
the air filter case. NOTICE: Make
sure that the air filter element is
properly seated in the air filter
case. The en gine shoul d never b
e operated without the air filter
element installed , otherwise the
piston(s) an d/or cylin der(s) may
b ecome excessively worn.
[ECA10482]
5. Install the air filter case cover by
installing the screws.TIPCheck the air filter element for exces-
sive dirt or damage and replace it if
necessary.
1. Air filter case cover
2. Screw
1. Air filter element
1
21
1. Air filter element
1
U2CME1E0.book Page 14 Tuesday, December 9, 2014 4:12 PM