brake YAMAHA TW125 2000 Owners Manual
[x] Cancel search | Manufacturer: YAMAHA, Model Year: 2000, Model line: TW125, Model: YAMAHA TW125 2000Pages: 86, PDF Size: 3.94 MB
Page 7 of 86
EAU00009
TABLE OF CONTENTS
1
2
3
4
5
6
7
8
9
1
5
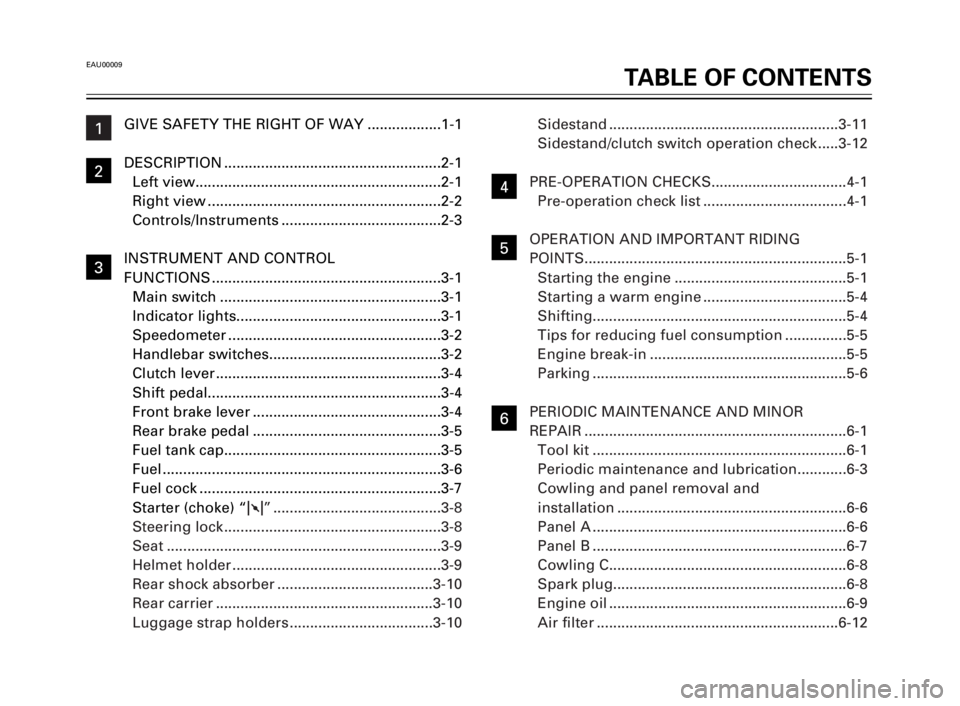
GIVE SAFETY THE RIGHT OF WAY ..................1-1
DESCRIPTION .....................................................2-1
Left view............................................................2-1
Right view .........................................................2-2
Controls/Instruments .......................................2-3
INSTRUMENT AND CONTROL
FUNCTIONS ........................................................3-1
Main switch ......................................................3-1
Indicator lights..................................................3-1
Speedometer ....................................................3-2
Handlebar switches..........................................3-2
Clutch lever .......................................................3-4
Shift pedal.........................................................3-4
Front brake lever ..............................................3-4
Rear brake pedal ..............................................3-5
Fuel tank cap.....................................................3-5
Fuel ....................................................................3-6
Fuel cock ...........................................................3-7
Starter (choke) “1” .........................................3-8
Steering lock .....................................................3-8
Seat ...................................................................3-9
Helmet holder ...................................................3-9
Rear shock absorber ......................................3-10
Rear carrier .....................................................3-10
Luggage strap holders ...................................3-10Sidestand ........................................................3-11
Sidestand/clutch switch operation check .....3-12
PRE-OPERATION CHECKS.................................4-1
Pre-operation check list ...................................4-1
OPERATION AND IMPORTANT RIDING
POINTS................................................................5-1
Starting the engine ..........................................5-1
Starting a warm engine ...................................5-4
Shifting..............................................................5-4
Tips for reducing fuel consumption ...............5-5
Engine break-in ................................................5-5
Parking ..............................................................5-6
PERIODIC MAINTENANCE AND MINOR
REPAIR ................................................................6-1
Tool kit ..............................................................6-1
Periodic maintenance and lubrication............6-3
Cowling and panel removal and
installation ........................................................6-6
Panel A ..............................................................6-6
Panel B ..............................................................6-7
Cowling C..........................................................6-8
Spark plug.........................................................6-8
Engine oil ..........................................................6-9
Air filter ...........................................................6-121
2
3
4
6
5EK-9-E1 (TW125)<3.1> 4/6/0 11:50 PM Page 5
Page 8 of 86
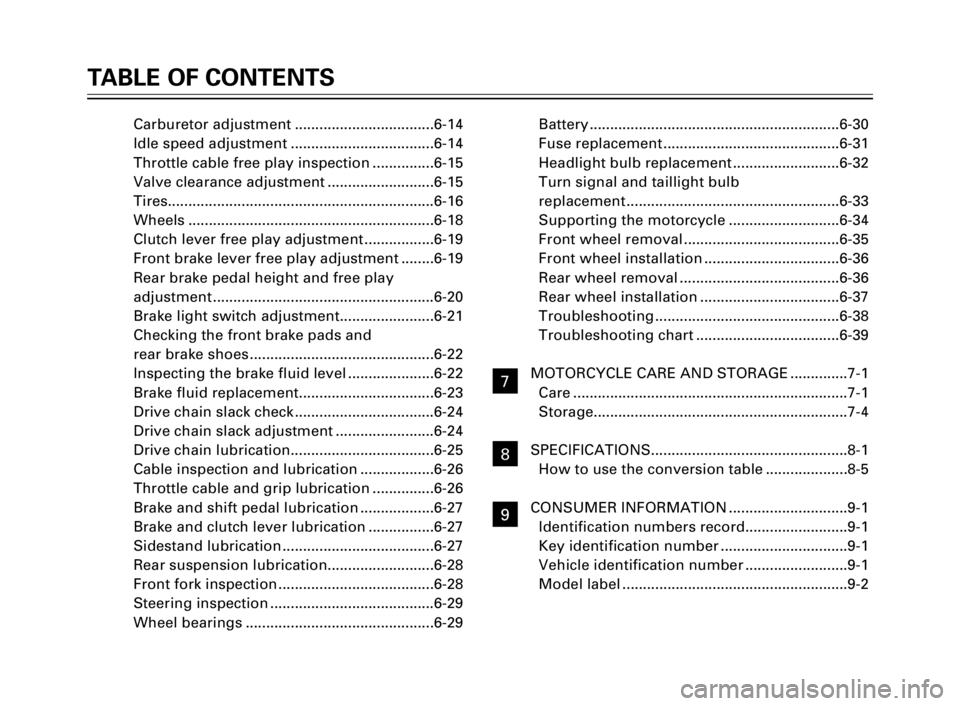
Carburetor adjustment ..................................6-14
Idle speed adjustment ...................................6-14
Throttle cable free play inspection ...............6-15
Valve clearance adjustment ..........................6-15
Tires.................................................................6-16
Wheels ............................................................6-18
Clutch lever free play adjustment .................6-19
Front brake lever free play adjustment ........6-19
Rear brake pedal height and free play
adjustment ......................................................6-20
Brake light switch adjustment.......................6-21
Checking the front brake pads and
rear brake shoes .............................................6-22
Inspecting the brake fluid level .....................6-22
Brake fluid replacement.................................6-23
Drive chain slack check ..................................6-24
Drive chain slack adjustment ........................6-24
Drive chain lubrication...................................6-25
Cable inspection and lubrication ..................6-26
Throttle cable and grip lubrication ...............6-26
Brake and shift pedal lubrication ..................6-27
Brake and clutch lever lubrication ................6-27
Sidestand lubrication .....................................6-27
Rear suspension lubrication..........................6-28
Front fork inspection ......................................6-28
Steering inspection ........................................6-29
Wheel bearings ..............................................6-29Battery .............................................................6-30
Fuse replacement ...........................................6-31
Headlight bulb replacement ..........................6-32
Turn signal and taillight bulb
replacement ....................................................6-33
Supporting the motorcycle ...........................6-34
Front wheel removal ......................................6-35
Front wheel installation .................................6-36
Rear wheel removal .......................................6-36
Rear wheel installation ..................................6-37
Troubleshooting .............................................6-38
Troubleshooting chart ...................................6-39
MOTORCYCLE CARE AND STORAGE ..............7-1
Care ...................................................................7-1
Storage..............................................................7-4
SPECIFICATIONS................................................8-1
How to use the conversion table ....................8-5
CONSUMER INFORMATION .............................9-1
Identification numbers record.........................9-1
Key identification number ...............................9-1
Vehicle identification number .........................9-1
Model label .......................................................9-2
TABLE OF CONTENTS
1
2
3
4
5
6
7
8
9
7
8
9
5EK-9-E1 (TW125)<3.1> 4/6/0 11:50 PM Page 6
Page 11 of 86

2-2
DESCRIPTION
1
2
3
4
5
6
7
8
9
8. Rear carrier (page 3-10)
9. Battery (page 6-30)
10. Fuse (page 6-31)11. Tool kit (page 6-1)
12. Rear brake pedal (page 3-5, 6-20)
13. Engine oil level check window (page 6-9)
89
10
1112 13Right view
5EK-9-E1 (TW125)<3.1> 4/6/0 11:50 PM Page 9
Page 12 of 86
2-3
DESCRIPTION
1
2
3
4
5
6
7
8
9
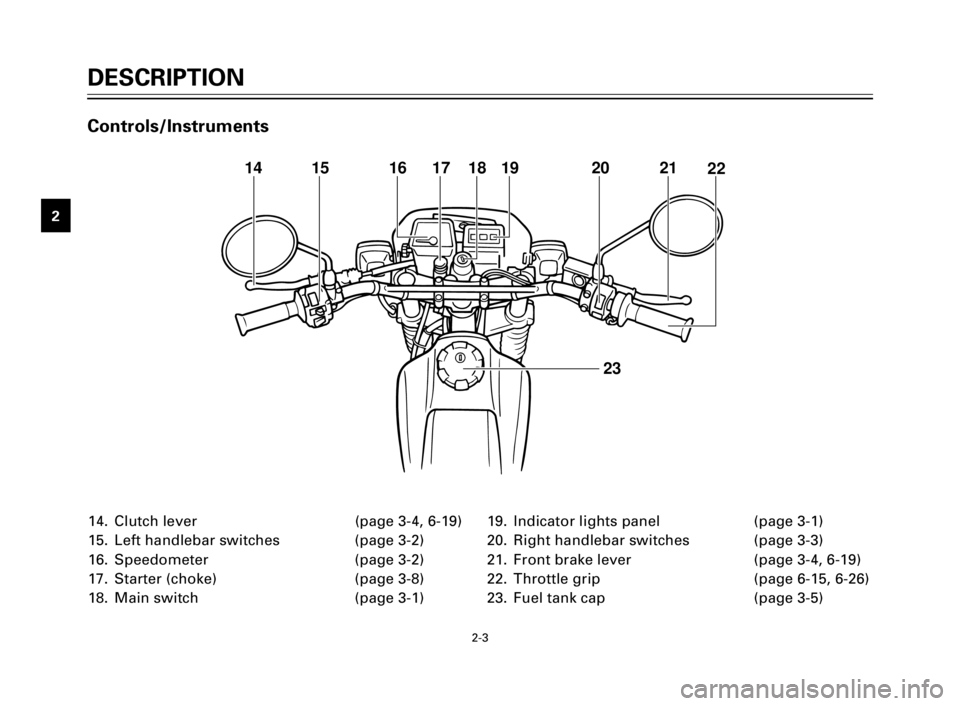
14. Clutch lever (page 3-4, 6-19)
15. Left handlebar switches (page 3-2)
16. Speedometer (page 3-2)
17. Starter (choke) (page 3-8)
18. Main switch (page 3-1)19. Indicator lights panel (page 3-1)
20. Right handlebar switches (page 3-3)
21. Front brake lever (page 3-4, 6-19)
22. Throttle grip (page 6-15, 6-26)
23. Fuel tank cap (page 3-5)
14 15 16 17 18 19 20 21
22
23
Controls/Instruments
5EK-9-E1 (TW125)<3.1> 4/6/0 11:50 PM Page 10
Page 16 of 86

3-4
INSTRUMENT AND CONTROL FUNCTIONS
1
2
3
4
5
6
7
8
9
EAU00157Shift pedal
This motorcycle is equipped with a
constant-mesh 5-speed transmis-
sion.
The shift pedal is located on the
left side of the engine and is used
in combination with the clutch
when shifting.
1. Shift pedal
N. Neutral
EAU00152Clutch lever
The clutch lever is located on the
left handlebar, and the ignition cir-
cuit cut-off system is incorporated
in the clutch lever holder. Pull the
clutch lever to the handlebar to dis-
engage the clutch, and release the
lever to engage the clutch. The
lever should be pulled rapidly and
released slowly for smooth clutch
operation. (Refer to the engine
starting procedures for a descrip-
tion of the ignition circuit cut-off
system.)
1. Clutch lever
EAU00158Front brake lever
The front brake lever is located on
the right handlebar. Pull it toward
the handlebar to apply the front
brake.
1. Front brake lever
11
1
N5
4
3
2
1
5EK-9-E1 (TW125)<3.1> 4/6/0 11:50 PM Page 14
Page 17 of 86

3-5
INSTRUMENT AND CONTROL FUNCTIONS
1
2
3
4
5
6
7
8
9
EAU00162Rear brake pedal
The rear brake pedal is on the right
side of the motorcycle. Press down
on the brake pedal to apply the
rear brake.
1. Rear brake pedal
EAU01498Fuel tank cap
To open
Insert the key and turn it 1/4 turn
counterclockwise. Open the cap by
turning it counterclockwise.
To close
Turn the cap clockwise with the
key inserted. To remove the key,
turn it clockwise to the original
position.
1. Fuel tank cap
NOTE:
This tank cap cannot be closed
unless the key is in the lock. The
key cannot be removed if the cap is
not locked properly.
EW000023
w
Be sure the cap is properly
installed and locked in place
before riding the motorcycle.
11
5EK-9-E1 (TW125)<3.1> 4/6/0 11:50 PM Page 15
Page 25 of 86

4-1
EAU01114
PRE-OPERATION CHECKS
1
2
3
4
5
6
7
8
9 Owners are personally responsible for their vehicle’s condition. Your motorcycle’s vital functions can start to
deteriorate quickly and unexpectedly, even if it remains unused (for instance, if it is exposed to the elements).
Any damage, fluid leak or loss of tire pressure could have serious consequences. Therefore, it is very important
that, in addition to a thorough visual inspection, you check the following points before each ride.
EAU00340PRE-OPERATION CHECK LIST
ITEM CHECKS PAGE
Front
brake9Check operation, free play, fluid level and vehicle for fluid leakage.
3-4, 6-19 ~ 6-20, 6-22 ~ 6-23
9Fill with DOT 4 (or DOT 3) brake fluid if necessary.
Rear brake9Check operation, condition and free play.
3-5, 6-20 ~ 6-22
9Adjust if necessary.
Clutch9Check operation, condition and free play.
3-4, 6-19
9Adjust if necessary.
Throttle grip and housing9Check for smooth operation.
6-15, 6-26
9Lubricate if necessary.
Engine oil9Check oil level.
6-9 ~ 6-12
9Fill with oil if necessary.
Drive chain9Check chain slack and condition.
6-24 ~ 6-25
9Adjust if necessary.
Wheels and tires9Check tire pressure, wear, damage and spoke tightness.
6-16 ~ 6-18
9Tighten spokes if necessary.
Brake and shift pedal shafts9Check for smooth operation.
6-27
9Lubricate if necessary.
Brake and clutch lever pivots9Check for smooth operation.
6-27
9Lubricate if necessary.
Sidestand pivot9Check for smooth operation.
6-27
9Lubricate if necessary.
Chassis fasteners9Make sure that all nuts, bolts and screws are properly tightened.
—
9Tighten if necessary.
5EK-9-E1 (TW125)<3.1> 4/6/0 11:50 PM Page 23
Page 35 of 86
6-3
PERIODIC MAINTENANCE AND MINOR REPAIR
1
2
3
4
5
6
7
8
9
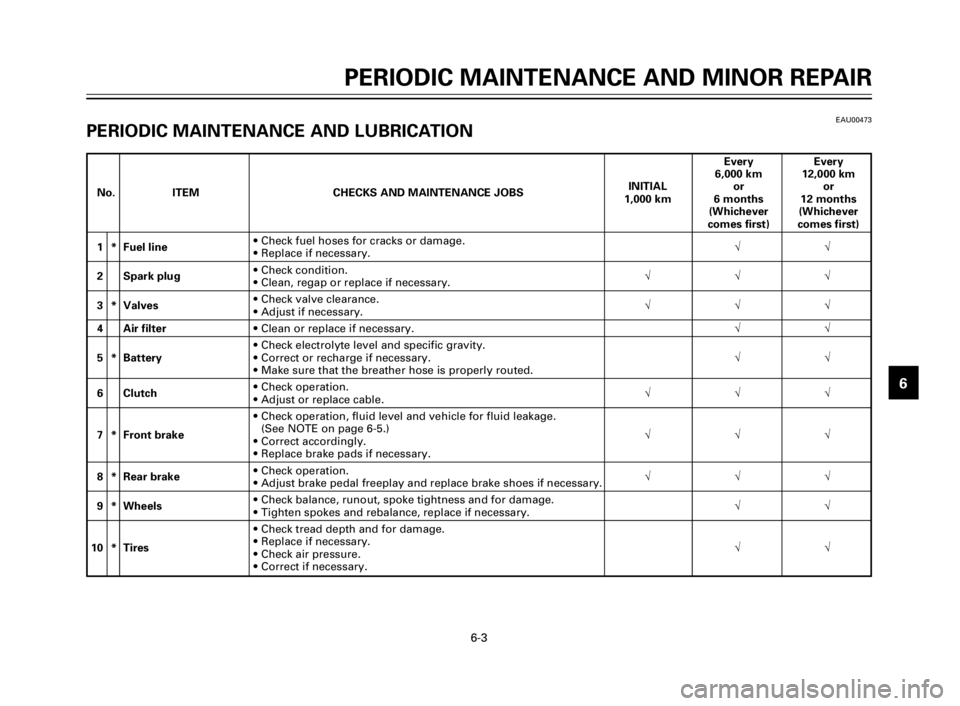
EAU00473PERIODIC MAINTENANCE AND LUBRICATION
Every Every
6,000 km 12,000 km
No. ITEM CHECKS AND MAINTENANCE JOBSINITIAL or or
1,000 km 6 months 12 months
(Whichever (Whichever
comes first) comes first)
1 * Fuel line 9Check fuel hoses for cracks or damage.
ÖÖ
9Replace if necessary.
2 Spark plug9Check condition.
ÖÖÖ
9Clean, regap or replace if necessary.
3 * Valves 9Check valve clearance.
ÖÖÖ
9Adjust if necessary.
4 Air filter9Clean or replace if necessary.ÖÖ
9Check electrolyte level and specific gravity.
5 * Battery9Correct or recharge if necessary.ÖÖ
9Make sure that the breather hose is properly routed.
6 Clutch9Check operation.
ÖÖÖ
9Adjust or replace cable.
9Check operation, fluid level and vehicle for fluid leakage.
7 * Front brake (See NOTE on page 6-5.)
ÖÖÖ
9Correct accordingly.
9Replace brake pads if necessary.
8 * Rear brake 9Check operation.
ÖÖÖ
9Adjust brake pedal freeplay and replace brake shoes if necessary.
9 * Wheels 9Check balance, runout, spoke tightness and for damage.
ÖÖ
9Tighten spokes and rebalance, replace if necessary.
9Check tread depth and for damage.
10 * Tires9Replace if necessary.
ÖÖ
9Check air pressure.
9Correct if necessary.
5EK-9-E1 (TW125)<3.1> 4/6/0 11:50 PM Page 33
Page 37 of 86

6-5
PERIODIC MAINTENANCE AND MINOR REPAIR
1
2
3
4
5
6
7
8
9
*: Since these items require special tools, data and technical skills, they should be serviced by a Yamaha dealer.
EAU02970
NOTE:
8The air filter needs more frequent service if you are riding in unusually wet or dusty areas.
8Hydraulic brake system
8When disassembling the master cylinder or caliper, always replace the brake fluid. Check the brake fluid
level regularly and fill as required.
8Replace the oil seals on the inner parts of the master cylinder and caliper every two years.
8Replace the brake hoses every four years or if cracked or damaged.
Every Every
6,000 km 12,000 km
No. ITEM CHECKS AND MAINTENANCE JOBSINITIAL or or
1,000 km 6 months 12 months
(Whichever (Whichever
comes first) comes first)
21 * Carburetor9Check engine idling speed and starter operation.
ÖÖÖ
9Adjust if necessary.
9Check oil level and vehicle for oil leakage.
22 Engine oil9Correct if necessary.ÖÖÖ
9Change. (Warm engine before draining.)
23Engine oil filter element9Clean or replace if necessary.ÖÖ
24 * Engine oil strainer9Clean or replace if necessary.ÖÖ
5EK-9-E1 (TW125)<3.1> 4/6/0 11:50 PM Page 35
Page 50 of 86
6-18
PERIODIC MAINTENANCE AND MINOR REPAIR
1
2
3
4
5
6
7
8
9
EAU00681
w
8Operating the motorcycle with
excessively worn tires
decrease riding stability and
can lead to loss of control.
Have excessively worn tires
replaced by a Yamaha dealer
immediately. Brakes, tires, and
related wheel parts replace-
ment should be left to a
Yamaha Service Technician.
8Patching a punctured tube is
not recommended. If it is
absolutely necessary to do so,
use great care and replace the
tube as soon as possible with
a good quality replacement.
EAU00685
Wheels
To ensure maximum performance,
long service, and safe operation,
note the following:
8Always inspect the wheels
before a ride. Check for cracks,
bends or warpage of the
wheel. Be sure the spokes are
tight and undamaged. If any
abnormal condition exists in a
wheel, consult a Yamaha deal-
er. Do not attempt even small
repairs to the wheel. If a wheel
is deformed or cracked, it must
be replaced.
8Tires and wheels should be
balanced whenever either one
is changed or replaced. Failure
to have a wheel balanced can
result in poor performance,
adverse handling characteris-
tics, and shortened tire life.8Ride at moderate speeds after
changing a tire since the tire
surface must first be broken in
for it to develop its optimal
characteristics.
5EK-9-E1 (TW125)<3.1> 4/6/0 11:50 PM Page 48