key battery YAMAHA VERSITY 300 2004 Owners Manual
[x] Cancel search | Manufacturer: YAMAHA, Model Year: 2004, Model line: VERSITY 300, Model: YAMAHA VERSITY 300 2004Pages: 104, PDF Size: 2.82 MB
Page 20 of 104

3
INSTRUMENT AND CONTROL FUNCTIONS
EAUM0098
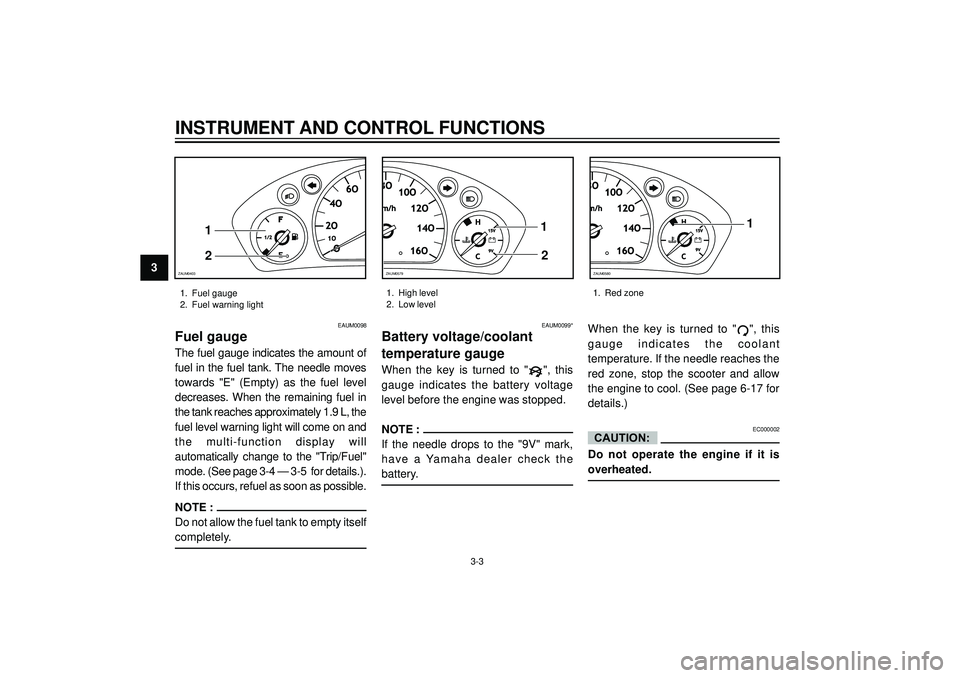
Fuel gauge
The fuel gauge indicates the amount of
fuel in the fuel tank. The needle moves
towards "E" (Empty) as the fuel level
decreases. When the remaining fuel in
the tank reaches approximately 1.9 L, the
fuel level warning light will come on and
the multi-function display will
automatically change to the "Trip/Fuel"
mode. (See page 3-4 — 3-5 for details.).
If this occurs, refuel as soon as possible.
NOTE :
Do not allow the fuel tank to empty itself
completely.
EAUM0099*
Battery voltage/coolant
temperature gauge
When the key is turned to "", this
gauge indicates the battery voltage
level before the engine was stopped.
NOTE :
If the needle drops to the "9V" mark,
have a Yamaha dealer check the
battery.When the key is turned to "
", this
gauge indicates the coolant
temperature. If the needle reaches the
red zone, stop the scooter and allow
the engine to cool. (See page 6-17 for
details.)
EC000002
Do not operate the engine if it is
overheated.
CAUTION:
1. Fuel gauge
2. Fuel warning light1. High level
2. Low level1. Red zone
O1O1O
2O2O
4O4O
6O6O
F
1/21/2
E
1
2
ZAUM0403
3-3
10O10O
12O12O
14O14O
16O16O
H
C15V15V
9V9V
1
2
ZAUM0579
10O
12O
14O
16O
H
C15V 15V
9V 9V1
ZAUM0580
Page 26 of 104

3
INSTRUMENT AND CONTROL FUNCTIONS
CAUTION:
1
ZAUM0084
1
ZAUM0085
EAU03882
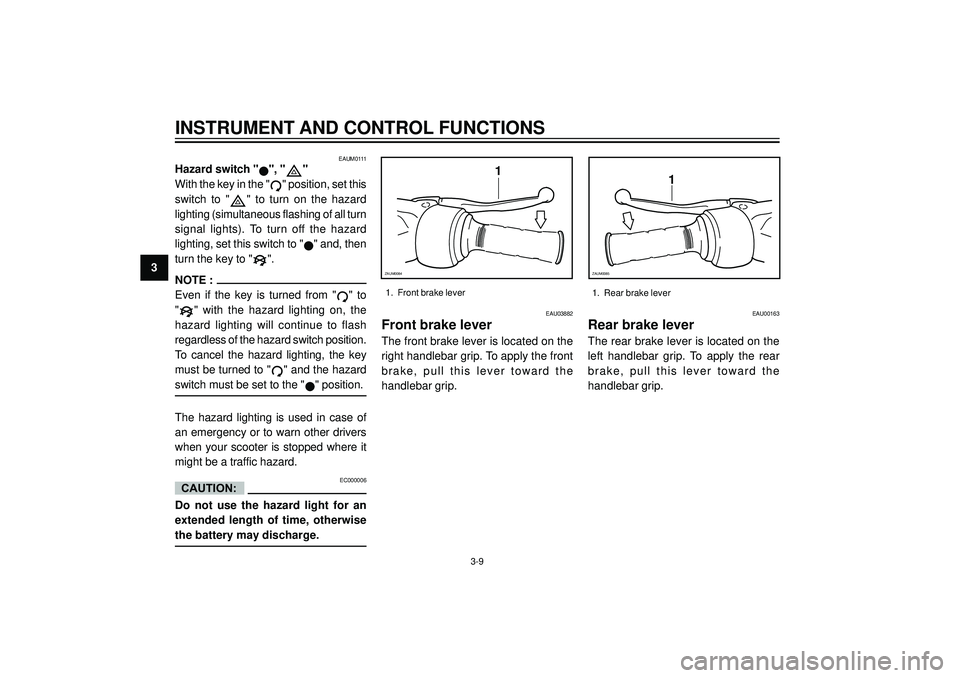
Front brake lever
The front brake lever is located on the
right handlebar grip. To apply the front
brake, pull this lever toward the
handlebar grip.
EAU00163
Rear brake lever
The rear brake lever is located on the
left handlebar grip. To apply the rear
brake, pull this lever toward the
handlebar grip.
1. Front brake lever
1. Rear brake lever
3-9
EC000006
Do not use the hazard light for an
extended length of time, otherwise
the battery may discharge.
EAUM0111
Hazard switch "", ""
With the key in the "
" position, set this
switch to "
" to turn on the hazard
lighting (simultaneous flashing of all turn
signal lights). To turn off the hazard
lighting, set this switch to "
" and, then
turn the key to "
".
NOTE :
Even if the key is turned from "
" to
"
" with the hazard lighting on, the
hazard lighting will continue to flash
regardless of the hazard switch position.
To cancel the hazard lighting, the key
must be turned to "
" and the hazard
switch must be set to the "" position.
The hazard lighting is used in case of
an emergency or to warn other drivers
when your scooter is stopped where it
might be a traffic hazard.
Page 35 of 104

INSTRUMENT AND CONTROL FUNCTIONS
3
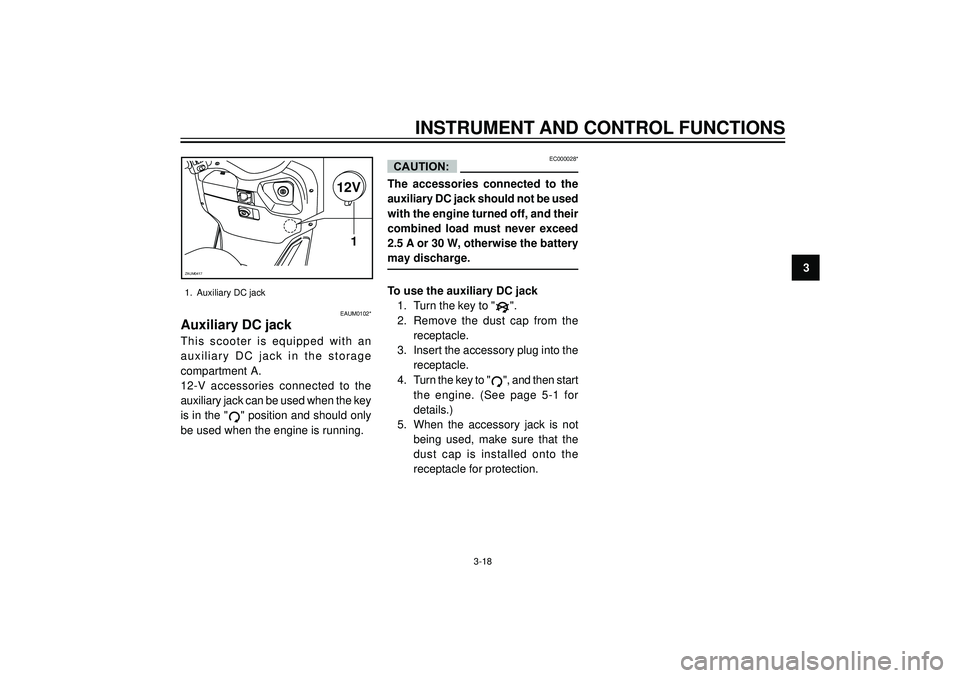
1. Auxiliary DC jack
EAUM0102*
Auxiliary DC jack
This scooter is equipped with an
auxiliary DC jack in the storage
compartment A.
12-V accessories connected to the
auxiliary jack can be used when the key
is in the "
" position and should only
be used when the engine is running.
EC000028*
The accessories connected to the
auxiliary DC jack should not be used
with the engine turned off, and their
combined load must never exceed
2.5 A or 30 W, otherwise the battery
may discharge.
To use the auxiliary DC jack
1. Turn the key to "
".
2. Remove the dust cap from the
receptacle.
3. Insert the accessory plug into the
receptacle.
4. Turn the key to "
", and then start
the engine. (See page 5-1 for
details.)
5. When the accessory jack is not
being used, make sure that the
dust cap is installed onto the
receptacle for protection.
CAUTION:
12V
1
ZAUM0417
3-18
Page 100 of 104

INDEX
A
Acceleration and deceleration ............. 5-3
Air filter and V-belt case air filter
elements, cleaning ....................... 6-18
Anti-theft alarm (optional) ................... 3-7
Auxiliary DC jack ............................... 3-18
Anti-theft device housing ................... 3-14
B
Battery .............................................. 6-29
Battery voltage / coolant
temperature gauge ......................... 3-3
Brake fuid level, checking ................. 6-24
Brake fluid, changing ........................ 6-25
Bake lever, front .................................. 3-9
Brake lever, rear .................................. 3-9
Brake levers, lubricating .................... 6-26
Brake pads, checking ........................ 6-24Braking ................................................ 5-3
C
Cables, checking and lubricating ...... 6-26
Carburator, adjusting ......................... 6-20
Care .................................................... 7-1
Catalytic converter ............................ 3-11
Centerstand and sidestand, checking
and lubricating .............................. 6-27
Conversion table ................................. 8-4
Coolant .............................................. 6-17
Cowlings and panels, removing
and installing .................................. 6-5
E
Engine break-in ................................... 5-4
Engine oil .......................................... 6-13
F
Final transmission oil ........................ 6-16
Front and rear brake lever free play,
adjusting ....................................... 6-23
Front fork, checking ........................... 6-27
Fuel ................................................... 3-10
Fuel consumption, tips for reducing .... 5-4
Fuel gauge .......................................... 3-3
Fuel tank cap .................................... 3-10Fuses, replacing ................................ 6-30
H
Handlebar switches ............................. 3-8
Dimmer switch ............................... 3-8
Engine stop switch ......................... 3-8
Horn switch .................................... 3-8
Hazard switch ................................ 3-9
Pass switch .................................... 3-8
Start switch .................................... 3-8
Turn signal switch ........................... 3-8
Headlight bulb, replacing ................... 6-32
I
Identification number ........................... 9-1
Ignition circuit cut-off system ............. 3-16
Indicator lights ..................................... 3-2
High beam indicator light ............... 3-2
Low beam indicator light ................ 3-2
Turn signal indicator lights .............. 3-2
K
Key identification number .................... 9-1
L
License plate liht bulb, replacing ....... 6-35