wheel YAMAHA VMAX 2001 Owners Manual
[x] Cancel search | Manufacturer: YAMAHA, Model Year: 2001, Model line: VMAX, Model: YAMAHA VMAX 2001Pages: 110, PDF Size: 11.88 MB
Page 26 of 110
INSTRUMENT AND CONTROL FUNCTIONS
3-11
3
EAU03414
Adjusting the front fork This front fork is equipped with air
valves for adjusting the spring rate.
EW000035
WARNING
@ Always adjust both fork legs equal-
ly, otherwise poor handling and loss
of stability may result. @
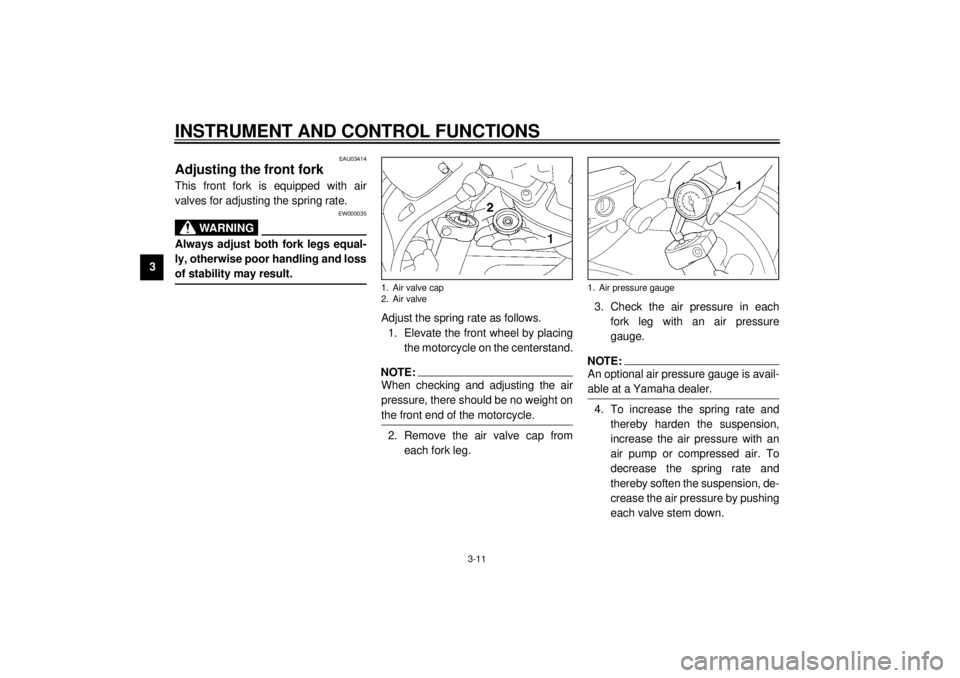
Adjust the spring rate as follows.
1. Elevate the front wheel by placing
the motorcycle on the centerstand.NOTE:@ When checking and adjusting the air
pressure, there should be no weight on
the front end of the motorcycle. @2. Remove the air valve cap from
each fork leg.3. Check the air pressure in each
fork leg with an air pressure
gauge.
NOTE:@ An optional air pressure gauge is avail-
able at a Yamaha dealer. @4. To increase the spring rate and
thereby harden the suspension,
increase the air pressure with an
air pump or compressed air. To
decrease the spring rate and
thereby soften the suspension, de-
crease the air pressure by pushing
each valve stem down.
1. Air valve cap
2. Air valve
1. Air pressure gauge
E_3lr.book Page 11 Wednesday, November 22, 2000 4:10 PM
Page 34 of 110

4-1
4
EAU01114
4-PRE-OPERATION CHECKSThe condition of a vehicle is the owner’s responsibility. Vital components can start to deteriorate quickly and unexpectedly,
even if the vehicle remains unused (for example, as a result of exposure to the elements). Any damage, fluid leakage or loss
of tire air pressure could have serious consequences. Therefore, it is very important, in addition to a thorough visual inspec-
tion, to check the following points before each ride.
EAU03328
Pre-operation check list
ITEM CHECKS PAGE
Front brake
• Check operation, free play, fluid level, and for fluid leakage.
• Fill with DOT 4 brake fluid if necessary.6-25–6-28
Rear brake6-25–6-28
Clutch• Check operation, fluid level, and for fluid leakage.
• Fill with DOT 4 brake fluid if necessary.6-24, 6-27
Throttle grip and housing• Check operation.
• Lubricate if necessary.6-21, 6-29
Engine oil• Check oil level.
• Add oil if necessary.6-9–6-12
Coolant• Check coolant level.
• Add coolant if necessary.6-14–6-18
Final gear oil• Check vehicle for leakage. 6-13
Wheels and tires• Check tire air pressure, for wear and damage. 6-21–6-24
Control cables• Check operation.
• Lubricate if necessary.6-28
Brake and shift pedal
shafts• Check operation.
• Lubricate if necessary.6-29
Brake and clutch lever
pivots• Check operation.
• Lubricate if necessary.6-30
Center and sidestand
pivots• Check operation.
• Lubricate if necessary.6-30
E_3lr.book Page 1 Wednesday, November 22, 2000 4:10 PM
Page 43 of 110
6
PERIODIC MAINTENANCE AND MINOR REPAIR
Owner’s tool kit .................................................... 6-1
Periodic maintenance and lubrication chart ......... 6-3
Removing and installing cowlings and panels ..... 6-6
Checking the spark plugs .................................... 6-7
Engine oil and oil filter cartridge .......................... 6-9
Final gear oil ...................................................... 6-13
Coolant .............................................................. 6-14
Cleaning the air filter element ............................ 6-19
Adjusting the carburetors ................................... 6-20
Adjusting the engine idling speed ...................... 6-20
Adjusting the throttle cable free play .................. 6-21
Adjusting the valve clearance ............................ 6-21
Tires ................................................................... 6-21
Cast wheels ....................................................... 6-24
Clutch lever free play ......................................... 6-24
Adjusting the brake lever free play ..................... 6-25
Adjusting the brake pedal position ..................... 6-25
Adjusting the rear brake light switch .................. 6-26
Checking the front and rear brake pads ............. 6-26
Checking the brake fluid level ............................ 6-27
Changing the brake fluid .................................... 6-28
Checking and lubricating the cables .................. 6-28Checking and lubricating the throttle
grip and cable ................................................. 6-29
Checking and lubricating the brake and
shift pedals ...................................................... 6-29
Checking and lubricating the brake and
clutch levers .................................................... 6-30
Checking and lubricating the centerstand and
sidestand......................................................... 6-30
Lubricating the rear suspension ........................ 6-31
Checking the front fork ...................................... 6-31
Checking the steering ....................................... 6-32
Checking the wheel bearings ............................ 6-33
Battery ............................................................... 6-33
Replacing the fuses .......................................... 6-37
Replacing the headlight bulb ............................. 6-38
Replacing a turn signal light bulb or the tail/
brake light bulb ................................................ 6-39
Front wheel ....................................................... 6-40
Rear wheel ........................................................ 6-41
Troubleshooting ................................................. 6-44
Troubleshooting charts ...................................... 6-45
E_3lr.book Page 1 Wednesday, November 22, 2000 4:10 PM
Page 47 of 110

PERIODIC MAINTENANCE AND MINOR REPAIR
6-4
6
10
*Brake hoses• Check for cracks or damage.ÖÖÖÖ Ö
• Replace. Every 4 years
11*Wheels• Check runout and for damage. ÖÖÖÖ
12*Tires• Check tread depth and for damage.
• Replace if necessary.
• Check air pressure.
• Correct if necessary.ÖÖÖÖ
13*Wheel bearings• Check bearings for looseness or damage. ÖÖÖÖ
14*Swingarm• Check swingarm pivoting point for play.ÖÖÖÖ
• Lubricate with molybdenum disulfide grease. Every 50,000 km
15*Steering bearings• Check bearing play and steering for roughness.ÖÖÖÖÖ
• Lubricate with lithium-soap-based grease. Every 50,000 km
16*Chassis fasteners• Make sure that all nuts, bolts and screws are properly
tightened.ÖÖÖÖ Ö
17 Sidestand/centerstand• Check operation.
• Lubricate.ÖÖÖÖ Ö
18*Sidestand switch• Check operation.ÖÖÖÖÖ Ö
19*Front fork• Check operation and for oil leakage.ÖÖÖÖ
20*Rear shock absorber
assemblies• Check operation and shock absorbers for oil leakage.ÖÖÖÖ
21*Carburetors• Check engine idling speed, synchronization and starter
operation.ÖÖÖÖÖ Ö
22 Engine oil• Change.ÖÖÖÖÖ Ö
23 Engine oil filter cartridge• Replace.ÖÖÖ
24*Cooling system• Check coolant level and vehicle for coolant leakage.ÖÖÖÖ Ö
• Change coolant. Every 3 years NO. ITEM CHECK OR MAINTENANCE JOBODOMETER READING (´1,000 km)
ANNUAL
CHECK
1 10203040
E_3lr.book Page 4 Wednesday, November 22, 2000 4:10 PM
Page 56 of 110
PERIODIC MAINTENANCE AND MINOR REPAIR
6-13
6
EAU02975
Final gear oil The final gear case must be checked
for oil leakage before each ride. If any
leakage is found, have a Yamaha deal-
er check and repair the motorcycle. In
addition, the final gear oil must be
changed as follows at the intervals
specified in the periodic maintenance
and lubrication chart.
1. Place the motorcycle on the cen-
terstand.
2. Place an oil pan under the final
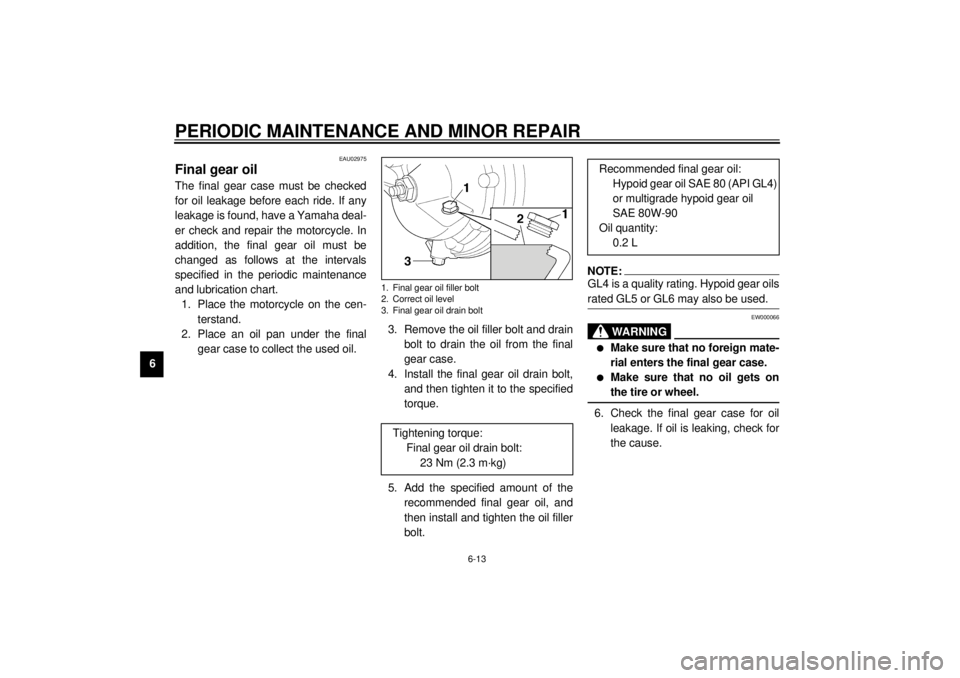
gear case to collect the used oil.3. Remove the oil filler bolt and drain
bolt to drain the oil from the final
gear case.
4. Install the final gear oil drain bolt,
and then tighten it to the specified
torque.
5. Add the specified amount of the
recommended final gear oil, and
then install and tighten the oil filler
bolt.
NOTE:@ GL4 is a quality rating. Hypoid gear oils
rated GL5 or GL6 may also be used. @
EW000066
WARNING
@ l
Make sure that no foreign mate-
rial enters the final gear case.
l
Make sure that no oil gets on
the tire or wheel.
@6. Check the final gear case for oil
leakage. If oil is leaking, check for
the cause.
1. Final gear oil filler bolt
2. Correct oil level
3. Final gear oil drain bolt
Tightening torque:
Final gear oil drain bolt:
23 Nm (2.3 m·kg)
Recommended final gear oil:
Hypoid gear oil SAE 80 (API GL4)
or multigrade hypoid gear oil
SAE 80W-90
Oil quantity:
0.2 L
E_3lr.book Page 13 Wednesday, November 22, 2000 4:10 PM
Page 66 of 110
PERIODIC MAINTENANCE AND MINOR REPAIR
6-23
6
EW000079
WARNING
@ l
Have a Yamaha dealer replace
excessively worn tires. Besides
being illegal, operating the
motorcycle with excessively
worn tires decreases riding sta-
bility and can lead to loss of
control.
l
The replacement of all wheel-
and brake-related parts, includ-
ing the tires, should be left to a
Yamaha dealer, who has the
necessary professional knowl-
edge and experience.
@
Tire information
This motorcycle is equipped with tube
tires.
EW000078
WARNING
@ l
The front and rear tires should
be of the same make and de-
sign, otherwise the handling
characteristics of the motor-
cycle cannot be guaranteed.
l
After extensive tests, only the
tires listed below have been ap-
proved for this model by
Yamaha Motor Co., Ltd.
@CE-10EEAU00684
WARNING
@ This motorcycle is fitted with super-
high-speed tires. Note the following
points in order to make the most ef-
ficient use of these tires.l
Use only the specified replace-
ment tires. Other tires may run
the danger of bursting at super
high speeds.
l
Brand-new tires can have a rela-
tively poor grip on certain road
surfaces until they have been
“broken in”. Therefore, it is ad-
visable before doing any high-
speed riding to ride conserva-
tively for approximately 100 km
after installing a new tire.
l
The tires must be warmed up
before a high-speed run.
l
Always adjust the tire air pres-
sure according to the operating
conditions.
@
FRONT
Manufacturer Size Type
Metzeler 110/90 V18 61V ME33
REAR
Manufacturer Size Type
Metzeler 150/90 B15 M/C 74V ML2
E_3lr.book Page 23 Wednesday, November 22, 2000 4:10 PM
Page 67 of 110

PERIODIC MAINTENANCE AND MINOR REPAIR
6-24
6
EAU00689
Cast wheels To maximize the performance, durabil-
ity, and safe operation of your motor-
cycle, note the following points
regarding the specified wheels.l
The wheel rims should be checked
for cracks, bends, warpage or
damage before each ride. If any
damage is found, have a Yamaha
dealer replace the wheel. Do not
attempt even the smallest repair to
the wheel. A deformed or cracked
wheel must be replaced.
l
The wheel should be balanced
whenever either the tire or wheel
has been changed or replaced. An
unbalanced wheel can result in
poor performance, adverse han-
dling characteristics, and a short-
ened tire life.
l
Ride at moderate speeds after
changing a tire since the tire sur-
face must first be “broken in” for it
to develop its optimal characteris-
tics.
l
After repairing or replacing a tire,
tighten the valve stem nut and
locknut to the specified torques.
EAU00695
Clutch lever free play Since this model is equipped with a hy-
draulic clutch, adjusting the clutch lever
free play is not needed. However, it is
necessary to check the clutch fluid lev-
el and check the hydraulic system for
leakage before each ride. If the clutch
lever free play does become exces-
sive, and shifting becomes rough or
clutch slippage occurs, causing poor
acceleration, there may be air in the
clutch system. If there is air in the hy-
draulic system, have a Yamaha dealer
bleed the system before operating the
motorcycle. Tightening torques:
Valve stem nut:
1.6 Nm (0.16 m·kg)
Valve stem locknut:
1.6 Nm (0.16 m·kg)
E_3lr.book Page 24 Wednesday, November 22, 2000 4:10 PM
Page 75 of 110
PERIODIC MAINTENANCE AND MINOR REPAIR
6-32
6
EAU00794
Checking the steering Worn or loose steering bearings may
cause danger. Therefore, the operation
of the steering must be checked as fol-
lows at the intervals specified in the pe-
riodic maintenance and lubrication
chart.
1. Place a stand under the engine to
raise the front wheel off the
ground.
EW000115
WARNING
@ Securely support the motorcycle so
that there is no danger of it falling
over. @
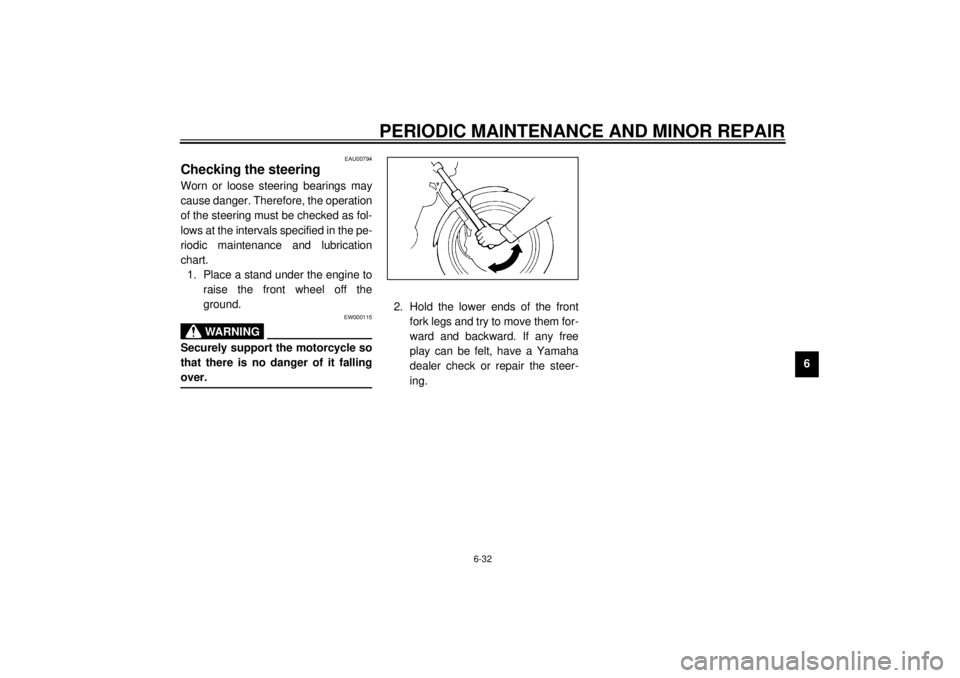
2. Hold the lower ends of the front
fork legs and try to move them for-
ward and backward. If any free
play can be felt, have a Yamaha
dealer check or repair the steer-
ing.
E_3lr.book Page 32 Wednesday, November 22, 2000 4:10 PM
Page 76 of 110
PERIODIC MAINTENANCE AND MINOR REPAIR
6-33
6
EAU01144
Checking the wheel bearings The front and rear wheel bearings must
be checked at the intervals specified in
the periodic maintenance and lubrica-
tion chart. If there is play in the wheel
hub or if the wheel does not turn
smoothly, have a Yamaha dealer
check the wheel bearings.
EAU03401
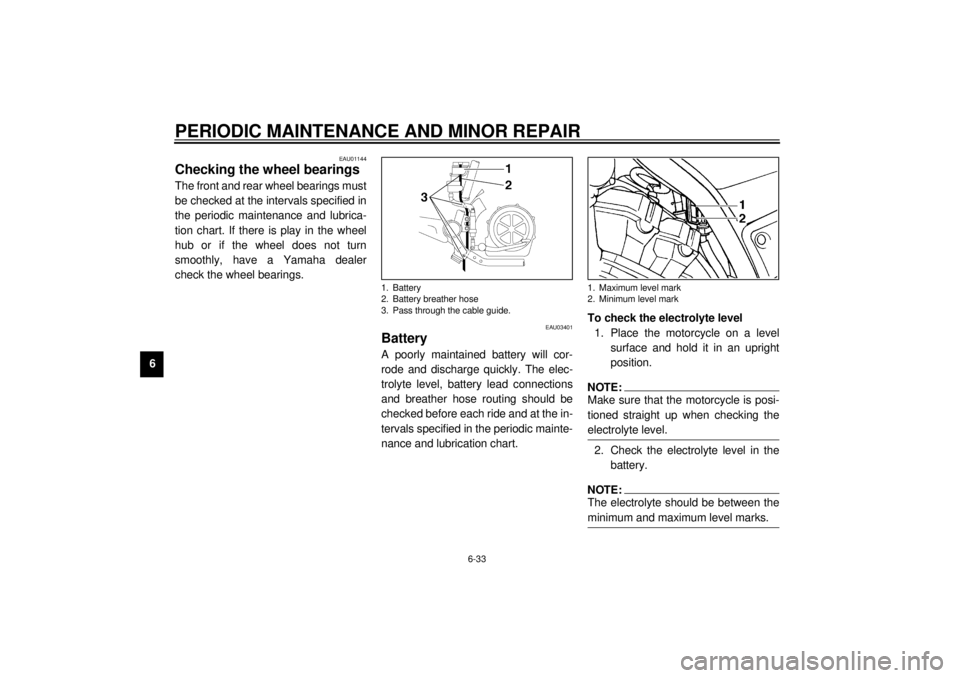
Battery A poorly maintained battery will cor-
rode and discharge quickly. The elec-
trolyte level, battery lead connections
and breather hose routing should be
checked before each ride and at the in-
tervals specified in the periodic mainte-
nance and lubrication chart.To check the electrolyte level
1. Place the motorcycle on a level
surface and hold it in an upright
position.
NOTE:@ Make sure that the motorcycle is posi-
tioned straight up when checking the
electrolyte level. @2. Check the electrolyte level in the
battery.NOTE:@ The electrolyte should be between the
minimum and maximum level marks. @
1. Battery
2. Battery breather hose
3. Pass through the cable guide.
1. Maximum level mark
2. Minimum level mark
E_3lr.book Page 33 Wednesday, November 22, 2000 4:10 PM
Page 83 of 110
PERIODIC MAINTENANCE AND MINOR REPAIR
6-40
6
EAU03419
Front wheel To remove the front wheel
EW000122
WARNING
@ l
It is advisable to have a Yamaha
dealer service the wheel.
l
Securely support the motor-
cycle so that there is no danger
of it falling over.
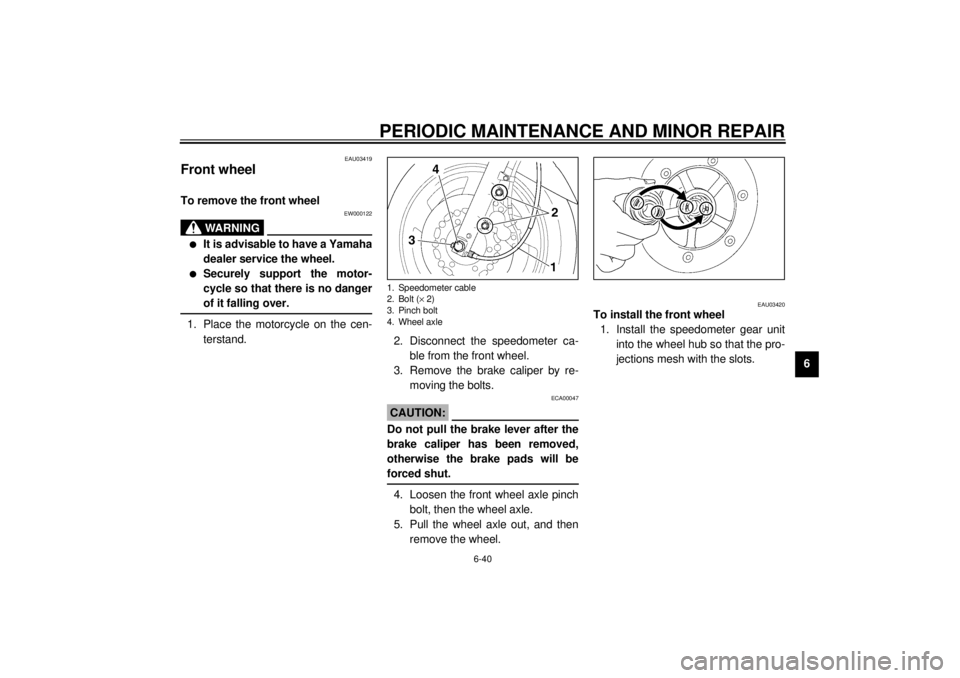
@1. Place the motorcycle on the cen-
terstand.
2. Disconnect the speedometer ca-
ble from the front wheel.
3. Remove the brake caliper by re-
moving the bolts.
ECA00047
CAUTION:@ Do not pull the brake lever after the
brake caliper has been removed,
otherwise the brake pads will be
forced shut. @4. Loosen the front wheel axle pinch
bolt, then the wheel axle.
5. Pull the wheel axle out, and then
remove the wheel.
EAU03420
To install the front wheel
1. Install the speedometer gear unit
into the wheel hub so that the pro-
jections mesh with the slots.
1. Speedometer cable
2. Bolt (´ 2)
3. Pinch bolt
4. Wheel axle
E_3lr.book Page 40 Wednesday, November 22, 2000 4:10 PM