check engine YAMAHA XJ900S 2000 User Guide
[x] Cancel search | Manufacturer: YAMAHA, Model Year: 2000, Model line: XJ900S, Model: YAMAHA XJ900S 2000Pages: 97, PDF Size: 2.08 MB
Page 50 of 97
PERIODIC MAINTENANCE AND MINOR REPAIR
6-4
6
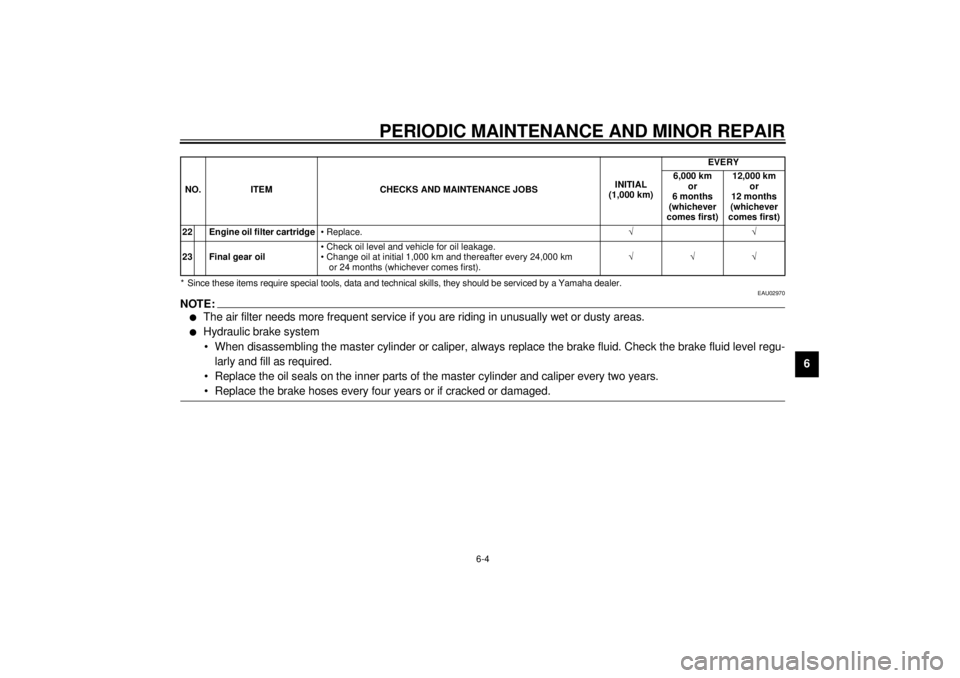
* Since these items require special tools, data and technical skills, they should be serviced by a Yamaha dealer.
EAU02970
NOTE:@ l
The air filter needs more frequent service if you are riding in unusually wet or dusty areas.
l
Hydraulic brake system
• When disassembling the master cylinder or caliper, always replace the brake fluid. Check the brake fluid level regu-
larly and fill as required.
• Replace the oil seals on the inner parts of the master cylinder and caliper every two years.
• Replace the brake hoses every four years or if cracked or damaged.
@22 Engine oil filter cartridge• Replace.ÖÖ
23 Final gear oil• Check oil level and vehicle for oil leakage.
• Change oil at initial 1,000 km and thereafter every 24,000 km
or 24 months (whichever comes first).ÖÖÖ NO. ITEM CHECKS AND MAINTENANCE JOBSINITIAL
(1,000 km)EVERY
6,000 km
or
6 months
(whichever
comes first)12,000 km
or
12 months
(whichever
comes first)
Page 54 of 97
PERIODIC MAINTENANCE AND MINOR REPAIR
6-8
6
EAU02938
Engine oilOil level inspection
1. Place the motorcycle on the cen-
terstand. Warm up the engine for
several minutes.NOTE:@ Be sure the motorcycle is positioned
straight up when checking the oil level.
A slight tilt toward the side can result in
false readings. @
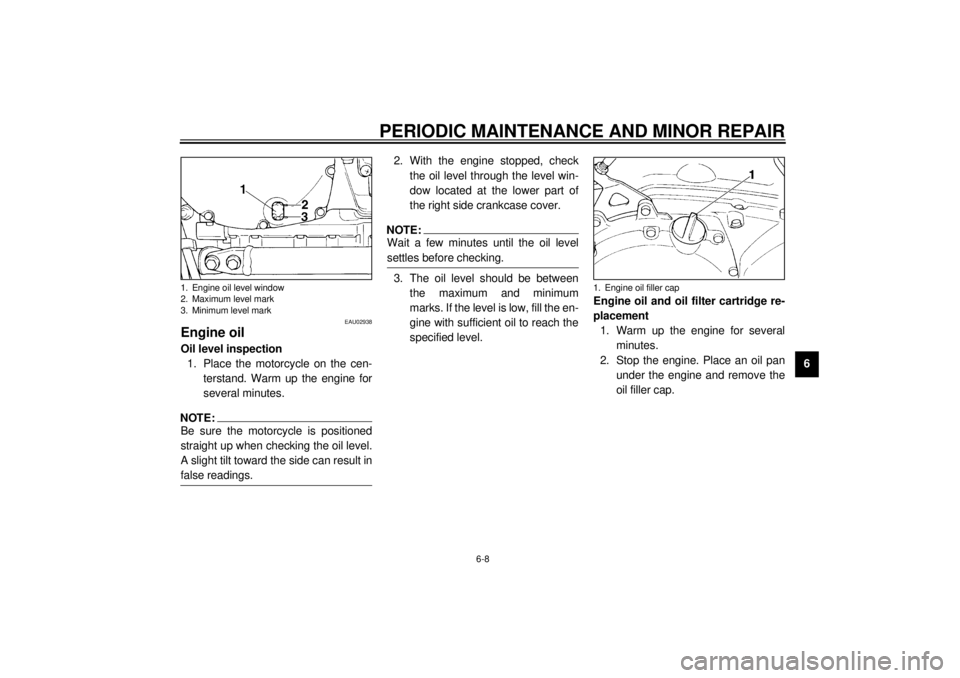
2. With the engine stopped, check
the oil level through the level win-
dow located at the lower part of
the right side crankcase cover.NOTE:@ Wait a few minutes until the oil level
settles before checking. @3. The oil level should be between
the maximum and minimum
marks. If the level is low, fill the en-
gine with sufficient oil to reach the
specified level.Engine oil and oil filter cartridge re-
placement
1. Warm up the engine for several
minutes.
2. Stop the engine. Place an oil pan
under the engine and remove the
oil filler cap.
1. Engine oil level window
2. Maximum level mark
3. Minimum level mark
1. Engine oil filler cap
Page 56 of 97
PERIODIC MAINTENANCE AND MINOR REPAIR
6-10
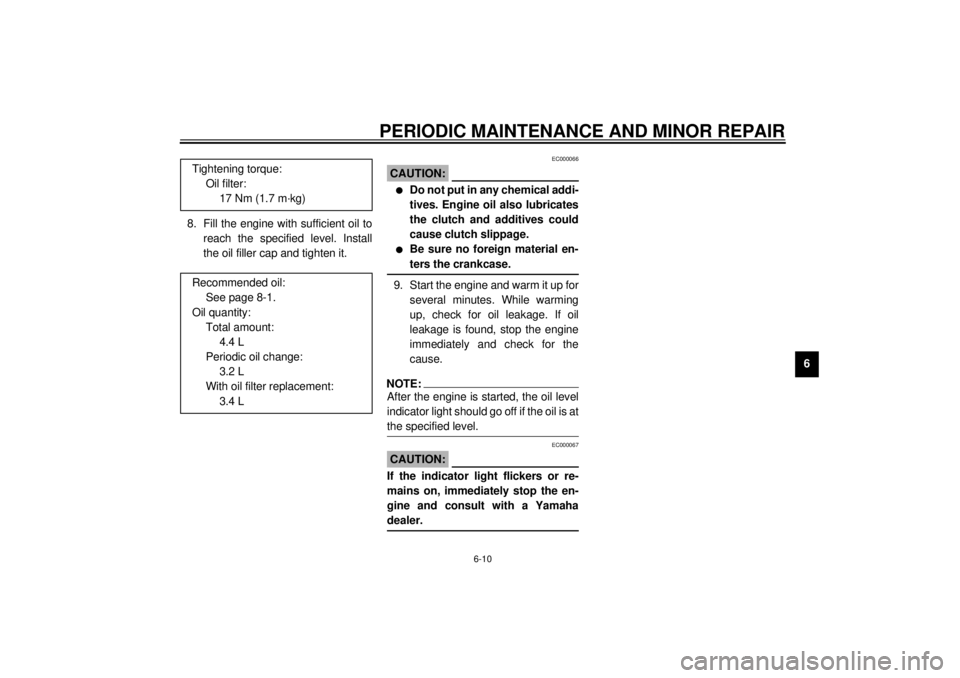
6 8. Fill the engine with sufficient oil to
reach the specified level. Install
the oil filler cap and tighten it.
EC000066
CAUTION:@ l
Do not put in any chemical addi-
tives. Engine oil also lubricates
the clutch and additives could
cause clutch slippage.
l
Be sure no foreign material en-
ters the crankcase.
@9. Start the engine and warm it up for
several minutes. While warming
up, check for oil leakage. If oil
leakage is found, stop the engine
immediately and check for the
cause.NOTE:@ After the engine is started, the oil level
indicator light should go off if the oil is at
the specified level. @
EC000067
CAUTION:@ If the indicator light flickers or re-
mains on, immediately stop the en-
gine and consult with a Yamaha
dealer. @
Tightening torque:
Oil filter:
17 Nm (1.7 m·kg)
Recommended oil:
See page 8-1.
Oil quantity:
Total amount:
4.4 L
Periodic oil change:
3.2 L
With oil filter replacement:
3.4 L
Page 68 of 97
PERIODIC MAINTENANCE AND MINOR REPAIR
6-22
6
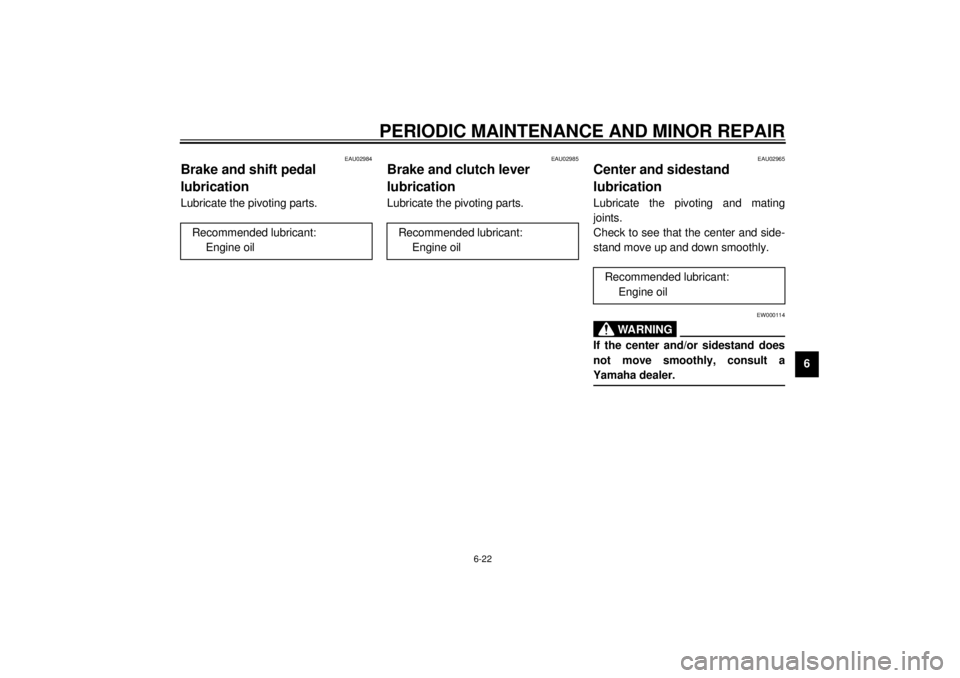
EAU02984
Brake and shift pedal
lubricationLubricate the pivoting parts.
EAU02985
Brake and clutch lever
lubricationLubricate the pivoting parts.
EAU02965
Center and sidestand
lubricationLubricate the pivoting and mating
joints.
Check to see that the center and side-
stand move up and down smoothly.
EW000114
WARNING
@ If the center and/or sidestand does
not move smoothly, consult a
Yamaha dealer. @
Recommended lubricant:
Engine oil
Recommended lubricant:
Engine oil
Recommended lubricant:
Engine oil
Page 69 of 97
PERIODIC MAINTENANCE AND MINOR REPAIR
6-23
6
EAU02939
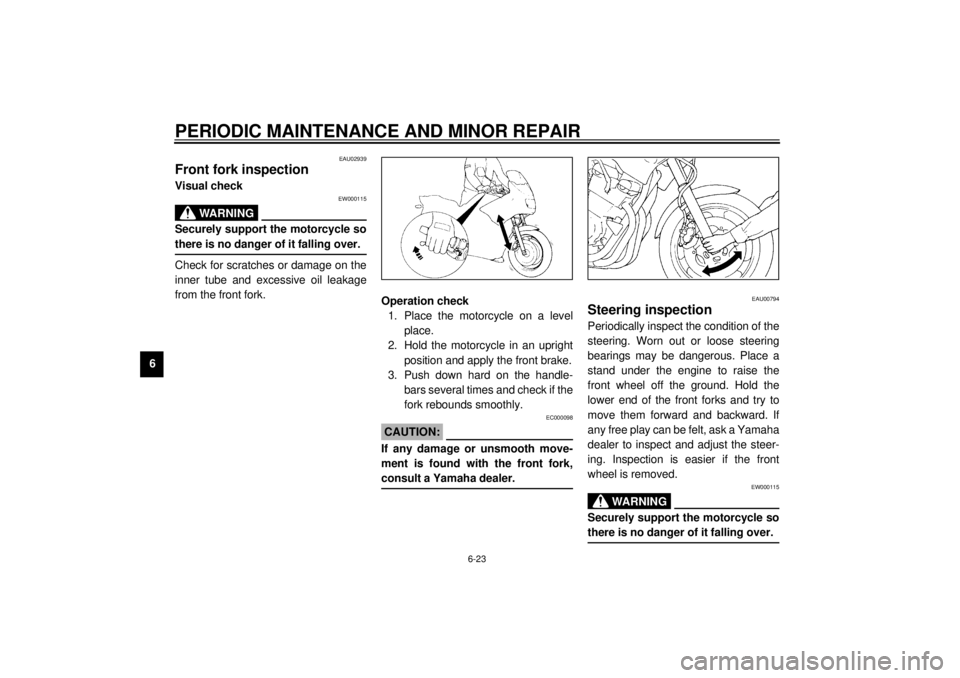
Front fork inspectionVisual check
EW000115
WARNING
@ Securely support the motorcycle so
there is no danger of it falling over. @Check for scratches or damage on the
inner tube and excessive oil leakage
from the front fork.
Operation check
1. Place the motorcycle on a level
place.
2. Hold the motorcycle in an upright
position and apply the front brake.
3. Push down hard on the handle-
bars several times and check if the
fork rebounds smoothly.
EC000098
CAUTION:@ If any damage or unsmooth move-
ment is found with the front fork,
consult a Yamaha dealer. @
EAU00794
Steering inspectionPeriodically inspect the condition of the
steering. Worn out or loose steering
bearings may be dangerous. Place a
stand under the engine to raise the
front wheel off the ground. Hold the
lower end of the front forks and try to
move them forward and backward. If
any free play can be felt, ask a Yamaha
dealer to inspect and adjust the steer-
ing. Inspection is easier if the front
wheel is removed.
EW000115
WARNING
@ Securely support the motorcycle so
there is no danger of it falling over. @
Page 78 of 97

PERIODIC MAINTENANCE AND MINOR REPAIR
6-32
6
EAU01297
Troubleshooting chart
EW000125
WARNING
@ Never check the fuel system while smoking or in the vicinity of an open flame. @
Check if there is fuel
in the fuel tank.1. Fuel
Enough fuel.
No fuel.
Go to compression check.
Supply fuel.
Use the electric starter.2. Compression
There is compression.
No compression.
Go to ignition check.
Ask a Yamaha dealer to
inspect.
Remove spark
plugs and
check electrodes.3. Ignition
Wet.
Dry.
Wipe clean with dry cloth and correct
spark gap or replace spark plug.
Ask a Yamaha dealer to inspect.
Engine doesn't start, go to battery
check.Open throttle half-way and start
the engine.
Use the electric starter.4. Battery
Engine turns over
quickly.
Engine turns over
slowly.
Battery good.Check connections or
recharge.
Engine doesn't start, ask a Yamaha
dealer to inspect.
Engine doesn't start, go to compression check.
Page 85 of 97
MOTORCYCLE CARE AND STORAGE
7-5
7a. Remove the spark plug caps and
spark plugs.
b. Pour a teaspoonful of engine oil
into each spark plug bore.
c. Install the spark plug caps onto the
spark plugs and place the spark
plugs on the cylinder head so that
the electrodes are grounded. (This
will limit sparking during the next
step.)
d. Turn the engine over several times
with the starter. (This will coat the
cylinder walls with oil.)
e. Remove the spark plug caps from
the spark plugs, install the spark
plugs and then the spark plug
caps.
EWA00003
WARNING
@ When turning the engine over, be
sure to ground the spark plug elec-
trodes to prevent damage or injury
from sparking. @
6. Lubricate all control cables and
the pivoting points of all levers and
pedals as well as of the sidestand/
centerstand.
7. Check and, if necessary, correct
the tire air pressure, then raise the
motorcycle so that both of its
wheels are off the ground. Alterna-
tively, turn the wheels a little every
month in order to prevent the tires
from becoming degraded in one
spot.
8. Cover up the muffler outlets with
plastic bags to prevent moisture
from entering.9. Remove the battery and fully
charge it. Store it in a cool, dry
place and recharge it once a
month. Do not store the battery in
an excessively cold or warm place
(less than 0 °C or more than
30 °C). For more information, see
“Battery storage” in the chapter
“PERIODIC MAINTENANCE AND
MINOR REPAIRS”.
NOTE:@ Make any necessary repairs before
storing the motorcycle. @
Page 95 of 97
10-INDEXAAir filter .................................................. 6-11
Antitheft alarm (optional) ..........................3-7BBattery ................................................... 6-24
Brake and clutch lever lubrication........... 6-22
Brake and shift pedal lubrication ............ 6-22
Brake fluid replacement ......................... 6-21
Brake light switch adjustment ................. 6-19CCable inspection and lubrication ............ 6-21
Carburetor adjustment ........................... 6-13
Care.........................................................7-1
Center and sidestand lubrication ............ 6-22
Checking the front and
rear brake pads ................................... 6-19
Clutch lever ............................................ 3-10
Clutch lever free play adjustment ........... 6-18
Controls/Instruments ................................2-3
Cowling A ................................................6-5
Cowling B ................................................6-6
Cowling removal and installation ..............6-5DDiagnosis device......................................3-7
Digital clock..............................................3-8
Dimmer switch .........................................3-9EEngine break-in........................................5-5
Engine oil .................................................6-8
Engine stop switch ................................. 3-10
FFinal gear oil replacement ..................... 6-11
Front brake lever ................................... 3-11
Front fork adjustment............................. 3-16
Front fork inspection .............................. 6-23
Front wheel installation .......................... 6-29
Front wheel removal .............................. 6-27
Fuel ....................................................... 3-13
Fuel gauge .............................................. 3-8
Fuel indicator circuit check....................... 3-5
Fuel indicator light ................................... 3-3
Fuel tank breather hose
(for Germany only) .............................. 3-14
Fuel tank cap ......................................... 3-12
Fuse replacement.................................. 6-25GGive safety the right of way ..................... 1-1HHandlebar switches ................................. 3-9
Dimmer switch ................................... 3-9
Engine stop switch ........................... 3-10
Hazard switch .................................... 3-9
Horn switch ........................................ 3-9
Lights switch .................................... 3-10
Pass switch ........................................ 3-9
Start switch ...................................... 3-10
Turn signal switch .............................. 3-9
Hazard switch .......................................... 3-9
Headlight bulb replacement ................... 6-26
Helmet holder ........................................ 3-15
High beam indicator light ......................... 3-3
Horn switch ............................................. 3-9
IIdentification number records ...................9-1
Idle speed adjustment ............................6-13
Indicator lights ..........................................3-3
Fuel indicator light...............................3-3
High beam indicator light ....................3-3
Neutral indicator light ..........................3-3
Oil level indicator light .........................3-3
Turn indicator lights ............................3-3
Inspecting the brake fluid level ...............6-20KKey identification number .........................9-1LLeft view...................................................2-1
Lights switch ..........................................3-10MMain switch/Steering lock .........................3-1
Model label ..............................................9-2NNeutral indicator light ...............................3-3OOil level indicator circuit check .................3-4
Oil level indicator light ..............................3-3PParking.....................................................5-6
Pass switch ..............................................3-9
Periodic maintenance and lubrication .......6-2
Pre-operation check list ............................4-1
Page 96 of 97

INDEX
RRear brake pedal ................................... 3-11
Rear shock absorber adjustment ........... 3-17
Rear wheel installation........................... 6-31
Rear wheel removal............................... 6-30
Recommended shift points
(for Switzerland only)............................. 5-5
Right view................................................ 2-2SSeat....................................................... 3-15
Shifting .................................................... 5-4
Shift pedal ............................................. 3-11
Sidestand .............................................. 3-18
Sidestand/clutch switch operation
check .................................................. 3-18
Spark plug inspection .............................. 6-7
Specifications .......................................... 8-1
Speedometer ........................................... 3-6
Starter (choke) “ ” .............................. 3-14
Starting a warm engine ............................ 5-4
Starting the engine .................................. 5-1
Start switch ............................................ 3-10
Steering inspection ................................ 6-23
Storage.................................................... 7-4
Storage compartment ............................ 3-16TTachometer ............................................. 3-6
Throttle cable and grip lubrication .......... 6-21
Throttle cable free play inspection ......... 6-14
Tips for reducing fuel consumption .......... 5-5
Tires ...................................................... 6-15
Tool kit..................................................... 6-1
Troubleshooting .................................... 6-31
Troubleshooting chart ........................... 6-32
Turn indicator lights ................................. 3-3
Turn signal switch ................................... 3-9VValve clearance adjustment .................. 6-14
Vehicle identification number................... 9-1WWheel bearings ..................................... 6-24
Wheels .................................................. 6-18