drain bolt YAMAHA XMAX 125 2013 Owners Manual
[x] Cancel search | Manufacturer: YAMAHA, Model Year: 2013, Model line: XMAX 125, Model: YAMAHA XMAX 125 2013Pages: 96, PDF Size: 4.83 MB
Page 14 of 96
DESCRIPTION
2-1
2
EAU32220
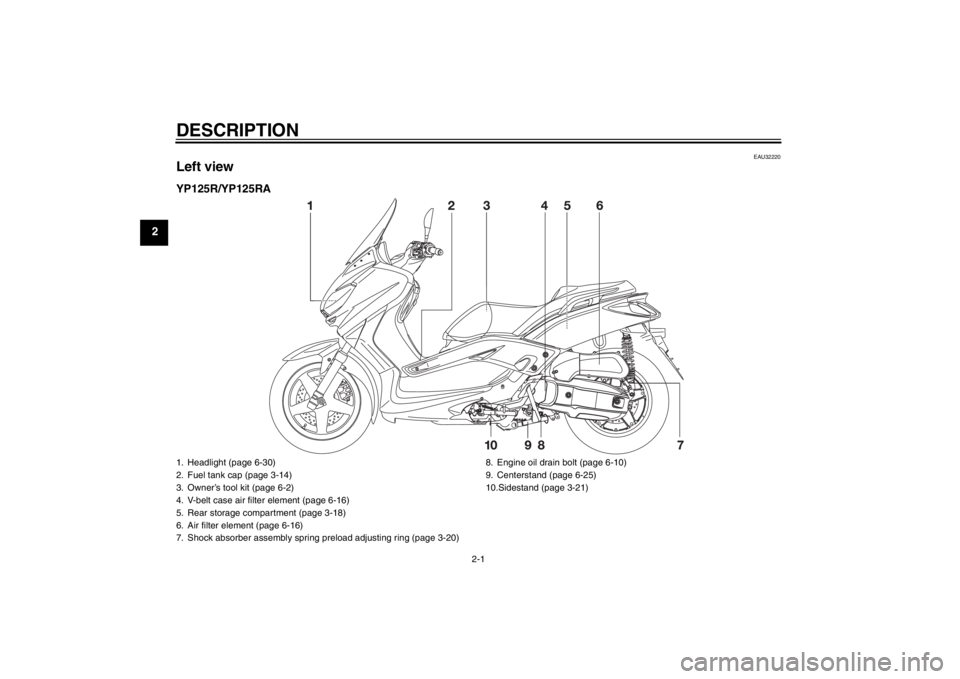
Left viewYP125R/YP125RA1. Headlight (page 6-30)
2. Fuel tank cap (page 3-14)
3. Owner’s tool kit (page 6-2)
4. V-belt case air filter element (page 6-16)
5. Rear storage compartment (page 3-18)
6. Air filter element (page 6-16)
7. Shock absorber assembly spring preload adjusting ring (page 3-20)8. Engine oil drain bolt (page 6-10)
9. Centerstand (page 6-25)
10.Sidestand (page 3-21)U2ABE2E0.book Page 1 Thursday, August 30, 2012 2:36 PM
Page 15 of 96
DESCRIPTION
2-2
2 YP125RA Business Edition / YP125R Sports
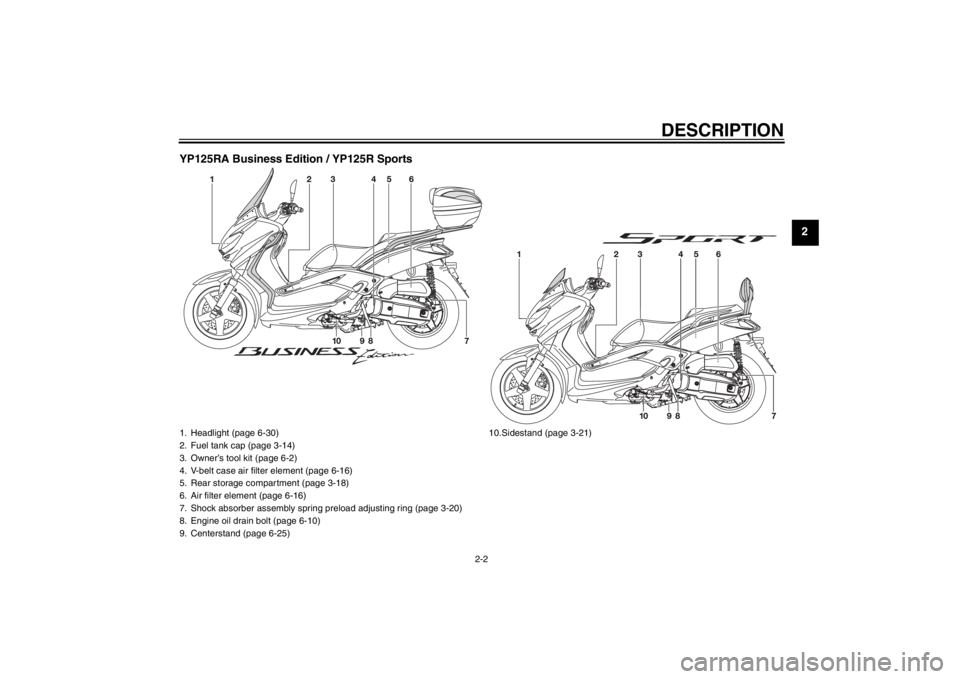
1. Headlight (page 6-30)
2. Fuel tank cap (page 3-14)
3. Owner’s tool kit (page 6-2)
4. V-belt case air filter element (page 6-16)
5. Rear storage compartment (page 3-18)
6. Air filter element (page 6-16)
7. Shock absorber assembly spring preload adjusting ring (page 3-20)
8. Engine oil drain bolt (page 6-10)
9. Centerstand (page 6-25)10.Sidestand (page 3-21)
U2ABE2E0.book Page 2 Thursday, August 30, 2012 2:36 PM
Page 59 of 96
PERIODIC MAINTENANCE AND ADJUSTMENT
6-11
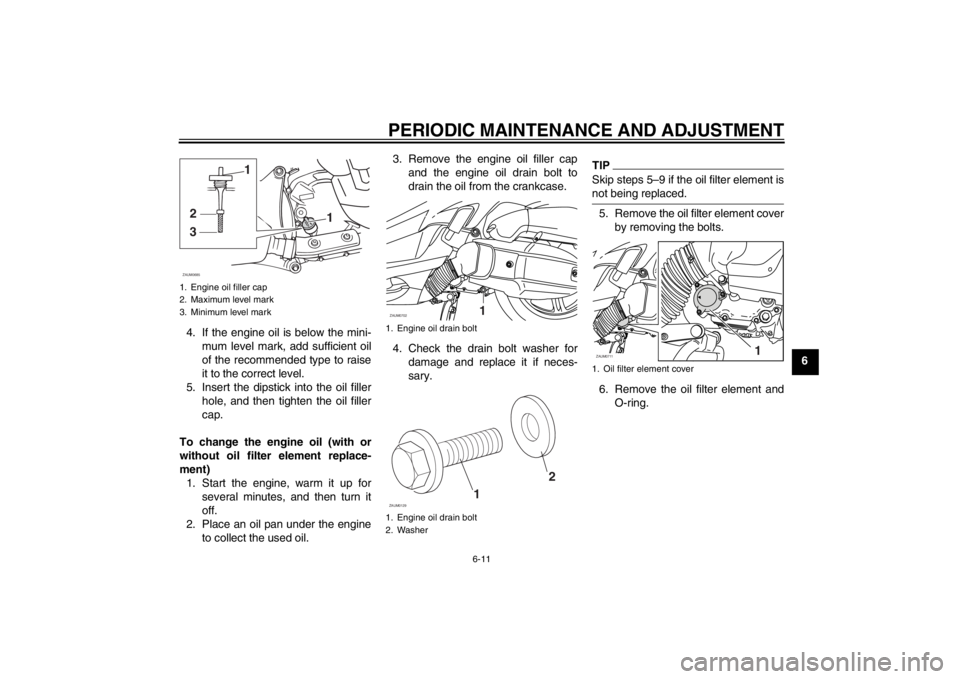
6 4. If the engine oil is below the mini-
mum level mark, add sufficient oil
of the recommended type to raise
it to the correct level.
5. Insert the dipstick into the oil filler
hole, and then tighten the oil filler
cap.
To change the engine oil (with or
without oil filter element replace-
ment)
1. Start the engine, warm it up for
several minutes, and then turn it
off.
2. Place an oil pan under the engine
to collect the used oil.3. Remove the engine oil filler cap
and the engine oil drain bolt to
drain the oil from the crankcase.
4. Check the drain bolt washer for
damage and replace it if neces-
sary.
TIPSkip steps 5–9 if the oil filter element is
not being replaced.5. Remove the oil filter element cover
by removing the bolts.
6. Remove the oil filter element and
O-ring.
1. Engine oil filler cap
2. Maximum level mark
3. Minimum level mark
1
32
1
ZAUM0685
1. Engine oil drain bolt
1. Engine oil drain bolt
2. WasherZAUM0702
11
2
ZAUM0129
1. Oil filter element coverZAUM0711
1
U2ABE2E0.book Page 11 Thursday, August 30, 2012 2:36 PM
Page 60 of 96
PERIODIC MAINTENANCE AND ADJUSTMENT
6-12
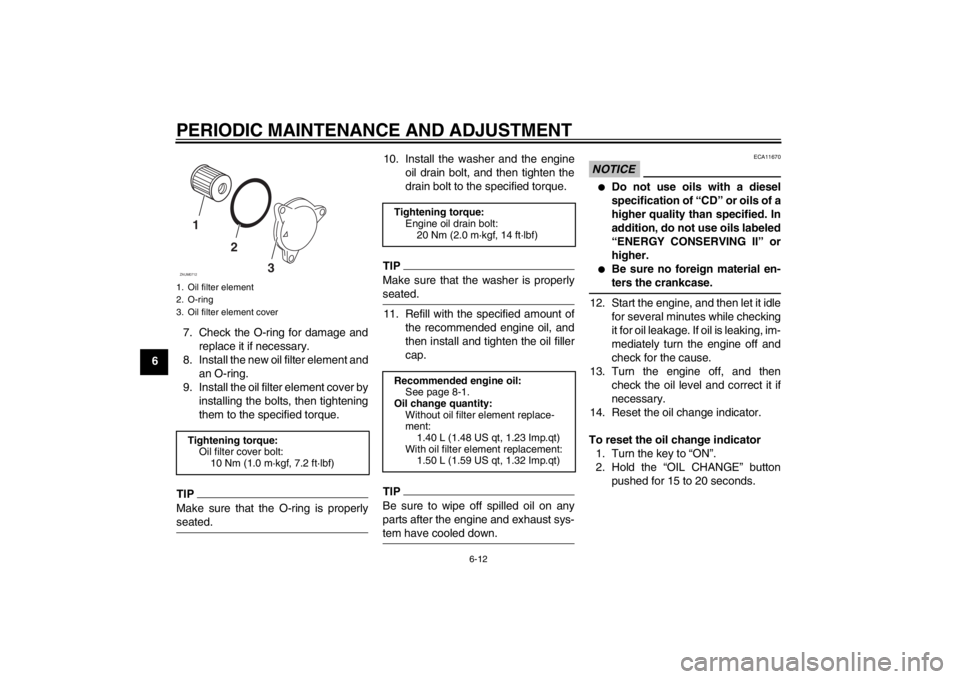
67. Check the O-ring for damage and
replace it if necessary.
8. Install the new oil filter element and
an O-ring.
9. Install the oil filter element cover by
installing the bolts, then tightening
them to the specified torque.
TIPMake sure that the O-ring is properly
seated.
10. Install the washer and the engine
oil drain bolt, and then tighten the
drain bolt to the specified torque.TIPMake sure that the washer is properly
seated.11. Refill with the specified amount of
the recommended engine oil, and
then install and tighten the oil filler
cap.TIPBe sure to wipe off spilled oil on any
parts after the engine and exhaust sys-
tem have cooled down.
NOTICE
ECA11670
●
Do not use oils with a diesel
specification of “CD” or oils of a
higher quality than specified. In
addition, do not use oils labeled
“ENERGY CONSERVING II” or
higher.
●
Be sure no foreign material en-
ters the crankcase.
12. Start the engine, and then let it idle
for several minutes while checking
it for oil leakage. If oil is leaking, im-
mediately turn the engine off and
check for the cause.
13. Turn the engine off, and then
check the oil level and correct it if
necessary.
14. Reset the oil change indicator.
To reset the oil change indicator
1. Turn the key to “ON”.
2. Hold the “OIL CHANGE” button
pushed for 15 to 20 seconds.
1. Oil filter element
2. O-ring
3. Oil filter element coverTightening torque:
Oil filter cover bolt:
10 Nm (1.0 m·kgf, 7.2 ft·lbf)1
2
3
ZAUM0712
Tightening torque:
Engine oil drain bolt:
20 Nm (2.0 m·kgf, 14 ft·lbf)
Recommended engine oil:
See page 8-1.
Oil change quantity:
Without oil filter element replace-
ment:
1.40 L (1.48 US qt, 1.23 Imp.qt)
With oil filter element replacement:
1.50 L (1.59 US qt, 1.32 Imp.qt)
U2ABE2E0.book Page 12 Thursday, August 30, 2012 2:36 PM
Page 62 of 96
PERIODIC MAINTENANCE AND ADJUSTMENT
6-14
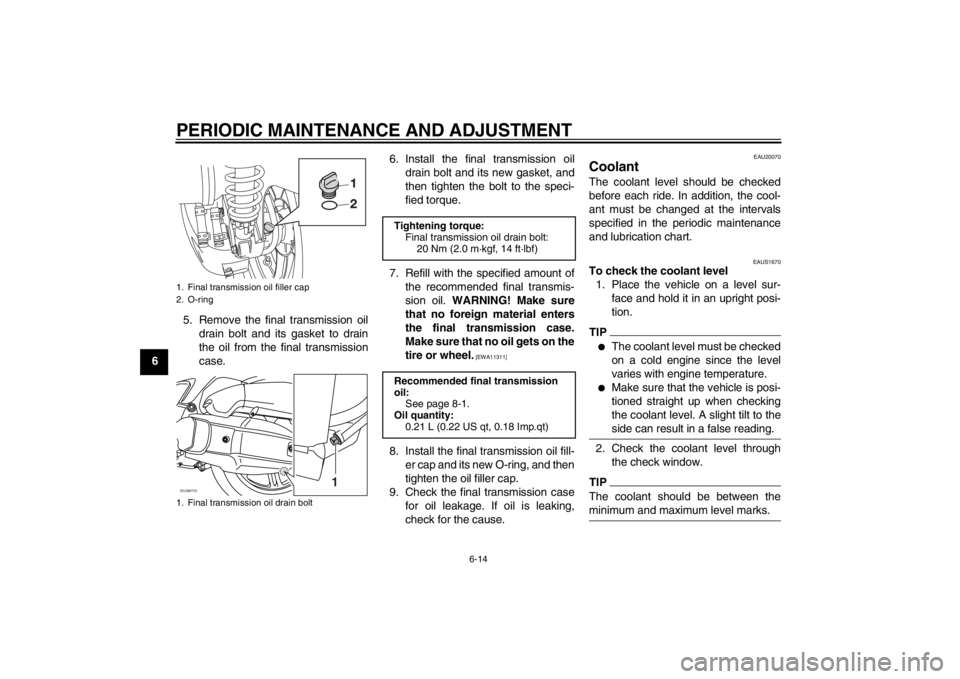
65. Remove the final transmission oil
drain bolt and its gasket to drain
the oil from the final transmission
case.6. Install the final transmission oil
drain bolt and its new gasket, and
then tighten the bolt to the speci-
fied torque.
7. Refill with the specified amount of
the recommended final transmis-
sion oil. WARNING! Make sure
that no foreign material enters
the final transmission case.
Make sure that no oil gets on the
tire or wheel.
[EWA11311]
8. Install the final transmission oil fill-
er cap and its new O-ring, and then
tighten the oil filler cap.
9. Check the final transmission case
for oil leakage. If oil is leaking,
check for the cause.
EAU20070
Coolant The coolant level should be checked
before each ride. In addition, the cool-
ant must be changed at the intervals
specified in the periodic maintenance
and lubrication chart.
EAUS1670
To check the coolant level
1. Place the vehicle on a level sur-
face and hold it in an upright posi-
tion.TIP●
The coolant level must be checked
on a cold engine since the level
varies with engine temperature.
●
Make sure that the vehicle is posi-
tioned straight up when checking
the coolant level. A slight tilt to the
side can result in a false reading.
2. Check the coolant level through
the check window.TIPThe coolant should be between the
minimum and maximum level marks.
1. Final transmission oil filler cap
2. O-ring
1. Final transmission oil drain boltZAUM0703
1
Tightening torque:
Final transmission oil drain bolt:
20 Nm (2.0 m·kgf, 14 ft·lbf)
Recommended final transmission
oil:
See page 8-1.
Oil quantity:
0.21 L (0.22 US qt, 0.18 Imp.qt)
U2ABE2E0.book Page 14 Thursday, August 30, 2012 2:36 PM