stop start YAMAHA XMAX 125 2020 Owners Manual
[x] Cancel search | Manufacturer: YAMAHA, Model Year: 2020, Model line: XMAX 125, Model: YAMAHA XMAX 125 2020Pages: 114, PDF Size: 13.55 MB
Page 1 of 114
PANTONE285C
YP125RA (XMAX 125)
1
2
3
4
5
6
7
8
9
10
11
12
B9Y-F8199-E0
Read this manual carefully
before operating this vehicle.
MOTORCYCLE
OWNER’S MANUAL
Specifications
Consumer information
Scooter care and storage
Periodic maintenance and adjustment
For your safety – pre-operation checks
Instrument and control functions Stop and Start SystemSmart key system Description
Safety information
Operation and important riding points Index
[English (E)]
Page 6 of 114
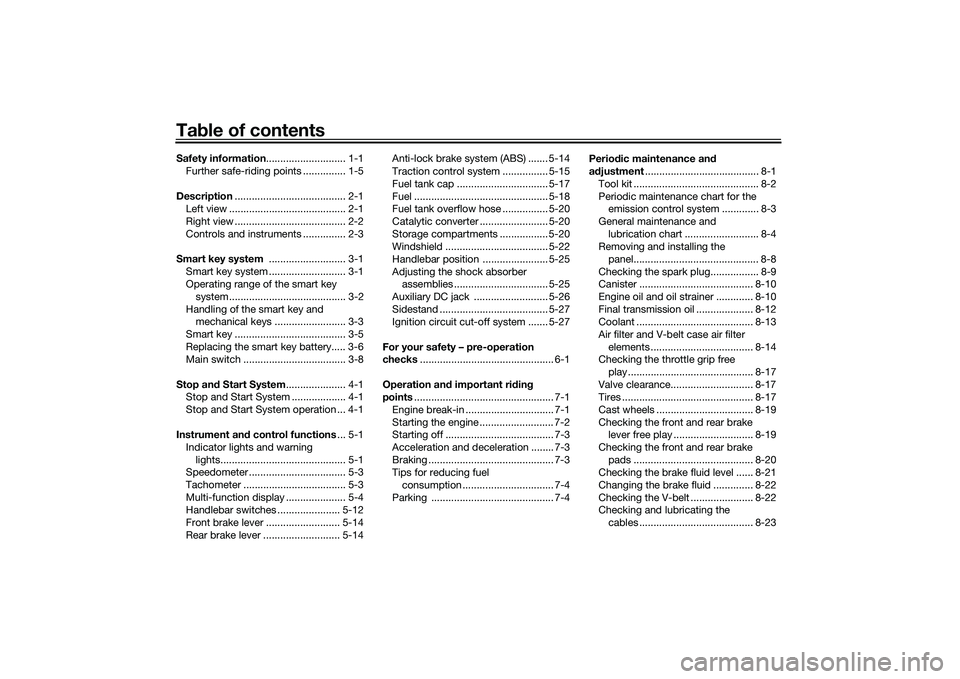
Table of contentsSafety information ............................ 1-1
Further safe-riding points ............... 1-5
Description ....................................... 2-1
Left view ......................................... 2-1
Right view ....................................... 2-2
Controls and instruments ............... 2-3
Smart key system ........................... 3-1
Smart key system ........................... 3-1
Operating range of the smart key system......................................... 3-2
Handling of the smart key and mechanical keys ......................... 3-3
Smart key ....................................... 3-5
Replacing the smart key battery..... 3-6
Main switch .................................... 3-8
Stop an d Start System ..................... 4-1
Stop and Start System ................... 4-1
Stop and Start System operation ... 4-1
Instrument an d control functions ... 5-1
Indicator lights and warning lights............................................ 5-1
Speedometer .................................. 5-3
Tachometer .................................... 5-3
Multi-function display ..................... 5-4
Handlebar switches ...................... 5-12
Front brake lever .......................... 5-14
Rear brake lever ........................... 5-14 Anti-lock brake system (ABS) ....... 5-14
Traction control system ................ 5-15
Fuel tank cap ................................ 5-17
Fuel ............................................... 5-18
Fuel tank overflow hose ................ 5-20
Catalytic converter ........................ 5-20
Storage compartments ................. 5-20
Windshield .................................... 5-22
Handlebar position ....................... 5-25
Adjusting the shock absorber
assemblies ................................. 5-25
Auxiliary DC jack .......................... 5-26
Sidestand ...................................... 5-27
Ignition circuit cut-off system ....... 5-27
For your safety – pre-operation
checks ............................................... 6-1
Operation an d important ri din g
points ................................................. 7-1
Engine break-in ............................... 7-1
Starting the engine .......................... 7-2
Starting off ...................................... 7-3
Acceleration and deceleration ........ 7-3
Braking ............................................ 7-3
Tips for reducing fuel consumption ................................ 7-4
Parking ........................................... 7-4 Perio
dic maintenance an d
a d justment ........................................ 8-1
Tool kit ............................................ 8-2
Periodic maintenance chart for the emission control system ............. 8-3
General maintenance and lubrication chart .......................... 8-4
Removing and installing the
panel............................................ 8-8
Checking the spark plug................. 8-9
Canister ........................................ 8-10
Engine oil and oil strainer ............. 8-10
Final transmission oil .................... 8-12
Coolant ......................................... 8-13
Air filter and V-belt case air filter elements .................................... 8-14
Checking the throttle grip free
play ............................................ 8-17
Valve clearance............................. 8-17
Tires .............................................. 8-17
Cast wheels .................................. 8-19
Checking the front and rear brake lever free play ............................ 8-19
Checking the front and rear brake pads .......................................... 8-20
Checking the brake fluid level ...... 8-21
Changing the brake fluid .............. 8-22
Checking the V-belt ...................... 8-22
Checking and lubricating the
cables ........................................ 8-23UB9YE0E0.book Page 1 Wednesday, January 6, 2021 3:03 PM
Page 24 of 114
Smart key system
3-8
3
EAU76892
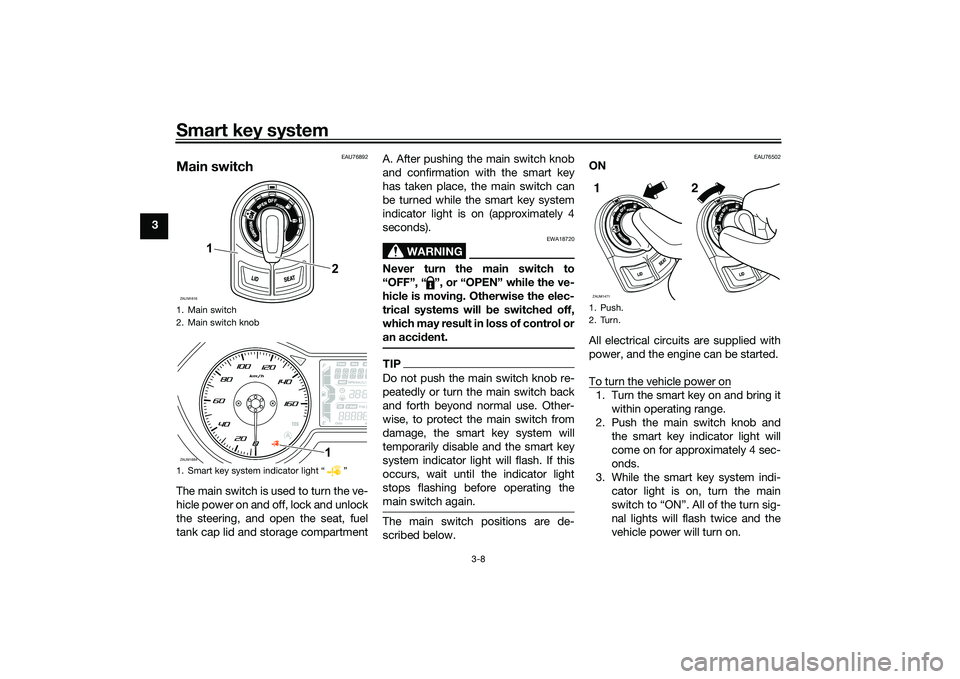
Main switchThe main switch is used to turn the ve-
hicle power on and off, lock and unlock
the steering, and open the seat, fuel
tank cap lid and storage compartmentA. After pushing the main switch knob
and confirmation with the smart key
has taken place, the main switch can
be turned while the smart key system
indicator light is on (approximately 4
seconds).
WARNING
EWA18720
Never turn the main switch to
“OFF”, “ ”, or “OPEN” while the ve-
hicle is movin
g. Otherwise the elec-
trical systems will be switche d off,
which may result in loss of control or
an acci dent.TIPDo not push the main switch knob re-
peatedly or turn the main switch back
and forth beyond normal use. Other-
wise, to protect the main switch from
damage, the smart key system will
temporarily disable and the smart key
system indicator light will flash. If this
occurs, wait until the indicator light
stops flashing before operating the
main switch again.The main switch positions are de-
scribed below.
EAU76502
ON
All electrical circuits are supplied with
power, and the engine can be started.
To turn the vehicle power on1. Turn the smart key on and bring it
within operating range.
2. Push the main switch knob and the smart key indicator light will
come on for approximately 4 sec-
onds.
3. While the smart key system indi- cator light is on, turn the main
switch to “ON”. All of the turn sig-
nal lights will flash twice and the
vehicle power will turn on.
1. Main switch
2. Main switch knob
1. Smart key system indicator light “ ”ZAUM1816
2
1
ZAUM1884
1
1. Push.
2. Turn.ZAUM14711 2
UB9YE0E0.book Page 8 Wednesday, January 6, 2021 3:03 PM
Page 28 of 114
Stop and Start System
4-1
4
EAU76825
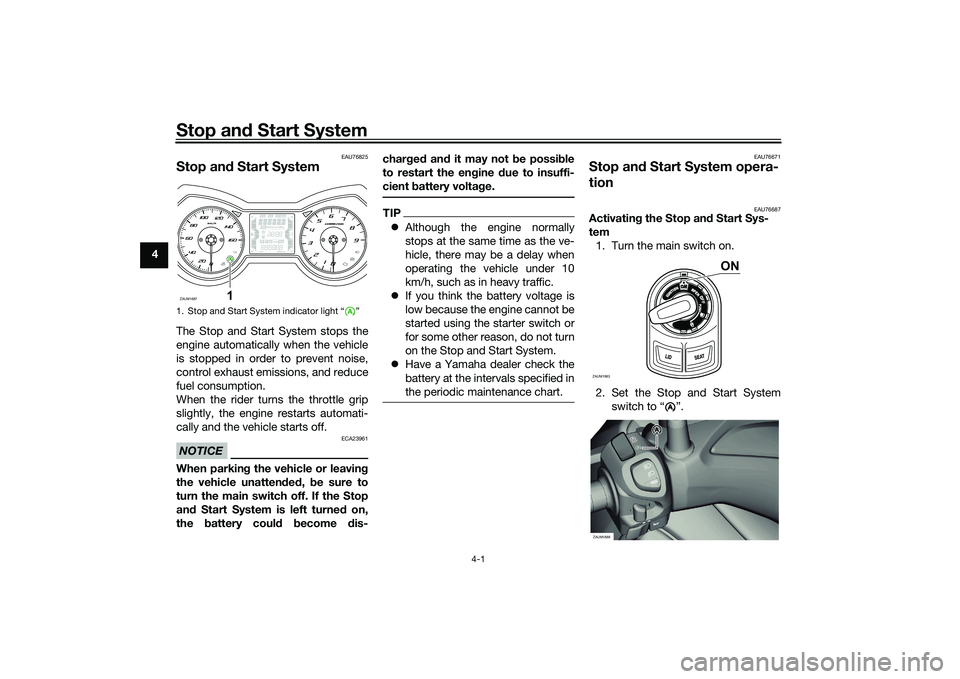
Stop and Start SystemThe Stop and Start System stops the
engine automatically when the vehicle
is stopped in order to prevent noise,
control exhaust emissions, and reduce
fuel consumption.
When the rider turns the throttle grip
slightly, the engine restarts automati-
cally and the vehicle starts off.NOTICE
ECA23961
When parkin g the vehicle or leavin g
the vehicle unatten ded , be sure to
turn the main switch off. If the Stop
an d Start System is left turne d on,
the battery coul d become dis- char
ged an d it may not be possi ble
to restart the en gine due to insuffi-
cient battery volta ge.
TIP Although the engine normally
stops at the same time as the ve-
hicle, there may be a delay when
operating the vehicle under 10
km/h, such as in heavy traffic.
If you think the battery voltage is
low because the engine cannot be
started using the starter switch or
for some other reason, do not turn
on the Stop and Start System.
Have a Yamaha dealer check the
battery at the intervals specified in
the periodic maintenance chart.
EAU76671
Stop and Start System opera-
tion
EAU76687
Activating the Stop an d Start Sys-
tem 1. Turn the main switch on.
2. Set the Stop and Start System switch to “ ”.
1. Stop and Start System indicator light “ ”ZAUM1887
1
ZAUM1983
ON
A
AA
ZAUM1888
UB9YE0E0.book Page 1 Wednesday, January 6, 2021 3:03 PM
Page 29 of 114
Stop and Start System
4-2
4
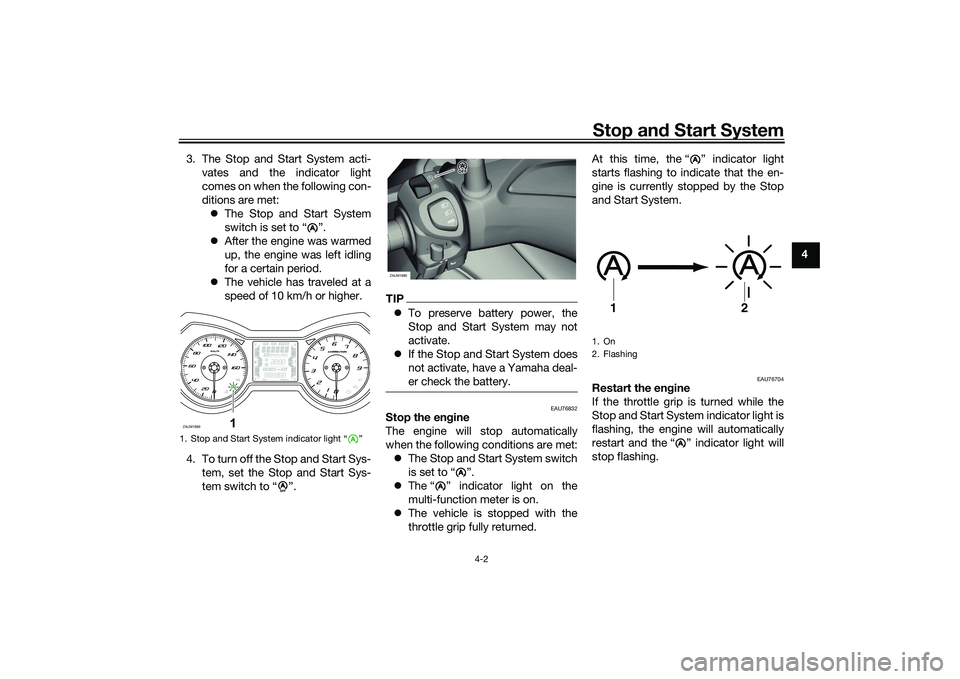
3. The Stop and Start System acti-
vates and the indicator light
comes on when the following con-
ditions are met: The Stop and Start System
switch is set to “ ”.
After the engine was warmed
up, the engine was left idling
for a certain period.
The vehicle has traveled at a
speed of 10 km/h or higher.
4. To turn off the Stop and Start Sys- tem, set the Stop and Start Sys-
tem switch to “ ”.
TIPTo preserve battery power, the
Stop and Start System may not
activate.
If the Stop and Start System does
not activate, have a Yamaha deal-
er check the battery.
EAU76832
Stop the en gine
The engine will stop automatically
when the following conditions are met: The Stop and Start System switch
is set to “ ”.
The “ ” indicator light on the
multi-function meter is on.
The vehicle is stopped with the
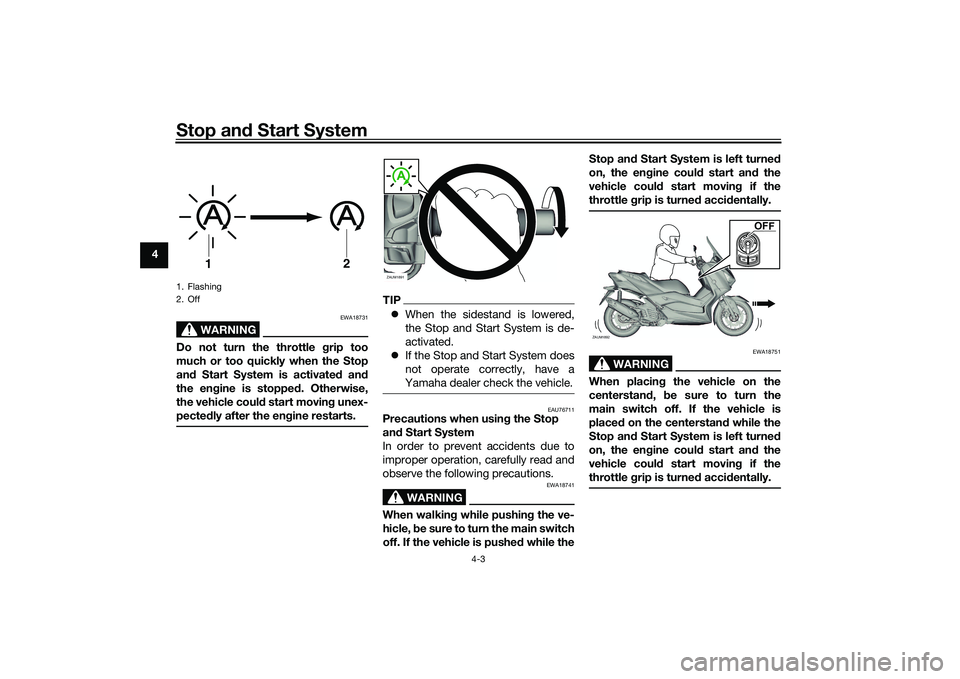
throttle grip fully returned. At this time, the “ ” indicator light
starts flashing to indicate that the en-
gine is currently stopped by the Stop
and Start System.
EAU76704
Restart the en
gine
If the throttle grip is turned while the
Stop and Start System indicator light is
flashing, the engine will automatically
restart and the “ ” indicator light will
stop flashing.
1. Stop and Start System indicator light “ ”
A
ZAUM1889
1
A
AAAA
A
ZAUM1890
AA
A
1. On
2. Flashing
A
1
2
A
UB9YE0E0.book Page 2 Wednesday, January 6, 2021 3:03 PM
Page 30 of 114
Stop and Start System
4-3
4
WARNING
EWA18731
Do not turn the throttle g rip too
much or too quickly when the Stop
an d Start System is activate d an d
the en gine is stoppe d. Otherwise,
the vehicle coul d start movin g unex-
pected ly after the en gine restarts.
TIP When the sidestand is lowered,
the Stop and Start System is de-
activated.
If the Stop and Start System does
not operate correctly, have a
Yamaha dealer check the vehicle.
EAU76711
Precautions when usin g the Stop
an d Start System
In order to prevent accidents due to
improper operation, carefully read and
observe the following precautions.
WARNING
EWA18741
When walkin g while pushin g the ve-
hicle, be sure to turn the main switch
off. If the vehicle is pushe d while the Stop an
d Start System is left turne d
on, the en gine coul d start an d the
vehicle coul d start movin g if the
throttle grip is turne d acci dentally.
WARNING
EWA18751
When placin g the vehicle on the
centerstan d, be sure to turn the
main switch off. If the vehicle is
place d on the centerstan d while the
Stop an d Start System is left turne d
on, the en gine coul d start an d the
vehicle coul d start movin g if the
throttle grip is turne d acci dentally.
1. Flashing
2. Off
1
2
ZAUM1891
ZAUM1892UM1892
OFF
UB9YE0E0.book Page 3 Wednesday, January 6, 2021 3:03 PM
Page 31 of 114
Stop and Start System
4-4
4
WARNING
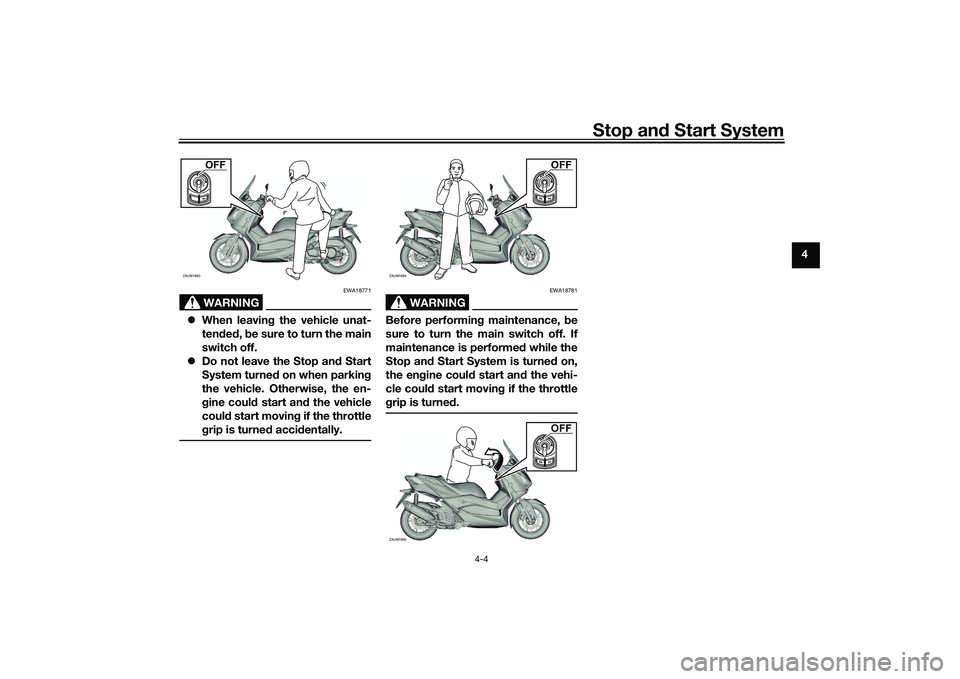
EWA18771
When leavin g the vehicle unat-
ten ded , b e sure to turn the main
switch off.
Do not leave the Stop an d Start
System turne d on when parkin g
the vehicle. Otherwise, the en-
g ine coul d start an d the vehicle
coul d start movin g if the throttle
g rip is turne d acci dentally.
WARNING
EWA18781
Before performin g maintenance, be
sure to turn the main switch off. If
maintenance is performe d while the
Stop an d Start System is turne d on,
the en gine coul d start an d the vehi-
cle coul d start movin g if the throttle
g rip is turne d.
ZAUM1893
OFF
ZAUM1894UM1894
OFF
ZAUM1895UM1895
OFF
UB9YE0E0.book Page 4 Wednesday, January 6, 2021 3:03 PM
Page 32 of 114
Instrument and control functions
5-1
5
EAU4939P
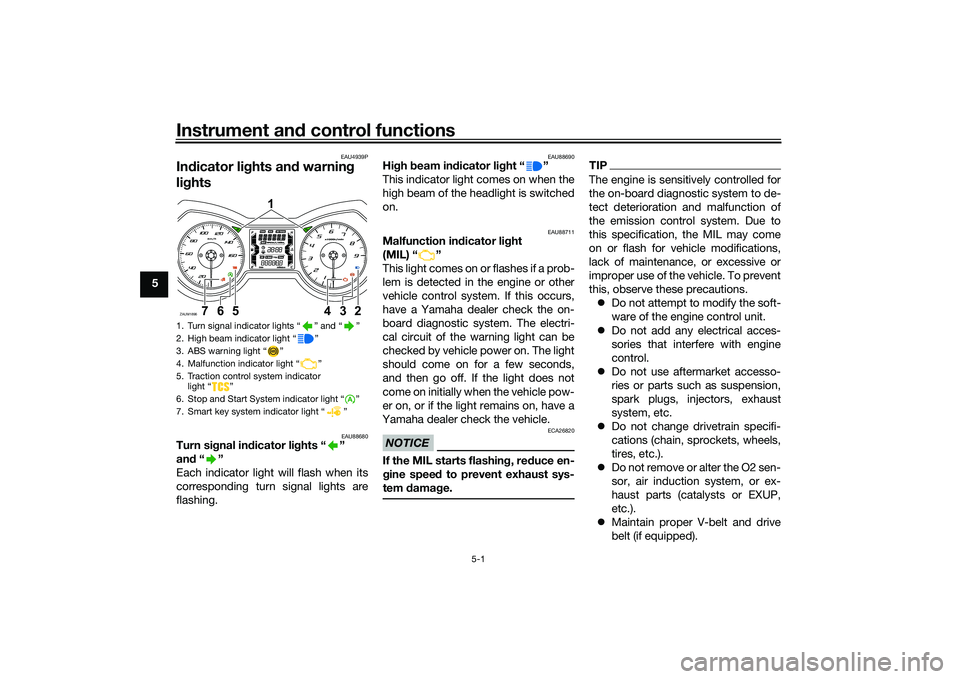
In dicator li ghts an d warnin g
li g hts
EAU88680
Turn si gnal in dicator li ghts “ ”
an d“”
Each indicator light will flash when its
corresponding turn signal lights are
flashing.
EAU88690
Hi gh beam in dicator li ght “ ”
This indicator light comes on when the
high beam of the headlight is switched
on.
EAU88711
Malfunction in dicator li ght
(MIL) “ ”
This light comes on or flashes if a prob-
lem is detected in the engine or other
vehicle control system. If this occurs,
have a Yamaha dealer check the on-
board diagnostic system. The electri-
cal circuit of the warning light can be
checked by vehicle power on. The light
should come on for a few seconds,
and then go off. If the light does not
come on initially when the vehicle pow-
er on, or if the light remains on, have a
Yamaha dealer check the vehicle.NOTICE
ECA26820
If the MIL starts flashin g, re duce en-
g ine spee d to prevent exhaust sys-
tem damag e.
TIPThe engine is sensitively controlled for
the on-board diagnostic system to de-
tect deterioration and malfunction of
the emission control system. Due to
this specification, the MIL may come
on or flash for vehicle modifications,
lack of maintenance, or excessive or
improper use of the vehicle. To prevent
this, observe these precautions.
Do not attempt to modify the soft-
ware of the engine control unit.
Do not add any electrical acces-
sories that interfere with engine
control.
Do not use aftermarket accesso-
ries or parts such as suspension,
spark plugs, injectors, exhaust
system, etc.
Do not change drivetrain specifi-
cations (chain, sprockets, wheels,
tires, etc.).
Do not remove or alter the O2 sen-
sor, air induction system, or ex-
haust parts (catalysts or EXUP,
etc.).
Maintain proper V-belt and drive
belt (if equipped).
1. Turn signal indicator lights “ ” and “ ”
2. High beam indicator light “ ”
3. ABS warning light “ ”
4. Malfunction indicator light “ ”
5. Traction control system indicator
light “ ”
6. Stop and Start System indicator light “ ”
7. Smart key system indicator light “ ”ZAUM1896
1
234
567
UB9YE0E0.book Page 1 Wednesday, January 6, 2021 3:03 PM
Page 33 of 114
Instrument and control functions
5-2
5
Maintain correct tire pressure.
Do not operate the vehicle in an
extreme manner. For example, re-
peated or excessive opening and
closing of the throttle, racing,
burnouts, wheelies, etc.
EAU88890
ABS warnin g lig ht “ ”
This warning light comes on when the
vehicle is first turned on, and goes off
after starting riding. If the warning light
comes on while riding, the anti-lock
brake system may not work correctly.
WARNING
EWA16043
If the ABS warnin g li ght does not
turn off after reachin g 10 km/h (6
mi/h), or if the warnin g lig ht comes
on while ri din g:
Use extra caution to avoi d pos-
si ble wheel lock durin g emer-
g ency brakin g.
Have a Yamaha dealer check
the vehicle as soon as possi ble.
TIPThe ABS warning light may come on
while revving the engine with the vehi-
cle on its centerstand, but this does
not indicate a malfunction.
EAU88930
Traction control system in dicator
li g ht “ ”
This indicator light will flash when trac-
tion control has engaged.
If the traction control system is turned
off, this indicator light will come on.
(See page 5-15.)TIPWhen the vehicle is turned on, the light
should come on for a few seconds and
then go off. If the light does not come
on, or if the light remains on, have a
Yamaha dealer check vehicle.
EAUN2770
Smart key system in dicator
li g ht “ ”
This indicator light communicates the
status of the smart key system. When
the smart key system is operating nor-
mally, this indicator light will be off. If there is an error in the smart key sys-
tem, the indicator light will flash. The
indicator light will also flash when com-
munication between the vehicle and
smart key takes place and when cer-
tain smart key system operations are
carried out.
EAUN2830
Stop an
d Start System in dicator
li g ht “ ”
This indicator light comes on when the
Stop and Start System activates. The
indicator light will flash when the en-
gine is automatically stopped by the
Stop and Start System.TIPEven if the Stop and Start Switch is set
to “ ”, this indicator light may not
come on. (See page 4-1.)
A
UB9YE0E0.book Page 2 Wednesday, January 6, 2021 3:03 PM
Page 35 of 114
Instrument and control functions
5-4
5
EAU78486
Multi-function display
WARNING
EWA12423
Be sure to stop the vehicle before
makin g any settin g chan ges to the
multi-function meter unit. Chan gin g
settin gs while ri din g can distract the
operator an d increase the risk of an
acci dent.The “TRIP/INFO” switch is located on
the right side of the handlebar. This
switch allows you to control or change the settings of the multi-function meter
unit. To use the “TRIP” switch, move
the “TRIP/INFO” switch in direction (a).
To use the “INFO” switch, move the
“TRIP/INFO” switch in direction (b).
The multi-function display is equipped
with the following:
clock
fuel meter
coolant temperature meter
tripmeter display
information display
TIPFor the UK: To switch the displays be-
tween kilometers and miles, turn the
main switch to “ON” while pushing the “INFO” switch, and then continue to
push the “INFO” switch for eight sec-
onds.
Clock
The clock uses a 24-hour time system.
To set the clock1. Turn the main switch to “OFF”.
2. Push and hold the “TRIP” switch.
3. Turn the main switch to “ON”
while pushing the “TRIP” switch,
and then continue to push the
“TRIP” switch for eight seconds.
The hour digits will start flashing.
4. Use the “TRIP” switch to set the hours.
1. Fuel meter
2. Information display
3. Coolant temperature meter
4. Clock
5. Tripmeter display
6. Icy road warning indicator “ ”ZAUM1481
234
165
1. “TRIP/INFO” switchZAUM1899
(b)
(a)
1
1. ClockZAUM1482
1
UB9YE0E0.book Page 4 Wednesday, January 6, 2021 3:03 PM