check engine YAMAHA XVS125 2001 User Guide
[x] Cancel search | Manufacturer: YAMAHA, Model Year: 2001, Model line: XVS125, Model: YAMAHA XVS125 2001Pages: 86, PDF Size: 1.35 MB
Page 38 of 86

PERIODIC MAINTENANCE AND MINOR REPAIR
6
6-8
To install a spark plug
1.Measure the spark plug gap with
a wire thickness gauge and, if
necessary, adjust the gap to
specification.
2.Clean the surface of the spark
plug gasket and its mating sur-
face, and then wipe off any grime
from the spark plug threads.
3.Install the spark plug with the
spark plug wrench, and then
tighten it to the specified torque.
1
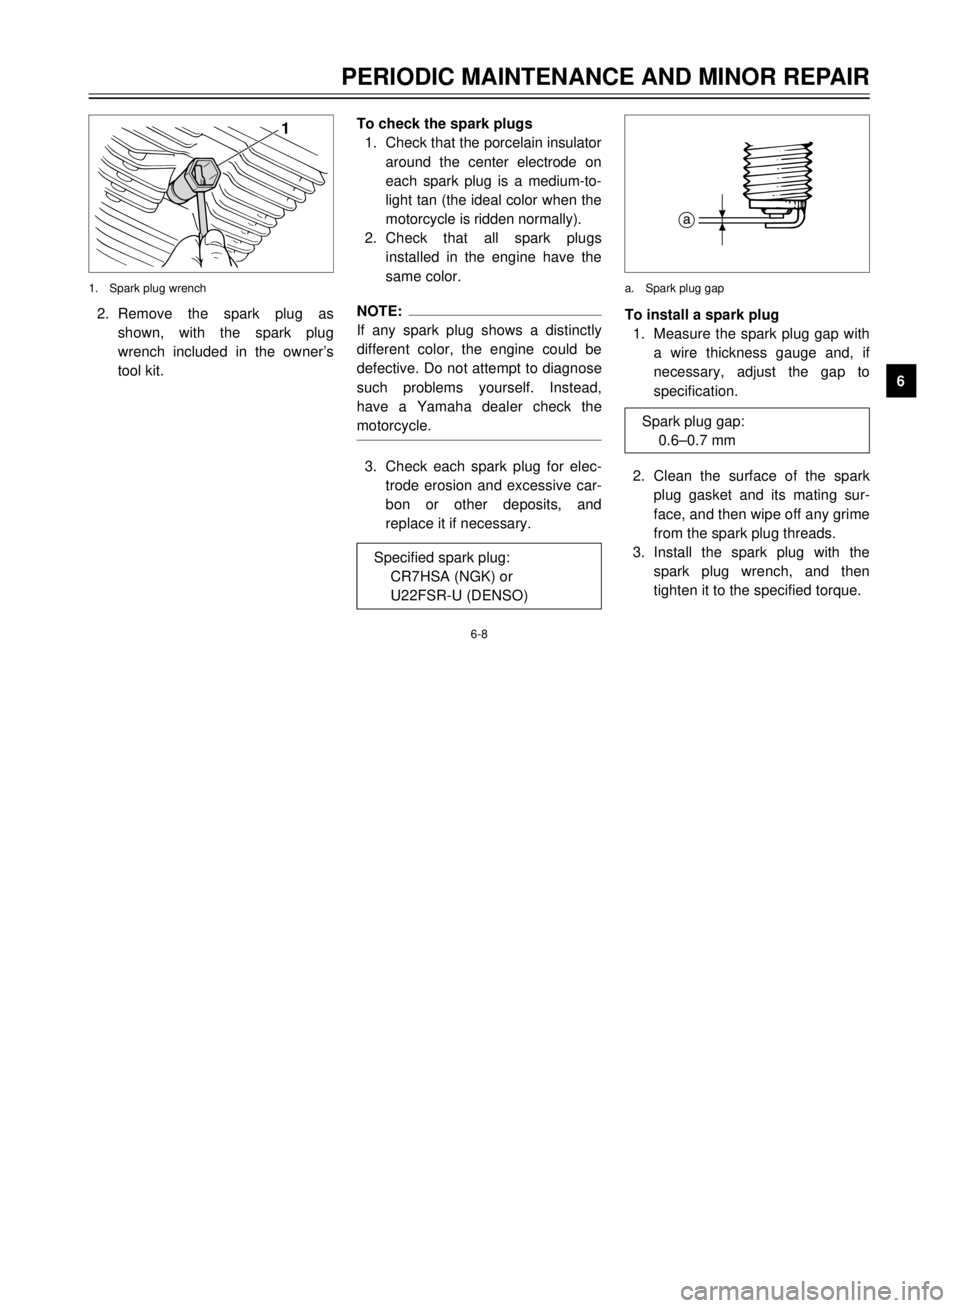
2.Remove the spark plug as
shown, with the spark plug
wrench included in the ownerÕs
tool kit.1.Spark plug wrench
Specified spark plug:
CR7HSA (NGK) or
U22FSR-U (DENSO)
To check the spark plugs
1.Check that the porcelain insulator
around the center electrode on
each spark plug is a medium-to-
light tan (the ideal color when the
motorcycle is ridden normally).
2.Check that all spark plugs
installed in the engine have the
same color.NOTE:
If any spark plug shows a distinctly
different color, the engine could be
defective. Do not attempt to diagnose
such problems yourself. Instead,
have a Yamaha dealer check the
motorcycle.3.Check each spark plug for elec-
trode erosion and excessive car-
bon or other deposits, and
replace it if necessary.
a
a.Spark plug gap
Spark plug gap:
0.6Ð0.7 mm
5JX-9-E1 9/27/00 10:45 AM Page 37
Page 39 of 86

6-9
PERIODIC MAINTENANCE AND MINOR REPAIR
6
NOTE:
If a torque wrench is not available
when installing a spark plug, a good
estimate of the correct torque is
1/4Ð1/2 turn past finger tight.
However, the spark plug should be
tightened to the specified torque as
soon as possible.4.Install the spark plug cap. Tightening torque:
Spark plug:
12.5 Nm (1.25 m0kg)
EAU01523
Engine oil and oil filter
elementThe engine oil level should be
checked before each ride. In addition,
the oil must be changed and the oil
filter element replaced at the intervals
specified in the periodic maintenance
and lubrication chart.
To check the engine oil level
1.Place the motorcycle on a level
surface and hold it in an upright
position.NOTE:
Make sure that the motorcycle is
positioned straight up when checking
the oil level. A slight tilt to the side
can result in a false reading.2.Start the engine, warm it up for
several minutes, and then turn it
off.3.Wait a few minutes until the oil
settles, and then check the oil
level through the check window
located at the bottom-right side
of the crankcase.
NOTE:
The engine oil should be between the
minimum and maximum level marks.4.If the engine oil is below the min-
imum level mark, add sufficient
oil of the recommended type to
raise it to the correct level.
2
1
3
1.Oil level window
2.Maximum level mark
3.Minimum level mark
5JX-9-E1 9/27/00 10:45 AM Page 38
Page 42 of 86

PERIODIC MAINTENANCE AND MINOR REPAIR
1
2
3
4
56
7
8
9
6-12
9.Start the engine, and then let it
idle for several minutes while
checking it for oil leakage. If oil is
leaking, immediately turn the
engine off and check for the
cause.
10.Turn the engine off, and then
check the oil level and correct it if
necessary.
EAU03330
Cleaning the air filter
elementThe air filter element should be
cleaned at the intervals specified in
the periodic maintenance and lubrica-
tion chart. Clean the air filter element
more frequently if you are riding in
unusually wet or dusty areas.
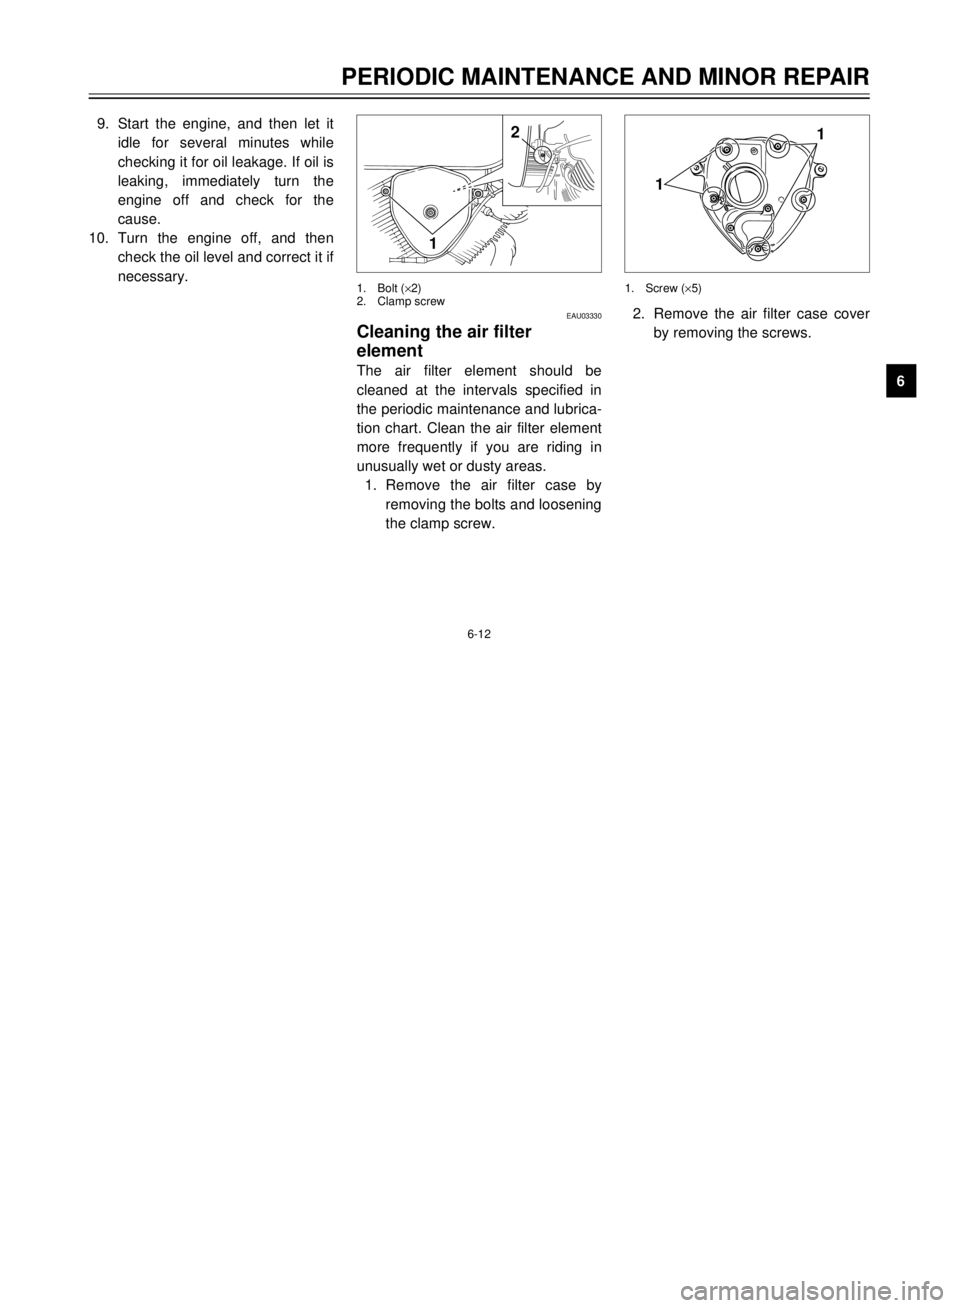
1.Remove the air filter case by
removing the bolts and loosening
the clamp screw.1.Bolt (´2)
2.Clamp screw
1
2
2.Remove the air filter case cover
by removing the screws.1.Screw (´5)
1
1
5JX-9-E1 9/27/00 10:45 AM Page 41
Page 44 of 86

1
2
3
4
56
7
8
9
6-14
PERIODIC MAINTENANCE AND MINOR REPAIR
EAU01168
Adjusting the engine idling
speedThe engine idling speed must be
checked and, if necessary, adjusted
as follows at the intervals specified in
the periodic maintenance and lubrica-
tion chart.NOTE:
A diagnostic tachometer is needed to
make this adjustment.1.Attach the tachometer to the
spark plug lead.
2.Start the engine and warm it up
for several minutes at 1,000Ð
2,000 r/min while occasionally
revving it to 4,000Ð5,000 r/min.NOTE:
The engine is warm when it quickly
responds to the throttle.
EAU00629
Adjusting the carburetorThe carburetor is an important part of
the engine and requires very sophisti-
cated adjustment. Therefore, most
carburetor adjustments should be left
to a Yamaha dealer, who has the
necessary professional knowledge
and experience. The adjustment
described in the following section,
however, may be serviced by the
owner as part of routine mainte-
nance.
EC000094
cCThe carburetor has been set and
extensively tested at the Yamaha
factory. Changing these settings
without sufficient technical knowl-
edge may result in poor perfor-
mance of or damage to the engine.
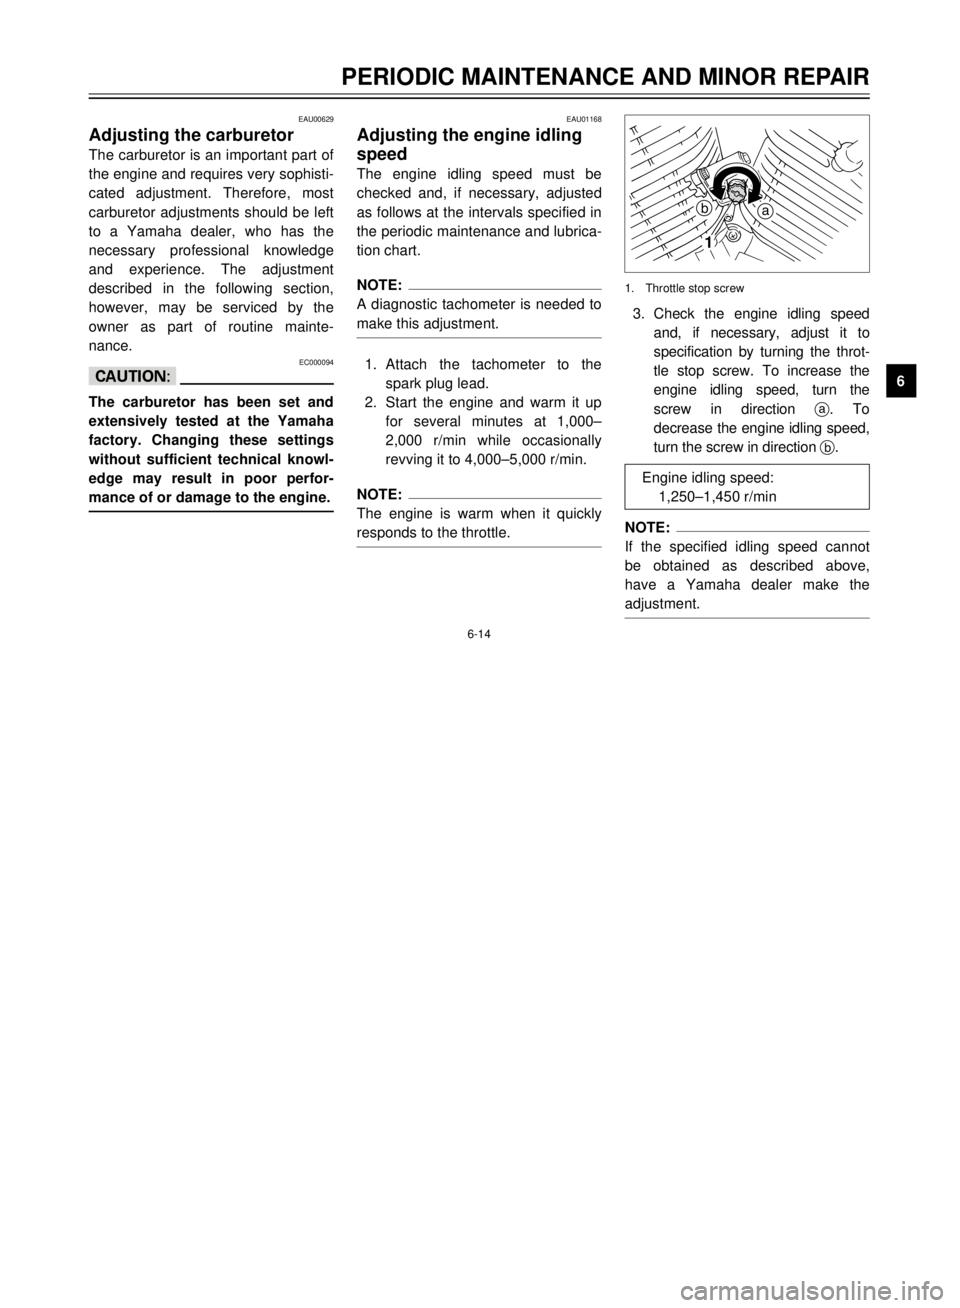
3.Check the engine idling speed
and, if necessary, adjust it to
specification by turning the throt-
tle stop screw. To increase the
engine idling speed, turn the
screw in direction a. To
decrease the engine idling speed,
turn the screw in direction b.NOTE:
If the specified idling speed cannot
be obtained as described above,
have a Yamaha dealer make the
adjustment.1.Throttle stop screw
1b
a
Engine idling speed:
1,250Ð1,450 r/min
5JX-9-E1 9/27/00 10:45 AM Page 43
Page 45 of 86

6-15
PERIODIC MAINTENANCE AND MINOR REPAIR
1
2
3
4
56
7
8
9
EAU00635
Adjusting the throttle cable
free playThe throttle cable free play should
measure 3Ð5 mm at the throttle grip.
Periodically check the throttle cable
free play and, if necessary, have a
Yamaha dealer adjust it.a.Throttle cable free play
a
EAU00637
Adjusting the valve
clearanceThe valve clearance changes with
use, resulting in improper air-fuel mix-
ture and/or engine noise. To prevent
this from occurring, the valve clear-
ance must be adjusted by a Yamaha
dealer at the intervals specified in the
periodic maintenance and lubrication
chart.
EAU03362
TiresTo maximize the performance, dura-
bility, and safe operation of your
motorcycle, note the following points
regarding the specified tires.
Tire air pressure
The tire air pressure should be
checked and, if necessary, adjusted
before each ride.
EW000082
w8The tire air pressure must be
checked and adjusted on cold
tires (i.e., when the tempera-
ture of the tires equals the
ambient temperature).
8The tire air pressure must be
adjusted in accordance with
the riding speed and with the
total weight of rider, passen-
ger, cargo, and accessories
approved for this model.
5JX-9-E1 9/27/00 10:45 AM Page 44
Page 56 of 86

1
2
3
4
56
7
8
9
6-26
PERIODIC MAINTENANCE AND MINOR REPAIR
1.Axle nut
1
2.To tighten the drive chain, turn
the adjusting nut at each end of
the swingarm in direction a. To
loosen the drive chain, turn the
adjusting nut at each end of the
swingarm in direction b, and
then push the rear wheel for-
ward.NOTE:
Using the alignment marks on each
side of the swingarm, make sure that
both adjusting nuts are in the same
position for proper wheel alignment.1.Drive chain adjusting nut
2.Alignment marks
3.Locknut
3
1
2
ba
EC000096
cCImproper drive chain slack will
overload the engine as well as
other vital parts of the motorcycle
and can lead to chain slippage or
breakage. To prevent this from
occurring, keep the drive chain
slack within the specified limits.3.Tighten both locknuts, and then
tighten the axle nut to the speci-
fied torque.
4.Adjust the brake pedal free play.
(See page 6-21 for brake pedal
free play adjustment proce-
dures.)
EW000103
wAfter adjusting the brake pedal
free play, check the operation of
the brake light.
Tightening torque:
Axle nut:
104 Nm (10.4 mákg)
5JX-9-E1 9/27/00 10:45 AM Page 55
Page 57 of 86

6-27
1
2
3
4
56
7
8
9
PERIODIC MAINTENANCE AND MINOR REPAIR
2.Wipe the drive chain dry.
3.Thoroughly lubricate the drive
chain with a special O-ring chain
lubricant.
ECA00052
cCDo not use engine oil or any other
lubricants for the drive chain, as
they may contain substances that
could damage the O-rings.
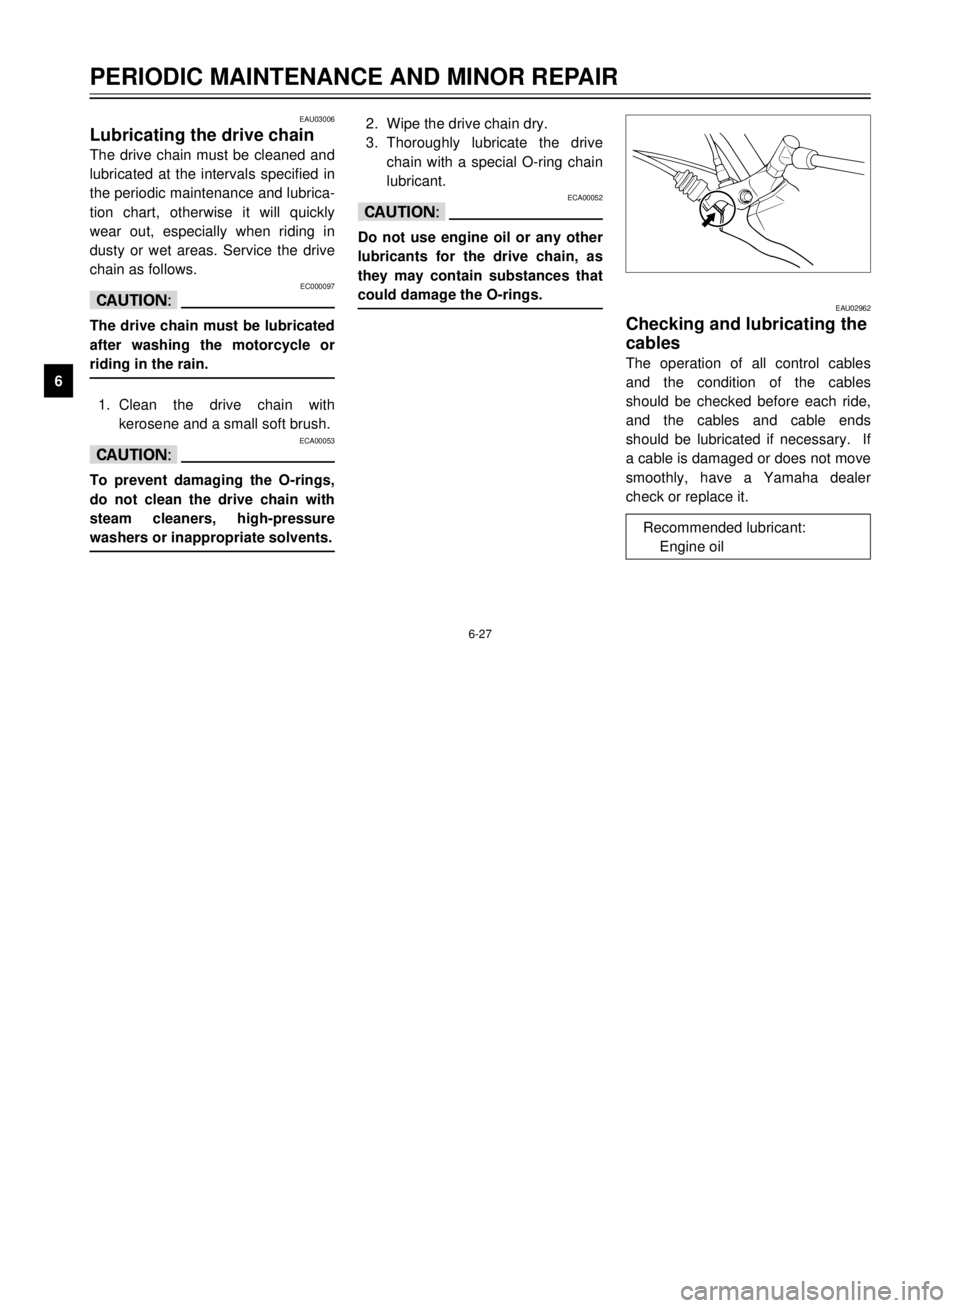
EAU02962
Checking and lubricating the
cablesThe operation of all control cables
and the condition of the cables
should be checked before each ride,
and the cables and cable ends
should be lubricated if necessary. If
a cable is damaged or does not move
smoothly, have a Yamaha dealer
check or replace it.
Recommended lubricant:
Engine oil
EAU03006
Lubricating the drive chainThe drive chain must be cleaned and
lubricated at the intervals specified in
the periodic maintenance and lubrica-
tion chart, otherwise it will quickly
wear out, especially when riding in
dusty or wet areas. Service the drive
chain as follows.
EC000097
cCThe drive chain must be lubricated
after washing the motorcycle or
riding in the rain.1.Clean the drive chain with
kerosene and a small soft brush.
ECA00053
cCTo prevent damaging the O-rings,
do not clean the drive chain with
steam cleaners, high-pressure
washers or inappropriate solvents.
5JX-9-E1 9/27/00 10:45 AM Page 56
Page 60 of 86

1
2
3
4
56
7
8
9
6-30
PERIODIC MAINTENANCE AND MINOR REPAIR
EAU00794
Checking the steeringWorn or loose steering bearings may
cause danger. Therefore, the opera-
tion of the steering must be checked
as follows at the intervals specified in
the periodic maintenance and lubrica-
tion chart.
1.Place a stand under the engine
to raise the front wheel off the
ground.
EW000115
wSecurely support the motorcycle
so that there is no danger of it
falling over.
2.Hold the lower ends of the front
fork legs and try to move them
forward and backward. If any
free play can be felt, have a
Yamaha dealer check or repair
the steering.
EAU01144
Checking the wheel bearingsThe front and rear wheel bearings
must be checked at the intervals
specified in the periodic maintenance
and lubrication chart. If there is play
in the wheel hub or if the wheel does
not turn smoothly, have a Yamaha
dealer check the wheel bearings.
5JX-9-E1 9/27/00 10:45 AM Page 59
Page 67 of 86

6-37
1
2
3
4
56
7
8
9
PERIODIC MAINTENANCE AND MINOR REPAIR
To service the rear wheel
Raise the rear wheel off the ground
by using a motorcycle stand or, if a
motorcycle stand is not available, by
placing a jack either under each side
of the frame in front of the rear wheel
or under each side of the swingarm.
EAU03239
Front wheelTo remove the front wheel
EW000122
w8It is advisable to have a
Yamaha dealer service the
wheel.
8Securely support the motorcy-
cle so that there is no danger
of it falling over.1.Disconnect the speedometer
cable from the front wheel.1.Speedometer cable
1
EAU01579
Supporting the motorcycleSince this model is not equipped with
a centerstand, follow these precau-
tions when removing the front and
rear wheel or performing other main-
tenance requiring the motorcycle to
stand upright. Check that the motor-
cycle is in a stable and level position
before starting any maintenance. A
strong wooden box can be placed
under the engine for added stability.
To service the front wheel
1.Stabilize the rear of the motorcy-
cle by using a motorcycle stand
or, if an additional motorcycle
stand is not available, by placing
a jack under the frame in front of
the rear wheel.
2.Raise the front wheel off the
ground by using a motorcycle
stand.
5JX-9-E1 9/27/00 10:45 AM Page 66
Page 72 of 86

PERIODIC MAINTENANCE AND MINOR REPAIR
1
2
3
4
56
7
8
9
6-42
EAU01297
Troubleshooting chart
EW000125
wKeep away open flames and do not smoke while checking or working on the fuel system.1. Fuel
2. Compression
3. Ignition
4. Battery
Remove the spark
There is compression.
There is no compression.
Check the ignition.Have a Yamaha dealer check the vehicle.
Wet
DryWipe off with a dry cloth and correct the spark
Have a Yamaha dealer check the vehicle.
The engine turns
The engine turnsThe battery is good.
Check the battely lead connections,
Check the fuel level
There is enough fuel.
There is no fuel.
Check the compression.
in the fuel tank.
the electrodes. plugs and check
over quickly.
over slowly.and charge the battery if necessary.Open the throttle halfway and
The engine does not start.Check the battery. operate the electric starter. plug gaps, or replace the spark plugs.
Supply fuel.
The engine does not start. Check the compression.
Operate the electric
starter. Operate the electric starter.
The engine does not start.
Have a Yamaha dealer
check the vehicle.
5JX-9-E1 9/27/00 10:45 AM Page 71