oil YAMAHA YFM80R 2005 Owners Manual
[x] Cancel search | Manufacturer: YAMAHA, Model Year: 2005, Model line: YFM80R, Model: YAMAHA YFM80R 2005Pages: 343, PDF Size: 5.94 MB
Page 17 of 343

LOCATION OF THE WARNING AND
SPECIFICATION LABELS .......................1-1
SAFETY INFORMATION .........................2-1
DESCRIPTION AND MACHINE
IDENTIFICATION.....................................3-1
Identification number records ...............3-3
Key identification number .....................3-5
Vehicle identification number ...............3-7
Model label ...........................................3-9
CONTROL FUNCTIONS..........................4-1
Main switch ...........................................4-1
Indicator lights ......................................4-3
Handlebar switches ..............................4-3
Throttle lever ........................................4-7
Speed limiter ........................................4-9
Front brake lever ................................4-13Brake pedal and rear brake lever .......4-15
Parking brake .....................................4-17
Shift pedal ..........................................4-19
Fuel tank cap ......................................4-19
Fuel cock ............................................4-21
Choke lever ........................................4-23
Seat ....................................................4-25
PRE-OPERATION CHECKS ...................5-1
Front and rear brakes ...........................5-5
Fuel ......................................................5-9
Engine oil ............................................5-11
Final gear oil .......................................5-15
Throttle lever ......................................5-17
Fittings and fasteners .........................5-17
Switches .............................................5-17
Battery ................................................5-17
Tires ...................................................5-19
How to measure tire pressure ............5-23
Tire wear limit .....................................5-25
EBU00015
CONTENTS
1
2
3
4
5
5TH-9-63 ~3 17/3/04 11:25 AM Page 16
Page 18 of 343

OPERATION ............................................6-1
Starting a cold engine ...........................6-3
Starting a warm engine ......................6-11
Warming up ........................................6-11
Shifting ...............................................6-13
To start out and accelerate .................6-15
To decelerate .....................................6-19
Engine break-in ..................................6-21
Parking ...............................................6-25
Parking on a slope ..............................6-27
Accessories and loading ....................6-29
Riding Your ATV ......................................7-1
Getting to know your ATV.....................7-3
Ride with care and good
judgement ...........................................7-5
Be careful where you ride ...................7-27
Turning your ATV ...............................7-41
Climbing uphill ....................................7-45
Riding downhill ...................................7-57
Crossing a slope .................................7-61Crossing through shallow water .........7-65
Riding over rough terrain ....................7-69
Sliding and skidding ...........................7-71
What to do if ......................................7-75
What to do .........................................7-75
PERIODIC MAINTENANCE AND
ADJUSTMENT .........................................8-1
Owner’s manual and tool kit .................8-3
Periodic maintenance/lubrication .........8-7
Engine oil ............................................8-13
Final gear oil .......................................8-19
Spark plug inspection .........................8-23
Air filter cleaning .................................8-27
Air intake restrictor plate removal .......8-33
Carburetor adjustment ........................8-35
Idle speed adjustment ........................8-37
Valve clearance adjustment ...............8-39
Cam chain adjustment ........................8-39
Front and rear brake shoe
inspection .........................................8-416
7
8
5TH-9-63 ~3 17/3/04 11:25 AM Page 17
Page 93 of 343

5-1
EBU00113
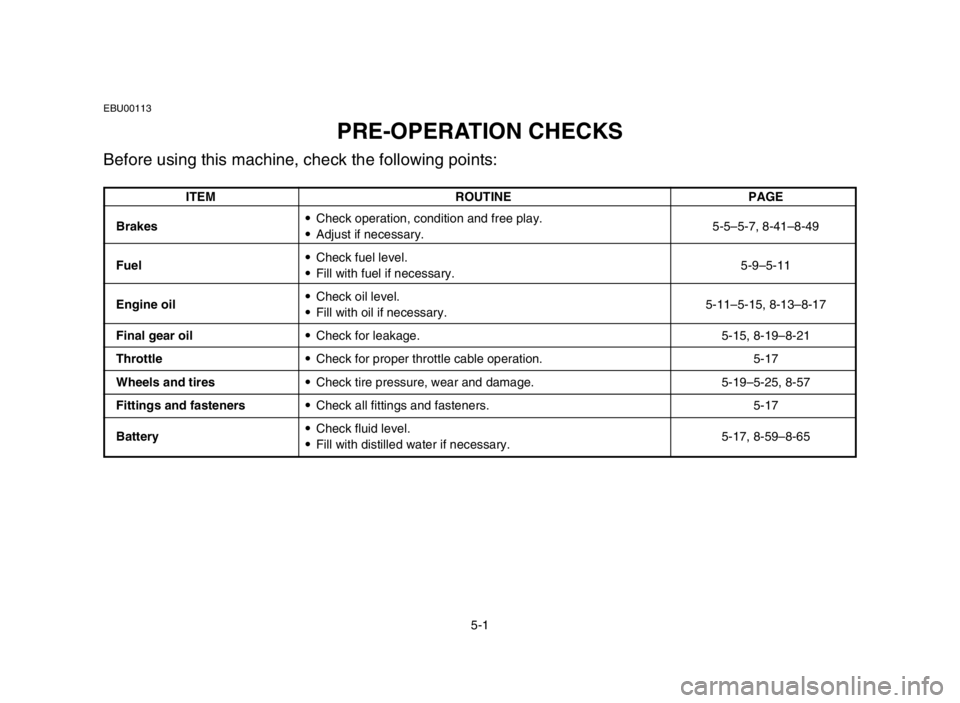
PRE-OPERATION CHECKS
Before using this machine, check the following points:
ITEM ROUTINE PAGE
Brakes9Check operation, condition and free play.
5-5–5-7, 8-41–8-49
9Adjust if necessary.
Fuel9Check fuel level.
9Fill with fuel if necessary.5-9–5-11
Engine oil9Check oil level.
9Fill with oil if necessary.5-11–5-15, 8-13–8-17
Final gear oil9Check for leakage. 5-15, 8-19–8-21
Throttle9Check for proper throttle cable operation. 5-17
Wheels and tires9Check tire pressure, wear and damage. 5-19–5-25, 8-57
Fittings and fasteners9Check all fittings and fasteners. 5-17
Battery9Check fluid level.
5-17, 8-59–8-65
9Fill with distilled water if necessary.
5TH-9-63 4~5 17/3/04 11:25 AM Page 26
Page 94 of 343

5-2
FBU00113
CONTRÔLES AVANT LE DÉMARRAGE
Contrôler les points suivants avant de mettre le moteur en marche:
5
DESCRIPTION VÉRIFICATION PAGE
Freins9Contrôler le fonctionnement, l’état et le jeu.
5-6–5-8, 8-42–8-50
9Régler si nécessaire.
Carburant9Contrôler le niveau de carburant.
9Ajouter de l’essence si nécessaire.5-10–5-12
Huile moteur9Contrôler le niveau d’huile.
9Ajouter de l’huile si nécessaire.5-12– 5-16, 8-14–8-18
Huile du carter de
9Contrôler s’il n’y a pas de fuites.
transmission finale5-16, 8-20–8-22
Accélérateur9Vérifier le fonctionnement des câbles d’accélérateur. 5-18
Roues et pneus9Vérifier la pression de gonflage des pneus/le voile/
5-20–5-26, 8-58
la tension des rayons/les écrous d’axes.
Visserie9Contrôler tous les assemblages et fixations. 5-18
Batterie9Contrôler le niveau du liquide.
5-18, 8-60–8-66
9Adjouter avec de l’eau distillée si nécessaire.
5TH-9-63 4~5 17/3/04 11:25 AM Page 27
Page 103 of 343

5-11
w
8Do not overfill the fuel tank. Fuel expands
when it heats up. If the fuel tank is over-
filled, fuel could spill out due to heat from
the engine or the sun.
8Be careful not to spill fuel, especially on
the engine or exhaust pipe which can
cause a fire and severe injury. Wipe up
any spilled fuel immediately.
8Do not refuel right after the engine has
been running and is still very hot.
8Be sure the fuel tank cap is closed secure-
ly.
EBU10842
Engine oil
Make sure the engine oil is at the specified level.
Add oil as necessary. (See page 8-13.)
5TH-9-63 4~5 17/3/04 11:25 AM Page 36
Page 105 of 343

5-13
cC
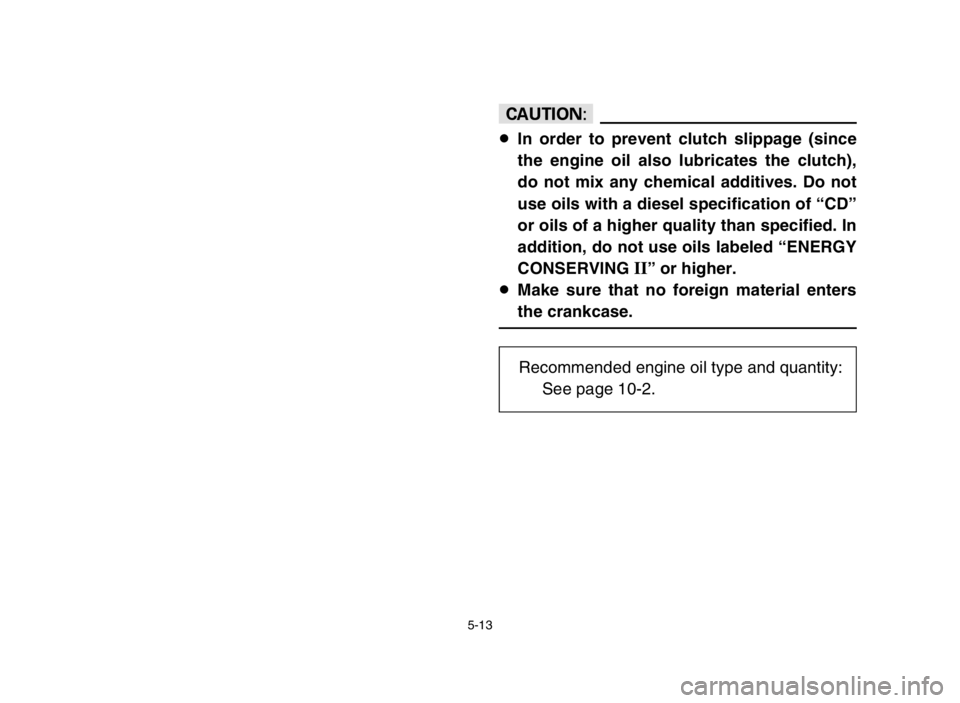
8In order to prevent clutch slippage (since
the engine oil also lubricates the clutch),
do not mix any chemical additives. Do not
use oils with a diesel specification of “CD”
or oils of a higher quality than specified. In
addition, do not use oils labeled “ENERGY
CONSERVING
II” or higher.
8Make sure that no foreign material enters
the crankcase.
Recommended engine oil type and quantity:
See page 10-2.
5TH-9-63 4~5 17/3/04 11:25 AM Page 38
Page 107 of 343

5-15
EBU00493
Final gear oil
Make sure the final gear oil is at the specified
level. Add oil as necessary. (See pages 8-19–
8-21 for details.)
If desired, an SAE 80W90 hypoid gear oil may
be used for all conditions.
NOTE
GL-4 is a quality and additive rating, GL-5 or
GL-6 rated hypoid gear oils may also be used.
Recommended oil:
SAE80API “GL-4” Hypoid gear oil
5TH-9-63 4~5 17/3/04 11:25 AM Page 40
Page 244 of 343

8-8 * Since these items require special tools, data and technical skills, have a Yamaha dealer perform the service.INITIAL EVERY
month 1 3 6 6 12
ITEM ROUTINEWhichever
km 320 1200 2400 2400 4800 comes first
(mi) (200) (750) (1500) (1500) (3000)
hours 20 75 150 150 300
Engine oil9Replace (warm engine before draining).2222
Final gear oil9Check oil level/oil leakage.
22
9Replace every 12 months.
Brakes*9Check operation.
22222
9Adjust if necessary.
Clutch*9Check operation.
2222
9Adjust if necessary.
Wheels*9Check balance/damage/runout.
2222
9Replace if necessary.
9Check bearing assemblies for looseness/
Wheel bearings*damage.2222
9Replace if damaged.
9Check operation.
Steering system*9Replace if damage.
22222
9Check toe-in
9Adjust if necessary.
Knuckle shafts/9Lubricate every 6 months with lithium-soap-based
222
steering shaft*grease.
Fittings and fasteners*9Check all chassis fittings and fasteners.
22222
9Correct if necessary.
9Check specific gravity.
Battery*9Check breather hose for correct routing.22222
9Correct if necessary.
5TH-9-63 8 17/3/04 11:24 AM Page 8-8
Page 249 of 343

8-13
EBU14181
Engine oil
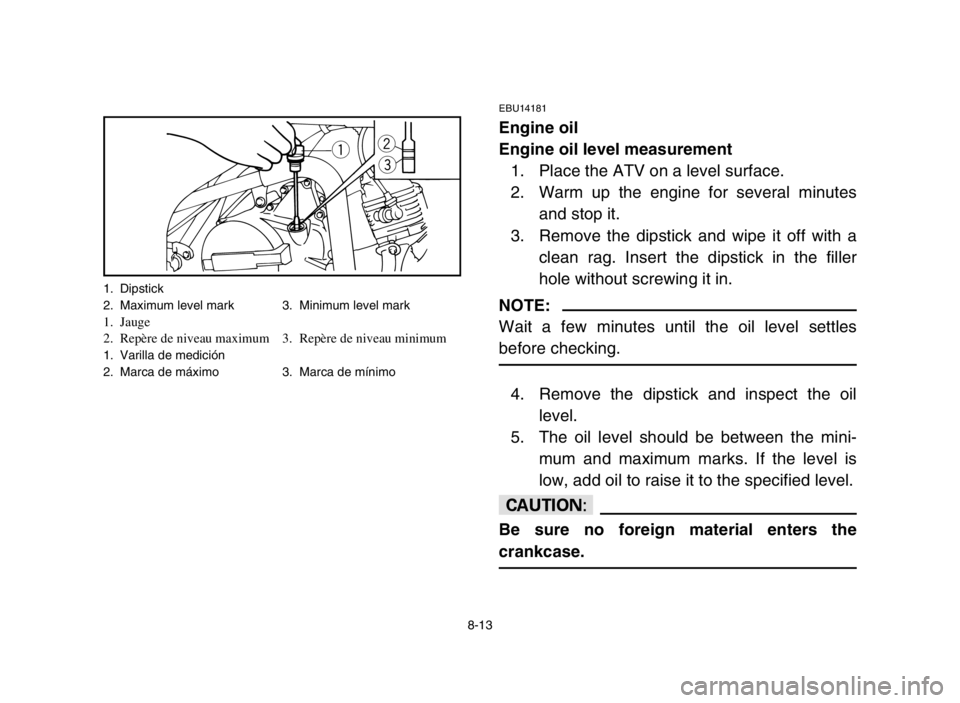
Engine oil level measurement
1. Place the ATV on a level surface.
2. Warm up the engine for several minutes
and stop it.
3. Remove the dipstick and wipe it off with a
clean rag. Insert the dipstick in the filler
hole without screwing it in.
NOTE:
Wait a few minutes until the oil level settles
before checking.
4. Remove the dipstick and inspect the oil
level.
5. The oil level should be between the mini-
mum and maximum marks. If the level is
low, add oil to raise it to the specified level.
cC
Be sure no foreign material enters the
crankcase.
qw
e
1. Dipstick
2. Maximum level mark 3. Minimum level mark
1. Jauge
2. Repère de niveau maximum 3. Repère de niveau minimum
1. Varilla de medición
2. Marca de máximo 3. Marca de mínimo
5TH-9-63 8 17/3/04 11:24 AM Page 8-13
Page 251 of 343

8-15
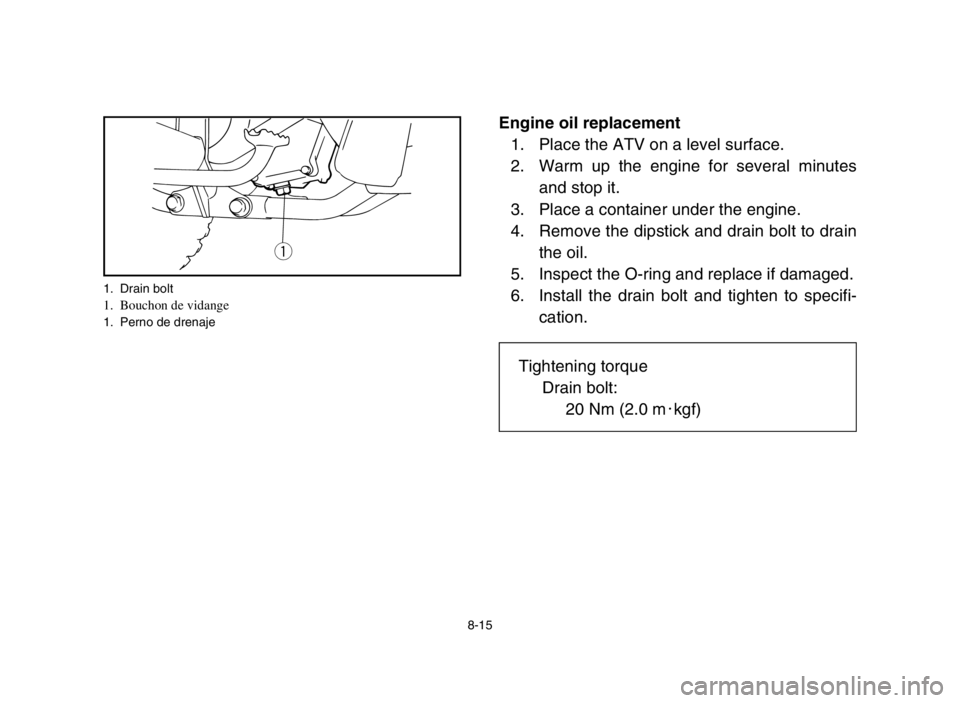
Engine oil replacement
1. Place the ATV on a level surface.
2. Warm up the engine for several minutes
and stop it.
3. Place a container under the engine.
4. Remove the dipstick and drain bolt to drain
the oil.
5. Inspect the O-ring and replace if damaged.
6. Install the drain bolt and tighten to specifi-
cation.
q
1. Drain bolt1. Bouchon de vidange1. Perno de drenaje
Tightening torque
Drain bolt:
20 Nm (2.0 m0kgf)
5TH-9-63 8 17/3/04 11:24 AM Page 8-15