wheel YAMAHA YFZ450 2013 Owners Manual
[x] Cancel search | Manufacturer: YAMAHA, Model Year: 2013, Model line: YFZ450, Model: YAMAHA YFZ450 2013Pages: 154, PDF Size: 3.77 MB
Page 10 of 154

Checking the wheel hub bearings ............ 8-45
Lubricating the swingarm pivots ............... 8-46
Lubricating the upper and lower arm pivots ...................................................... 8-46
Lubricating the steering shaft ................... 8-47
Battery ...................................................... 8-48
Replacing the fuse ................................... 8-50
Replacing a headlight bulb ....................... 8-51
Adjusting a headlight beam ...................... 8-53
Replacing the tail/brake light bulb ............ 8-53
Removing a wheel .................................... 8-54
Installing a wheel ...................................... 8-55
Troubleshooting ....................................... 8-56
Troubleshooting charts ............................. 8-57
CLEANING AND STORAGE .......................... 9-1 Cleaning ..................................................... 9-1
Storage ....................................................... 9-2
SPECIFICATIONS ...................................... 10-1
CONSUMER INFORMATION ...................... 11-1 Identification numbers .............................. 11-1
U1PD61E0.book Page 3 Tuesday, February 14, 2012 10:06 AM
Page 21 of 154

2-2
2
●Never operate at speeds too fast for your skills
or the riding conditions. Always go at a speed
that is proper for the terrain, visibility, operating
conditions, and your experience.●Never attempt wheelies, jumps, or other stunts.●Always inspect your ATV each time you use it to
make sure it is in safe operating condition. Al-
ways follow the inspection and maintenance
procedures and schedules described in this
manual.●Always keep both hands on the handlebars and
both feet on the footrests of the ATV during op-
eration.●Always go slowly and be extra careful when op-
erating on unfamiliar terrain. Always be alert to
changing terrain conditions when operating the
ATV.●Never operate on excessively rough, slippery or
loose terrain until you have learned and prac-
ticed the skills necessary to control the ATV on
such terrain. Always be especially cautious on
these kinds of terrain.●Always follow proper procedures for turning as
described in this manual. Practice turning at low
speeds before attempting to turn at faster
speeds and never turn at excessive speeds.
●Never operate the ATV on hills too steep for the
ATV or for your abilities. Practice on smaller hills
before attempting larger hills.●Always follow proper procedures for climbing
hills as described in this manual. Check the ter-
rain carefully before you start up any hill. Never
climb hills with excessively slippery or loose sur-
faces. Shift your weight forward. Never open the
throttle suddenly or make sudden gear changes.
Never go over the top of a hill at high speed.●Always follow proper procedures for going down
hills and for braking on hills as described in this
manual. Check the terrain carefully before you
start down any hill. Shift your weight backward.
Never go down a hill at high speed. Avoid going
down a hill at an angle that would cause the ve-
hicle to lean sharply to one side. Go straight
down the hill where possible.●Always follow proper procedures for crossing
the side of a hill as described in this manual.
Avoid hills with excessively slippery or loose sur-
faces. Shift your weight to the uphill side of the
ATV. Never attempt to turn the ATV around on
any hill until you have mastered the turning tech-
nique described in this manual on level ground.
Avoid crossing the side of a steep hill if possible.
U1PD61E0.book Page 2 Tuesday, February 14, 2012 10:06 AM
Page 24 of 154

2-5
24. Once immediate safety hazards are con-
firmed not to exist, you may remove your hel-
met to more closely inspect your vehicle.
Check for external signs of wear, broken
parts, fluid leaks, cracks in the frame, suspen-
sion damage, wheel damage, and so on. Fuel,
oil, and coolant usually give off a noticeable
odor.
5. If your vehicle will not restart or if it is unsafe to ride, then turn off all vehicle systems (en-
gine stop switch, main switch, and fuel cock),
and then signal or go for help.
Aftermarket Parts, Accessories, and Modifica-
tions
While you may find aftermarket products similar in
design and quality to genuine Yamaha accesso-
ries, recognize that some aftermarket accessories
or modifications are not suitable because of poten-
tial safety hazards to you or others. Installing after-
market products or having other modifications
performed to your vehicle that change any of the
vehicle’s design or operation characteristics can
put you and others at greater risk of serious injury
or death. You are responsible for injuries related to changes in the vehicle. Keep the following guide-
lines in mind, as well as those provided under
“Loading” when mounting accessories.
●Never install accessories that would impair the
performance of your ATV. Carefully inspect the
accessory before using it to make sure that it
does not in any way reduce ground clearance,
limit suspension travel, steering travel or control
operation.●Accessories fitted to the ATV can create instabil-
ity due to improper weight distribution.●Bulky or large accessories may seriously affect
the stability of the ATV.●Certain accessories can displace the operator
from his or her normal riding position. This im-
proper position limits the freedom of movement
of the operator and may limit control ability,
therefore, such accessories are not recom-
mended.●Use caution when adding electrical accessories.
If electrical accessories exceed the capacity of
the ATV’s electrical system, an electric failure
could result, which could cause a dangerous
loss of lights or engine power.
U1PD61E0.book Page 5 Tuesday, February 14, 2012 10:06 AM
Page 46 of 154

5-2
5
Front brake Check operation. If soft or spongy, have Yamaha dealer bleed hy-
draulic system.
Check brake pads for wear , and replace if necessary.
Check brake fluid level in reservoir, and add specified brake fluid to specified level if necessary.
Check hydraulic system for leakage. Correct if necessary. 5-4, 8-32, 8-33, 8-36
Rear brake Check operation. If soft or spongy, have Yamaha dealer bleed hy-
draulic system.
Check brake pads for wear , and replace if necessary.
Check brake fluid level in reservoir, and add specified brake fluid to specified level if necessary.
Check hydraulic system for leakage. Correct if necessary. 5-4, 8-32, 8-33, 8-36
Clutch Check operation, and correct if necessary.
Lubricate cable if necessary.
Check lever free play, and adjust if necessary. 8-39
Throttle lever Make sure that operation is smooth. Lubricate cable and lever hous-
ing if necessary.
Check lever free play, and adjust if necessary. 5-5, 8-31
Control cables Make sure that operation is smooth. Lubricate if necessary. 8-43
Drive chain Check chain slack, and adjust if necessary.
Check chain condition. Lubricate if necessary. 5-5, 8-41, 8-43
Wheels and tires Check wheel condition, and replace if damaged.
Check tire condition and tread depth. Replace if necessary.
Check air pressure. Correct if necessary. 5-5
Shift pedal Make sure that operation is smooth.
Correct if necessary.
8-45
Brake pedal Make sure that operation is smooth. Lubricate pedal pivoting point if
necessary. 8-45
ITEM ROUTINE PAGEU1PD61E0.book Page 2 Tuesday, February 14, 2012 10:06 AM
Page 55 of 154

6-4
6
3. Shift into first gear, and then release the
brake.
4. Open the throttle gradually and at the same time, release the clutch lever slowly.
WARNING! Opening the throttle abruptly or releasing the clutch lever too quickly
could make the ATV wheelie, which would
increase the chance of an accident, includ-
ing an overturn.
[EWB00731]
5. Once the ATV has attained adequate speed, release the throttle, and at the same time,
quickly pull in the clutch lever.
6. Shift the transmission into second gear. (Make sure not to shift the transmission into
neutral.)
7. Open the throttle part way and gradually re- lease the clutch lever.
8. Follow the same procedure when shifting to the next higher gear.EBU20650To decelerate
When slowing down or stopping, release the throt-
tle and apply the brakes smoothly and evenly. As
you slow down, shift to a lower gear. Be sure that
the engine has sufficiently slowed before engaging a lower gear. Improper use of the brakes or shifting
can cause the tires to lose traction, reducing con-
trol and increasing the possibility of an accident.
WARNING
EWB00710Make sure the engine has sufficiently slowed
before shifting to a lower gear. Engaging a low-
er gear when the engine speed is too high
could make the wheels stop rotating and lose
traction. This could cause loss of control, an
accident and injury. It could also cause engine
or drive train damage.NOTICEECB00180●Even with the transmission in the neutral po-
sition, do not coast for long periods of time
with the engine off, and do not tow the ATV
for long distances. The transmission is prop-
erly lubricated only when the engine is run-
ning. Inadequate lubrication may damage
the transmission.
U1PD61E0.book Page 4 Tuesday, February 14, 2012 10:06 AM
Page 57 of 154

6-6
6
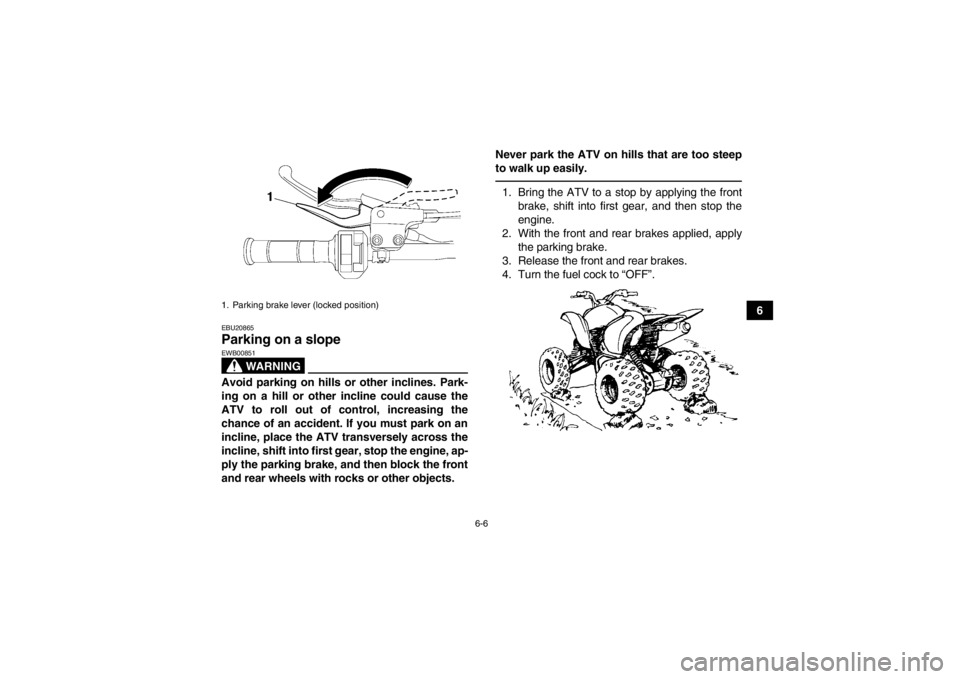
EBU20865Parking on a slope
WARNING
EWB00851Avoid parking on hills or other inclines. Park-
ing on a hill or other incline could cause the
ATV to roll out of control, increasing the
chance of an accident. If you must park on an
incline, place the ATV transversely across the
incline, shift into first gear, stop the engine, ap-
ply the parking brake, and then block the front
and rear wheels with rocks or other objects.Never park the ATV on hills that are too steep
to walk up easily.
1. Bring the ATV to a stop by applying the front
brake, shift into first gear, and then stop the
engine.
2. With the front and rear brakes applied, apply the parking brake.
3. Release the front and rear brakes.
4. Turn the fuel cock to “OFF”.
1. Parking brake lever (locked position)U1PD61E0.book Page 6 Tuesday, February 14, 2012 10:06 AM
Page 66 of 154

7-7
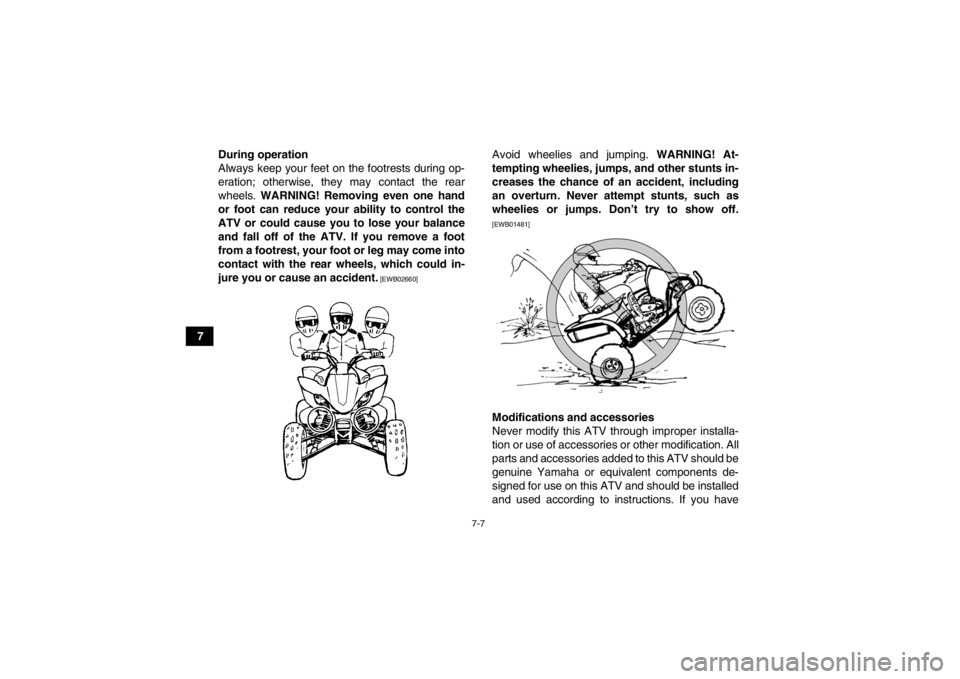
7During operation
Always keep your feet on the footrests during op-
eration; otherwise, they may contact the rear
wheels.
WARNING! Removing even one hand
or foot can reduce your ability to control the
ATV or could cause you to lose your balance
and fall off of the ATV. If you remove a foot
from a footrest, your foot or leg may come into
contact with the rear wheels, which could in-
jure you or cause an accident.
[EWB02660]
Avoid wheelies and jumping. WARNING! At-
tempting wheelies, jumps, and other stunts in-
creases the chance of an accident, including
an overturn. Never attempt stunts, such as
wheelies or jumps. Don’t try to show off.[EWB01481]Modifications and accessories
Never modify this ATV through improper installa-
tion or use of accessories or other modification. All
parts and accessories added to this ATV should be
genuine Yamaha or equivalent components de-
signed for use on this ATV and should be installed
and used according to instructions. If you have
U1PD61E0.book Page 7 Tuesday, February 14, 2012 10:06 AM
Page 70 of 154

7-11
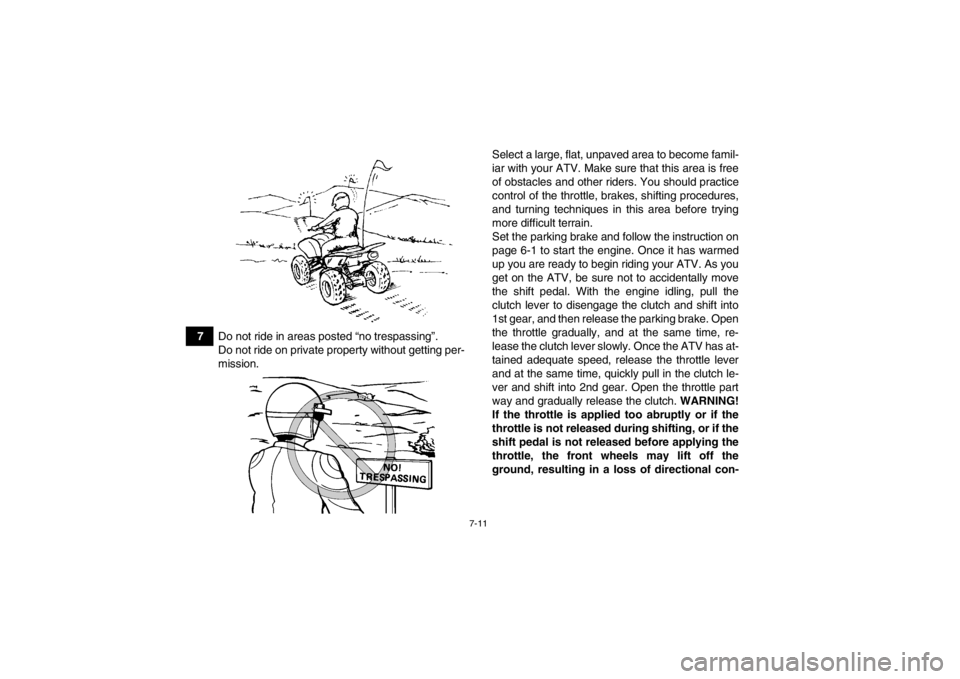
7Do not ride in areas posted “no trespassing”.
Do not ride on private property without getting per-
mission. Select a large, flat, unpaved area to become famil-
iar with your ATV. Make sure that this area is free
of obstacles and other riders. You should practice
control of the throttle, brakes, shifting procedures,
and turning techniques in this area before trying
more difficult terrain.
Set the parking brake and follow the instruction on
page 6-1 to start the engine. Once it has warmed
up you are ready to begin riding your ATV. As you
get on the ATV, be sure not to accidentally move
the shift pedal. With the engine idling, pull the
clutch lever to disengage the clutch and shift into
1st gear, and then release the parking brake. Open
the throttle gradually, and at the same time, re-
lease the clutch lever slowly. Once the ATV has at-
tained adequate speed, release the throttle lever
and at the same time, quickly pull in the clutch le-
ver and shift into 2nd gear. Open the throttle part
way and gradually release the clutch.
WARNING!
If the throttle is applied too abruptly or if the
throttle is not released during shifting, or if the
shift pedal is not released before applying the
throttle, the front wheels may lift off the
ground, resulting in a loss of directional con-
U1PD61E0.book Page 11 Tuesday, February 14, 2012 10:06 AM
Page 71 of 154
![YAMAHA YFZ450 2013 Owners Manual 7-12
7
trol.
[EWB02631]
NOTICE: Do not shift gears without
releasing the throttle. Damage to the engine or
drive train may occur.
[ECB01071]
Use this same procedure as you move into the
higher ge YAMAHA YFZ450 2013 Owners Manual 7-12
7
trol.
[EWB02631]
NOTICE: Do not shift gears without
releasing the throttle. Damage to the engine or
drive train may occur.
[ECB01071]
Use this same procedure as you move into the
higher ge](/img/51/53813/w960_53813-70.png)
7-12
7
trol.
[EWB02631]
NOTICE: Do not shift gears without
releasing the throttle. Damage to the engine or
drive train may occur.
[ECB01071]
Use this same procedure as you move into the
higher gears. Be sure to coordinate the use of the
throttle and shift pedal properly.
Avoid higher speeds until you are thoroughly famil-
iar with the operation of your ATV.
When slowing down or stopping, release the throt-
tle and apply the brakes smoothly and evenly. As
you slow down, shift to a lower gear. Be sure that
the engine has sufficiently slowed before engaging
a lower gear. Improper use of the brakes or shifting
can cause the tires to lose traction, reducing con-
trol and increasing the possibility of an accident.
TURNING YOUR ATV
WARNING
EWB01771Always follow proper procedures for turning
as described in this Owner’s Manual. Practice
turning at low speeds before attempting to turn
at faster speeds. Do not turn at speeds too fast
for your skills or the conditions. ATV could go
out of control, causing a collision or overturn.
To achieve maximum traction on unpaved surfac-
es, the two rear wheels turn together at the same
speed. Therefore, unless the wheel on the inside
of the turn is allowed to slip or lose some traction,
the ATV will resist turning. A special turning tech-
nique must be used to allow the ATV to make turns
quickly and easily. It is essential that this skill be
learned first at low speed.
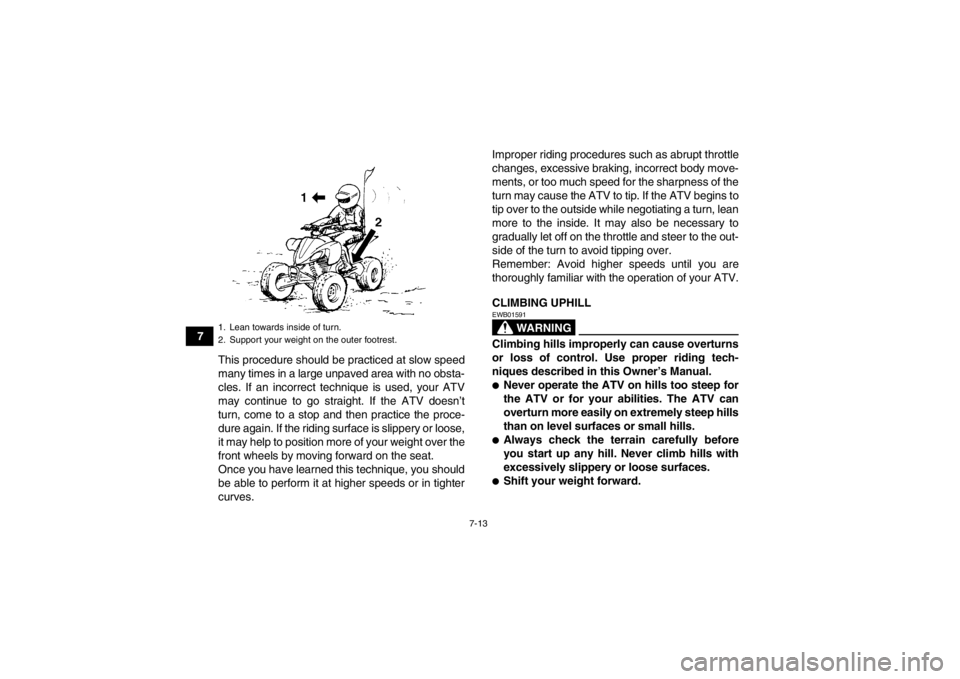
As you approach a curve, slow down and begin to
turn the handlebars in the desired direction. As you
do so, put your weight on the footrest to the outside
of the turn (opposite your desired direction) and
lean your upper body into the turn. Use the throttle
to maintain an even speed through the turn. This
maneuver will let the wheel on the inside of the turn
slip slightly, allowing the ATV to make the turn
properly.
U1PD61E0.book Page 12 Tuesday, February 14, 2012 10:06 AM
Page 72 of 154

7-13
7This procedure should be practiced at slow speed
many times in a large unpaved area with no obsta-
cles. If an incorrect technique is used, your ATV
may continue to go straight. If the ATV doesn’t
turn, come to a stop and then practice the proce-
dure again. If the riding surface is slippery or loose,
it may help to position more of your weight over the
front wheels by moving forward on the seat.
Once you have learned this technique, you should
be able to perform it at higher speeds or in tighter
curves. Improper riding procedures such as abrupt throttle
changes, excessive braking, incorrect body move-
ments, or too much speed for the sharpness of the
turn may cause the ATV to tip. If the ATV begins to
tip over to the outside while negotiating a turn, lean
more to the inside. It may also be necessary to
gradually let off on the throttle and steer to the out-
side of the turn to avoid tipping over.
Remember: Avoid higher speeds until you are
thoroughly familiar with the operation of your ATV.
CLIMBING UPHILL
WARNING
EWB01591Climbing hills improperly can cause overturns
or loss of control. Use proper riding tech-
niques described in this Owner’s Manual.●Never operate the ATV on hills too steep for
the ATV or for your abilities. The ATV can
overturn more easily on extremely steep hills
than on level surfaces or small hills.●Always check the terrain carefully before
you start up any hill. Never climb hills with
excessively slippery or loose surfaces.●Shift your weight forward.
1. Lean towards inside of turn.
2. Support your weight on the outer footrest.U1PD61E0.book Page 13 Tuesday, February 14, 2012 10:06 AM