ECU YAMAHA YFZ450R 2013 Owners Manual
[x] Cancel search | Manufacturer: YAMAHA, Model Year: 2013, Model line: YFZ450R, Model: YAMAHA YFZ450R 2013Pages: 156, PDF Size: 3.75 MB
Page 1 of 156

YFZ450RD
YFZ450RSED
OWNER’S MANUAL
MANUEL DU PROPRIÉTAIRE
MANUAL DEL PROPIETARIO
18P-28199-67
READ THIS MANUAL CAREFULLY!
It contains important safety information.
LIRE ATTENTIVEMENT CE MANUEL!
Il comprend d’importantes informations de sécurité.
¡LEA ESTE MANUAL ATENTAMENTE!
Contiene indicaciones importantes acerca de la seguridad.
DIC183
Page 22 of 156

2-3
2
●Always use proper procedures if you stall or roll
backwards when climbing a hill. To avoid stall-
ing, use the proper gear and maintain a steady
speed when climbing a hill. If you stall or roll
backwards, follow the special procedure for
braking described in this manual. Dismount on
the uphill side or to a side if pointed straight up-
hill. Turn the ATV around and remount, following
the procedure described in this manual.●Always check for obstacles before operating in a
new area.●Never attempt to operate over large obstacles,
such as large rocks or fallen trees. Always follow
proper procedures when operating over obsta-
cles as described in this manual.●Always be careful when skidding or sliding.
Learn to safely control skidding or sliding by
practicing at low speeds and on level, smooth
terrain. On extremely slippery surfaces, such as
ice, go slowly and be very cautious in order to re-
duce the chance of skidding or sliding out of con-
trol.●Never operate an ATV in fast flowing water or in
water deeper than that recommended in this
manual. Remember that wet brakes may havereduced stopping ability. Test your brakes after
leaving water. If necessary, apply them several
times to let friction dry out the linings.
●Always use the size and type of tires specified in
this manual.●Always maintain proper tire pressure as de-
scribed in this manual.●Never exceed the stated load capacity for an
ATV. Cargo should be properly distributed and
securely attached. Reduce speed and follow in-
structions in this manual for carrying cargo or
pulling a trailer. Allow greater distance for brak-
ing.●Do not operate your ATV during darkness un-
less it is equipped with a properly functioning
headlight. Off-road riding is inherently danger-
ous and additionally, off-road trails do not have
streetlights to guide you.●Never maintain an ATV without proper knowl-
edge. Contact an authorized ATV dealer to in-
form you on basic ATV maintenance. Certain
maintenance can only be carried out by certified
staff.
U18P67E0.book Page 3 Wednesday, May 9, 2012 3:30 PM
Page 37 of 156
![YAMAHA YFZ450R 2013 Owners Manual 4-10
4
3. Wipe up any spilled fuel immediately. NOTICE: Immediately wipe off spilled fuel
with a clean, dry, soft cloth, since fuel may
deteriorate painted surfaces or plastic
parts.
[ECB00981]
4. T YAMAHA YFZ450R 2013 Owners Manual 4-10
4
3. Wipe up any spilled fuel immediately. NOTICE: Immediately wipe off spilled fuel
with a clean, dry, soft cloth, since fuel may
deteriorate painted surfaces or plastic
parts.
[ECB00981]
4. T](/img/51/53846/w960_53846-36.png)
4-10
4
3. Wipe up any spilled fuel immediately. NOTICE: Immediately wipe off spilled fuel
with a clean, dry, soft cloth, since fuel may
deteriorate painted surfaces or plastic
parts.
[ECB00981]
4. Turn the fuel tank cap fully clockwise to make sure it is securely closed.
WARNING
EWB02531Gasoline is poisonous and can cause injury or
death. Handle gasoline with care. Never siphon
gasoline by mouth. If you should swallow
some gasoline or inhale a lot of gasoline vapor,
or get some gasoline in your eyes, see your doctor immediately. If gasoline spills on your
skin, wash with soap and water. If gasoline
spills on your clothing, change your clothes.
NOTICEECB00070Use only unleaded gasoline. The use of leaded
gasoline will cause severe damage to internal
engine parts, such as the valves and piston
rings, as well as to the exhaust system.Your Yamaha engine has been designed to use
premium unleaded gasoline with a research oc-
tane number of 97 or higher. If knocking (or ping-
ing) occurs, use a gasoline of a different brand.
Use of unleaded fuel will extend spark plug life and
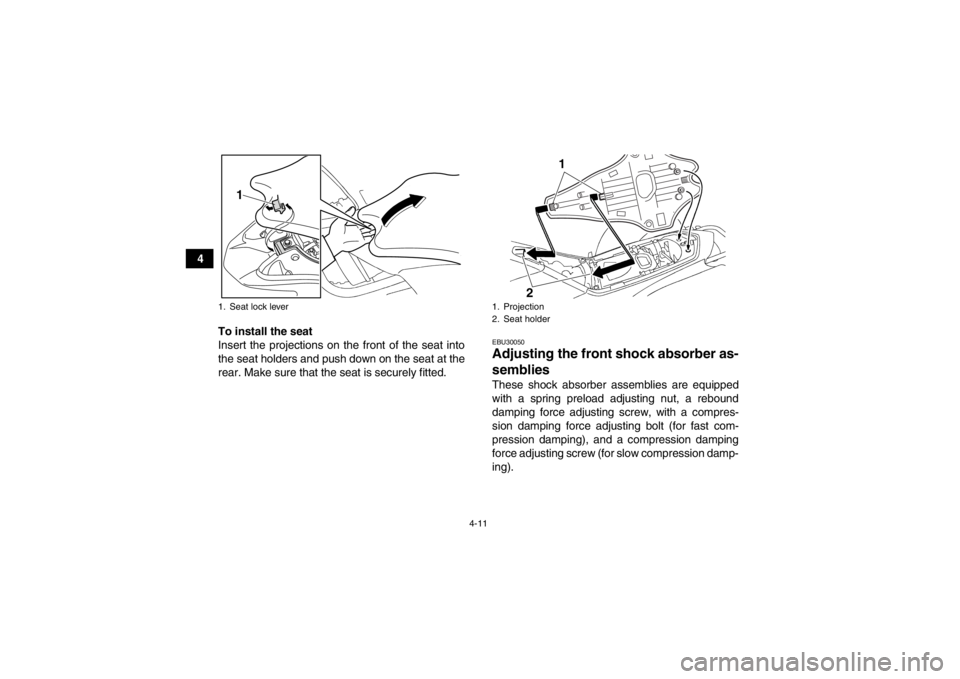
reduce maintenance costs.EBU26731Seat To remove the seat
Insert your hand between the rear of the seat and
the rear fender, pull the seat lock lever and pull up
the seat at the rear.
Recommended fuel:
PREMIUM UNLEADED GASOLINE ONLY
For Europe: PREMIUM UNLEADED GASO-
LINE ONLY with a research octane number
of 97 or higher
Fuel tank capacity: 10.0 L (2.64 US gal, 2.20 Imp.gal)
Fuel reserve amount: 3.4 L (0.90 US gal, 0.75 Imp.gal)
U18P67E0.book Page 10 Wednesday, May 9, 2012 3:30 PM
Page 38 of 156

4-11
4To install the seat
Insert the projections on the front of the seat into
the seat holders and push down on the seat at the
rear. Make sure that the seat is securely fitted.
EBU30050Adjusting the front shock absorber as-
semblies These shock absorber assemblies are equipped
with a spring preload adjusting nut, a rebound
damping force adjusting screw, with a compres-
sion damping force adjusting bolt (for fast com-
pression damping), and a compression damping
force adjusting screw (for slow compression damp-
ing).
1. Seat lock lever
1
1. Projection
2. Seat holder
1
2
U18P67E0.book Page 11 Wednesday, May 9, 2012 3:30 PM
Page 48 of 156

4-21
411. Connect the air intake duct to the throttle
body, and then tighten the clamp screw at the
throttle body side. NOTICE: Make sure that
the air intake duct is properly connected to
the throttle body, and that the clamp screw
is tightened securely.
[ECB00961]
12. Connect the coupler.
13. Connect the air filter case to the air intake duct, place the air filter case in the original po-
sition, and then tighten the clamp screw at the
air filter case side. NOTICE: Make sure that
the air intake duct is properly connected to
the air filter case, and that the clamp screw
is tightened securely.
[ECB00971]
14. Install the air filter case bolts, and then tighten them to the specified torque. 15. Install the air filter case holding plate by install-
ing the bolts and collars, and then tighten the
bolts to the specified torque.
16. Install the blow-by gas chamber by installing the bolt, tighten the bolt to the specified
torque, and then install the clip to the hose
holder.
17. Install the cowling.
Rebound damping force
Turn the rebound damping force adjusting screw in
direction (a) to increase the rebound damping
force and thereby harden the damping, and in di-
rection (b) to decrease the rebound damping force
and thereby soften the damping.
Tightening torque:
Locknut:30 Nm (3.0 m·kgf, 22 ft·lbf)
Tightening torque: Air filter case bolt:7 Nm (0.7 m·kgf, 5.1 ft·lbf)
Tightening torque:Air filter case holding plate bolt:7 Nm (0.7 m·kgf, 5.1 ft·lbf)
Tightening torque: Blow-by gas chamber bolt:7 Nm (0.7 m·kgf, 5.1 ft·lbf)
U18P67E0.book Page 21 Wednesday, May 9, 2012 3:30 PM
Page 64 of 156

6-6
6
EBU20910Accessories and loading EBU20921Genuine Yamaha Accessories
Choosing accessories for your ATV is an important
decision. Genuine Yamaha Accessories, which
are available only from a Yamaha dealer, have
been designed, tested, and approved by Yamaha
for use on your ATV. Many companies with no con-
nection to Yamaha manufacture parts and acces-
sories or offer other modifications for Yamaha
vehicles. Yamaha is not in a position to test the
products that these aftermarket companies pro-
duce. Therefore, Yamaha can neither endorse nor
recommend the use of accessories not sold by
Yamaha or modifications not specifically recom- mended by Yamaha, even if sold and installed by
a Yamaha dealer.
Aftermarket parts, accessories, and modifica-
tions
While you may find aftermarket products similar in
design and quality to genuine Yamaha Accesso-
ries, recognize that some aftermarket accessories
or modifications are not suitable because of poten-
tial safety hazards to you or others. Installing after- market products or having other modifications
performed to your ATV that change any of the ve-
hicle’s design or operation characteristics can put
you and others at greater risk of serious injury or
death. You are responsible for injuries related to
changes in the vehicle.
Keep the following in mind when considering an
accessory or operating an ATV which has acces-
sories.
●Accessories should be rigidly and securely
mounted. An accessory which can shift position
or come off while you are riding could affect your
ability to control the ATV.●Do not mount an accessory where it could inter-
fere with your ability to control the ATV. Exam-
ples include (but are not limited to) a heavy or
bulky object attached to the handlebars which
could make steering difficult, an accessory that
limits your ability to move around on the seat, or
one that limits your view.●Use extra caution when riding an ATV with ac-
cessories. The ATV may handle differently than
it does without accessories.
U18P67E0.book Page 6 Wednesday, May 9, 2012 3:30 PM
Page 65 of 156

6-7
6
EBU20941Loading
WARNING
EWB00820Never exceed the stated load capacity for this
ATV. Overloading this ATV or carrying or tow-
ing cargo improperly could cause changes in
ATV handling which could lead to an accident.
Cargo should be properly distributed and se-
curely attached. Reduce speed when carrying
cargo or pulling a trailer. Allow greater dis-
tance for braking.As originally equipped, this ATV is not designed to
carry cargo or tow a trailer. If you choose to add ac-
cessories so that you can carry cargo or tow a trail-
er, you must use common sense and good
judgment as the stability and handling of an ATV
can be changed. When adding accessories, keep
the following points in mind:●Never exceed the weight limits shown. An over-
loaded ATV can be unstable.
●If you are carrying cargo and towing a trailer, in-
clude the tongue weight in the maximum ATV
load limit.●Load cargo on the carriers as close to the center
of the ATV as possible. Put cargo at the rear of
the front carrier, at the front of the rear carrier,
and center it.●Tie down cargo securely to the carriers. Make
sure cargo in the trailer cannot move around. A
shifting load can cause an accident.●Make sure the load does not interfere with con-
trols or your ability to see where you are going.●Ride more slowly than you would without a load.
The more weight you carry, the slower you
should go. Although conditions vary, it is good
practice not to exceed 2nd gear whenever you
are carrying heavier loads or when towing a trail-
er.●Allow more braking distance. A heavier ATV
takes longer to stop.●Avoid making sharp turns unless at very slow
speeds.●Avoid hills and rough terrain. Choose terrain
carefully. Added weight affects the stability and
handling of the ATV.
MAXIMUM LOADING LIMIT
ATV loading limit (total weight of rider, cargo,
accessories, and tongue):100.0 kg (220 lb)
U18P67E0.book Page 7 Wednesday, May 9, 2012 3:30 PM
Page 106 of 156

8-18
8
TIPWhen adding oil, be careful not to overfill the en-
gine oil tank; the oil level rises faster starting from
the half-level mark on the dipstick.6. Insert the dipstick into the engine oil tank fillerhole, and then tighten the engine oil tank filler
cap. NOTICE: Make sure that the engine oil
tank filler cap is securely tightened; other-
wise, oil may seep out when the engine is
running.
[ECB00362]
To change the engine oil (with or without oil fil-
ter element replacement) 1. Place the ATV on a level surface.
2. Remove the engine guard by removing the bolts. 3. Start the engine, warm it up for several min-
utes, and then turn it off.
4. Place an oil pan under the engine to collect the used oil.
5. Remove the engine oil tank filler cap, and then remove the engine oil tank drain bolt and its
gasket.
1. Engine guard
2. Bolt
2 21
U18P67E0.book Page 18 Wednesday, May 9, 2012 3:30 PM
Page 115 of 156

8-27
8
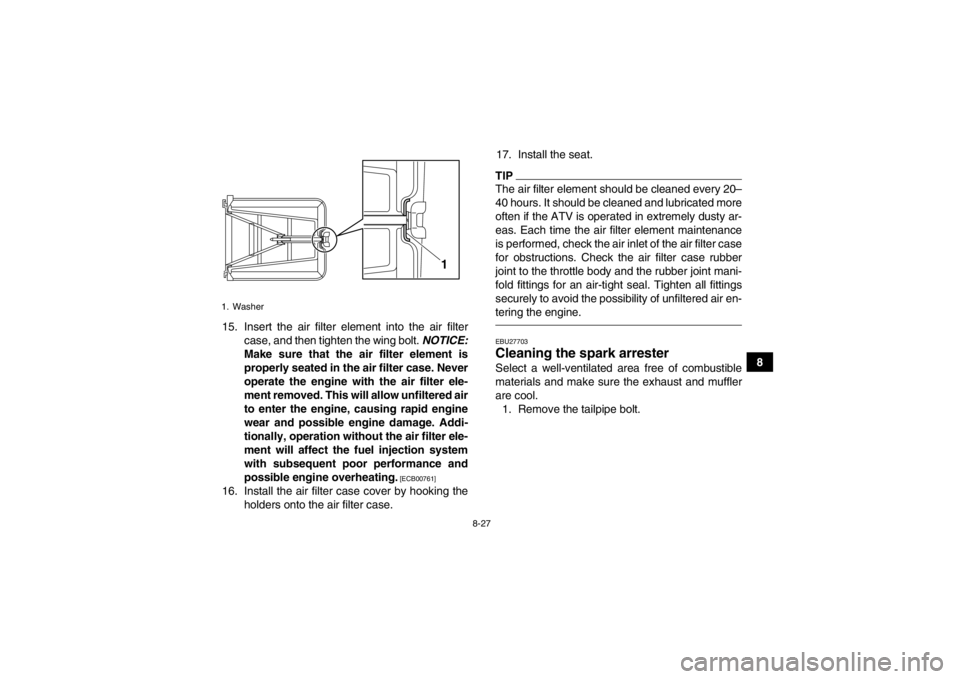
15. Insert the air filter element into the air filter
case, and then tighten the wing bolt. NOTICE:
Make sure that the air filter element is
properly seated in the air filter case. Never
operate the engine with the air filter ele-
ment removed. This will allow unfiltered air
to enter the engine, causing rapid engine
wear and possible engine damage. Addi-
tionally, operation without the air filter ele-
ment will affect the fuel injection system
with subsequent poor performance and
possible engine overheating.
[ECB00761]
16. Install the air filter case cover by hooking the holders onto the air filter case. 17. Install the seat.
TIPThe air filter element should be cleaned every 20–
40 hours. It should be cleaned and lubricated more
often if the ATV is operated in extremely dusty ar-
eas. Each time the air filter element maintenance
is performed, check the air inlet of the air filter case
for obstructions. Check the air filter case rubber
joint to the throttle body and the rubber joint mani-
fold fittings for an air-tight seal. Tighten all fittings
securely to avoid the possibility of unfiltered air en-
tering the engine.EBU27703Cleaning the spark arrester Select a well-ventilated area free of combustible
materials and make sure the exhaust and muffler
are cool.
1. Remove the tailpipe bolt.
1. Washer
1
U18P67E0.book Page 27 Wednesday, May 9, 2012 3:30 PM