ECU YAMAHA YXZ1000R SS 2017 User Guide
[x] Cancel search | Manufacturer: YAMAHA, Model Year: 2017, Model line: YXZ1000R SS, Model: YAMAHA YXZ1000R SS 2017Pages: 208, PDF Size: 4.79 MB
Page 104 of 208
6-9
6
EBU35440ParkingWhen parking, shift into first gear, stop the
engine, and then apply the parking brake. See
page 7-16 for when parking on a slope.EBU35351LoadingTake extra precautions when driving with a
load. Turn gradually and drive more slowly
than you would without a load. The more
weight you carry, the slower you should go.
Although conditions vary, it is good practice
to keep the vehicle in a low gear when you are
carrying a heavy load. Follow these instruc-
tions and always use common sense and
good judgment when carrying a load.
WARNING
EWB03921Improper loading or any pulling or towing
will increase the risk of loss of control, an
overturn, or other accident:
Do not pull objects, other vehicles, or
tow a trailer—this vehicle is not de-
signed for such operation.
Keep weight in the cargo bed centered
side to side, and as low and as far for-
ward as possible. Top-heavy loads in-
crease the risk of overturn.
Make sure that cargo is securely fas-
tened down—a loose load could change
handling unexpectedly or strike occu-
pants.
Do not exceed the maximum loading
limit for the cargo bed: 136.0 kg (300 lb).
Do not exceed the maximum loading
limit for the vehicle: 317.0 kg (699 lb).
Cargo bed
Use the hooks equipped on the cargo bed to
tie down loads. Make sure the load is securely
fastened down, centered in the cargo bed,
and not top-heavy. Never allow anyone to
ride in the cargo bed.
U2HC7ME0.book Page 9 Tuesday, April 19, 2016 10:33 AM
Page 109 of 208

7-5
7
Protective structure
The vehicle cage/frame provides a protective
structure that helps limit intrusions by branch-
es or other objects and may reduce your risk
of injury in accidents. The protective structure
will not protect occupants in all rollovers or
accidents.
Body parts outside of vehicle can be struck
by passing objects or crushed during vehicle
rollover. Do not put your hands or feet outside
of the vehicle for any reason. Do not hold onto
the door, cage/frame or shoulder bolster.
Wear your seat belt and helmet.
If you think or feel that the vehicle may tip or
roll, do not put your hands or feet outside the
vehicle for any reason. You will not be able to
stop the vehicle from tipping over using your
body. Any part of your body (arms, legs, or
head) outside of the vehicle can be crushed
by the vehicle cage/frame. Seat belts
Seat belts should be worn by the driver and
passenger. The driver must be sure that the
passenger is belted before driving.
Be sure the seat belt is not twisted, is close-
fitting across the hips and chest, and is
latched securely.
Do not wear the seat belt across the abdo-
men or stomach.
Do not put the seat belt behind the back.
Failure to use seat belts properly may lead to
an increased likelihood and severity of injury.
An unbelted occupant may strike the interior
of the vehicle, the protective structure, or oth-
er objects in an accident or during operation.
You may also fall completely out or be partial-
ly ejected from the vehicle, which may lead to
being crushed between the ground and the
vehicle. Wearing the seat belt helps you re-
main in the vehicle – the doors and passenger
handhold are not a substitute for using a seat
belt.U2HC7ME0.book Page 5 Tuesday, April 19, 2016 10:33 AM
Page 111 of 208
7-7
7
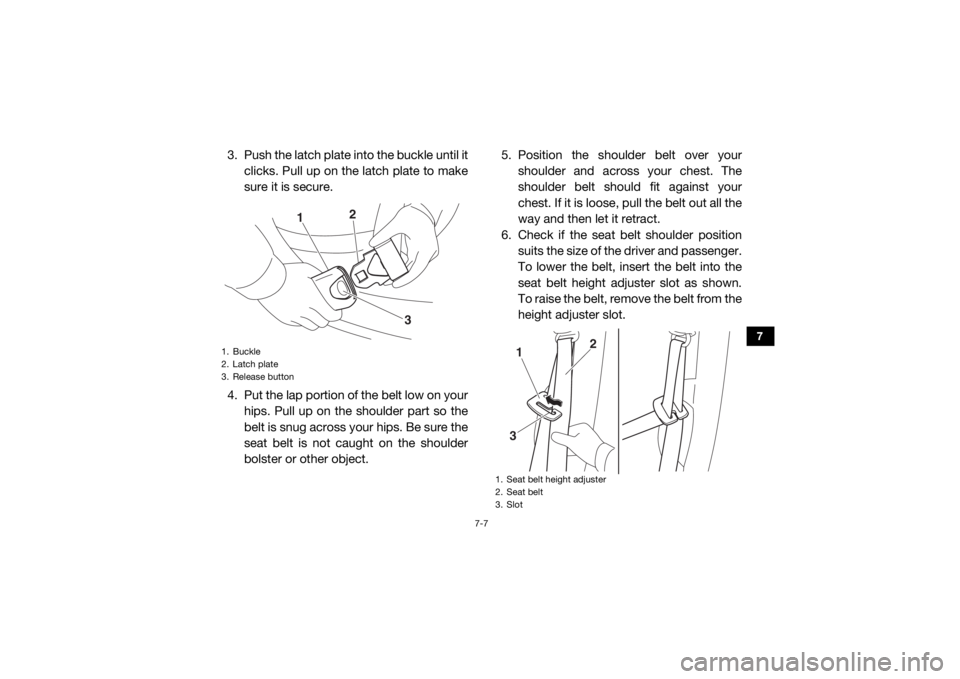
3. Push the latch plate into the buckle until itclicks. Pull up on the latch plate to make
sure it is secure.
4. Put the lap portion of the belt low on your hips. Pull up on the shoulder part so the
belt is snug across your hips. Be sure the
seat belt is not caught on the shoulder
bolster or other object. 5. Position the shoulder belt over your
shoulder and across your chest. The
shoulder belt should fit against your
chest. If it is loose, pull the belt out all the
way and then let it retract.
6. Check if the seat belt shoulder position suits the size of the driver and passenger.
To lower the belt, insert the belt into the
seat belt height adjuster slot as shown.
To raise the belt, remove the belt from the
height adjuster slot.1. Buckle
2. Latch plate
3. Release button
1
3
2
1. Seat belt height adjuster
2. Seat belt
3. Slot
1
2
3
U2HC7ME0.book Page 7 Tuesday, April 19, 2016 10:33 AM
Page 112 of 208
7-8
7
7. To release the buckle, firmly press the re-lease button.
Doors
The doors are designed to reduce the likeli-
hood that you will stick your leg out to stop
the vehicle from tipping over or for any other
reason in a rollover. The doors may also re-
duce intrusion of objects into the occupant
area. Make sure the door is securely latched
before operation. Do not place your arm or
hand on the door during operation. Your hand
or arm may be struck by objects or crushed
against outside objects or the ground during
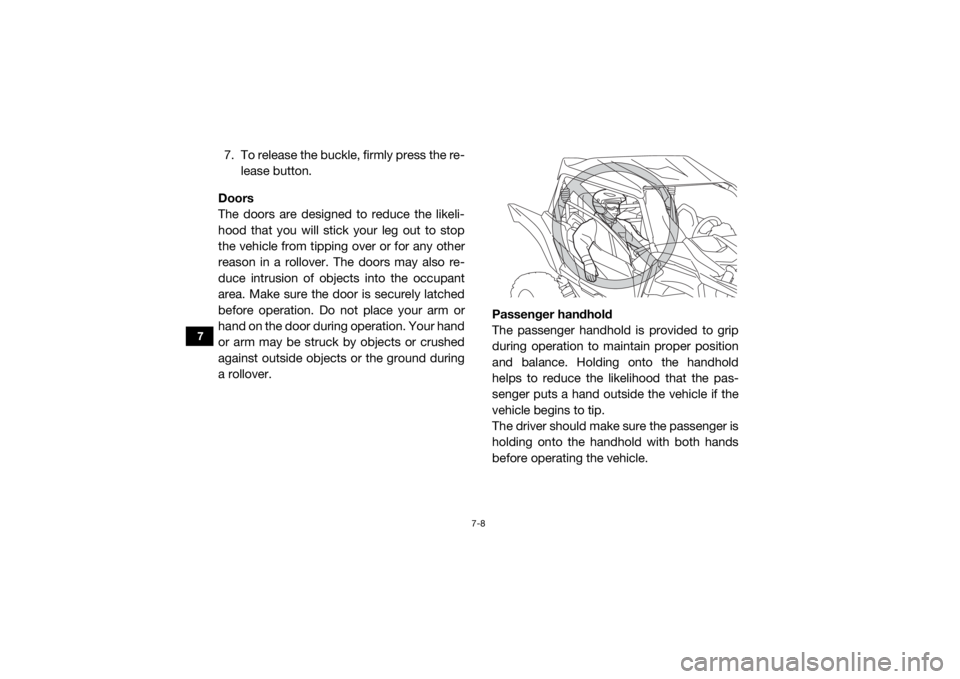
a rollover. Passenger handhold
The passenger handhold is provided to grip
during operation to maintain proper position
and balance. Holding onto the handhold
helps to reduce the likelihood that the pas-
senger puts a hand outside the vehicle if the
vehicle begins to tip.
The driver should make sure the passenger is
holding onto the handhold with both hands
before operating the vehicle.U2HC7ME0.book Page 8 Tuesday, April 19, 2016 10:33 AM
Page 114 of 208
7-10
7
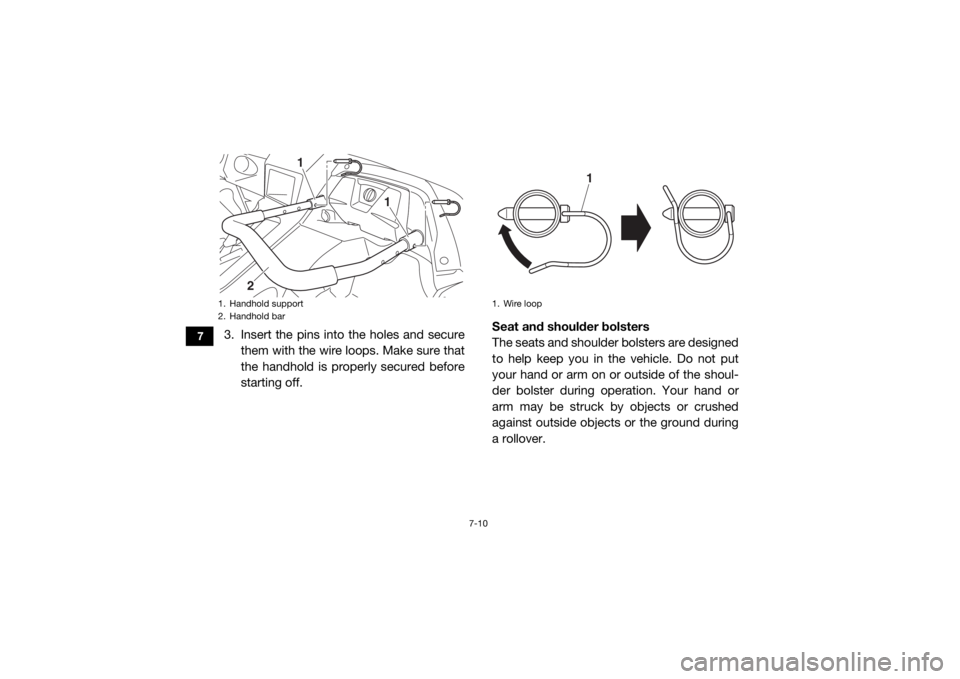
3. Insert the pins into the holes and securethem with the wire loops. Make sure that
the handhold is properly secured before
starting off. Seat and shoulder bolsters
The seats and shoulder bolsters are designed
to help keep you in the vehicle. Do not put
your hand or arm on or outside of the shoul-
der bolster during operation. Your hand or
arm may be struck by objects or crushed
against outside objects or the ground during
a rollover.1. Handhold support
2. Handhold bar
2
1
1
1. Wire loop
1
U2HC7ME0.book Page 10 Tuesday, April 19, 2016 10:33 AM
Page 140 of 208
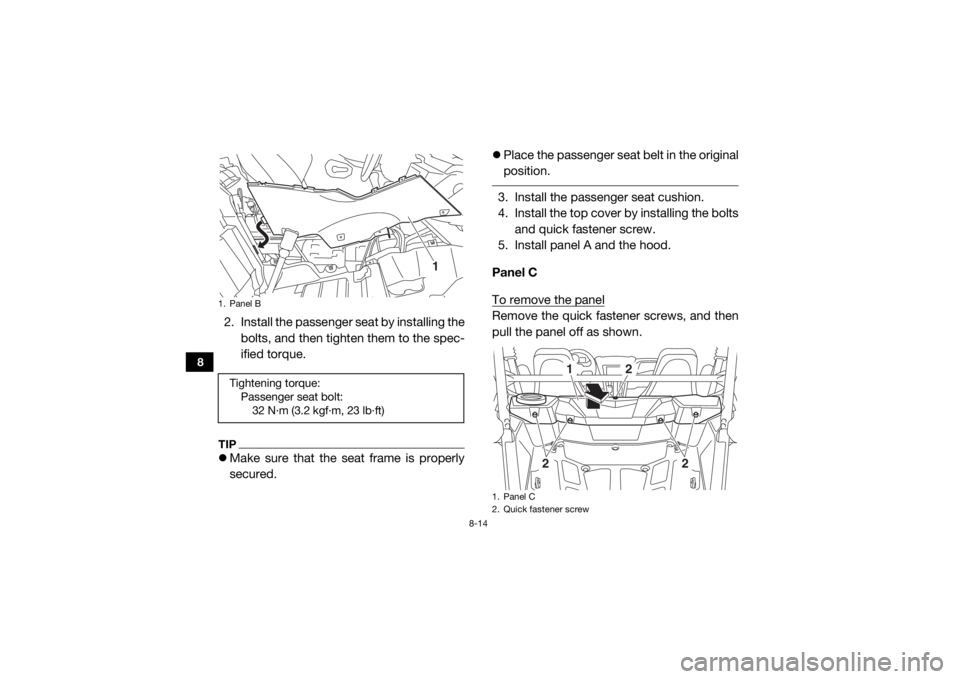
8-14
8
2. Install the passenger seat by installing thebolts, and then tighten them to the spec-
ified torque.TIPMake sure that the seat frame is properly
secured.
Place the passenger seat belt in the original
position.
3. Install the passenger seat cushion.
4. Install the top cover by installing the bolts
and quick fastener screw.
5. Install panel A and the hood.
Panel C
To remove the panelRemove the quick fastener screws, and then
pull the panel off as shown.
1. Panel BTightening torque: Passenger seat bolt:32 N·m (3.2 kgf·m, 23 lb·ft)
1
1. Panel C
2. Quick fastener screw
1
2
2
2
U2HC7ME0.book Page 14 Tuesday, April 19, 2016 10:33 AM
Page 164 of 208
8-38
8
TIPService the air filters more frequently when
operating in wet or dusy environments. Whenever air filter maintenance is performed:
check the air inlet for obstructions and the
air filter case for dirt and foreign matter.
check the air filter case check hoses for dirt
or water and clean as necessary.
check the air filter cas e joints and the rub-
ber joints to and from the throttle body for
proper fit and sealing.
tighten all fittings securely to avoid the pos-
sibility of unfiltered air entering the engine.NOTICEECB02270Never operate the engine with the air filter
element removed. Doing so would allow
unfiltered air to enter, causing rapid en-
gine wear and possible engine damage. Additionally, the fuel injection system
would be affected, resulting in poor engine
performance and possible overheating.
Clean the primary air filter as follows.
1. Remove panel C (page 8-10).
2. Remove the air filter case cover by turn- ing the air filter case cover lock counter-
clockwise.TIPMake sure that the match mark on the cover
lock is aligned with the open match mark on
the air filter case cover.
U2HC7ME0.book Page 38 Tuesday, April 19, 2016 10:33 AM