diagram YAMAHA YZ450F 2014 Owner's Manual
[x] Cancel search | Manufacturer: YAMAHA, Model Year: 2014, Model line: YZ450F, Model: YAMAHA YZ450F 2014Pages: 360, PDF Size: 11.76 MB
Page 86 of 360
CABLE ROUTING DIAGRAM
2-43
Page 143 of 360
FRONT BRAKE
4-17
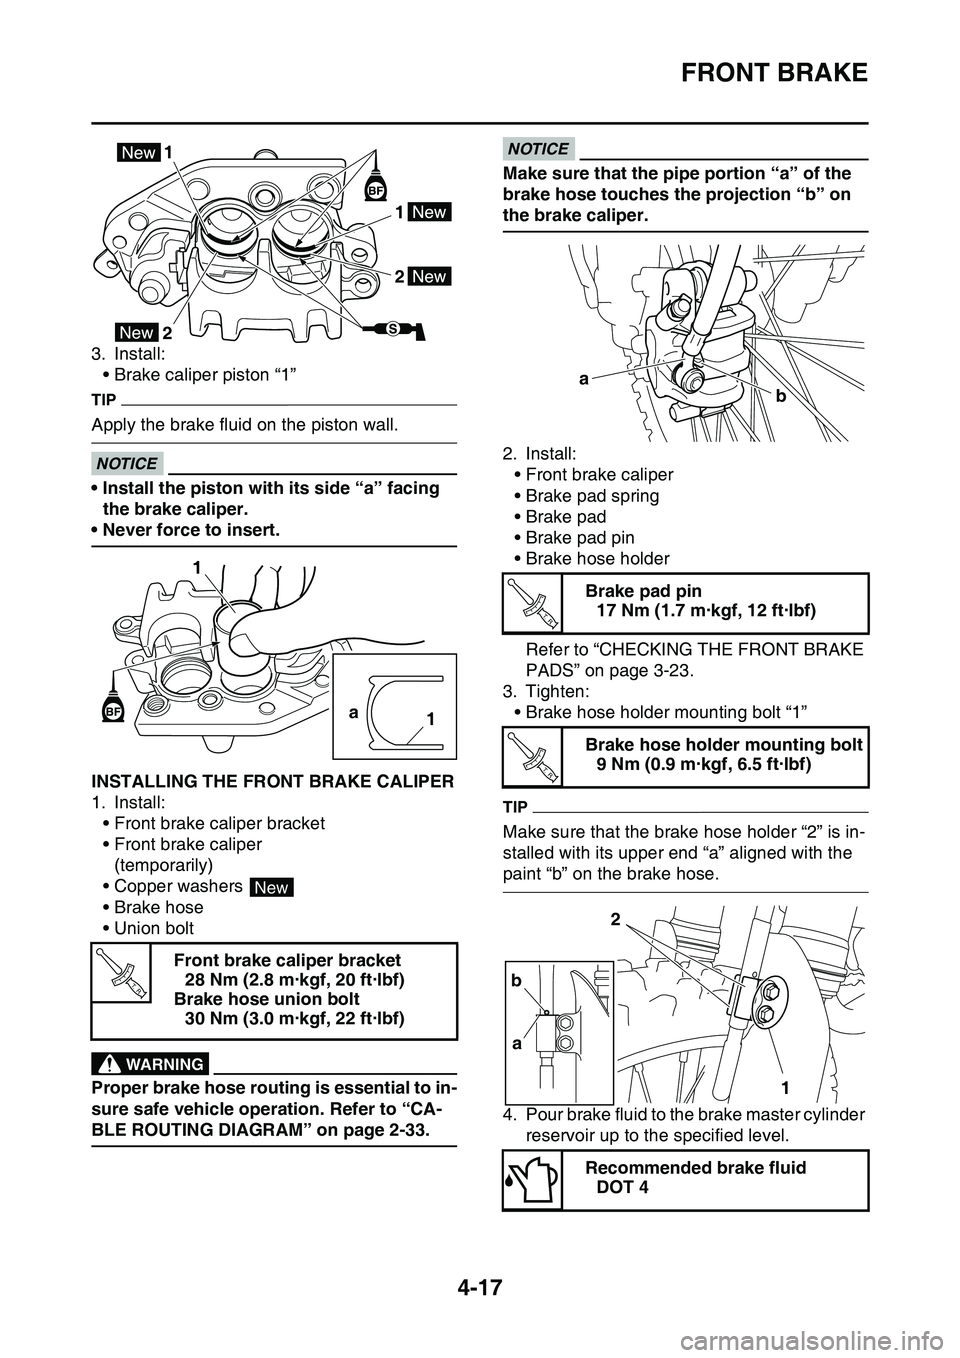
3. Install:
• Brake caliper piston “1”
TIP
Apply the brake fluid on the piston wall.
ECA33DD047
NOTICE
• Install the piston with its side “a” facing
the brake caliper.
• Never force to insert.
EAS1SL1143INSTALLING THE FRONT BRAKE CALIPER
1. Install:
• Front brake caliper bracket
• Front brake caliper
(temporarily)
• Copper washers
• Brake hose
• Union bolt
EWA13530
WARNING
Proper brake hose routing is essential to in-
sure safe vehicle operation. Refer to “CA-
BLE ROUTING DIAGRAM” on page 2-33.
ECA14170
NOTICE
Make sure that the pipe portion “a” of the
brake hose touches the projection “b” on
the brake caliper.
2. Install:
• Front brake caliper
• Brake pad spring
• Brake pad
• Brake pad pin
• Brake hose holder
Refer to “CHECKING THE FRONT BRAKE
PADS” on page 3-23.
3. Tighten:
• Brake hose holder mounting bolt “1”
TIP
Make sure that the brake hose holder “2” is in-
stalled with its upper end “a” aligned with the
paint “b” on the brake hose.
4. Pour brake fluid to the brake master cylinder
reservoir up to the specified level.
EWA13090
Front brake caliper bracket
28 Nm (2.8 m·kgf, 20 ft·lbf)
Brake hose union bolt
30 Nm (3.0 m·kgf, 22 ft·lbf)
1
1
22
1
a
1
New
T R..
Brake pad pin
17 Nm (1.7 m·kgf, 12 ft·lbf)
Brake hose holder mounting bolt
9 Nm (0.9 m·kgf, 6.5 ft·lbf)
Recommended brake fluid
DOT 4
a
b
T R..
T R..
2
1 b
a
Page 146 of 360
FRONT BRAKE
4-20
WARNING
Proper brake hose routing is essential to in-
sure safe vehicle operation. Refer to“CA-
BLE ROUTING DIAGRAM” on page 2-33.
ECA1DX1007
NOTICE
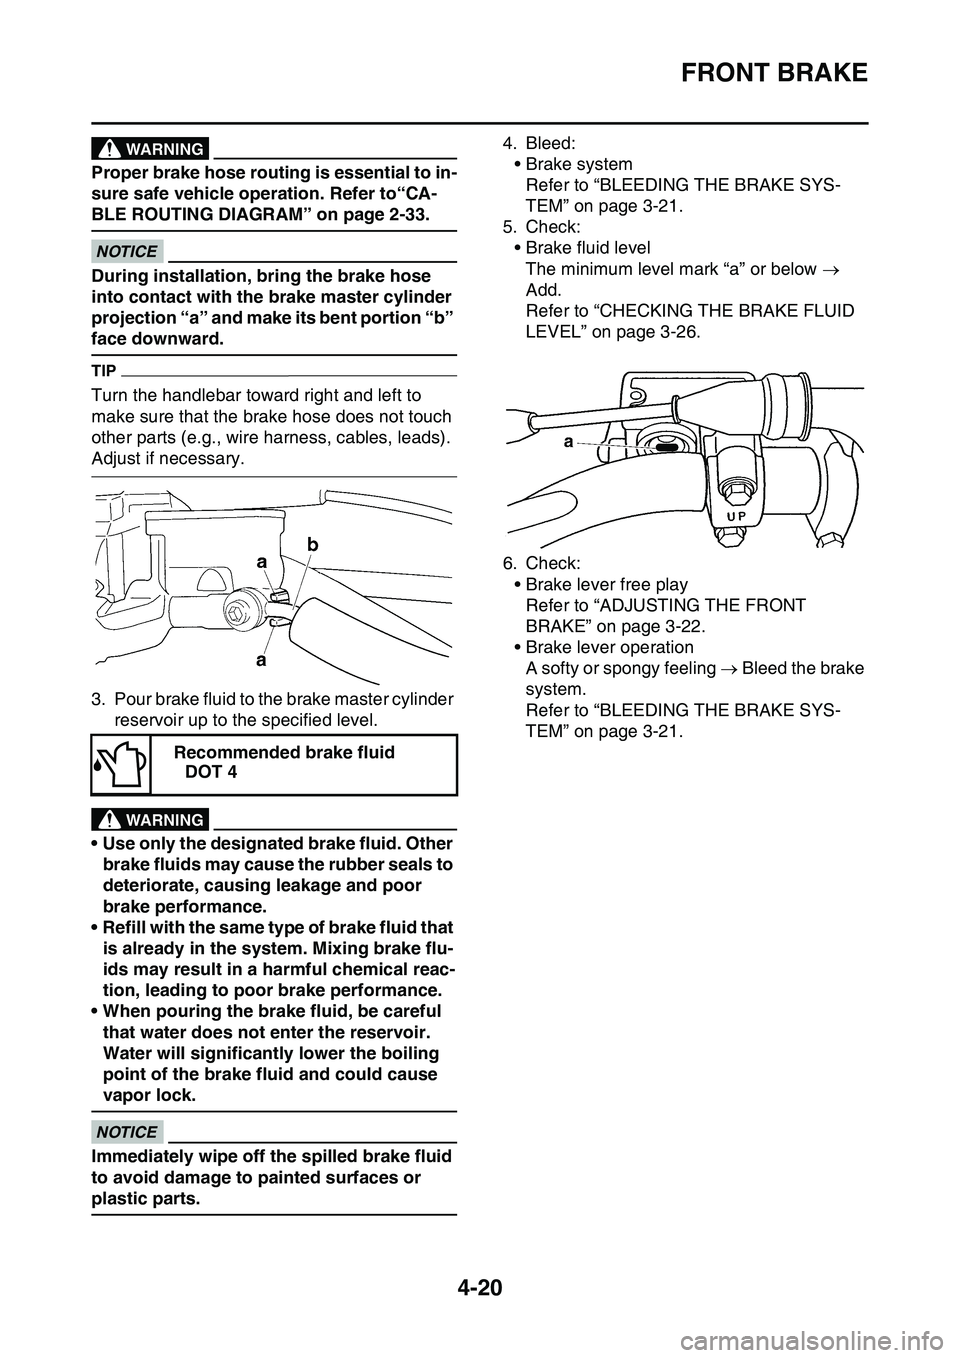
During installation, bring the brake hose
into contact with the brake master cylinder
projection “a” and make its bent portion “b”
face downward.
TIP
Turn the handlebar toward right and left to
make sure that the brake hose does not touch
other parts (e.g., wire harness, cables, leads).
Adjust if necessary.
3. Pour brake fluid to the brake master cylinder
reservoir up to the specified level.
EWA13540
WARNING
• Use only the designated brake fluid. Other
brake fluids may cause the rubber seals to
deteriorate, causing leakage and poor
brake performance.
• Refill with the same type of brake fluid that
is already in the system. Mixing brake flu
-
ids may result in a harmful chemical reac-
tion, leading to poor brake performance.
• When pouring the brake fluid, be careful
that water does not enter the reservoir.
Water will significantly lower the boiling
point of the brake fluid and could cause
vapor lock.
ECA13540
NOTICE
Immediately wipe off the spilled brake fluid
to avoid damage to painted surfaces or
plastic parts.
4. Bleed:
• Brake system
Refer to “BLEEDING THE BRAKE SYS-
TEM” on page 3-21.
5. Check:
• Brake fluid level
The minimum level mark “a” or below
Add.
Refer to “CHECKING THE BRAKE FLUID
LEVEL” on page 3-26.
6. Check:
• Brake lever free play
Refer to “ADJUSTING THE FRONT
BRAKE” on page 3-22.
• Brake lever operation
A softy or spongy feeling Bleed the brake
system.
Refer to “BLEEDING THE BRAKE SYS-
TEM” on page 3-21.
Recommended brake fluid
DOT 4
Page 153 of 360
REAR BRAKE
4-27
INSTALLING THE BRAKE CALIPER PISTON
1. Clean:
• Brake caliper
• Brake caliper piston seal
• Brake caliper piston dust seal
• Brake caliper piston
Use brake fluid for cleaning.
2. Install:
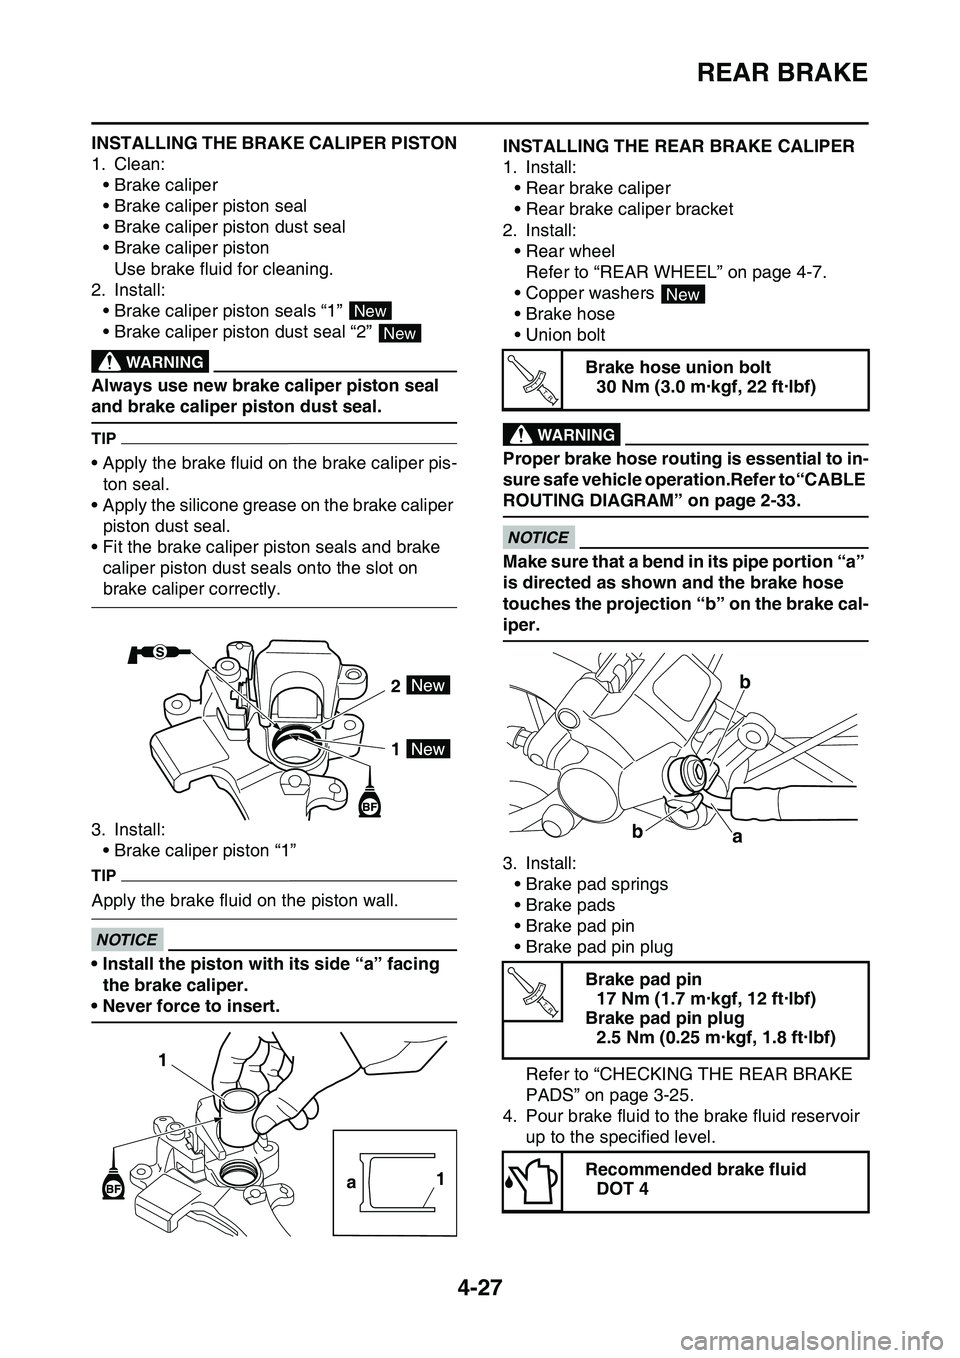
• Brake caliper piston seals “1”
• Brake caliper piston dust seal “2” EWA33DD033
WARNING
Always use new brake caliper piston seal
and brake caliper piston dust seal.
TIP
• Apply the brake fluid on the brake caliper pis-
ton seal.
• Apply the silicone grease on the brake caliper
piston dust seal.
• Fit the brake caliper piston seals and brake
caliper piston dust seals onto the slot on
brake caliper correctly.
3. Install:
• Brake caliper piston “1”
TIP
Apply the brake fluid on the piston wall.
ECA33DD047
NOTICE
• Install the piston with its side “a” facing
the brake caliper.
• Never force to insert.
EAS1SL1156INSTALLING THE REAR BRAKE CALIPER
1. Install:
• Rear brake caliper
• Rear brake caliper bracket
2. Install:
• Rear wheel
Refer to “REAR WHEEL” on page 4-7.
• Copper washers
• Brake hose
• Union bolt
EWA13530
WARNING
Proper brake hose routing is essential to in-
sure safe vehicle operation.Refer to“CABLE
ROUTING DIAGRAM” on page 2-33.
ECA14170
NOTICE
Make sure that a bend in its pipe portion “a”
is directed as shown and the brake hose
touches the projection “b” on the brake cal
-
iper.
3. Install:
• Brake pad springs
• Brake pads
• Brake pad pin
• Brake pad pin plug
Refer to “CHECKING THE REAR BRAKE
PADS” on page 3-25.
4. Pour brake fluid to the brake fluid reservoir
up to the specified level.
EWA13090
New
New
2
1
1
a1
Brake hose union bolt
30 Nm (3.0 m·kgf, 22 ft·lbf)
Brake pad pin
17 Nm (1.7 m·kgf, 12 ft·lbf)
Brake pad pin plug
2.5 Nm (0.25 m·kgf, 1.8 ft·lbf)
Recommended brake fluid
DOT 4
New
T R..
b
b
a
T R..
Page 155 of 360
REAR BRAKE
4-29
ASSEMBLING THE REAR BRAKE MASTER
CYLINDER
EWA13520
WARNING
• Before installation, clean and lubricate the
internal parts. Use new brake fluid for
cleaning and lubricating.
• Never use solvents on internal brake com-
ponents.
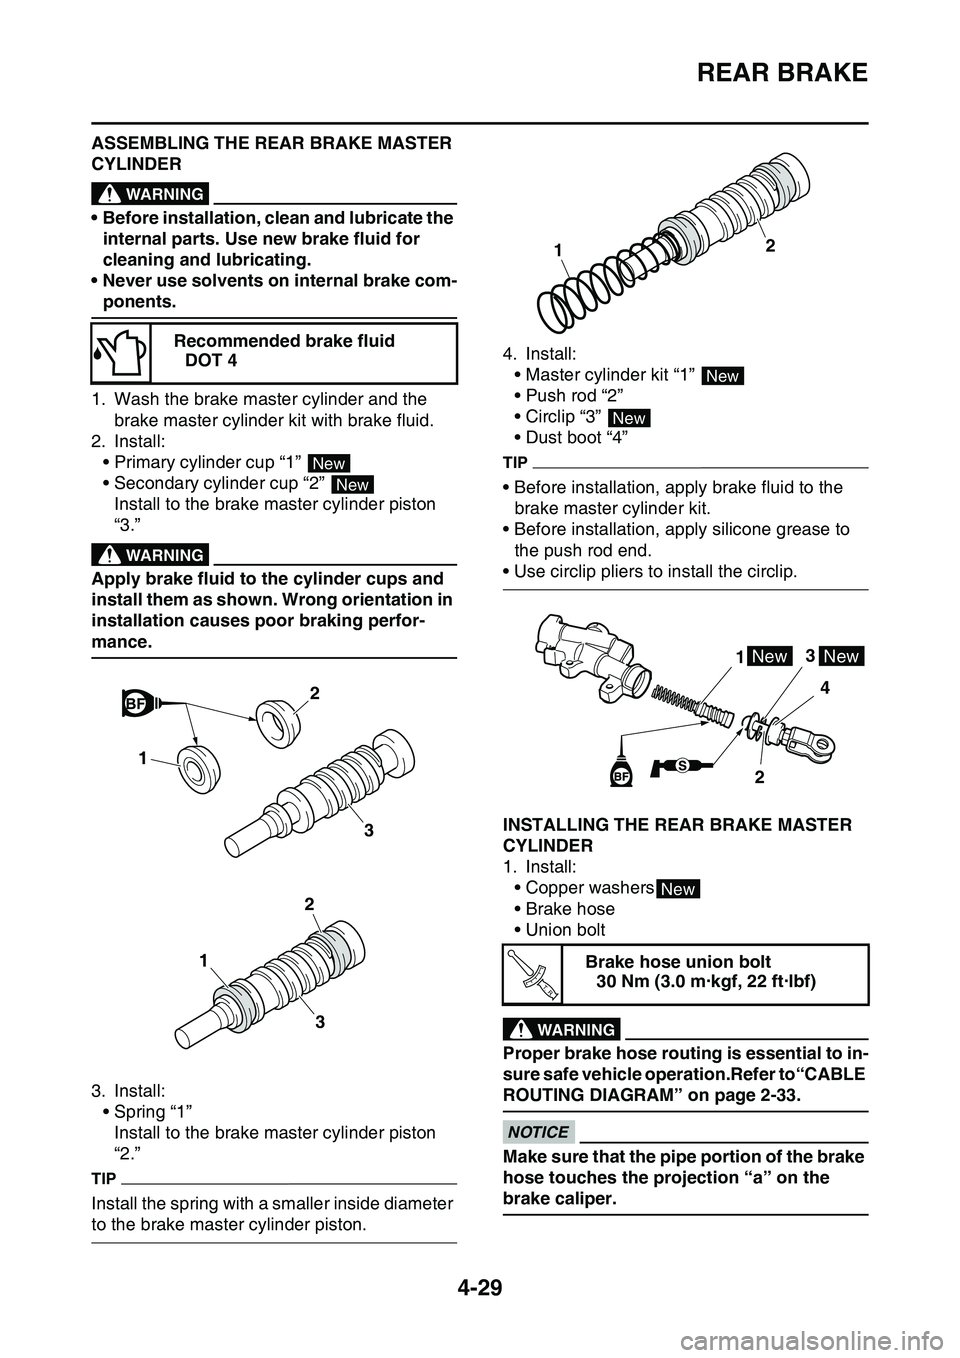
1. Wash the brake master cylinder and the
brake master cylinder kit with brake fluid.
2. Install:
• Primary cylinder cup “1”
• Secondary cylinder cup “2”
Install to the brake master cylinder piston
“3.”
EWA13520
WARNING
Apply brake fluid to the cylinder cups and
install them as shown. Wrong orientation in
installation causes poor braking perfor
-
mance.
3. Install:
• Spring “1”
Install to the brake master cylinder piston
“2.”
TIP
Install the spring with a smaller inside diameter
to the brake master cylinder piston.
4. Install:
• Master cylinder kit “1”
• Push rod “2”
• Circlip “3”
• Dust boot “4”
TIP
• Before installation, apply brake fluid to the
brake master cylinder kit.
• Before installation, apply silicone grease to
the push rod end.
• Use circlip pliers to install the circlip.
EAS1SL1160INSTALLING THE REAR BRAKE MASTER
CYLINDER
1. Install:
• Copper washers
• Brake hose
• Union bolt
EWA13530
WARNING
Proper brake hose routing is essential to in-
sure safe vehicle operation.Refer to“CABLE
ROUTING DIAGRAM” on page 2-33.
ECA1DX1008
NOTICE
Make sure that the pipe portion of the brake
hose touches the projection “a” on the
brake caliper.
Recommended brake fluid
DOT 4
New
New
2
3
1
2
3
1Brake hose union bolt
30 Nm (3.0 m·kgf, 22 ft·lbf)
12
New
New
13
4
2NewNew
New
T R..
Page 256 of 360

AC MAGNETO
5-61
2. Install:
• Woodruff key “1”
• Rotor “2”
TIP
• Clean the contact surfaces of the tapered por-
tions of the crankshaft and rotor.
• When installing the woodruff key, make sure
that its flat surface “a” is in parallel with the
crankshaft center line “b”.
• When installing the rotor, align the keyway “c”
of the rotor with the woodruff key.
3. Install:
• Washers
• Nut (rotor) “1”
4. Install:
• Dowel pin “1”
• Gasket (left crankcase cover) “2”
• Left crankcase cover “3”
• Lead holder “4”
• Bolt (left crankcase cover) “5”
TIP
Tighten the bolts in stages and in a crisscross
pattern.
5. Connect:
• AC magneto lead
Refer to “CABLE ROUTING DIAGRAM” on
page 2-33.
Nut (rotor)
65 Nm (6.5 m·kgf, 47 ft·lbf)
Bolt (left crankcase cover)
10 Nm (1.0 m·kgf, 7.2 ft·lbf)
b11
c
2 a
T R..
1
New
T R..
1
1
2
3
5
5
5
5
4
45
Page 289 of 360
8
ELECTRICAL SYSTEM
IGNITION SYSTEM.......................................................................................... 8-2
CIRCUIT DIAGRAM ................................................................................... 8-2
TROUBLESHOOTING ............................................................................... 8-4
CHARGING SYSTEM....................................................................................... 8-6
CIRCUIT DIAGRAM ................................................................................... 8-6
TROUBLE SHOOTING .............................................................................. 8-8
FUEL INJECTION SYSTEM........................................................................... 8-10
CIRCUIT DIAGRAM ................................................................................. 8-10
YAMAHA DIAGNOSTIC TOOL ................................................................ 8-12
TROUBLESHOOTING DETAILS ............................................................. 8-13
FUEL PUMP SYSTEM.................................................................................... 8-32
CIRCUIT DIAGRAM ................................................................................. 8-32
TROUBLESHOOTING ............................................................................. 8-34
ELECTRICAL COMPONENTS....................................................................... 8-36
CHECKING THE SWITCHES .................................................................. 8-38
CHECKING THE IGNITION SPARK GAP................................................ 8-41
CHECKING THE SPARK PLUG CAP ...................................................... 8-41
CHECKING THE IGNITION COIL ............................................................ 8-41
CHECKING THE CRANKSHAFT POSITION SENSOR........................... 8-42
CHECKING THE ECU .............................................................................. 8-43
CHECKING THE STATOR COIL ............................................................. 8-43
CHECKING THE RECTIFIER/REGULATOR ........................................... 8-43
CHECKING THE COOLANT TEMPERATURE SENSOR........................ 8-44
CHECKING THE THROTTLE POSITION SENSOR ................................ 8-44
CHECKING THE THROTTLE POSITION SENSOR
INPUT VOLTAGE .................................................................................... 8-43
CHECKING THE INTAKE AIR PRESSURE SENSOR ............................ 8-46
CHECKING THE INTAKE AIR TEMPERATURE SENSOR ..................... 8-46
CHECKING THE NEUTRAL SWITCH ..................................................... 8-46
CHECKING THE FUEL INJECTOR ......................................................... 8-47
Page 292 of 360
IGNITION SYSTEM
8-2
IGNITION SYSTEM
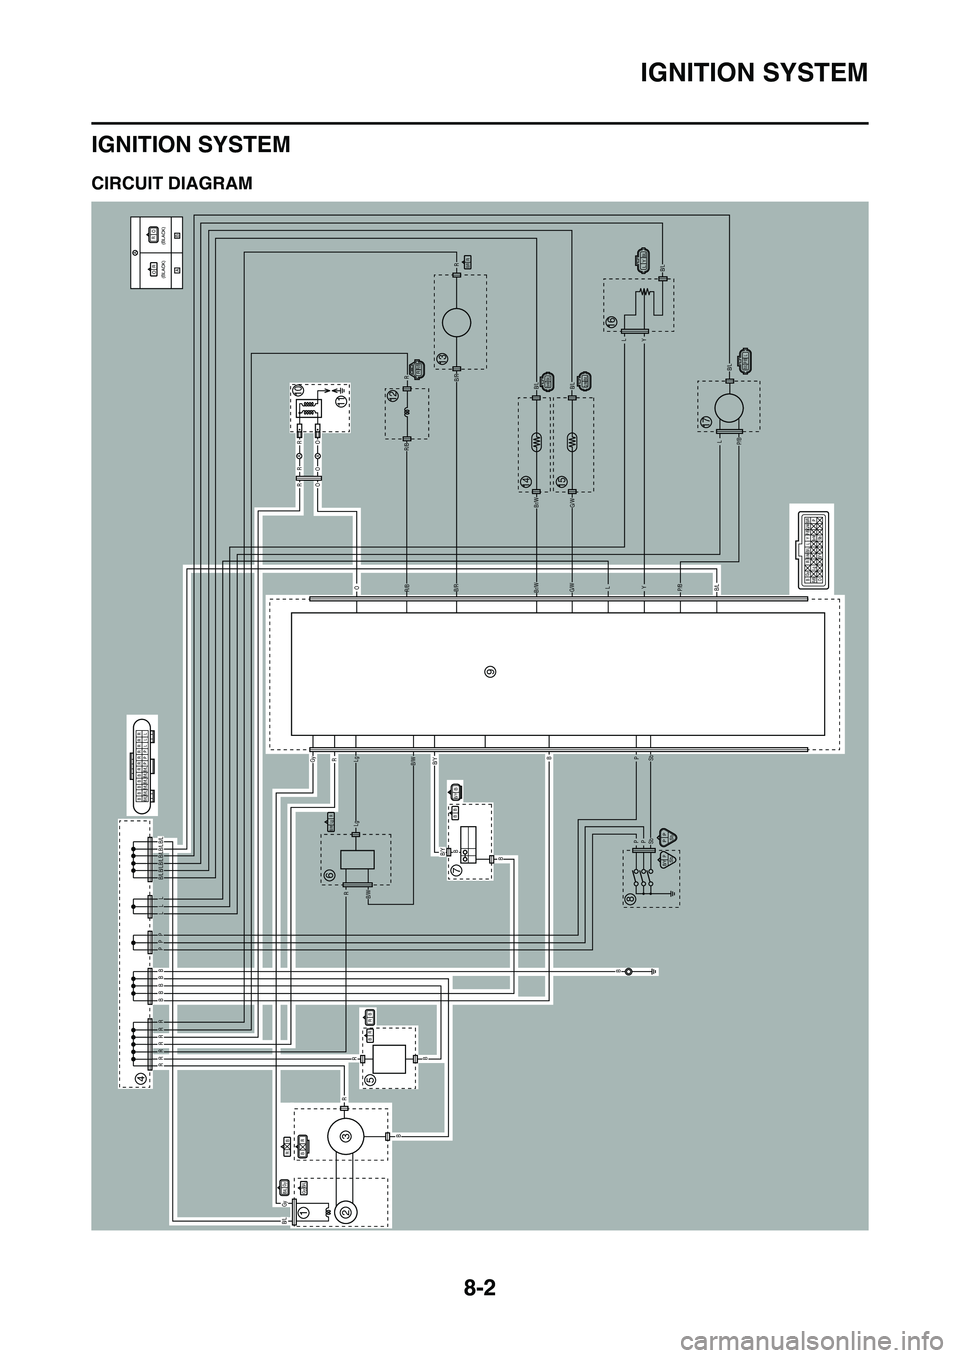
EAS1SL1321CIRCUIT DIAGRAM
B/LGy
BR
A
A
AA
B
RR R R R R R
B
B
B
RR
R
Lg
LgB/WB/Y
B/YB
B
BP
PP
Sb
B/LP/B
P/B
YL
YL
L
G/WBr/W
G/WBr/W
B/LB/L
B/L
B/L
B/R
B/R
R/B
R/B
O
OROR
OR
R
R
SbB
GyR
B/W
P L B/L
B/L Gy B/L B/L B/L B/L B/L
LL
PP
BBBB
PP
Sb
RB
B/RR
RB
B/Y PSb
BB
RR/B
LYB/L
B/W RLg
B/LBr/W
B/L P/B LB/LG/W
BB/Y
BB/L B/L B/L B/L B/L B/LBBBBRR
PPPL L LRR RR R
B
O P
Gy
R
B/Y Sb
P/B
R/B Lg B/RG/WBr/WB/L L Y
RB
B/L
Gy
R
O
O
R(BLACK) (BLACK)
B/W
4
1
3
2
5
67
8
10
9
1211
13
1415
16
17
Page 295 of 360
IGNITION SYSTEM
8-5
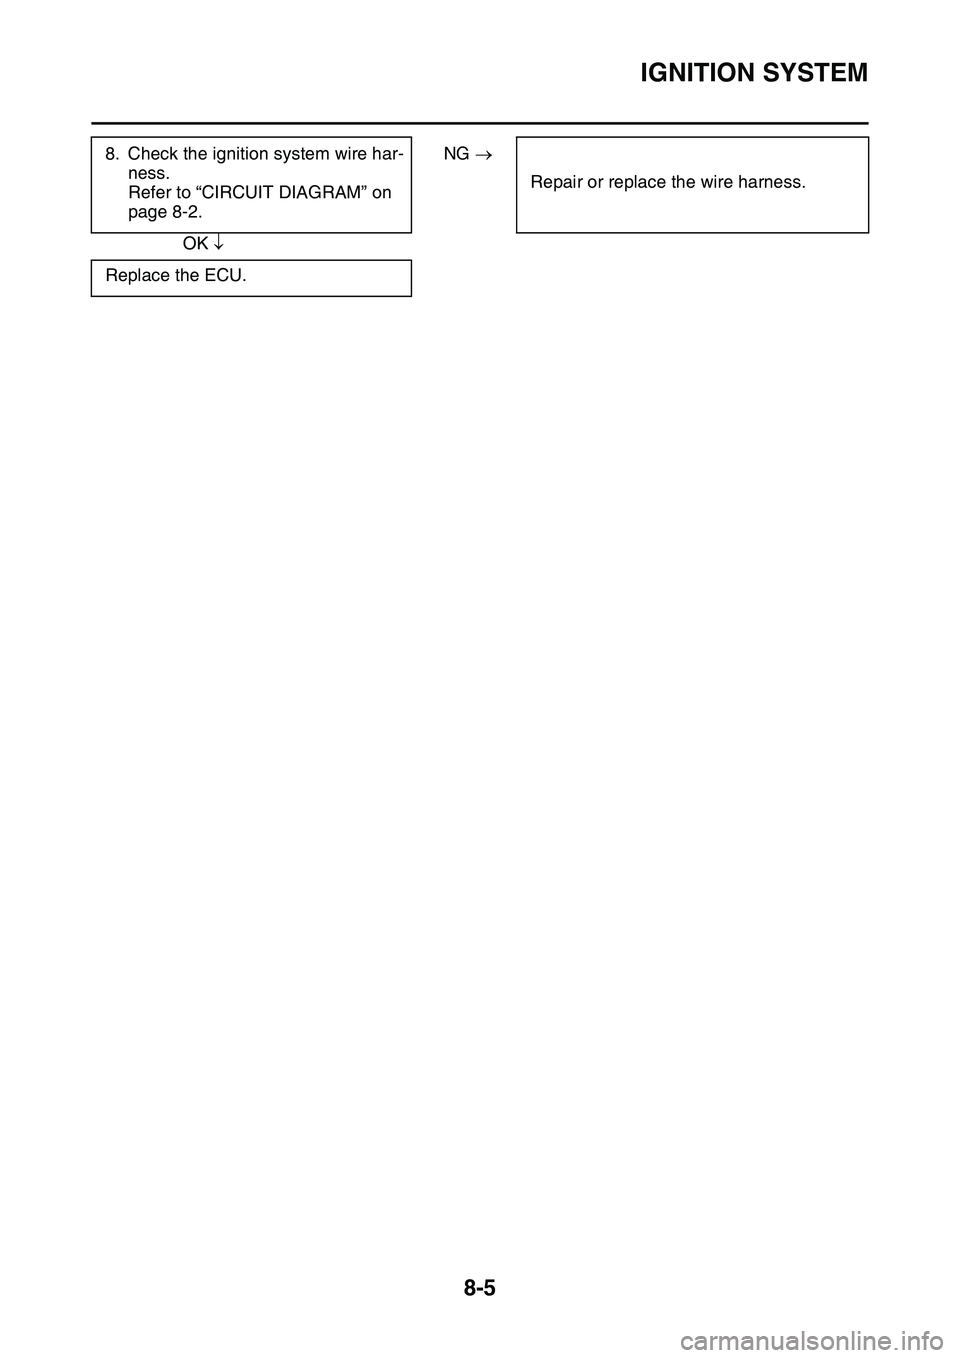
8. Check the ignition system wire har-
ness.
Refer to “CIRCUIT DIAGRAM” on
page 8-2.
NG
Repair or replace the wire harness.
OK
Replace the ECU.
Page 296 of 360
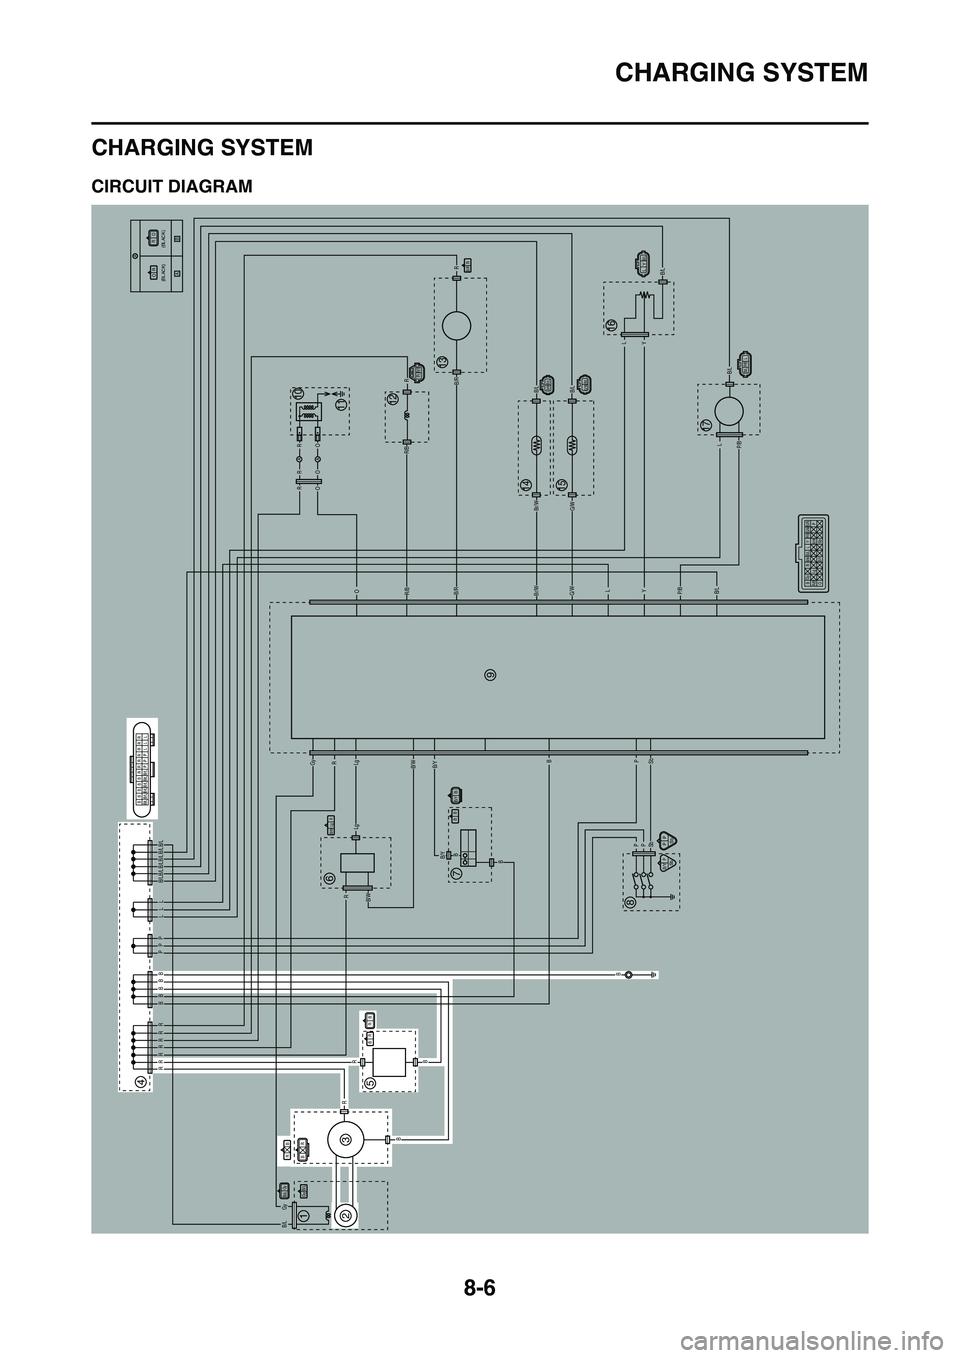
CHARGING SYSTEM
8-6
EAS27200
CHARGING SYSTEM
EAS1SL1323CIRCUIT DIAGRAM
B/LGy
BR
A
A
AA
B
RR R R R R R
B
B
B
RR
R
Lg
LgB/WB/Y
B/YB
B
BP
PP
Sb
B/LP/B
P/B
YL
YL
L
G/WBr/W
G/WBr/W
B/LB/L
B/L
B/L
B/R
B/R
R/B
R/B
O
OROR
OR
R
R
SbB
GyR
B/W
P L B/L
B/L Gy B/L B/L B/L B/L B/L
LL
PP
BBBB
PP
Sb
RB
B/RR
RB
B/Y PSb
BB
RR/B
LYB/L
B/W RLg
B/LBr/W
B/L P/B LB/LG/W
BB/Y
BB/L B/L B/L B/L B/L B/LBBBBRR
PPPL L LRR RR R
B
O P
Gy
R
B/Y Sb
P/B
R/B Lg B/RG/WBr/WB/L L Y
RB
B/L
Gy
R
O
O
R(BLACK) (BLACK)
B/W
4
1
3
2
5
67
8
10
9
1211
13
1415
16
17