YAMAHA YZ450F 2015 Owner's Guide
Manufacturer: YAMAHA, Model Year: 2015, Model line: YZ450F, Model: YAMAHA YZ450F 2015Pages: 360, PDF Size: 10.82 MB
Page 31 of 360
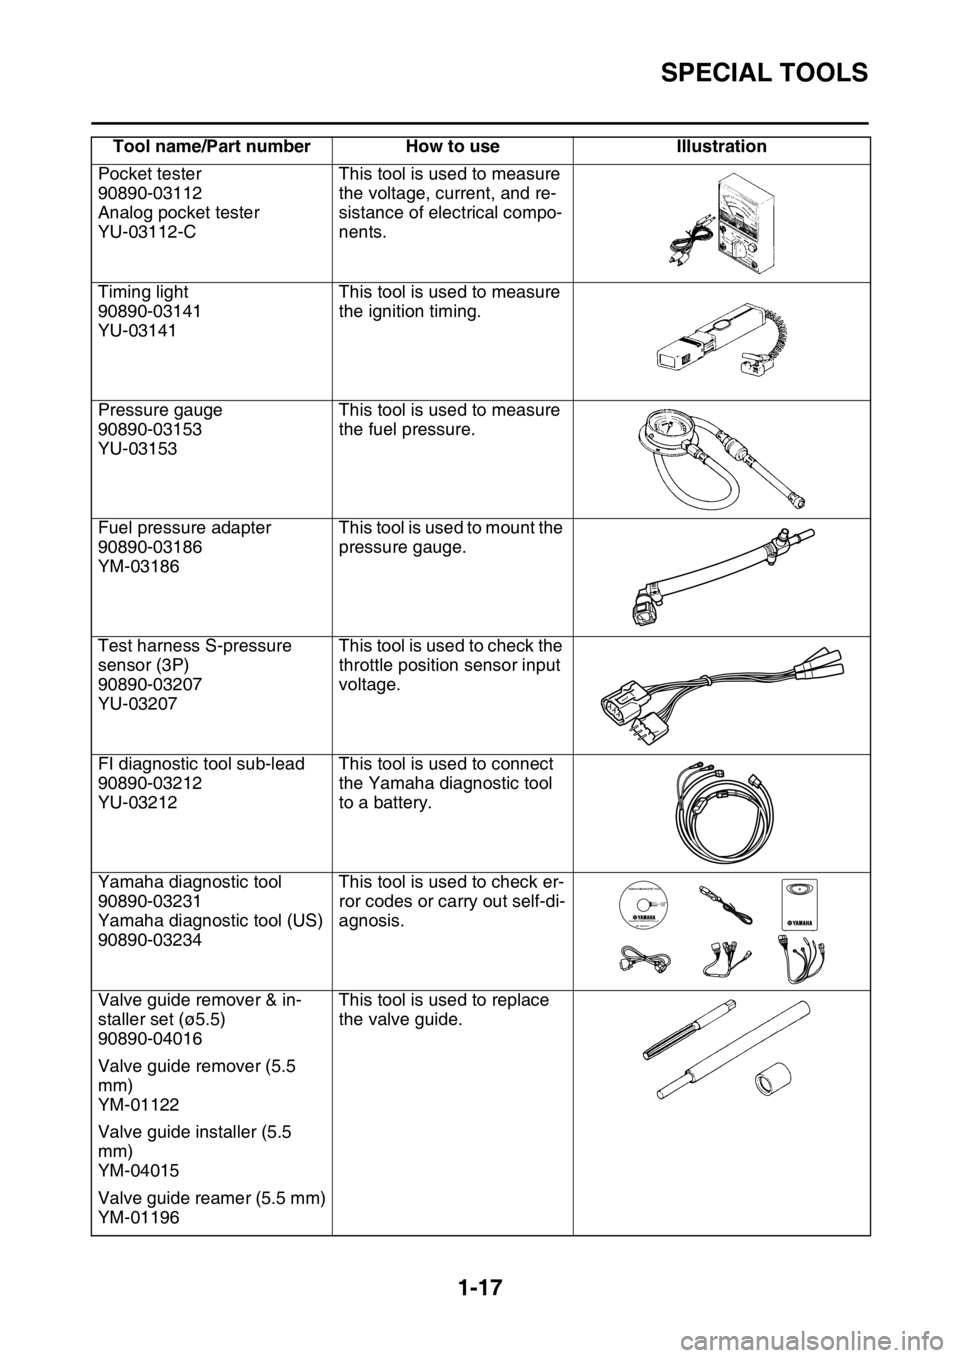
SPECIAL TOOLS
1-17
Pocket tester
90890-03112
Analog pocket tester
YU-03112-CThis tool is used to measure
the voltage, current, and re-
sistance of electrical compo-
nents.
Timing light
90890-03141
YU-03141This tool is used to measure
the ignition timing.
Pressure gauge
90890-03153
YU-03153This tool is used to measure
the fuel pressure.
Fuel pressure adapter
90890-03186
YM-03186This tool is used to mount the
pressure gauge.
Test harness S-pressure
sensor (3P)
90890-03207
YU-03207This tool is used to check the
throttle position sensor input
voltage.
FI diagnostic tool sub-lead
90890-03212
YU-03212This tool is used to connect
the Yamaha diagnostic tool
to a battery.
Yamaha diagnostic tool
90890-03231
Yamaha diagnostic tool (US)
90890-03234This tool is used to check er-
ror codes or carry out self-di-
agnosis.
Valve guide remover & in-
staller set (ø5.5)
90890-04016This tool is used to replace
the valve guide.
Valve guide remover (5.5
mm)
YM-01122
Valve guide installer (5.5
mm)
YM-04015
Valve guide reamer (5.5 mm)
YM-01196Tool name/Part number How to use Illustration
Page 32 of 360
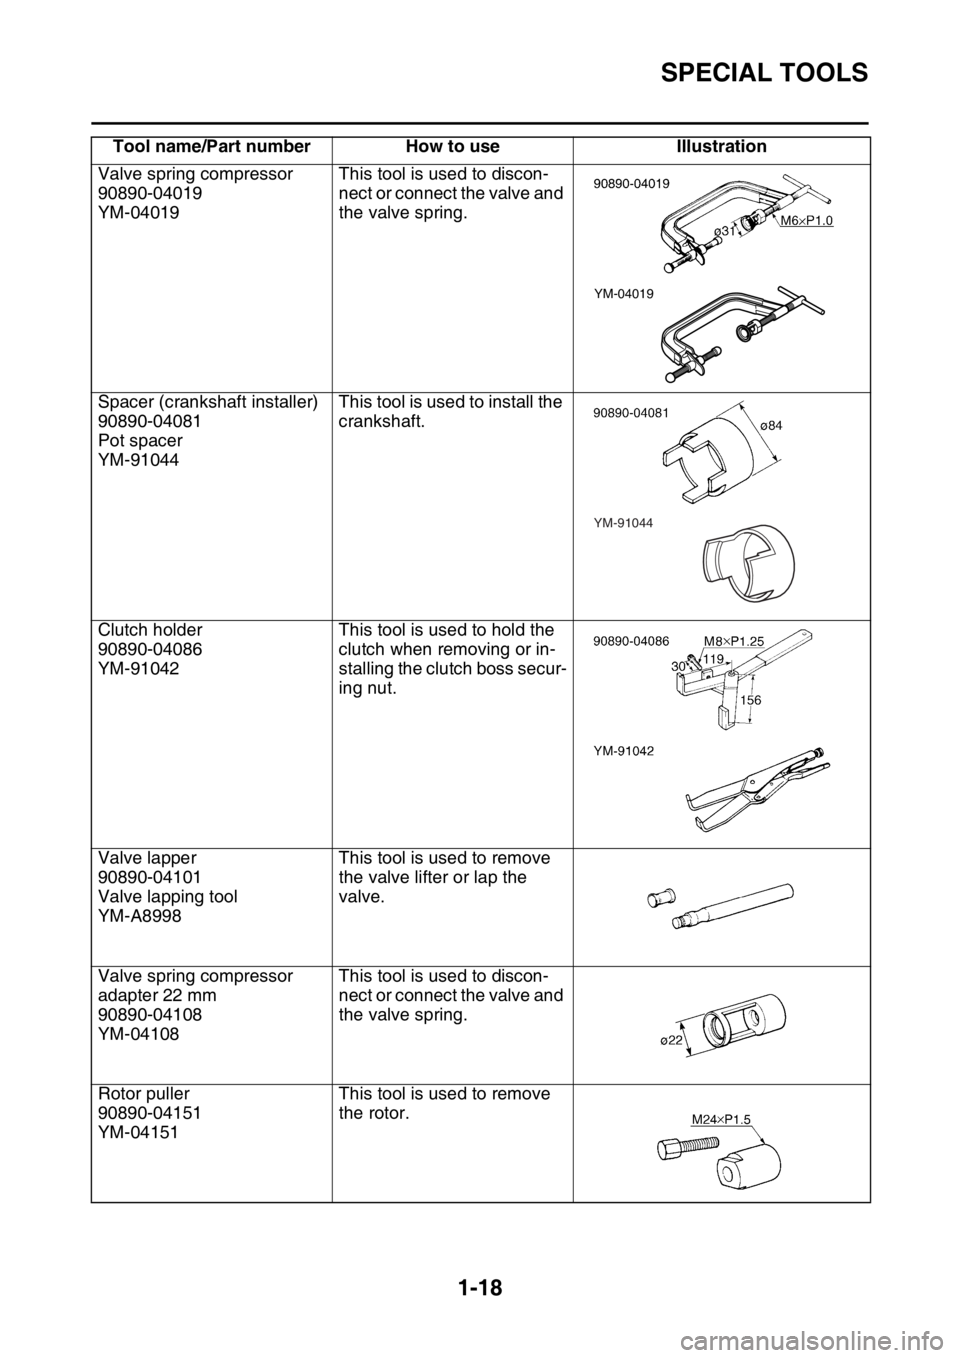
SPECIAL TOOLS
1-18
Valve spring compressor
90890-04019
YM-04019This tool is used to discon-
nect or connect the valve and
the valve spring.
Spacer (crankshaft installer)
90890-04081
Pot spacer
YM-91044This tool is used to install the
crankshaft.
Clutch holder
90890-04086
YM-91042This tool is used to hold the
clutch when removing or in-
stalling the clutch boss secur-
ing nut.
Valve lapper
90890-04101
Valve lapping tool
YM-A8998This tool is used to remove
the valve lifter or lap the
valve.
Valve spring compressor
adapter 22 mm
90890-04108
YM-04108This tool is used to discon-
nect or connect the valve and
the valve spring.
Rotor puller
90890-04151
YM-04151This tool is used to remove
the rotor. Tool name/Part number How to use Illustration
YM-04019
YM-91044
Page 33 of 360

SPECIAL TOOLS
1-19
Crankcase separating tool
90890-04152
YU-A9642This tool is used to remove
the crankshaft.
Ignition checker
90890-06754
Oppama pet-4000 spark
checker
YM-34487This tool is used to check the
spark performance of the ig-
nition coil.
Digital tachometer
90890-06760
YU-39951-BThis tool is used to measure
the engine speed.
Three bond No.1215®
90890-85505This sealant (Bond) is used
for crankcase mating sur-
face, etc. Tool name/Part number How to use Illustration
Page 34 of 360
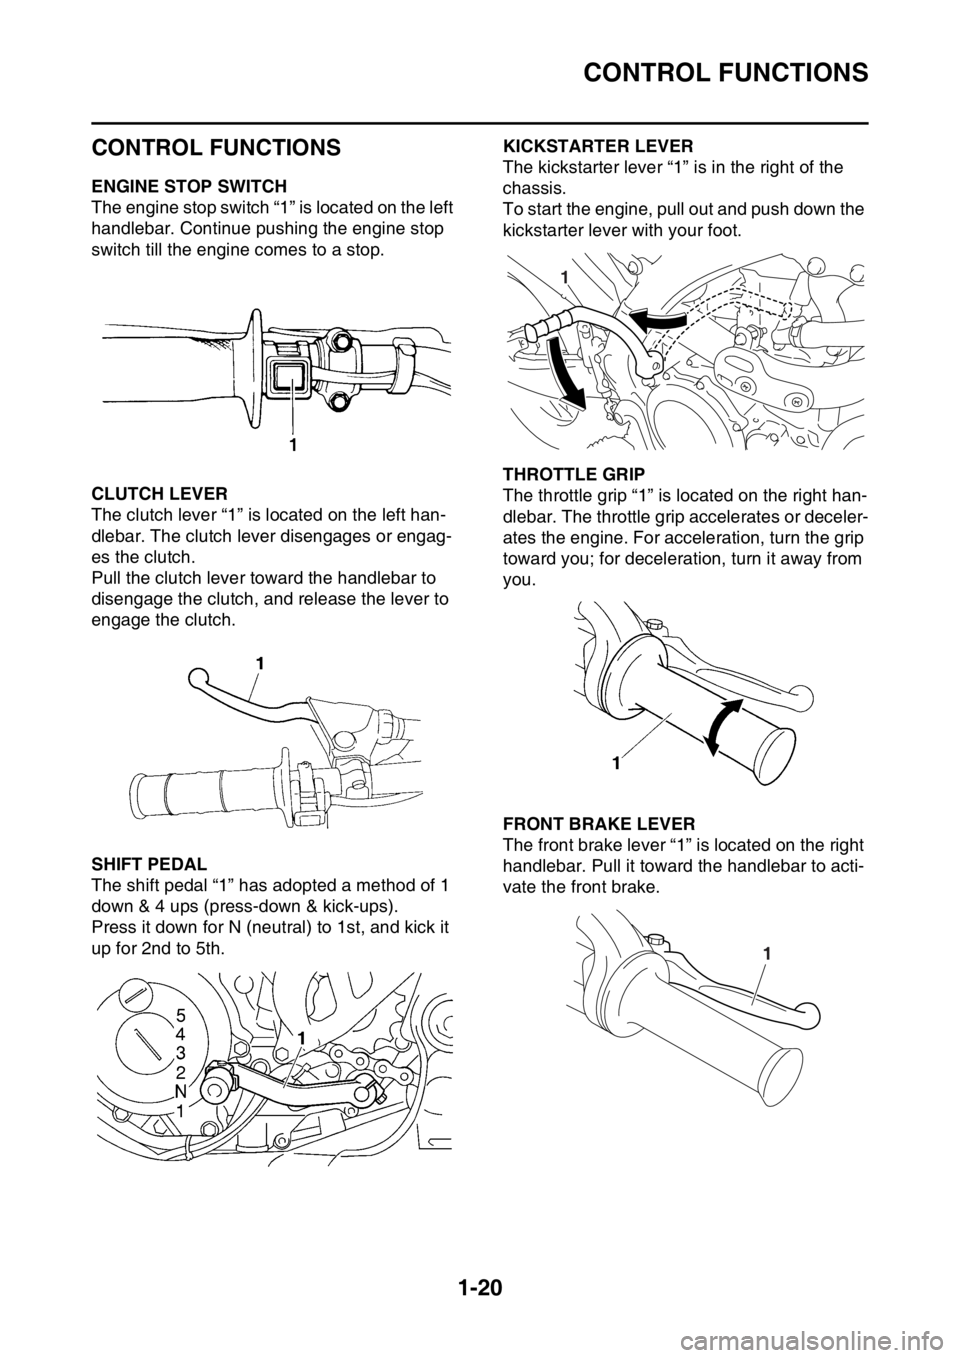
CONTROL FUNCTIONS
1-20
EAS1SL5032
CONTROL FUNCTIONS
EAS1SL5033ENGINE STOP SWITCH
The engine stop switch “1” is located on the left
handlebar. Continue pushing the engine stop
switch till the engine comes to a stop.
EAS1SL5034CLUTCH LEVER
The clutch lever “1” is located on the left han-
dlebar. The clutch lever disengages or engag-
es the clutch.
Pull the clutch lever toward the handlebar to
disengage the clutch, and release the lever to
engage the clutch.
EAS1SL5035SHIFT PEDAL
The shift pedal “1” has adopted a method of 1
down & 4 ups (press-down & kick-ups).
Press it down for N (neutral) to 1st, and kick it
up for 2nd to 5th.
EAS1SL5036KICKSTARTER LEVER
The kickstarter lever “1” is in the right of the
chassis.
To start the engine, pull out and push down the
kickstarter lever with your foot.
EAS1SL5037THROTTLE GRIP
The throttle grip “1” is located on the right han-
dlebar. The throttle grip accelerates or deceler-
ates the engine. For acceleration, turn the grip
toward you; for deceleration, turn it away from
you.
EAS1SL5038FRONT BRAKE LEVER
The front brake lever “1” is located on the right
handlebar. Pull it toward the handlebar to acti-
vate the front brake.
1
1
Page 35 of 360
CONTROL FUNCTIONS
1-21
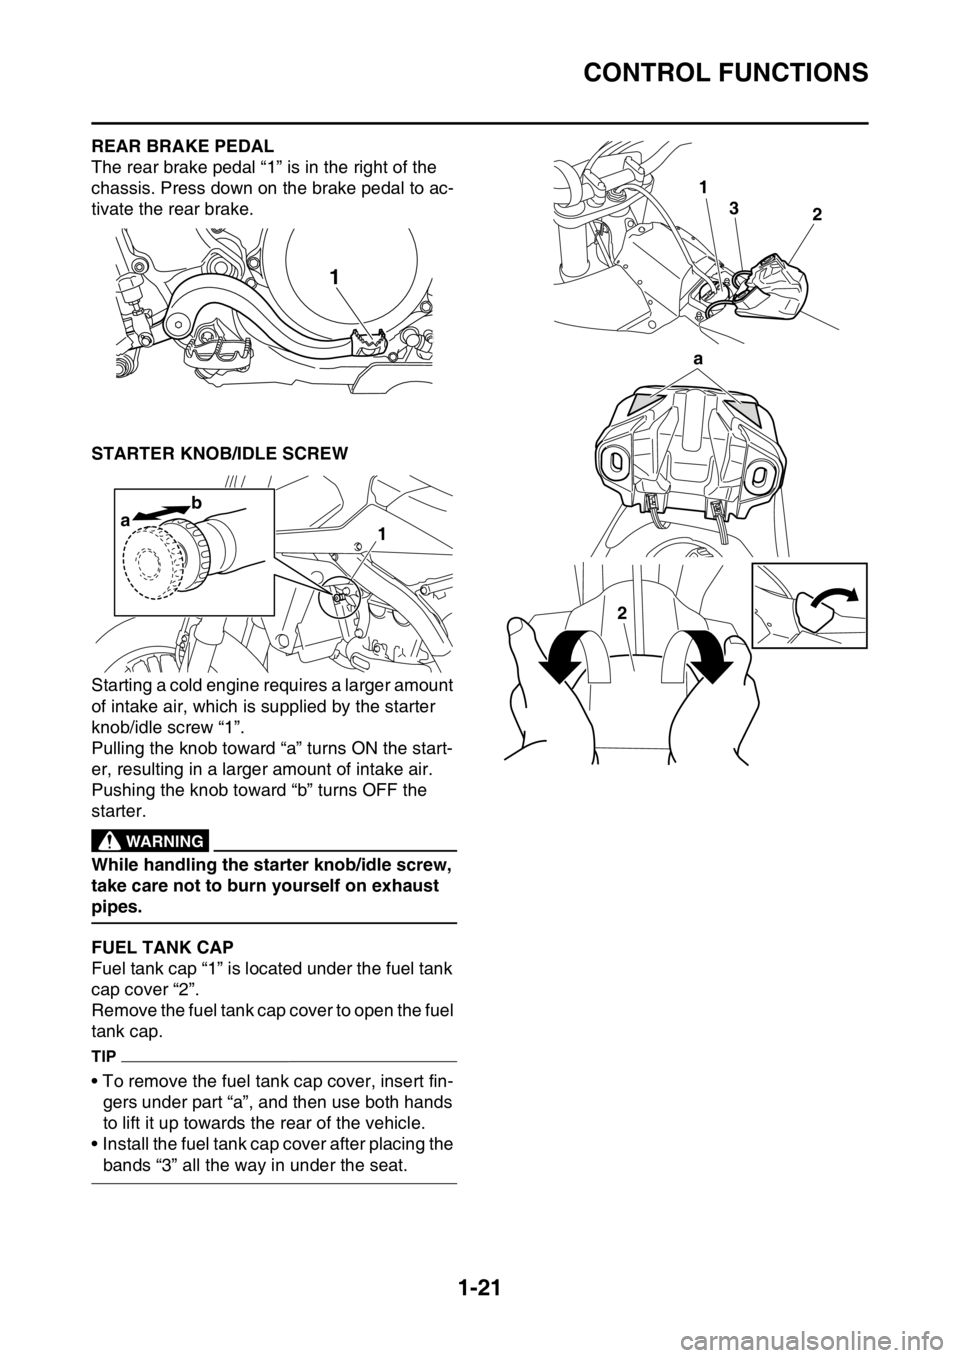
EAS1SL5039REAR BRAKE PEDAL
The rear brake pedal “1” is in the right of the
chassis. Press down on the brake pedal to ac-
tivate the rear brake.
EAS1SL5040STARTER KNOB/IDLE SCREW
Starting a cold engine requires a larger amount
of intake air, which is supplied by the starter
knob/idle screw “1”.
Pulling the knob toward “a” turns ON the start-
er, resulting in a larger amount of intake air.
Pushing the knob toward “b” turns OFF the
starter.
EWA@
WARNING
While handling the starter knob/idle screw,
take care not to burn yourself on exhaust
pipes.
EAS1SL5041FUEL TANK CAP
Fuel tank cap “1” is located under the fuel tank
cap cover “2”.
Remove the fuel tank cap cover to open the fuel
tank cap.
TIP
• To remove the fuel tank cap cover, insert fin-
gers under part “a”, and then use both hands
to lift it up towards the rear of the vehicle.
• Install the fuel tank cap cover after placing the
bands “3” all the way in under the seat.
1
ab1
1
23
a
2
Page 36 of 360
STARTING AND BREAK-IN
1-22
EAS1SL5042
STARTING AND BREAK-IN
EAS1SL5043FUEL
Always use the recommended fuel as stated
below. Also, be sure to use new gasoline the
day of a race.
JCA
NOTICE
Use only unleaded gasoline. The use of
leaded gasoline will cause severe damage
to the engine internal parts such as valves,
piston rings, and exhaust system, etc.
TIP
Your Yamaha engine has been designed to use
premium unleaded gasoline with a pump oc-
tane number [(R+M)/2] of 91 or higher, or a re-
search octane number of 95 or higher. If
knocking (or pinging) occurs, use a gasoline of
a different brand.
JWA
WARNING
• For refueling, be sure to stop the engine
and use enough care not to spill any fuel.
Also be sure to avoid refueling close to a
fire.
• Refuel after the engine, exhaust pipe, etc.
have cooled off.
Gasohol (For USA and Canada)
There are two types of gasohol: gasohol con-
taining ethanol and that containing methanol.
Gasohol containing ethanol can be used if the
ethanol content does not exceed 10%. Gasohol
containing methanol is not recommended by
Yamaha because it can cause damage to the
fuel system or vehicle performance problems.
EAS1SL5044STARTING A COLD ENGINE
1. Press the shift pedal to neutral.
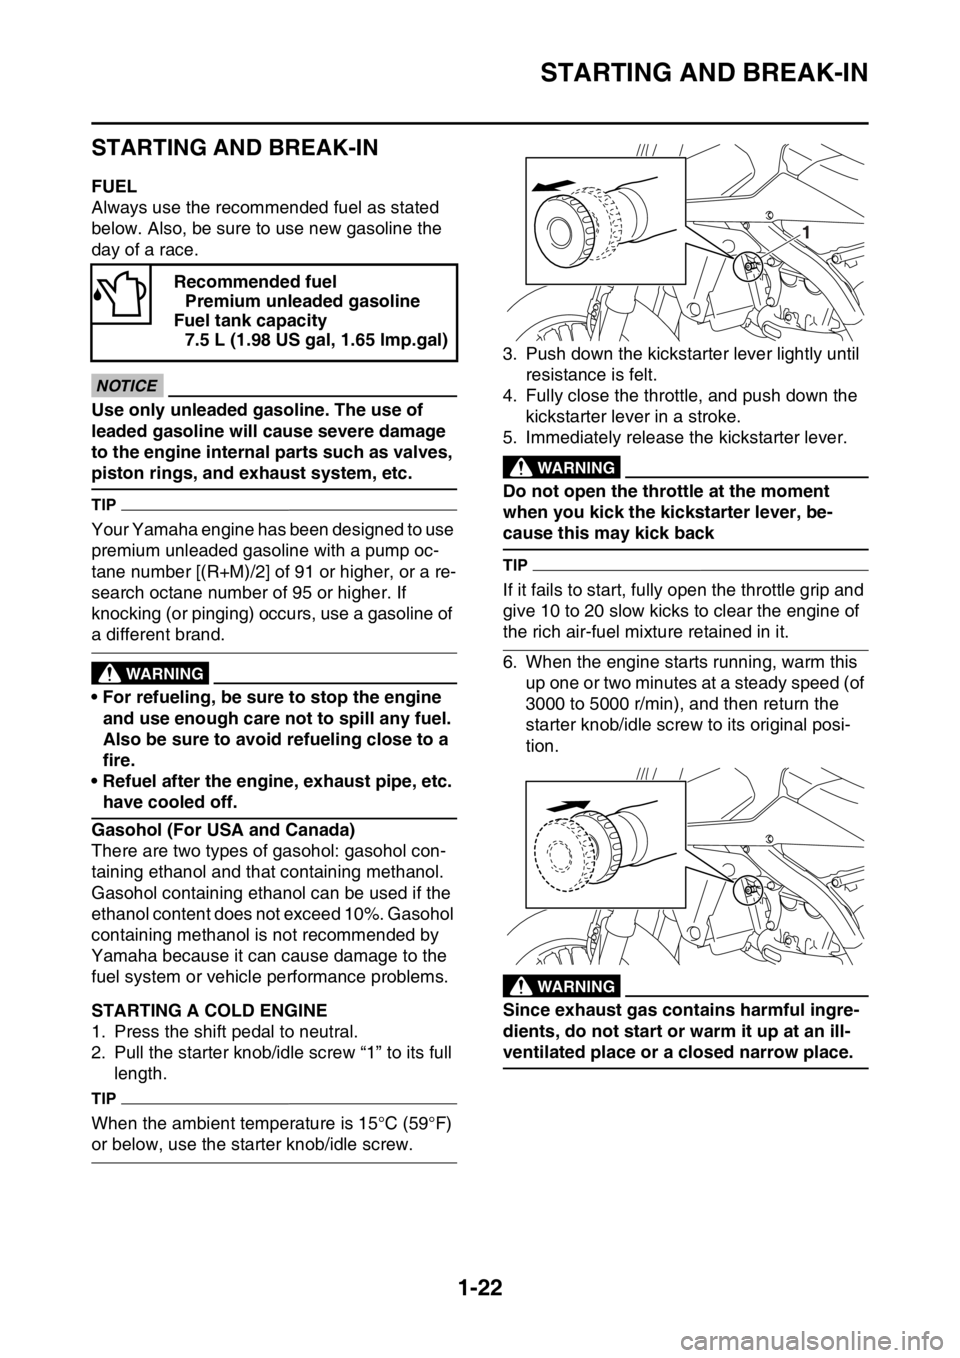
2. Pull the starter knob/idle screw “1” to its full
length.
TIP
When the ambient temperature is 15°C (59°F)
or below, use the starter knob/idle screw.3. Push down the kickstarter lever lightly until
resistance is felt.
4. Fully close the throttle, and push down the
kickstarter lever in a stroke.
5. Immediately release the kickstarter lever.
EWA
WARNING
Do not open the throttle at the moment
when you kick the kickstarter lever, be-
cause this may kick back
TIP
If it fails to start, fully open the throttle grip and
give 10 to 20 slow kicks to clear the engine of
the rich air-fuel mixture retained in it.
6. When the engine starts running, warm this
up one or two minutes at a steady speed (of
3000 to 5000 r/min), and then return the
starter knob/idle screw to its original posi-
tion.
EWA
WARNING
Since exhaust gas contains harmful ingre-
dients, do not start or warm it up at an ill-
ventilated place or a closed narrow place. Recommended fuel
Premium unleaded gasoline
Fuel tank capacity
7.5 L (1.98 US gal, 1.65 lmp.gal)
1
Page 37 of 360

STARTING AND BREAK-IN
1-23
7. To stop the engine, push the engine stop
switch “1”.
TIP
Continue pushing the engine stop switch till the
engine comes to a full stop.
EAS1SL5045STARTING A WARM ENGINE
When the engine is warm, give a kick with the
throttle closed without using the starter knob/
idle screw.
TIP
If it fails to start, fully open the throttle grip and
give 10 to 20 slow kicks to clear the engine of
the rich air-fuel mixture retained in it.
EAS1SL5046BREAK-IN PROCEDURES
A break-in is important so that rotating portion,
sliding surfaces, and mounted areas may fit
one another, and that the rider may become ac-
customed to the machine.
ECA
NOTICE
Before running, do maintenance on the air
filter element.
Refer to “CLEANING THE AIR FILTER ELE-
MENT” on page 3-12.
1. After warming up the engine, drive it for
about 20 minutes at a throttle opening of 1/2
or less.
2. Make a pit stop, and check mounted areas
for looseness, oil leaks, or other problems.
3. Then, drive it for about 40 minutes at a throt-
tle opening of 3/4 or less.
4. Make a pit stop again, and thoroughly check
mounted areas for looseness, oil leaks, or
other problems. Thorough checks and ad-
justments are required in particular for
stretch of cables, free play of the brake,
stretch of the drive chain, looseness of the
spoke, and so on.
ECA
NOTICE
After a break-in or after each race, always
check the points shown in “TORQUE-
CHECK POINTS” for tightening torques and
retighten them. (Refer to “TORQUE-CHECK
POINTS” on page 1-25.)
Also when the following parts are replaced,
a break-in is required.
• Cylinder and Crankshaft: A break-in is re-
quired for about an hour.
• Piston, Piston ring, Valve, Camshaft, and
Gear: A break-in is required for about 30
minutes at a throttle opening of 1/2 or less.
Observe the condition of the engine careful-
ly during a break-in.
For checkpoints for a break-in, see “MAIN-
TENANCE AFTER BREAK-IN”. If any prob-
lem is found, immediately stop the engine
and make a checkup.
Page 38 of 360

MAINTENANCE AFTER BREAK-IN
1-24
EAS1SL5047
MAINTENANCE AFTER BREAK-IN
After a break-in, perform careful maintenance
to get ready for the next practice or race.
Refer to “PRE-OPERATION INSPECTION
AND MAINTENANCE” on page 3-7.
EAS1SL5048MAJOR MAINTENANCE
1. For the engine
• Leaks around the engine
Check for pressure leaks from the cylinder
head or the cylinder, oil leaks from the
crankcase or the case cover, leaks from the
coolant system, and other leaks.
• Check that the valve, the cylinder head, the
cylinder, the piston, and the piston ring fit
one another, and that contact between the
valve and the cylinder head, and that be-
tween the cylinder and the piston are cor-
rect.
• Engine oil change
Drain the oil, and check for dirt and foreign
materials such as metal chips. (If any foreign
material is mixed, disassemble and check
the crankcase.)
Pour the specified amount of the recom-
mended oil.
• AC magneto
Check for looseness in mounted areas of
the rotor and the stator.
Check that the connector is not being dis-
connected.
• Silencer
Check the main body and stay for cracks.
Check for leaks.
• Mounting bolts and nuts
Check for looseness in mounted areas of
parts, as well as engine mounting bolts and
engine brackets.
2. For the chassis
• Check welds and mounted areas of the
frame, the swingarm, the link, the bracket,
and so on, for looseness and cracks.
• Wheel (s)
Check the wheel for runout. Check the
spoke for looseness.
• Brake(s)
Check the brake disc mounting bolt for
looseness.
Check that the reservoir contains the speci-
fied amount of brake fluid. Check for leaks.• Cable
Grease and adjust cables.
•Drive chain
Lubricate the drive chain and adjust its ten-
sion.
• Fuel tank
Clean the inside of the fuel tank. Check for
leaks.
• Suspension
Check for oil leaks in the front fork or the rear
shock absorber. Check that the mounted
conditions are good.
• Sprocket
Check for looseness in the sprocket mount-
ed on the rear wheel.
• Mounting bolts and nuts
Check mounted areas for looseness.
JCA1SL1001
NOTICE
After a break-in or before each race, always
check the points shown in “TORQUE-
CHECK POINTS” for tightening torques and
retighten them. (Refer to “TORQUE-CHECK
POINTS” on page 1-25.)
• Greasing and oiling
Always grease or oil the specified points.
Page 39 of 360

TORQUE-CHECK POINTS
1-25
EAS1SL5049
TORQUE-CHECK POINTS
Frame construction Frame to rear frame
Frame to engine protector
Combined seat and fuel tank Fuel tank to frame
Engine mounting Frame to engine
Engine bracket to engine
Engine bracket to frame
Seat Seat to frame
Steering Steering stem to handlebar Steering stem to frame
Steering stem to upper bracket
Upper bracket to handlebar
Suspension Front Steering stem to front fork Front fork to upper bracket
Front fork to lower bracket
Rear Link Assembly of links
Link to frame
Link to rear shock absorber
Link to swingarm
Mounting of rear shock absorber Rear shock absorber and frame
Mounting of swingarm Tightening of pivot shaft
Wheel (s) Mounting of wheel Front Tightening of wheel axle
Tightening of axle holder
Tightening of spoke nipple
Rear Tightening of wheel axle
Wheel to rear wheel sprocket
Tightening of spoke nipple
Brake(s) Front Brake caliper to front fork
Brake disc to wheel
Tightening of union bolt
Brake master cylinder to handle-
bar
Tightening of bleed screw
Tightening of brake hose holder
Rear Brake pedal to frame
Brake disc to wheel
Tightening of union bolt
Brake master cylinder to frame
Tightening of bleed screw
Tightening of brake hose holder
Fuel system Fuel pump to fuel tank
Plastic cover Tightening of number plate
Page 40 of 360
TORQUE-CHECK POINTS
1-26
TIP
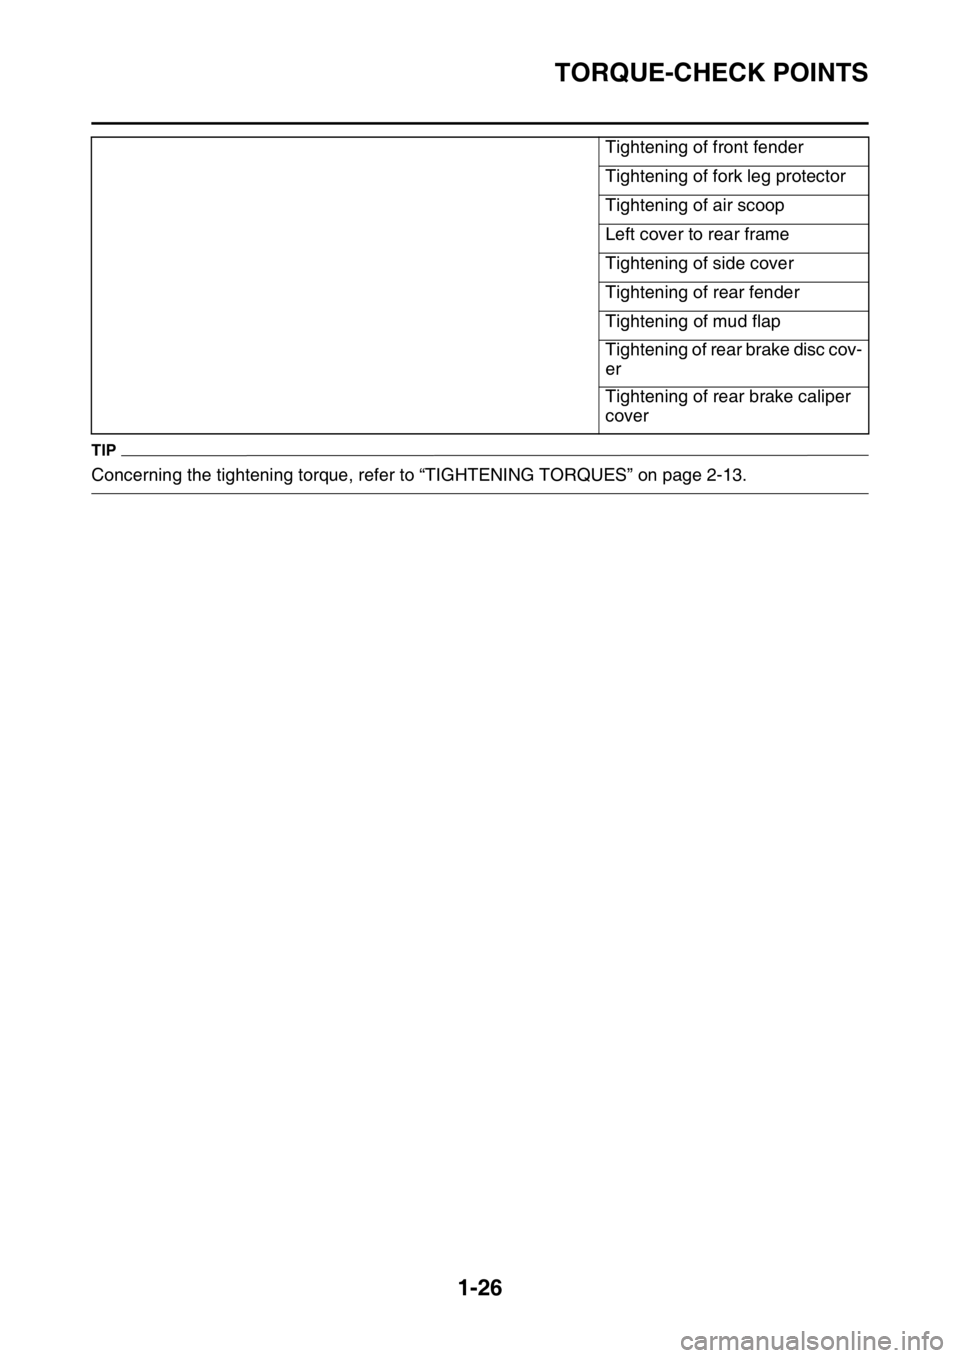
Concerning the tightening torque, refer to “TIGHTENING TORQUES” on page 2-13.Tightening of front fender
Tightening of fork leg protector
Tightening of air scoop
Left cover to rear frame
Tightening of side cover
Tightening of rear fender
Tightening of mud flap
Tightening of rear brake disc cov-
er
Tightening of rear brake caliper
cover