oil level YAMAHA YZ85 2014 Owners Manual
[x] Cancel search | Manufacturer: YAMAHA, Model Year: 2014, Model line: YZ85, Model: YAMAHA YZ85 2014Pages: 88, PDF Size: 1.8 MB
Page 9 of 88

TABLE OF CONTENTS
LOCATION OF IMPORTANT
LABELS..............................................1-1
SAFETY INFORMATION ...................2-1
DESCRIPTION ...................................3-1
Left view ..........................................3-1
Right view ........................................3-2
Controls and instruments ................3-3
INSTRUMENT AND CONTROL
FUNCTIONS .......................................4-1
Handlebar switch ............................4-1
Clutch lever .....................................4-1
Shift pedal .......................................4-1
Brake lever ......................................4-2
Brake pedal .....................................4-2
Fuel tank cap ...................................4-3
Fuel ..................................................4-3
Fuel tank breather hose...................4-5
Fuel cock .........................................4-5
Starter (choke) knob ........................4-6
Kickstarter .......................................4-6
Seat .................................................4-7
Adjusting the front fork ....................4-7
Front fork bleeding ..........................4-9
Adjusting the shock absorber assembly ......................................4-9
Removable sidestand ....................4-12 FOR YOUR SAFETY –
PRE-OPERATION CHECKS
............. 5-1
OPERATION AND IMPORTANT
RIDING POINTS ................................ 6-1
Starting and warming up a cold engine .......................................... 6-1
Starting a warm engine................... 6-1
Shifting............................................ 6-2
Engine break-in............................... 6-3
Parking ............................................ 6-4
PERIODIC MAINTENANCE AND
ADJUSTMENT .................................. 7-1
Periodic maintenance and lubrication chart .......................... 7-2
Checking the spark plug................. 7-8
Transmission oil .............................. 7-9
Coolant ......................................... 7-10
Cleaning the air filter element ....... 7-12
Adjusting the carburetor ............... 7-14
Adjusting the engine idling speed......................................... 7-14
Adjusting the throttle grip free play ............................................ 7-15
Tires .............................................. 7-15
Spoke wheels ............................... 7-17
Adjusting the clutch lever free play ............................................ 7-18
Checking the brake lever free play ............................................ 7-19 Checking the shift pedal ............... 7-19
Checking the front and rear brake
pads ........................................... 7-20
Checking the brake fluid level ....... 7-20
Changing the brake fluid ............... 7-22
Drive chain slack ........................... 7-22
Cleaning and lubricating the drive chain .......................................... 7-23
Checking and lubricating the cables ........................................ 7-24
Checking and lubricating the
throttle grip and cable ............... 7-24
Checking and lubricating the brake and clutch levers ............. 7-24
Checking and lubricating the brake pedal ................................ 7-25
Lubricating the rear suspension.... 7-25
Lubricating the swingarm pivots ... 7-26
Checking the front fork ................. 7-26
Checking the steering ................... 7-27
Checking the wheel bearings ........ 7-27
Supporting the motorcycle ........... 7-28
Front wheel ................................... 7-28
Rear wheel .................................... 7-29
Troubleshooting ............................ 7-31
Troubleshooting charts ................. 7-32
MOTORCYCLE CARE AND
STORAGE .......................................... 8-1
Matte color caution ......................... 8-1
Care................................................. 8-1
U1SN82E0.book Page 1 Friday, June 7, 2013 3:51 PM
Page 30 of 88
![YAMAHA YZ85 2014 Owners Manual INSTRUMENT AND CONTROL FUNCTIONS
4-4
4Your Yamaha engine has been de-
signed to use premium unleaded gas-
oline with a pump octane number
[(R+M)/2] of 91 or higher, or a research
octane number of 95 o YAMAHA YZ85 2014 Owners Manual INSTRUMENT AND CONTROL FUNCTIONS
4-4
4Your Yamaha engine has been de-
signed to use premium unleaded gas-
oline with a pump octane number
[(R+M)/2] of 91 or higher, or a research
octane number of 95 o](/img/51/54042/w960_54042-29.png)
INSTRUMENT AND CONTROL FUNCTIONS
4-4
4Your Yamaha engine has been de-
signed to use premium unleaded gas-
oline with a pump octane number
[(R+M)/2] of 91 or higher, or a research
octane number of 95 or higher. If
knocking (or pinging) occurs, use a
gasoline of a different brand.
If the recommended 2-stroke engine
oil is not available, use an equivalent
oil.
NOTICE
ECA15552
Never mix two
bran ds of 2-stroke
en gine oil in the same batch. Always
use the same type of oil to ensure
maximum en gine performance.
Shoul d it b e necessary to use a dif-
ferent oil bran d, b e sure to d rain the
fuel tank an d the car buretor float
cham ber of the ol d premixe d fuel
prior to fillin g with the new type.
Fillin g the fuel tank
Make sure there is sufficient gasoline in
the tank.
WARNING
EWA10882
Gasoline an d g asoline vapors are
extremely flamma ble. To avoi d fires
an d explosions an d to re duce the
risk of injury when refuelin g, follow
these instructions.1. Before refueling, turn off the en- gine and be sure that no one is sit-
ting on the vehicle. Never refuel
while smoking, or while in the vi-
cinity of sparks, open flames, or other sources of ignition such as
the pilot lights of water heaters
and clothes dryers.
2. Do not overfill the fuel tank. Stop filling when the fuel reaches the
bottom of the filler tube. Because
fuel expands when it heats up,
heat from the engine or the sun
can cause fuel to spill out of the
fuel tank.
3. Wipe up any spilled fuel immedi- ately. NOTICE: Immediately
wipe off spille d fuel with a clean,
d ry, soft cloth, since fuel may
d eteriorate painted surfaces or
plastic parts.
[ECA10072]
4. Be sure to securely close the fuel tank cap.
WARNING
EWA15152
Gasoline is poisonous an d can
cause injury or death. Han dle gaso-
line with care. Never siphon gasoline
b y mouth. If you shoul d swallow
some gasoline or inhale a lot of g as-
oline vapor, or g et some gasoline in
your eyes, see your doctor imme di-
ately. If g asoline spills on your skin,
1. Maximum fuel level
2. Fuel tank filler tube
U1SN82E0.book Page 4 Friday, June 7, 2013 3:51 PM
Page 39 of 88
FOR YOUR SAFETY – PRE-OPERATION CHECKS
5-1
5
EAU15598
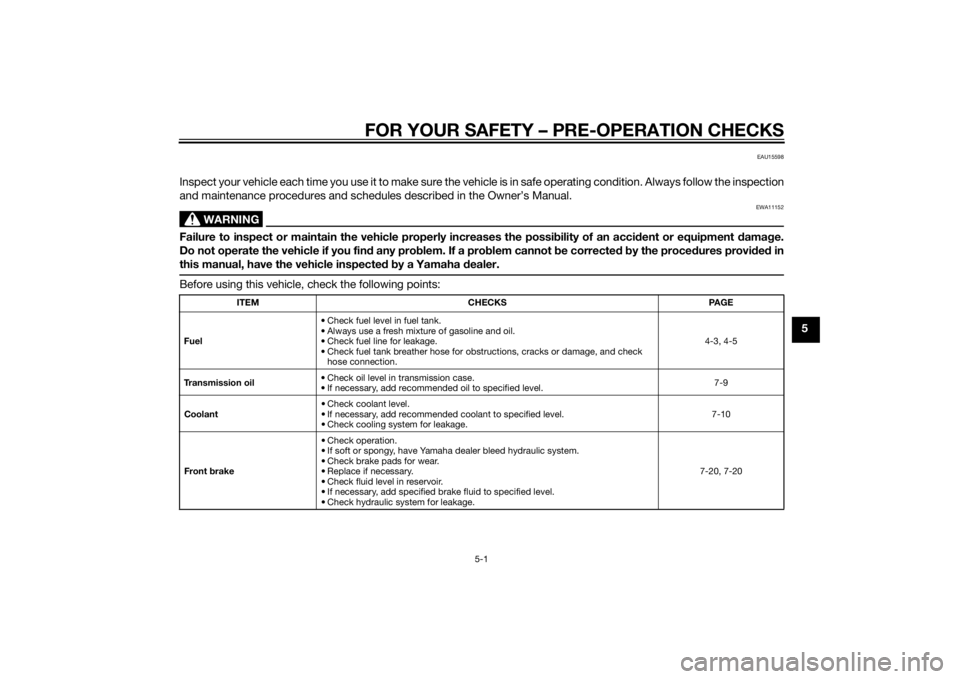
Inspect your vehicle each time you use it to make sure the vehicle is in safe operating condition. Always follow the inspection
and maintenance procedures and schedules described in the Owner’s Manual.
WARNING
EWA11152
Failure to inspect or maintain the vehicle properly increases the possibility of an acci dent or equipment damag e.
Do not operate the vehicle if you fin d any pro blem. If a pro blem cannot be corrected b y the proce dures provi ded in
this manual, have the vehicle inspecte d b y a Yamaha dealer.Before using this vehicle, check the following points:
ITEM CHECKS PAGE
Fuel • Check fuel level in fuel tank.
• Always use a fresh mixture of gasoline and oil.
• Check fuel line for leakage.
• Check fuel tank breather hose for obstructions, cracks or damage, and check
hose connection. 4-3, 4-5
Transmission oil • Check oil level in transmission case.
• If necessary, add recommended oil to specified level. 7-9
Coolant • Check coolant level.
• If necessary, add recommended coolant to specified level.
• Check cooling system for leakage. 7-10
Front brake • Check operation.
• If soft or spongy, have Yamaha dealer bleed hydraulic system.
• Check brake pads for wear.
• Replace if necessary.
• Check fluid level in reservoir.
• If necessary, add specified brake fluid to specified level.
• Check hydraulic system for leakage. 7-20, 7-20
U1SN82E0.book Page 1 Friday, June 7, 2013 3:51 PM
Page 50 of 88
PERIODIC MAINTENANCE AND ADJUSTMENT
7-5
7
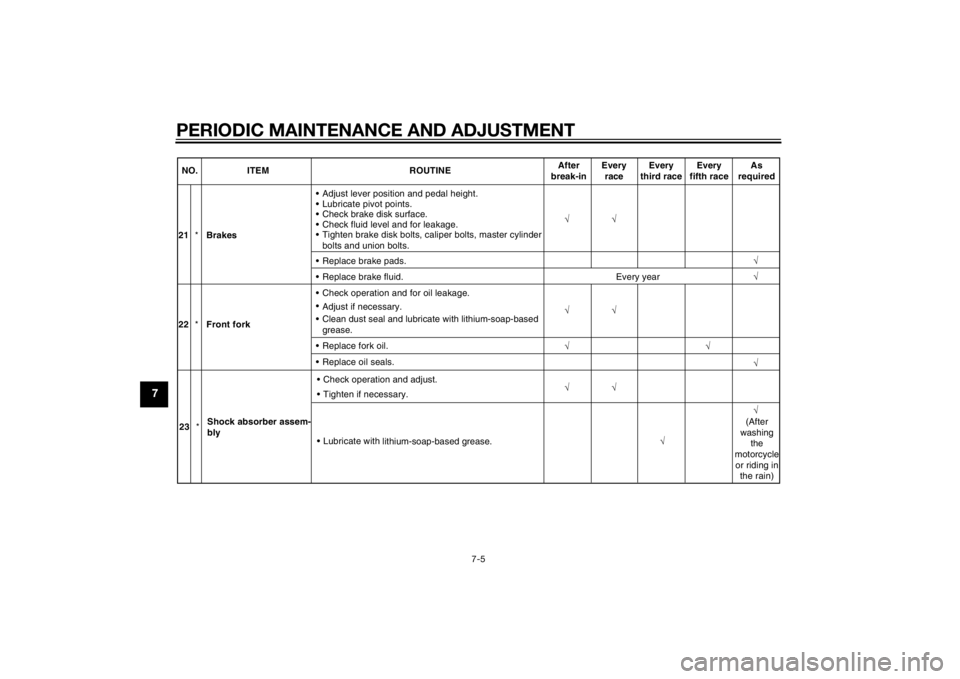
√ √
21 *Brakes Adjust lever position and pedal height.
Lubricate pivot points.
Check brake disk surface.
Check fluid level and for leakage.
Tighten brake disk bolts, caliper bolts, master cylinder
bolts and union bolts. √
Replace brake pads. √
Replace brake fluid. Every year√
22 *Front fork
Replace oil seals. Replace fork oil.
Clean dust seal and lubricate with lithium-soap-based
grease.Adjust if necessary.
Check operation and for oil leakage.
√
√√√
NO. ITEM ROUTINE
After
break-in Every
race Every
third race Every
fifth race As
required
√
√
√
23 *Shock absorber assem-
bly Check operation and adjust.
Tighten if necessary.
Lubricate with
lithium-soap-based grease
. √(After
washing the
motorcycle or riding in the rain)
U1SN82E0.book Page 5 Friday, June 7, 2013 3:51 PM
Page 54 of 88
PERIODIC MAINTENANCE AND ADJUSTMENT
7-9
7To install the spark plu
g
1. Clean the surface of the spark plug gasket and its mating sur-
face, and then wipe off any grime
from the spark plug threads.
2. Install the spark plug with the spark plug wrench, and then tight-
en it to the specified torque.
TIPIf a torque wrench is not available
when installing a spark plug, a good
estimate of the correct torque is 1/4–
1/2 turn past finger tight. However, the
spark plug should be tightened to the
specified torque as soon as possible.3. Install the spark plug cap.
EAU41449
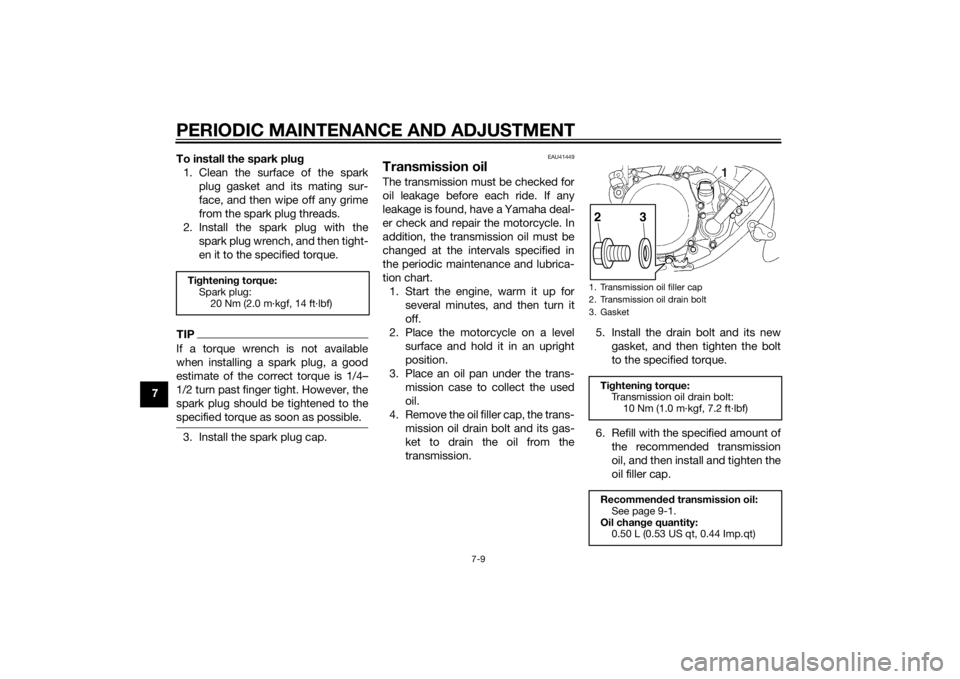
Transmission oilThe transmission must be checked for
oil leakage before each ride. If any
leakage is found, have a Yamaha deal-
er check and repair the motorcycle. In
addition, the transmission oil must be
changed at the intervals specified in
the periodic maintenance and lubrica-
tion chart.1. Start the engine, warm it up for several minutes, and then turn it
off.
2. Place the motorcycle on a level surface and hold it in an upright
position.
3. Place an oil pan under the trans- mission case to collect the used
oil.
4. Remove the oil filler cap, the trans- mission oil drain bolt and its gas-
ket to drain the oil from the
transmission. 5. Install the drain bolt and its new
gasket, and then tighten the bolt
to the specified torque.
6. Refill with the specified amount of the recommended transmission
oil, and then install and tighten the
oil filler cap.
Tightenin g torque:
Spark plug: 20 Nm (2.0 m·kgf, 14 ft·lbf)
1. Transmission oil filler cap
2. Transmission oil drain bolt
3. GasketTightenin g torque:
Transmission oil drain bolt:
10 Nm (1.0 m·kgf, 7.2 ft·lbf)
Recommen ded transmission oil:
See page 9-1.
Oil chan ge quantity:
0.50 L (0.53 US qt, 0.44 Imp.qt)
1
2
3
U1SN82E0.book Page 9 Friday, June 7, 2013 3:51 PM
Page 55 of 88
PERIODIC MAINTENANCE AND ADJUSTMENT
7-10
7
NOTICE
ECA10453
In or der to prevent clutch slip-
pa ge (since the transmission oil
also lu bricates the clutch), do
not mix any chemical additives.
Do not use oils with a d iesel
specification of “CD” or oils of a
hi gher quality than specifie d. In
a ddition, do not use oils lab eled
“ENERGY CONSERVING II” or
hi gher.
Make sure that no forei gn mate-
rial enters the transmission.7. Start the engine, and then let it idle for several minutes while checking
it for oil leakage. If oil is leaking,
immediately turn the engine off
and check for the cause.
EAU20071
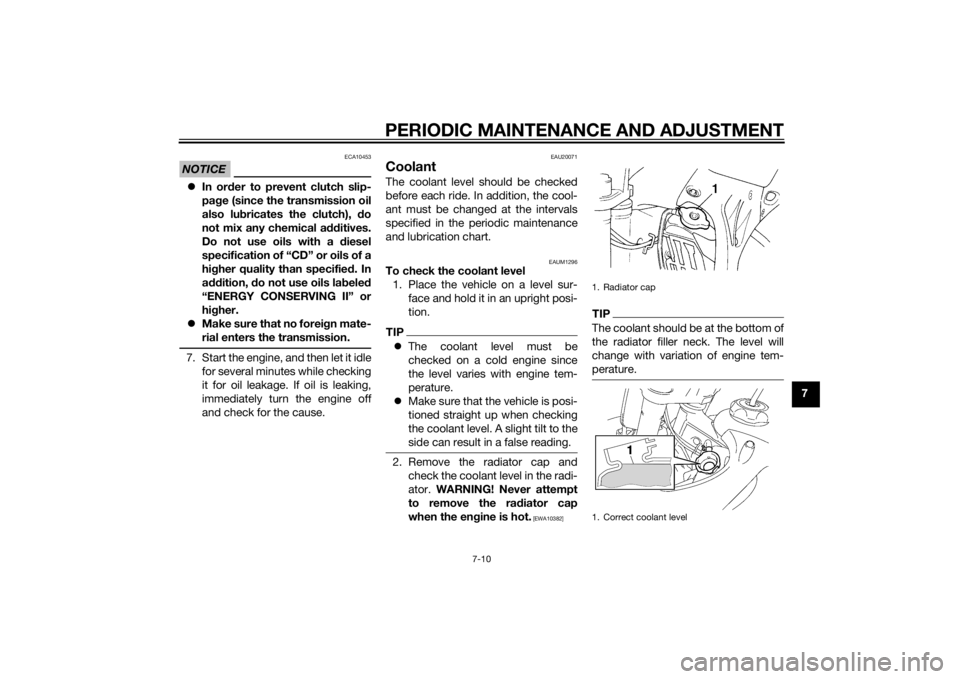
CoolantThe coolant level should be checked
before each ride. In addition, the cool-
ant must be changed at the intervals
specified in the periodic maintenance
and lubrication chart.
EAUM1296
To check the coolant level1. Place the vehicle on a level sur- face and hold it in an upright posi-
tion.TIPThe coolant level must be
checked on a cold engine since
the level varies with engine tem-
perature.
Make sure that the vehicle is posi-
tioned straight up when checking
the coolant level. A slight tilt to the
side can result in a false reading.2. Remove the radiator cap and
check the coolant level in the radi-
ator. WARNING! Never attempt
to remove the ra diator cap
when the en gine is hot.
[EWA10382]
TIPThe coolant should be at the bottom of
the radiator filler neck. The level will
change with variation of engine tem-
perature.1. Radiator cap
1. Correct coolant level
U1SN82E0.book Page 10 Friday, June 7, 2013 3:51 PM
Page 66 of 88
PERIODIC MAINTENANCE AND ADJUSTMENT
7-21
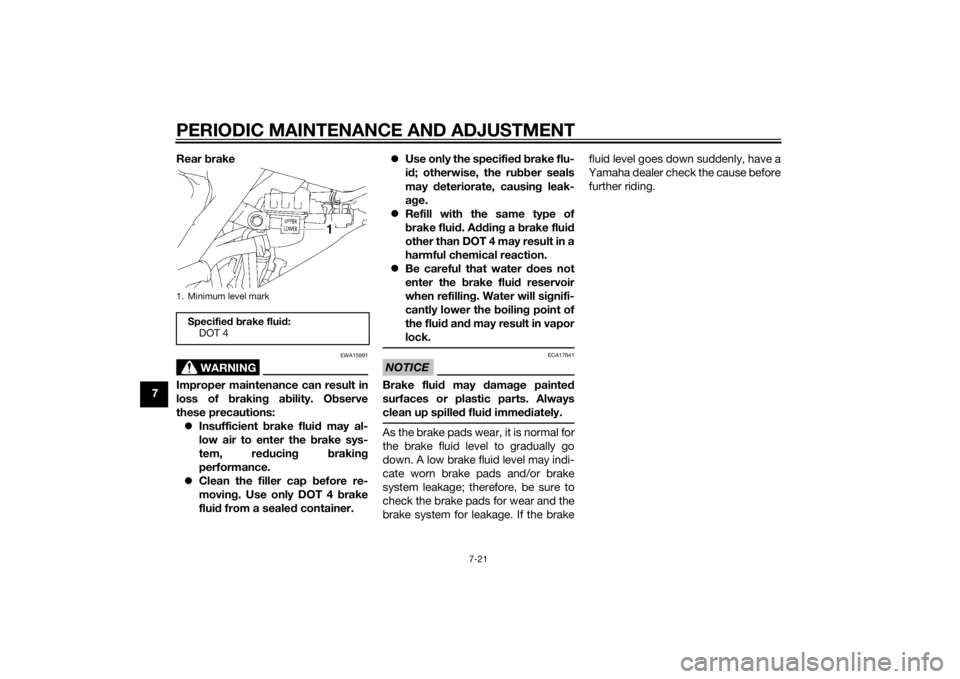
7Rear
brake
WARNING
EWA15991
Improper maintenance can result in
loss of brakin g a bility. O bserve
these precautions: Insufficient brake flui d may al-
low air to enter the b rake sys-
tem, re ducin g brakin g
performance.
Clean the filler cap before re-
moving . Use only DOT 4 b rake
flui d from a seale d container.
Use only the specified b rake flu-
i d ; otherwise, the ru bber seals
may deteriorate, causin g leak-
a g e.
Refill with the same type of
brake flui d. A ddin g a brake flui d
other than DOT 4 may result in a
harmful chemical reaction.
Be careful that water does not
enter the brake flui d reservoir
when refillin g. Water will si gnifi-
cantly lower the boilin g point of
the flui d an d may result in vapor
lock.
NOTICE
ECA17641
Brake flui d may damag e painted
surfaces or plastic parts. Always
clean up spille d flui d imme diately.As the brake pads wear, it is normal for
the brake fluid level to gradually go
down. A low brake fluid level may indi-
cate worn brake pads and/or brake
system leakage; therefore, be sure to
check the brake pads for wear and the
brake system for leakage. If the brake fluid level goes down suddenly, have a
Yamaha dealer check the cause before further riding.
1. Minimum level markSpecifie d b rake flui d:
DOT 4
U1SN82E0.book Page 21 Friday, June 7, 2013 3:51 PM
Page 71 of 88
PERIODIC MAINTENANCE AND ADJUSTMENT
7-26
7
EAUM1653
Lubricatin g the swin garm piv-
otsThe swingarm pivots must be lubricat-
ed by a Yamaha dealer at the intervals
specified in the periodic maintenance
and lubrication chart.
EAU23273
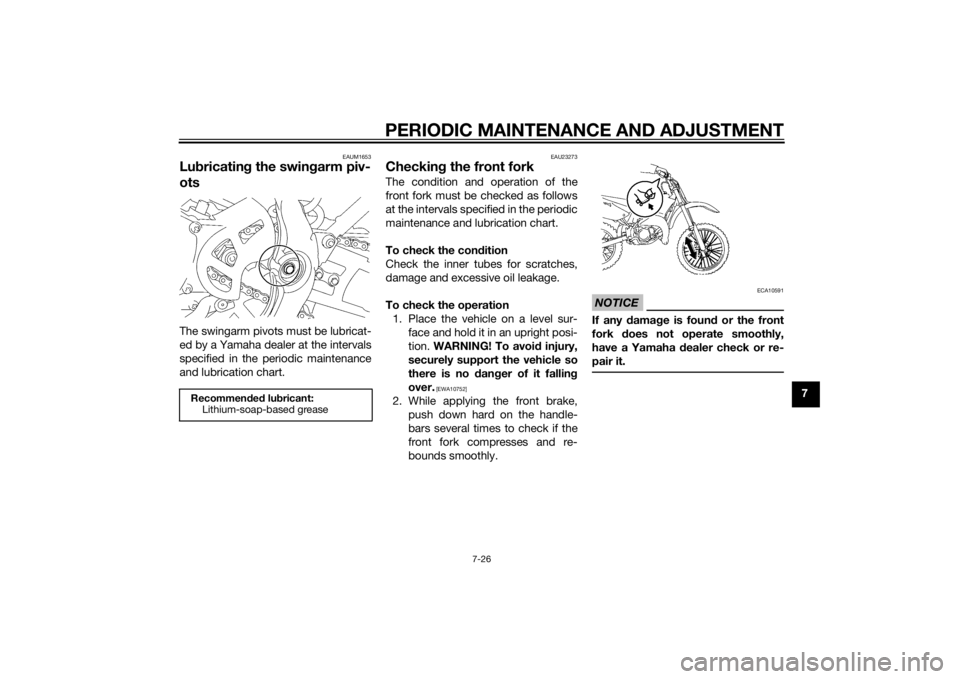
Checkin g the front forkThe condition and operation of the
front fork must be checked as follows
at the intervals specified in the periodic
maintenance and lubrication chart.
To check the con dition
Check the inner tubes for scratches,
damage and excessive oil leakage.
To check the operation 1. Place the vehicle on a level sur- face and hold it in an upright posi-
tion. WARNING! To avoi d injury,
securely support the vehicle so
there is no dan ger of it fallin g
over.
[EWA10752]
2. While applying the front brake, push down hard on the handle-
bars several times to check if the
front fork compresses and re-
bounds smoothly.
NOTICE
ECA10591
If any damag e is foun d or the front
fork does not operate smoothly,
have a Yamaha dealer check or re-
pair it.
Recommen ded lu bricant:
Lithium-soap-based grease
U1SN82E0.book Page 26 Friday, June 7, 2013 3:51 PM
Page 86 of 88

INDEXAAir filter element, cleaning .................... 7-12BBrake and clutch levers, checking and lubricating ........................................... 7-24
Brake fluid, changing ............................ 7-22
Brake fluid level, checking .................... 7-20
Brake lever .............................................. 4-2
Brake lever free play, checking............. 7-19
Brake pedal............................................. 4-2
Brake pedal, checking and lubricating ........................................... 7-25CCables, checking and lubricating ......... 7-24
Carburetor, adjusting ............................ 7-14
Care ........................................................ 8-1
Clutch lever ............................................. 4-1
Clutch lever free play, adjusting ........... 7-18
Coolant ................................................. 7-10DDrive chain, cleaning and lubricating .... 7-23
Drive chain slack................................... 7-22EEngine break-in....................................... 6-3
Engine idling speed .............................. 7-14
Engine, starting a warm .......................... 6-1
Engine stop button ................................. 4-1FFront and rear brake pads, checking.... 7-20
Front fork, adjusting................................ 4-7
Front fork, bleeding ................................ 4-9
Front fork, checking .............................. 7-26
Fuel ......................................................... 4-3
Fuel cock ................................................ 4-5 Fuel tank breather hose.......................... 4-5
Fuel tank cap .......................................... 4-3
HHandlebar switch ................................... 4-1IIdentification numbers .......................... 10-1KKickstarter .............................................. 4-6LLabels, location ...................................... 1-1MMatte color, caution ............................... 8-1
Model label ........................................... 10-1PParking ................................................... 6-4
Part locations ......................................... 3-1
Periodic maintenance and lubrication
chart ..................................................... 7-2RRear suspension, lubricating ................ 7-25SSafety information .................................. 2-1
Seat ........................................................ 4-7
Shifting ................................................... 6-2
Shift pedal .............................................. 4-1
Shift pedal, checking ............................ 7-19
Shock absorber assembly, adjusting ..... 4-9
Sidestand ............................................. 4-12
Spark plug, checking.............................. 7-8
Specifications ......................................... 9-1
Starter (choke) knob ............................... 4-6
Starting and warming up a cold engine .................................................. 6-1
Steering, checking................................ 7-27 Storage ...................................................8-3
Supporting the motorcycle ...................7-28
Swingarm pivots, lubricating ................7-26
TThrottle grip and cable, checking and
lubricating ...........................................7-24
Throttle grip free play, adjusting ...........7-15
Tires ......................................................7-15
Transmission oil ......................................7-9
Troubleshooting ....................................7-31
Troubleshooting charts .........................7-32VVehicle identification number ................10-1WWheel bearings, checking .....................7-27
Wheel (front) ..........................................7-28
Wheel (rear) ...........................................7-29
Wheels ..................................................7-17
U1SN82E0.book Page 1 Friday, June 7, 2013 3:51 PM