spark plugs YAMAHA YZF-R7 2022 Owners Manual
[x] Cancel search | Manufacturer: YAMAHA, Model Year: 2022, Model line: YZF-R7, Model: YAMAHA YZF-R7 2022Pages: 100, PDF Size: 3.78 MB
Page 6 of 100

Table of contentsSafety information ............................ 1-1
Description ....................................... 2-1
Left view ......................................... 2-1
Right view ....................................... 2-2
Controls and instruments ............... 2-3
Instrument an d control functions ... 3-1
Immobilizer system......................... 3-1
Main switch/steering lock............... 3-2
Indicator lights and warning lights............................................ 3-3
Multi-function meter unit ................ 3-6
Handlebar switches ...................... 3-12
Clutch lever .................................. 3-14
Shift pedal .................................... 3-14
Brake lever.................................... 3-14
Brake pedal .................................. 3-15
ABS .............................................. 3-15
Fuel tank cap ................................ 3-16
Fuel ............................................... 3-17
Fuel tank overflow hose ............... 3-18
Catalytic converter ....................... 3-19
Seats ............................................ 3-19
Rear view mirrors.......................... 3-21
Adjusting the front fork ................. 3-22
Adjusting the shock absorber assembly ................................... 3-24
Auxiliary DC connector ................. 3-26
Sidestand ..................................... 3-26
Ignition circuit cut-off system ....... 3-27 For your safety – pre-operation
checks
............................................... 4-1
Operation an d important ri din g
points ................................................. 5-1
Engine break-in ............................... 5-1
Starting the engine .......................... 5-2
Shifting ............................................ 5-3
Tips for reducing fuel consumption ................................ 5-4
Parking ............................................ 5-4
Perio dic maintenance an d
a d justment ........................................ 6-1
Tool kits........................................... 6-2
Periodic maintenance charts .......... 6-3
Periodic maintenance chart for the emission control system .............. 6-3
General maintenance and lubrication chart ........................... 6-5
Removing and installing cowlings... 6-9
Checking the spark plugs ............. 6-10
Canister ......................................... 6-11
Engine oil and oil filter cartridge.... 6-11
Why Yamalube .............................. 6-14
Coolant.......................................... 6-14
Replacing the air filter element and cleaning the check hose..... 6-16
Checking the engine idling
speed ......................................... 6-16 Checking the throttle grip free
play ............................................ 6-17
Valve clearance............................. 6-17
Tires .............................................. 6-17
Cast wheels .................................. 6-20
Adjusting the clutch lever free play ............................................ 6-20
Checking the brake lever free
play ............................................ 6-21
Brake light switches ..................... 6-21
Checking the front and rear brake pads ................................ 6-22
Checking the brake fluid level ...... 6-22
Changing the brake fluid .............. 6-24
Drive chain slack........................... 6-24
Cleaning and lubricating the drive chain ................................. 6-26
Checking and lubricating the cables ........................................ 6-26
Checking and lubricating the
throttle grip and cable ............... 6-27
Checking and lubricating the brake and shift pedals............... 6-27
Checking and lubricating the brake and clutch levers ............. 6-28
Checking and lubricating the
sidestand................................... 6-28
Lubricating the rear suspension ... 6-29
Lubricating the swingarm pivots......................................... 6-29
Checking the front fork ................. 6-29UBEBE0E0.book Page 1 Monday, July 5, 2021 2:26 PM
Page 19 of 100

Instrument and control functions
3-4
3
lig
ht remains on after addin g oil,
stop the en gine an d have a Yamaha
d ealer check the vehicle.
EAU88880
Coolant temperature warnin g
lig ht “ ”
This warning light comes on when the
engine is overheating. If this occurs,
stop the engine immediately and allow
the engine to cool. (See page 6-37.)
For vehicles with a radiator fan, the ra-
diator fan(s) automatically switch on or
off according to the coolant tempera-
ture.TIPWhen the vehicle is turned on, the light
will come on for a few seconds, and
then go off. If the light does not come
on, or if the light remains on, have a
Yamaha dealer check the vehicle.NOTICE
ECA10022
Do not continue to operate the en-
g ine if it is overheatin g.
EAU91840
Malfunction in dicator li ght
(MIL) “ ”
This light comes on or flashes if a prob-
lem is detected in the engine or other
vehicle control system. If this occurs,
have a Yamaha dealer check the on-
board diagnostic system. The electri-
cal circuit of the warning light can be
checked by turning the vehicle power
on. The light should come on for a few
seconds, and then go off. If the light
does not come on initially when the ve-
hicle power is turned on, or if the light
remains on, have a Yamaha dealer
check the vehicle.NOTICE
ECA26820
If the MIL starts flashin g, re duce en-
g ine spee d to prevent exhaust sys-
tem damag e.TIPThe engine is sensitively monitored by
the on-board diagnostic system to de-
tect deterioration or malfunction of the
emission control system. Therefore the
MIL may come on or flash due to vehi-
cle modifications, lack of maintenance, or excessive/improper use of the mo-
torcycle. To prevent this, observe
these precautions.
Do not attempt to modify the soft-
ware of the engine control unit.
Do not add any electrical acces-
sories that interfere with engine
control.
Do not use aftermarket accesso-
ries or parts such as suspension,
spark plugs, injectors, exhaust
system, etc.
Do not change the drivetrain
specifications (chain, sprockets,
wheels, tires, etc.).
Do not remove or alter the O2 sen-
sor, air induction system, or ex-
haust parts (catalysts or EXUP,
etc.).
Maintain the drive chain properly.
Maintain correct tire pressure.
Maintain proper brake pedal
height to prevent rear brake from
dragging.
Do not operate the vehicle in an
extreme manner. For example, re-
peated or excessive opening and
UBEBE0E0.book Page 4 Monday, July 5, 2021 2:26 PM
Page 53 of 100

Periodic maintenance and adjustment
6-3
6
EAU71033
Periodic maintenance chartsTIPItems marked with an asterisk should be performed by your Yamaha dealer because these items require special tools,
data, and technical skills.
From 50000 km (30000 mi), repeat the maintenance intervals starting from 10000 km (6000 mi).
The annual checks must be performed every year, except if a distance-based maintenance is performed in-
stead.
EAU71051
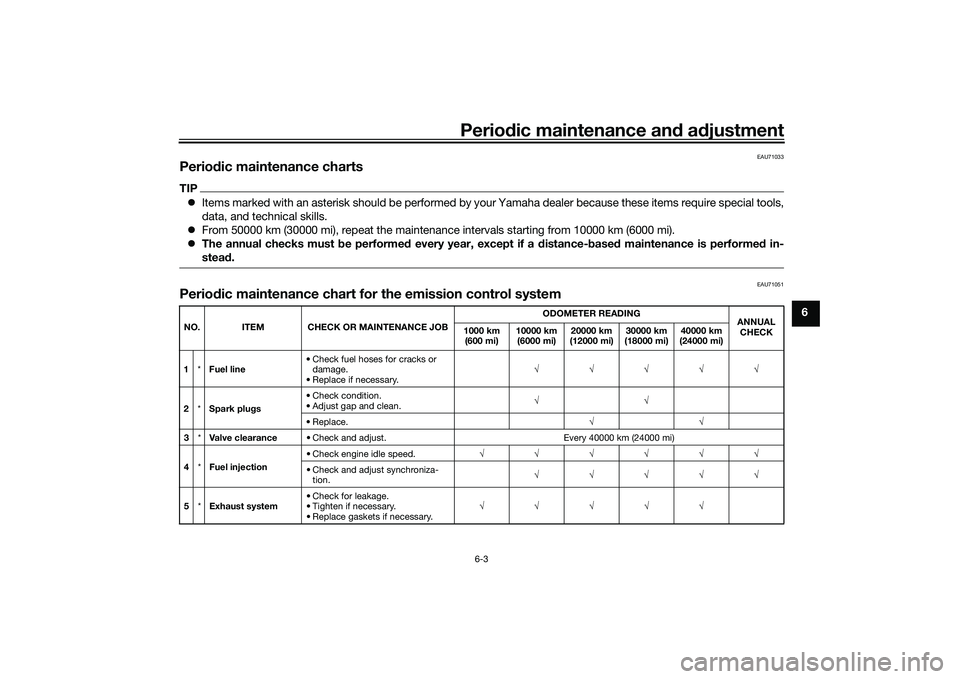
Periodic maintenance chart for the emission control systemNO. ITEM CHECK OR MAINTENANCE JOB ODOMETER READING
ANNUAL
CHECK
1000 km
(600 mi) 10000 km
(6000 mi) 20000 km
(12000 mi) 30000 km
(18000 mi) 40000 km
(24000 mi)
1 *Fuel line • Check fuel hoses for cracks or
damage.
• Replace if necessary. √√√√√
2 *Spark plugs • Check condition.
• Adjust gap and clean.
√√
•Replace. √√
3 *Valve clearance • Check and adjust. Every 40000 km (24000 mi)
4 *Fuel injection • Check engine idle speed.
√√√√√√
• Check and adjust synchroniza- tion. √√√√√
5 *Exhaust system • Check for leakage.
• Tighten if necessary.
• Replace gaskets if necessary. √√√√√
UBEBE0E0.book Page 3 Monday, July 5, 2021 2:26 PM
Page 60 of 100

Periodic maintenance and adjustment
6-10
6
EAU19653
Checking the spark plugsThe spark plugs are important engine
components, which should be
checked periodically, preferably by a
Yamaha dealer. Since heat and depos- its will cause any spark plug to slowly
erode, they should be removed and
checked in accordance with the peri-
odic maintenance and lubrication
chart. In addition, the condition of the
spark plugs can reveal the condition of
the engine.
The porcelain insulator around the
center electrode of each spark plug
should be a medium-to-light tan (the
ideal color when the vehicle is ridden
normally), and all spark plugs installed
in the engine should have the same
color. If any spark plug shows a dis-
tinctly different color, the engine could
be operating improperly. Do not at-
tempt to diagnose such problems
yourself. Instead, have a Yamaha deal-
er check the vehicle.
If a spark plug shows signs of elec-
trode erosion and excessive carbon or
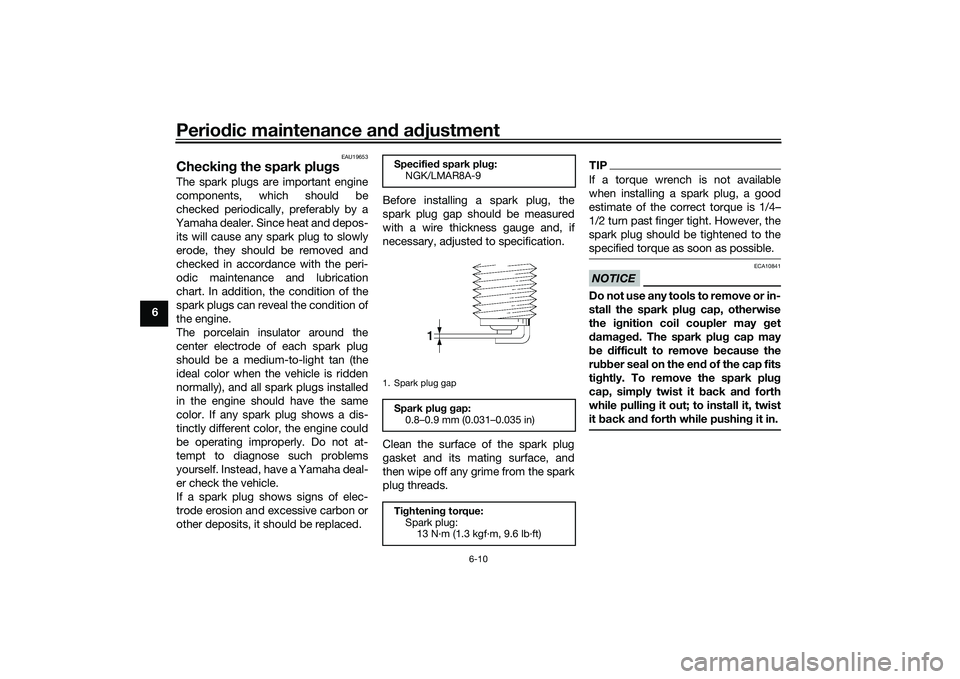
other deposits, it should be replaced. Before installing a spark plug, the
spark plug gap should be measured
with a wire thickness gauge and, if
necessary, adjusted to specification.
Clean the surface of the spark plug
gasket and its mating surface, and
then wipe off any grime from the spark
plug threads.
TIPIf a torque wrench is not available
when installing a spark plug, a good
estimate of the correct torque is 1/4–
1/2 turn past finger tight. However, the
spark plug should be tightened to the
specified torque as soon as possible.NOTICE
ECA10841
Do not use any tools to remove or in-
stall the spark plug cap, otherwise
the ignition coil coupler may get
damaged. The spark plug cap may
be difficult to remove because the
rubber seal on the end of the cap fits
tightly. To remove the spark plug
cap, simply twist it back and forth
while pulling it out; to install it, twist
it back and forth while pushing it in.
Specified spark plug:
NGK/LMAR8A-91. Spark plug gapSpark plug gap:0.8–0.9 mm (0.031–0.035 in)
Tightening torque: Spark plug:13 N·m (1.3 kgf·m, 9.6 lb·ft)
UBEBE0E0.book Page 10 Monday, July 5, 2021 2:26 PM
Page 98 of 100

Index
10-2
10
Sidestand, checking and lubricating .... 6-28
Spark plugs, checking .......................... 6-10
Specifications ......................................... 8-1
Speedometer .......................................... 3-6
Starting the engine.................................. 5-2
Start switch ........................................... 3-13
Steering, checking ................................ 6-30
Storage ................................................... 7-3
Supporting the motorcycle ................... 6-34
Swingarm pivots, lubricating ................ 6-29TTachometer ............................................. 3-6
Throttle grip and cable, checking and
lubricating ........................................... 6-27
Throttle grip free play, checking ........... 6-17
Tires ...................................................... 6-17
Tool kits .................................................. 6-2
Transmission gear display ...................... 3-7
Troubleshooting .................................... 6-35
Troubleshooting chart........................... 6-36
Turn signal indicator lights ...................... 3-3
Turn signal switch ................................. 3-13VValve clearance..................................... 6-17
Vehicle identification number ................. 9-1
Vehicle lights ......................................... 6-33WWheel bearings, checking..................... 6-30
Wheels .................................................. 6-20YYamalube .............................................. 6-14
UBEBE0E0.book Page 2 Monday, July 5, 2021 2:26 PM