check engine YAMAHA YZF600 2000 User Guide
[x] Cancel search | Manufacturer: YAMAHA, Model Year: 2000, Model line: YZF600, Model: YAMAHA YZF600 2000Pages: 109, PDF Size: 5.01 MB
Page 59 of 109
PERIODIC MAINTENANCE AND MINOR REPAIR
6-9
6Installation
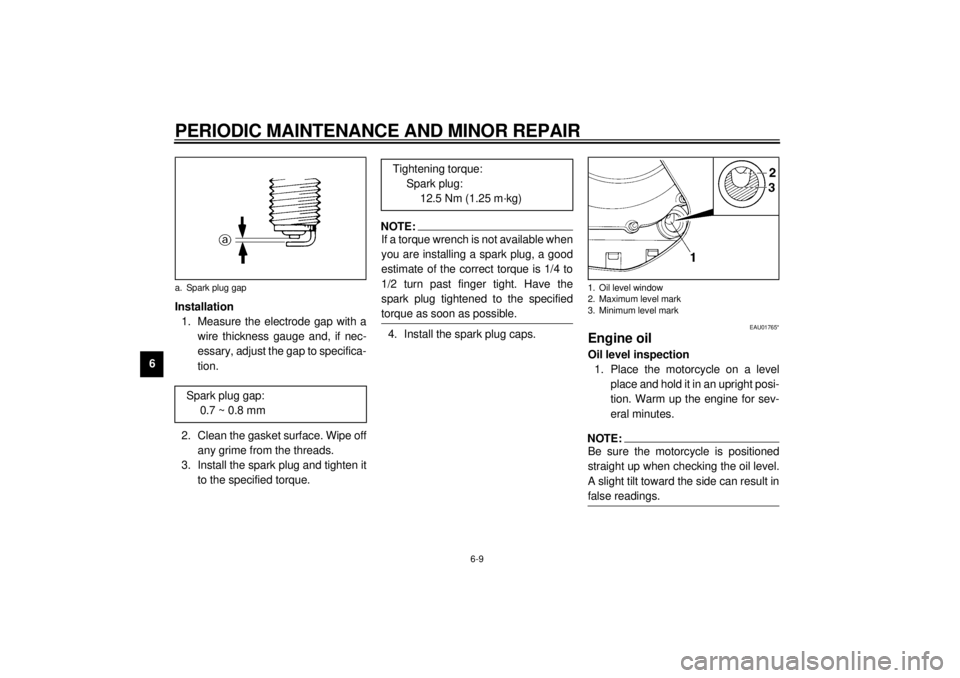
1. Measure the electrode gap with a
wire thickness gauge and, if nec-
essary, adjust the gap to specifica-
tion.
2. Clean the gasket surface. Wipe off
any grime from the threads.
3. Install the spark plug and tighten it
to the specified torque.
NOTE:@ If a torque wrench is not available when
you are installing a spark plug, a good
estimate of the correct torque is 1/4 to
1/2 turn past finger tight. Have the
spark plug tightened to the specified
torque as soon as possible. @4. Install the spark plug caps.
EAU01765*
Engine oilOil level inspection
1. Place the motorcycle on a level
place and hold it in an upright posi-
tion. Warm up the engine for sev-
eral minutes.NOTE:@ Be sure the motorcycle is positioned
straight up when checking the oil level.
A slight tilt toward the side can result in
false readings. @
a. Spark plug gap
Spark plug gap:
0.7 ~ 0.8 mm
Tightening torque:
Spark plug:
12.5 Nm (1.25 m·kg)
1. Oil level window
2. Maximum level mark
3. Minimum level mark
E_4tv_Periodic.fm Page 9 Wednesday, September 1, 1999 11:12 AM
Page 60 of 109
PERIODIC MAINTENANCE AND MINOR REPAIR
6-10
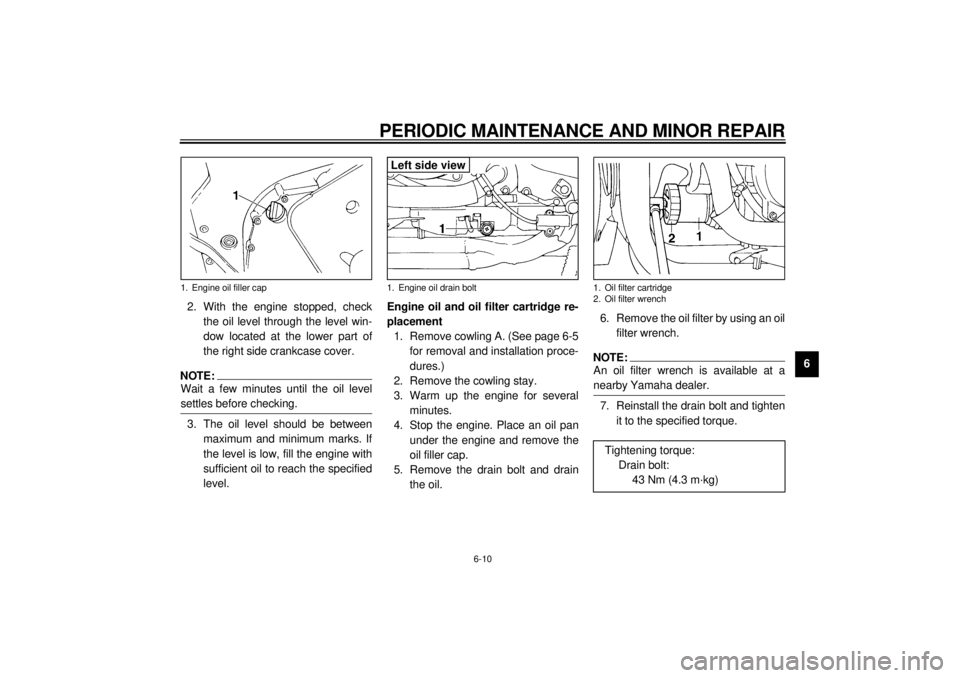
6 2. With the engine stopped, check
the oil level through the level win-
dow located at the lower part of
the right side crankcase cover.
NOTE:@ Wait a few minutes until the oil level
settles before checking. @3. The oil level should be between
maximum and minimum marks. If
the level is low, fill the engine with
sufficient oil to reach the specified
level.Engine oil and oil filter cartridge re-
placement
1. Remove cowling A. (See page 6-5
for removal and installation proce-
dures.)
2. Remove the cowling stay.
3. Warm up the engine for several
minutes.
4. Stop the engine. Place an oil pan
under the engine and remove the
oil filler cap.
5. Remove the drain bolt and drain
the oil.6. Remove the oil filter by using an oil
filter wrench.
NOTE:@ An oil filter wrench is available at a
nearby Yamaha dealer. @7. Reinstall the drain bolt and tighten
it to the specified torque.
1. Engine oil filler cap
1. Engine oil drain boltLeft side view
1. Oil filter cartridge
2. Oil filter wrenchTightening torque:
Drain bolt:
43 Nm (4.3 m·kg)
E_4tv_Periodic.fm Page 10 Wednesday, September 1, 1999 11:12 AM
Page 61 of 109
PERIODIC MAINTENANCE AND MINOR REPAIR
6-11
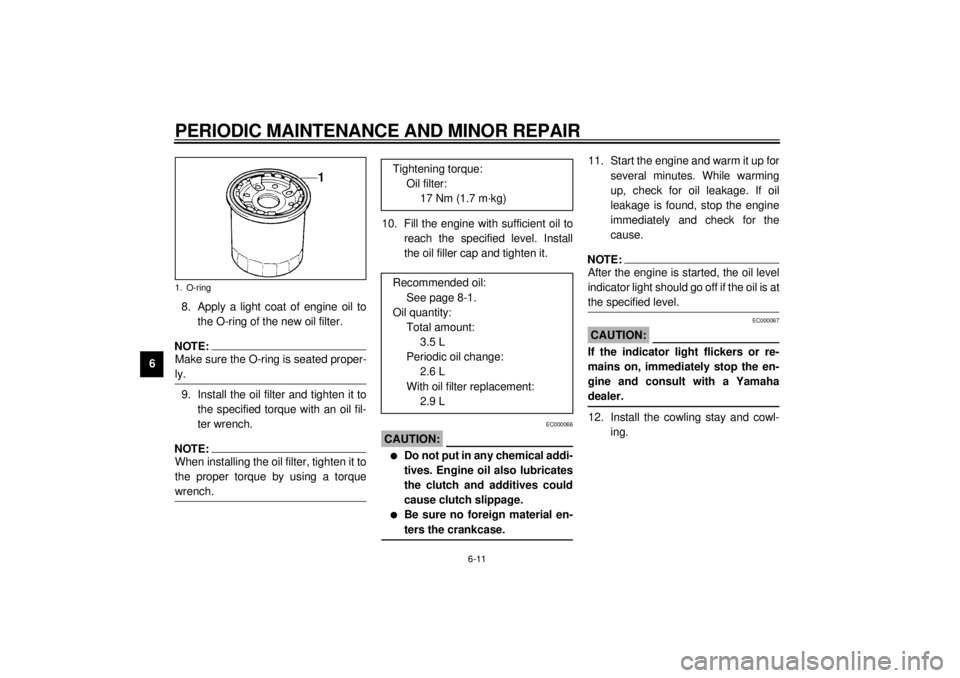
68. Apply a light coat of engine oil to
the O-ring of the new oil filter.
NOTE:@ Make sure the O-ring is seated proper-
ly. @9. Install the oil filter and tighten it to
the specified torque with an oil fil-
ter wrench.NOTE:When installing the oil filter, tighten it to
the proper torque by using a torque
wrench.
10. Fill the engine with sufficient oil to
reach the specified level. Install
the oil filler cap and tighten it.
EC000066
CAUTION:@ l
Do not put in any chemical addi-
tives. Engine oil also lubricates
the clutch and additives could
cause clutch slippage.
l
Be sure no foreign material en-
ters the crankcase.
@
11. Start the engine and warm it up for
several minutes. While warming
up, check for oil leakage. If oil
leakage is found, stop the engine
immediately and check for the
cause.NOTE:@ After the engine is started, the oil level
indicator light should go off if the oil is at
the specified level. @
EC000067
CAUTION:@ If the indicator light flickers or re-
mains on, immediately stop the en-
gine and consult with a Yamaha
dealer. @12. Install the cowling stay and cowl-
ing.
1. O-ring
Tightening torque:
Oil filter:
17 Nm (1.7 m·kg)
Recommended oil:
See page 8-1.
Oil quantity:
Total amount:
3.5 L
Periodic oil change:
2.6 L
With oil filter replacement:
2.9 L
E_4tv_Periodic.fm Page 11 Wednesday, September 1, 1999 11:12 AM
Page 62 of 109
PERIODIC MAINTENANCE AND MINOR REPAIR
6-12
6
EAU03024
Cooling system1. Remove the seat. (See page 3-14
for seat removal and installation
procedures.)
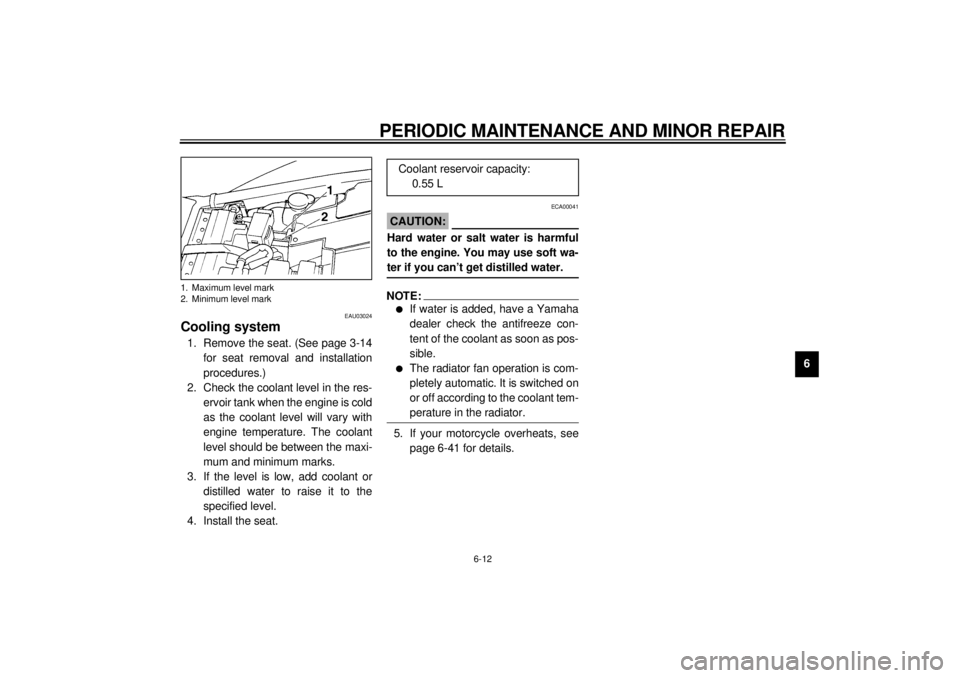
2. Check the coolant level in the res-
ervoir tank when the engine is cold
as the coolant level will vary with
engine temperature. The coolant
level should be between the maxi-
mum and minimum marks.
3. If the level is low, add coolant or
distilled water to raise it to the
specified level.
4. Install the seat.
ECA00041
CAUTION:@ Hard water or salt water is harmful
to the engine. You may use soft wa-
ter if you can’t get distilled water. @NOTE:@ l
If water is added, have a Yamaha
dealer check the antifreeze con-
tent of the coolant as soon as pos-
sible.
l
The radiator fan operation is com-
pletely automatic. It is switched on
or off according to the coolant tem-
perature in the radiator.
@5. If your motorcycle overheats, see
page 6-41 for details.
1. Maximum level mark
2. Minimum level mark
Coolant reservoir capacity:
0.55 L
E_4tv_Periodic.fm Page 12 Wednesday, September 1, 1999 11:12 AM
Page 64 of 109
PERIODIC MAINTENANCE AND MINOR REPAIR
6-14
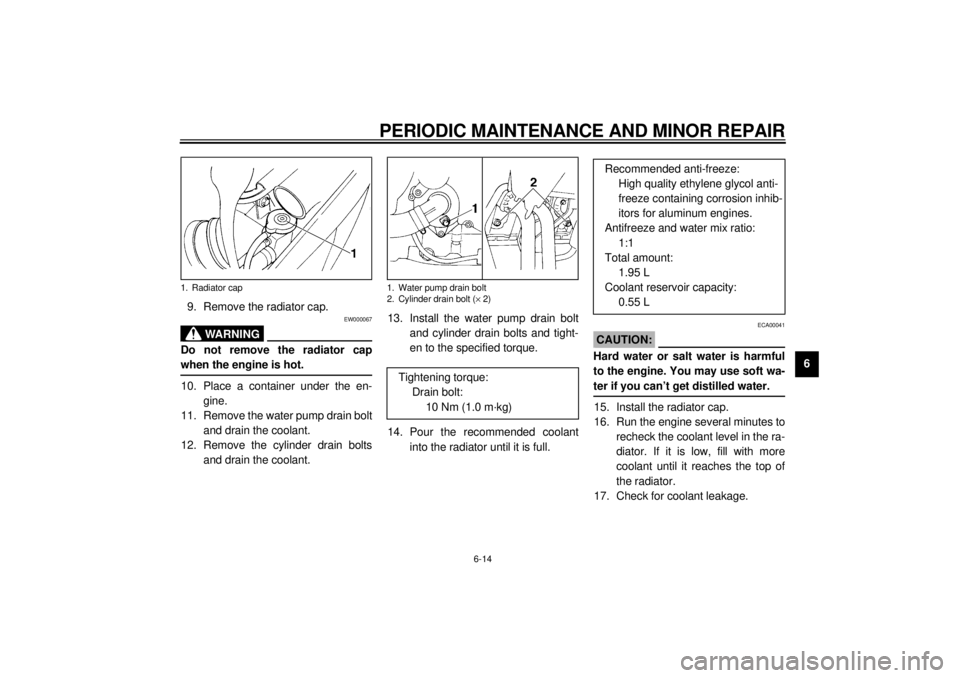
6 9. Remove the radiator cap.
EW000067
WARNING
@ Do not remove the radiator cap
when the engine is hot. @10. Place a container under the en-
gine.
11. Remove the water pump drain bolt
and drain the coolant.
12. Remove the cylinder drain bolts
and drain the coolant.13. Install the water pump drain bolt
and cylinder drain bolts and tight-
en to the specified torque.
14. Pour the recommended coolant
into the radiator until it is full.
ECA00041
CAUTION:@ Hard water or salt water is harmful
to the engine. You may use soft wa-
ter if you can’t get distilled water. @15. Install the radiator cap.
16. Run the engine several minutes to
recheck the coolant level in the ra-
diator. If it is low, fill with more
coolant until it reaches the top of
the radiator.
17. Check for coolant leakage.
1. Radiator cap
1. Water pump drain bolt
2. Cylinder drain bolt (´ 2)
Tightening torque:
Drain bolt:
10 Nm (1.0 m·kg)
Recommended anti-freeze:
High quality ethylene glycol anti-
freeze containing corrosion inhib-
itors for aluminum engines.
Antifreeze and water mix ratio:
1:1
Total amount:
1.95 L
Coolant reservoir capacity:
0.55 L
E_4tv_Periodic.fm Page 14 Wednesday, September 1, 1999 11:12 AM
Page 67 of 109
PERIODIC MAINTENANCE AND MINOR REPAIR
6-17
6
EAU00626
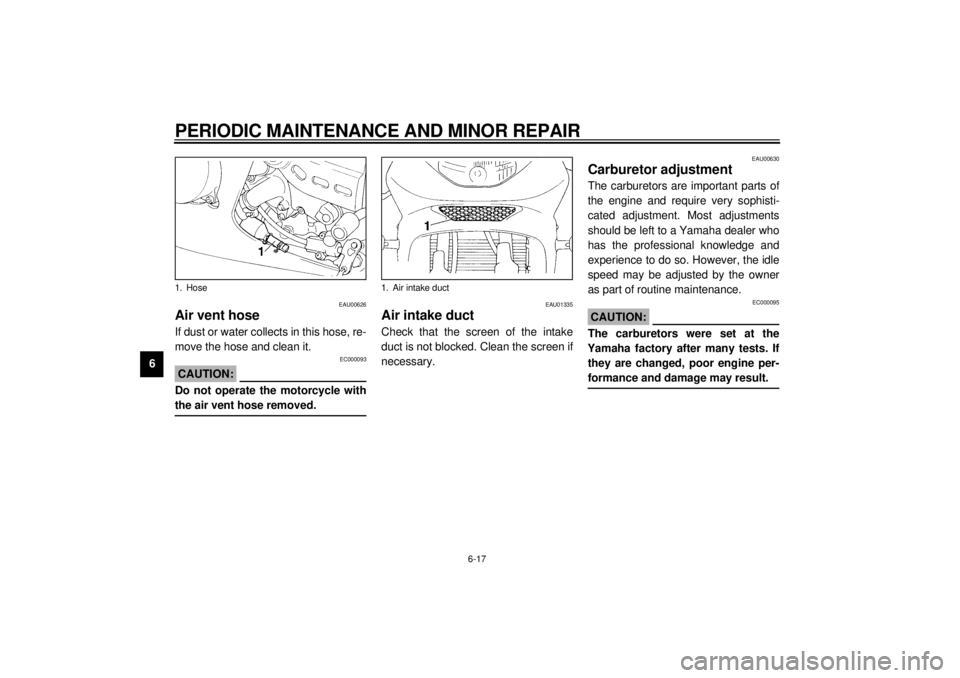
Air vent hoseIf dust or water collects in this hose, re-
move the hose and clean it.
EC000093
CAUTION:@ Do not operate the motorcycle with
the air vent hose removed. @
EAU01335
Air intake ductCheck that the screen of the intake
duct is not blocked. Clean the screen if
necessary.
EAU00630
Carburetor adjustmentThe carburetors are important parts of
the engine and require very sophisti-
cated adjustment. Most adjustments
should be left to a Yamaha dealer who
has the professional knowledge and
experience to do so. However, the idle
speed may be adjusted by the owner
as part of routine maintenance.
EC000095
CAUTION:@ The carburetors were set at the
Yamaha factory after many tests. If
they are changed, poor engine per-
formance and damage may result. @
1. Hose
1. Air intake duct
E_4tv_Periodic.fm Page 17 Wednesday, September 1, 1999 11:12 AM
Page 69 of 109
PERIODIC MAINTENANCE AND MINOR REPAIR
6-19
6
EAU00637
Valve clearance adjustmentThe correct valve clearance changes
with use, resulting in improper fuel/air
supply or engine noise. To prevent this,
the valve clearance must be adjusted
regularly. This adjustment however,
should be left to a professional
Yamaha service technician.
EAU00658
TiresTo ensure maximum performance,
long service and safe operation, note
the following:
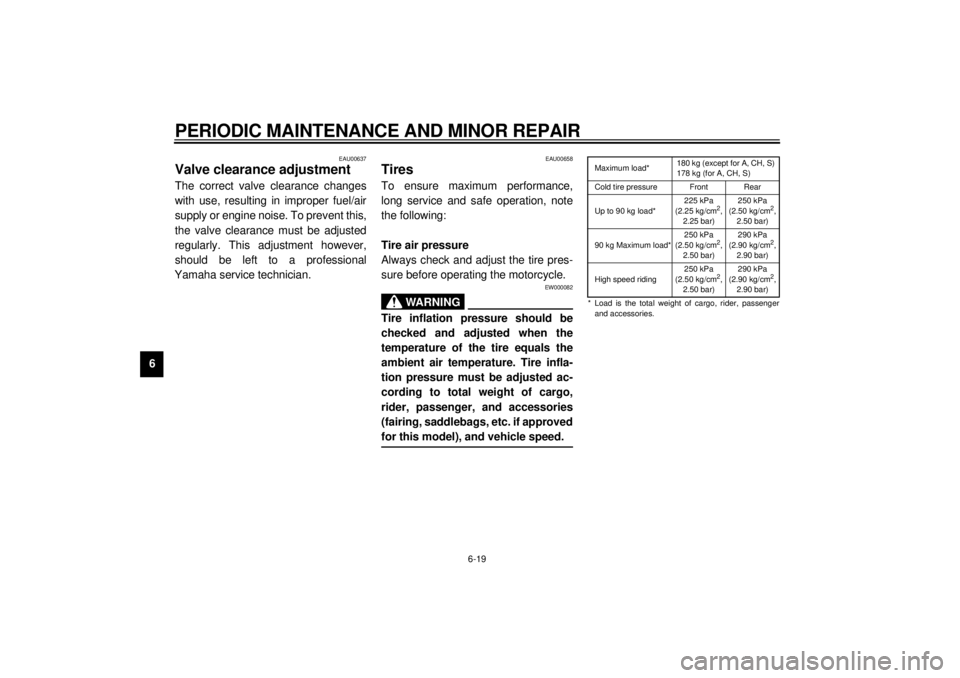
Tire air pressure
Always check and adjust the tire pres-
sure before operating the motorcycle.
EW000082
WARNING
@ Tire inflation pressure should be
checked and adjusted when the
temperature of the tire equals the
ambient air temperature. Tire infla-
tion pressure must be adjusted ac-
cording to total weight of cargo,
rider, passenger, and accessories
(fairing, saddlebags, etc. if approved
for this model), and vehicle speed. @
CE-33EMaximum load*180 kg (except for A, CH, S)
178 kg (for A, CH, S)
Cold tire pressure Front Rear
Up to 90 kg load*225 kPa
(2.25 kg/cm
2,
2.25 bar)250 kPa
(2.50 kg/cm
2,
2.50 bar)
90 kg Maximum load*250 kPa
(2.50 kg/cm
2,
2.50 bar)290 kPa
(2.90 kg/cm
2,
2.90 bar)
High speed riding250 kPa
(2.50 kg/cm
2,
2.50 bar)290 kPa
(2.90 kg/cm
2,
2.90 bar)
* Load is the total weight of cargo, rider, passenger
and accessories.
E_4tv_Periodic.fm Page 19 Wednesday, September 1, 1999 11:12 AM
Page 77 of 109
PERIODIC MAINTENANCE AND MINOR REPAIR
6-27
6
EAU00744
Drive chain slack checkNOTE:@ Spin the wheel several times and find
the tightest position of the chain. Check
and/or adjust the chain slack while it’s
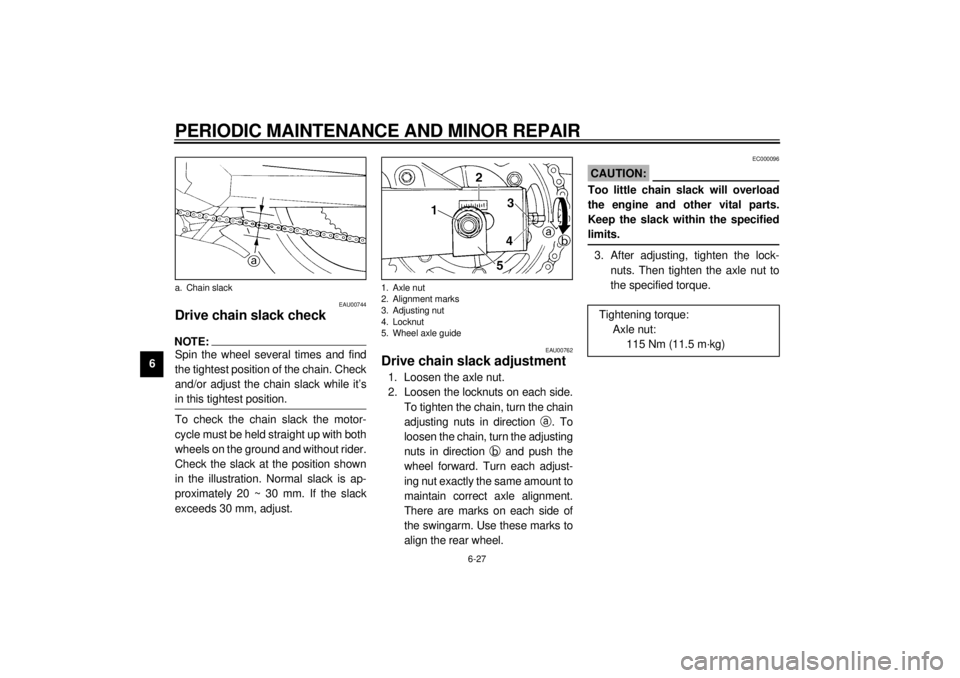
in this tightest position. @To check the chain slack the motor-
cycle must be held straight up with both
wheels on the ground and without rider.
Check the slack at the position shown
in the illustration. Normal slack is ap-
proximately 20 ~ 30 mm. If the slack
exceeds 30 mm, adjust.
EAU00762
Drive chain slack adjustment1. Loosen the axle nut.
2. Loosen the locknuts on each side.
To tighten the chain, turn the chain
adjusting nuts in direction a
. To
loosen the chain, turn the adjusting
nuts in direction b
and push the
wheel forward. Turn each adjust-
ing nut exactly the same amount to
maintain correct axle alignment.
There are marks on each side of
the swingarm. Use these marks to
align the rear wheel.
EC000096
CAUTION:@ Too little chain slack will overload
the engine and other vital parts.
Keep the slack within the specified
limits. @3. After adjusting, tighten the lock-
nuts. Then tighten the axle nut to
the specified torque.
a. Chain slack
1. Axle nut
2. Alignment marks
3. Adjusting nut
4. Locknut
5. Wheel axle guide
Tightening torque:
Axle nut:
115 Nm (11.5 m·kg)
E_4tv_Periodic.fm Page 27 Wednesday, September 1, 1999 11:12 AM
Page 79 of 109
PERIODIC MAINTENANCE AND MINOR REPAIR
6-29
6
EAU02984
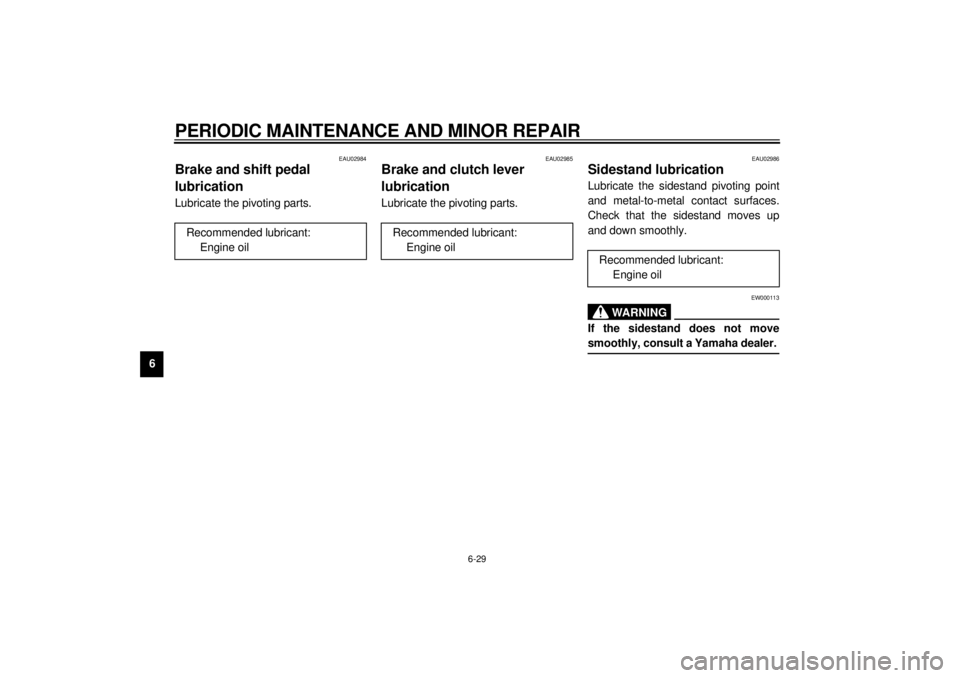
Brake and shift pedal
lubricationLubricate the pivoting parts.
EAU02985
Brake and clutch lever
lubricationLubricate the pivoting parts.
EAU02986
Sidestand lubricationLubricate the sidestand pivoting point
and metal-to-metal contact surfaces.
Check that the sidestand moves up
and down smoothly.
EW000113
WA R N I N G
@ If the sidestand does not move
smoothly, consult a Yamaha dealer. @
Recommended lubricant:
Engine oil
Recommended lubricant:
Engine oil
Recommended lubricant:
Engine oil
E_4tv_Periodic.fm Page 29 Wednesday, September 1, 1999 11:12 AM
Page 90 of 109
PERIODIC MAINTENANCE AND MINOR REPAIR
6-40
6
EAU02990*
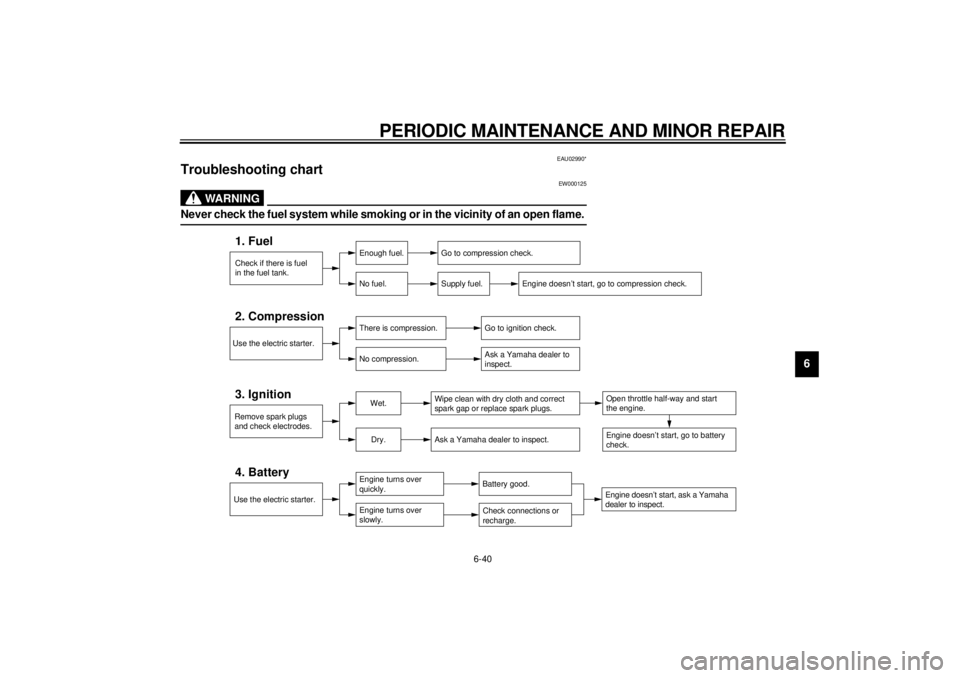
Troubleshooting chart
EW000125
WARNING
@ Never check the fuel system while smoking or in the vicinity of an open flame. @
Check if there is fuel
in the fuel tank.1. Fuel
Enough fuel.
No fuel.
Go to compression check.
Supply fuel.
Engine doesn’t start, go to compression check.
Use the electric starter.2. Compression
There is compression.
No compression.
Go to ignition check.
Ask a Yamaha dealer to
inspect.
Remove spark plugs
and check electrodes.3. Ignition
Wet.
Dry.
Wipe clean with dry cloth and correct
spark gap or replace spark plugs.
Ask a Yamaha dealer to inspect.
Engine doesn’t start, ask a Yamaha
dealer to inspect.Engine doesn’t start, go to battery
check.Open throttle half-way and start
the engine.
Use the electric starter.4. Battery
Engine turns over
quickly.
Engine turns over
slowly.
Battery good.Check connections or
recharge.
E_4tv_Periodic.fm Page 40 Wednesday, September 1, 1999 11:12 AM