ignition Abarth 500 2015 Owner handbook (in English)
[x] Cancel search | Manufacturer: ABARTH, Model Year: 2015, Model line: 500, Model: Abarth 500 2015Pages: 215, PDF Size: 19.08 MB
Page 39 of 215

IMPORTANT When the SPORT button
is pressed, the function is activated
about 5 seconds later.
IMPORTANT During acceleration using
the SPORT function the steering may
shudder which is typical of a sports
setting.
HAZARD WARNING
LIGHTS
They are turned on by pressing the
button B fig. 31, regardless of the
position of the ignition key.
With the device on, warning lights
andlight up in the instrument
panel.
Press button B again to switch the
lights off.
IMPORTANT The use of hazard warning
lights is governed by the highway
code of the country you are driving in:
comply with legal requirements.Emergency braking
In the event of an emergency braking,
the hazard warning light switch on
automatically together with warning
lights
andon the instrument
panel.
The lights switch off automatically when
emergency braking ceases.
FRONT FOG
LIGHTS/REAR FOG
LIGHTS
(for versions/markets, where provided)
The fog lights can be activated only
when the dipped headlamps are on.
To turn on the front/rear fog lights, use
the button C fig. 31 as follows:
❒First pressing: front fog lights on;
❒second pressing: rear fog lamps
on;
❒third pressing: front/rear fog lights
off.
With front fog lights on, the
warning
light on the instrument panel will come
on at the same time.
With rear fog lights on, the
warning
light on the instrument panel will come
on at the same time.REAR FOG LIGHTS
When the dipped beam headlights are
on, these can be activated by pressing
button
fig. 32.
With lights on, the warning light
on
the instrument panel will come on at the
same time.
Press the button again to switch the
lights off.
FUEL CUT-OFF SYSTEM
This intervenes in the case of an impact
causing:
❒the fuel supply cut-off with the engine
consequently switching off
❒the automatic unlocking of the doors
❒turning on the lights inside the
vehicle.
32AB0A0030
35
Page 40 of 215
The intervention of the system is
indicated by a message shown on the
display.
IMPORTANT Carefully check the car for
fuel leaks, for instance in the engine
compartment, under the car or near the
tank area.
14)
After a collision, turn the ignition key to
STOP position to prevent the battery
from running down.
To restore the correct operation of the
car, proceed as follows:
❒turn the ignition key to the MAR-ON
position
❒activate the right direction indicator
❒deactivate the right direction indicator
❒activate the left direction indicator
❒deactivate the left direction indicator
❒activate the right direction indicator
❒deactivate the right direction indicator
❒activate the left direction indicator
❒deactivate the left direction indicator
❒turn the ignition key to the STOP
position
❒turn the ignition key to the MAR-ON
position.
WARNING
14) If, after an impact, you smell fuel
or notice leaks from the fuel
system, do not reactivate the
system to avoid the risk of fire.
INTERIOR FITTINGS
CIGAR LIGHTER
(for versions/markets, where provided)
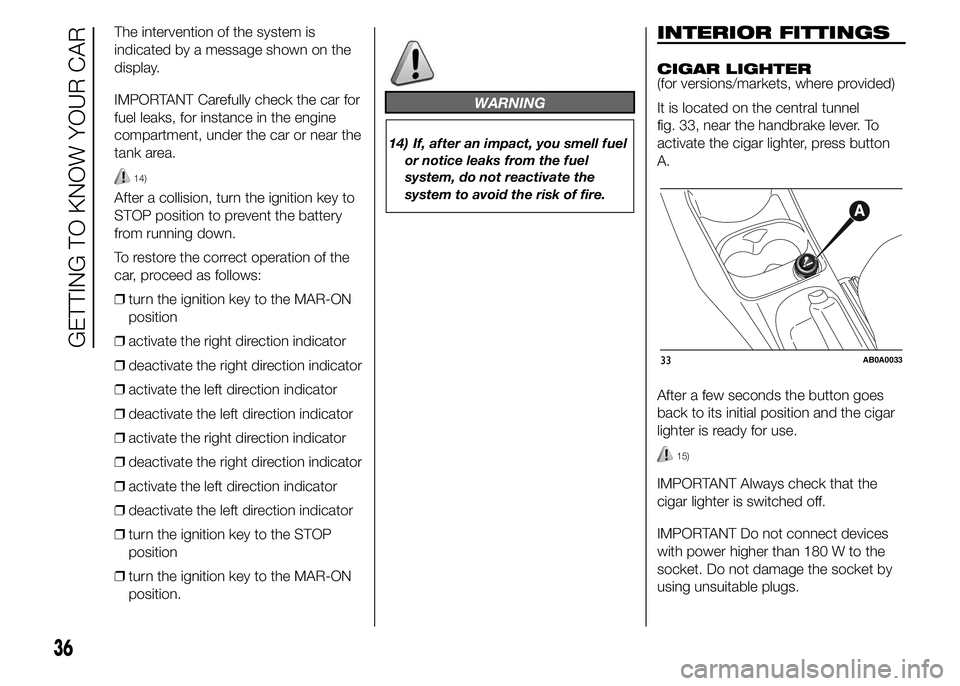
It is located on the central tunnel
fig. 33,near the handbrake lever. To
activate the cigar lighter, press button
A.
After a few seconds the button goes
back to its initial position and the cigar
lighter is ready for use.
15)
IMPORTANT Always check that the
cigar lighter is switched off.
IMPORTANT Do not connect devices
with power higher than 180 W to the
socket. Do not damage the socket by
using unsuitable plugs.
33AB0A0033
36
GETTING TO KNOW YOUR CAR
Page 42 of 215
STORAGE
COMPARTMENT UNDER
PASSENGER SEAT
(for versions/markets, where provided)
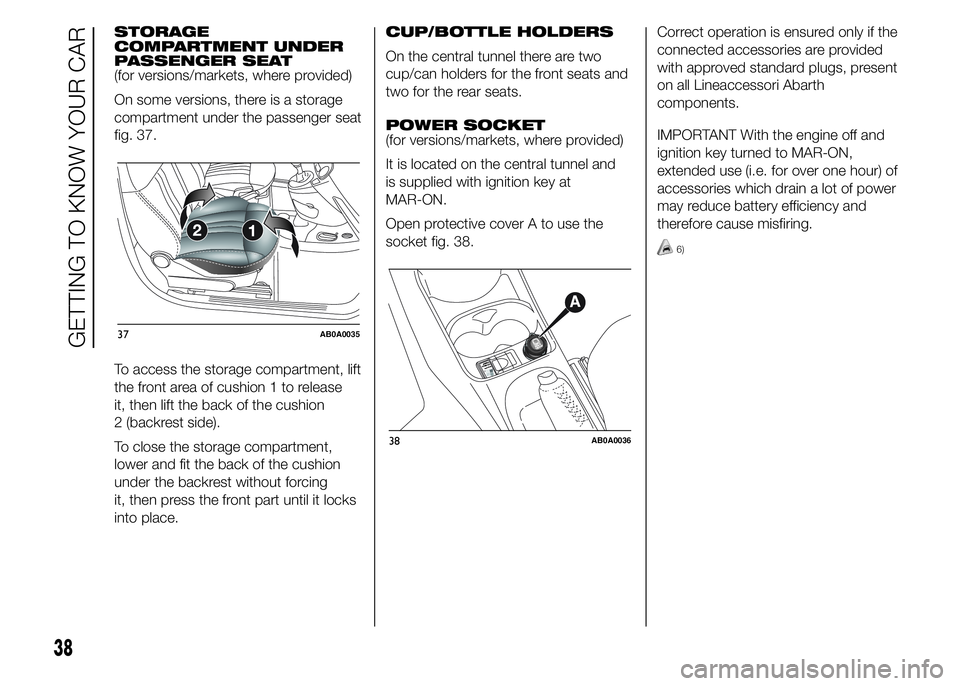
On some versions, there is a storage
compartment under the passenger seat
fig. 37.
To access the storage compartment, lift
the front area of cushion 1 to release
it, then lift the back of the cushion
2 (backrest side).
To close the storage compartment,
lower and fit the back of the cushion
under the backrest without forcing
it, then press the front part until it locks
into place.CUP/BOTTLE HOLDERS
On the central tunnel there are two
cup/can holders for the front seats and
two for the rear seats.
POWER SOCKET
(for versions/markets, where provided)
It is located on the central tunnel and
is supplied with ignition key at
MAR-ON.
Open protective cover A to use the
socket fig. 38.Correct operation is ensured only if the
connected accessories are provided
with approved standard plugs, present
on all Lineaccessori Abarth
components.
IMPORTANT With the engine off and
ignition key turned to MAR-ON,
extended use (i.e. for over one hour) of
accessories which drain a lot of power
may reduce battery efficiency and
therefore cause misfiring.
6)
37AB0A0035
38AB0A0036
38
GETTING TO KNOW YOUR CAR
Page 44 of 215

FIXED GLASS ROOF
(for versions/markets, where provided)
The roof comprises a wide fixed glass
panel and a manually-operated sun
blind. The blind can be used in the "fully
closed" or "fully open" positions.
To open the blind, grab the handle,
press the tooth A fig. 40 and move it to
the completely open position.
To close it, grab the handle and move
the blind to the closing position until
tooth A is attached.
ELECTRIC SUN
ROOF
(for versions/markets, where provided)
The sun roof comprises a wide
electrically-operated glass panel and a
manually-operated sun blind. The
blind can be used in the "fully closed"
or "fully open" positions.
To open the blind, grab the handle,
press the tooth A fig. 41 and move it to
the completely open position. To close
it, grab the handle and move the blind
to the closing position until tooth A
is attached.OPERATION
The sun roof can be operated only with
the ignition key turned to MAR-ON.
The controls A and B fig. 42 are located
near the front roof light and operate
sun roof closing/opening respectively.
OPENING
Keep the button B fig. 42 pressed: the
roof will move to "spoiler" position.
To fully open the roof press button B
again and hold it down: the roof will
stop in the position reached when the
button is released.
7) 8)
18)
40AB0A0039
41AB0A0039
42AB0A0037
40
GETTING TO KNOW YOUR CAR
Page 46 of 215

IMPORTANT
7) Do not open the sun roof if there
is snow or ice on it: you may
damage it.
8) Use the sun roof only at "spoiler"
position if a transverse roof rack is
fitted.
WARNING
18) When leaving the car, always
remove the key from the ignition
to avoid the risk of injury due
to accidental operation of the sun
roof. Improper use of the roof
can be dangerous. Before and
during operation, always check
that nobody is at risk of being
injured by the moving sun roof or
by objects getting caught or hit by
it.
DOORS
19)
DOOR CENTRAL
LOCKING/UNLOCKING
Unlocking doors from
the outside
Press the
button on the key or turn
the metal insert (located inside the key)
to position 1 fig. 44 in the driver side
door lock.
When the key is turned the doors and
the tailgate are simultaneously
unlocked.Locking doors from the
outside
With the doors closed, press the
button on the key or fit and then turn
the metal insert (located inside the
key) to position 2 fig. 44 in the driver
side door lock.
IMPORTANT If one of the doors is not
completely closed or if there is a fault in
the system, the central locking will not
be activated. If the operation is
repeated 10/11 times in quick
succession, the device is excluded for
approximately 30 seconds.
44AB0A0041
42
GETTING TO KNOW YOUR CAR
Page 48 of 215

ELECTRIC WINDOWS
IN BRIEF
These operate when the ignition key
is turned to MAR-ON and for about
three minutes after the ignition key is
turned to STOP or removed unless
one of the doors is opened.
20)
The electric window control buttons are
located beside the gear lever fig. 47
and activate:
A Opening/closing of the left window.
B Opening/closing of the right
window.
21)
If the button is held down for several
seconds, the window raises or lowers
automatically (only with key in MAR-ON
position).
As regards the passenger's side
window, only the opening occurs
automatically with the same procedure.
WARNING
20) Incorrect use of the electric
windows may be dangerous.
Before and during operation,
always check that nobody is
exposed to the risk of being
injured either directly by the
moving window or through
objects getting caught or hit by it.
21) When leaving the car, always
remove the ignition key to avoid
the risk of injury for people still on
board due to accidental operation
of the electric windows.
47AB0A0225
44
GETTING TO KNOW YOUR CAR
Page 55 of 215
HEADLIGHTS
LIGHT BEAM ALIGNMENT
The correct alignment of the headlights
is important for the comfort and safety
of not only the driver but all other road
users. This is also covered by a specific
rule of the highway code.
The headlights must be correctly aimed
to guarantee the best visibility
conditions for all drivers while travelling
with headlights on.
Contact an Abarth Dealership to have
them properly adjusted.
Check light beam alignment every time
the load or its distribution changes.
IMPORTANT When the gas discharge
(Xenon) headlights (for versions/
markets, where provided) are switched
on, normally parabolas and light beam
move vertically for about 2 seconds
until headlight alignment has stabilised.HEADLIGHT ALIGNMENT
CORRECTOR
This device works with the ignition key
in the MAR-ON position and the dipped
headlights on.
Headlight alignment
adjustment
When the car is loaded, it slopes
backwards. This means the light beam
rises.
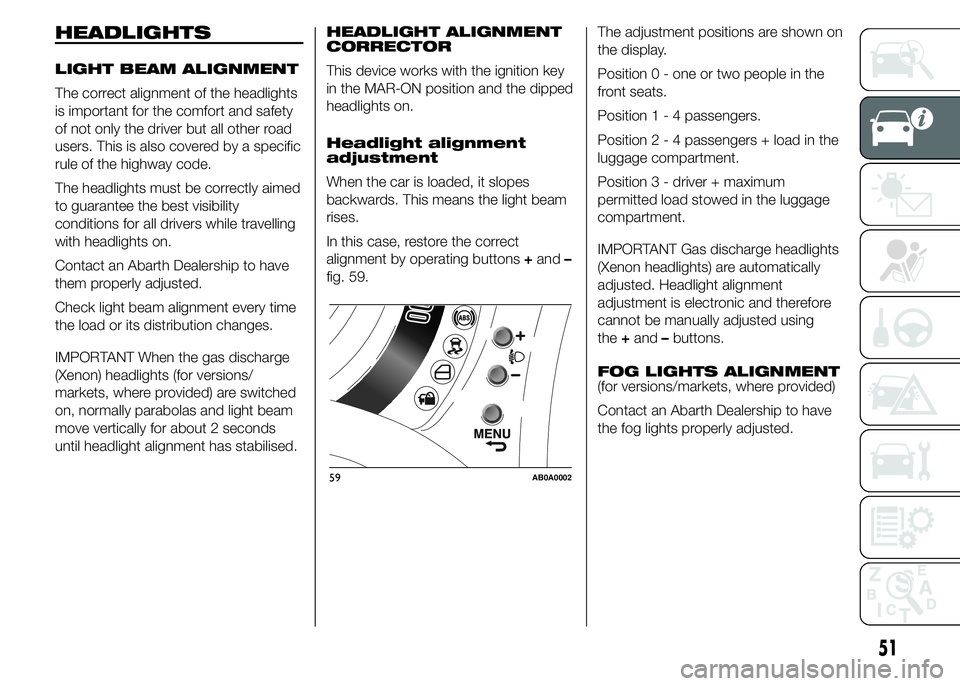
In this case, restore the correct
alignment by operating buttons+and–
fig. 59.The adjustment positions are shown on
the display.
Position 0 - one or two people in the
front seats.
Position1-4passengers.
Position2-4passengers + load in the
luggage compartment.
Position 3 - driver + maximum
permitted load stowed in the luggage
compartment.
IMPORTANT Gas discharge headlights
(Xenon headlights) are automatically
adjusted. Headlight alignment
adjustment is electronic and therefore
cannot be manually adjusted using
the+and–buttons.
FOG LIGHTS ALIGNMENT
(for versions/markets, where provided)
Contact an Abarth Dealership to have
the fog lights properly adjusted.
59AB0A0002
51
Page 59 of 215

TTC SYSTEM (Torque
Transfer Control)
It is an integral part of the ESC system.
This system improves the transfer of
drive torque to the wheels,
guaranteeing safer and more sporty
driving, especially when cornering, far
more able to prevent understeer.
System activation
It is turned off by pressing the button
again or when the vehicle is switched
off (ignition key in the OFF position).
WARNING
31) When the ABS intervenes and
you feel the brake pedal pulsating,
do not reduce the pressure, but
hold it down firmly and
confidently; in doing so you will
brake in the shortest distance
possible, depending on the
current road conditions.
32) To obtain the maximum
efficiency of the braking system, a
bedding-in period of about 500
km is needed: during this period it
is better to avoid sharp, repeated
and prolonged braking.
33) If the ABS system intervenes,
this indicates that the traction
of the tyres on the road is about
to reach its limit. You must slow
down to a speed compatible with
the available traction.
34) The ABS cannot overrule the
natural laws of physics, and
cannot increase the grip available
according to the condition of
the road.35) The ABS cannot prevent
accidents, including those due to
excessive speed on corners,
driving on low-grip surfaces or
aquaplaning.
36) The capability of the ABS must
never be tested irresponsibly and
dangerously, in such a way as
to compromise personal safety
and the safety of others.
37) For the correct operation of the
ABS, it is essential that the tyres
are of the same make and type on
all wheels, in perfect condition
and, above all, of the specified
type and dimensions.
38) For the correct operation of the
ASR system, it is essential that
the tyres are of the same make
and type on all wheels, in perfect
condition and, above all, of the
specified type and dimensions.
39) The ASR system cannot overrule
the natural laws of physics, and
cannot increase the grip available
according to the condition of
the road.
40) The ASR system cannot prevent
accidents, including those due to
excessive speed on corners,
driving on low-grip surfaces or
aquaplaning.
60AB0A0226
55
The system is activated by pressing
button A fig. 60 in the dashboard.
Activation is signalled by the LED in the
TTC button lighting up.
Page 61 of 215
Low tyre pressure
The system warns the driver if one or
more tyres are flat by switching on
the
warning light on the instrument
panel.
The display will also show the following
information:
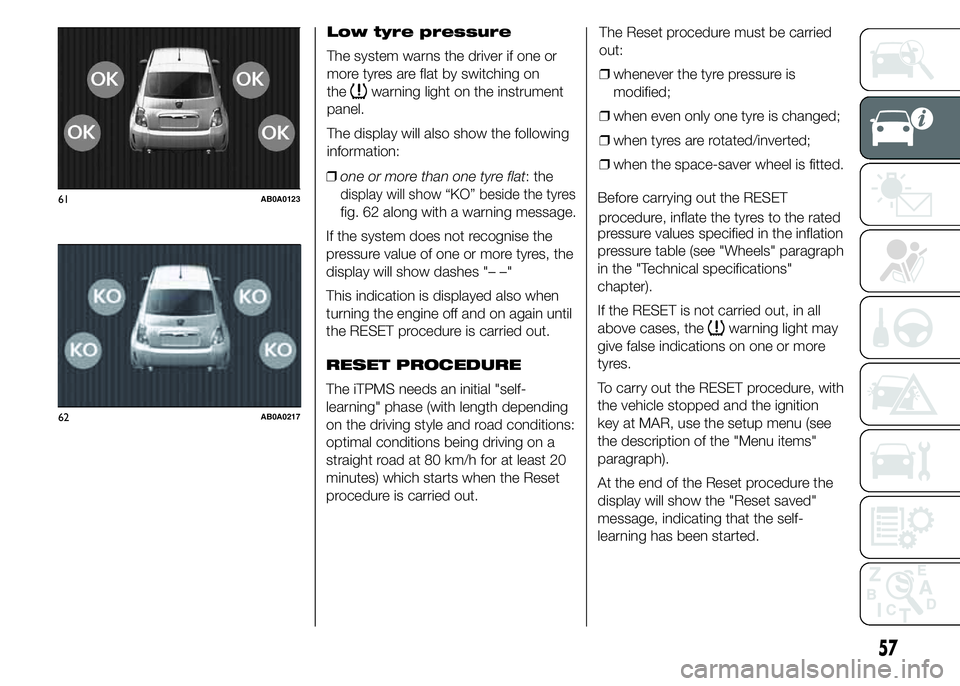
❒one or morethan one tyre flat: the
display will show “KO” beside the tyres
fig. 62 along with a warning message.
If the system does not recognise the
pressure value of one or more tyres, the
display will show dashes "– –"
This indication is displayed also when
turning the engine off and on again until
the RESET procedure is carried out.
RESET PROCEDURE
The iTPMS needs an initial "self-
learning" phase (with length depending
on the driving style and road conditions:
optimal conditions being driving on a
straight road at 80 km/h for at least 20
minutes) which starts when the Reset
procedure is carried out.The Reset procedure must be carried
out:
❒whenever the tyre pressure is
modified;
❒when even only one tyre is changed;
❒when tyres are rotated/inverted;
❒when the space-saver wheel is fitted.
Before carrying out the RESET
pressure values specified in the inflation
pressure table (see "Wheels" paragraph
in the "Technical specifications"
chapter).
If the RESET is not carried out, in all
above cases, the
warning light may
give false indications on one or more
tyres.
To carry out the RESET procedure, with
the vehicle stopped and the ignition
key at MAR, use the setup menu (see
the description of the "Menu items"
paragraph).
At the end of the Reset procedure the
display will show the "Reset saved"
message, indicating that the self-
learning has been started.
61AB0A0123
62AB0A0217
57
p. rocedure, inflate the tyres to the rated
Page 63 of 215
EOBD SYSTEM
The EOBD (European On Board
Diagnosis system) carries out a
continuous diagnosis of the
components of the car related to
emissions. It also alerts the driver, by
turning on the warning light
on the
instrument panel together with relevant
message on the display, when these
components are no longer in peak
conditions (see chapter "Warning lights
and messages").
The goal of the system is to:
❒monitor system efficiency
❒indicate an increase in emissions due
to vehicle malfunction
❒indicate the need to replace
damaged components.
The system also has a connector that
can be interfaced with appropriate
equipment, which makes it possible to
read the error codes stored in the
control unit together with a series of
specific parameters for engine
operation and diagnosis.
IMPORTANT After eliminating the
failure, to check the system completely,
Abarth Dealerships must run a bench
test and, if necessary, road tests which
may also call for a long journey.
DUALDRIVE
ELECTRIC POWER
STEERING
(for versions/markets, where provided)
OPERATION
This only operates with the ignition key
turned to MAR-ON and the engine
started.
Electric power steering allows the force
required at the steering wheel to be
adapted to the driving conditions.
IMPORTANT When turning the ignition
key quickly, full power steering
functionality can be achieved after a
few seconds.
When the SPORT function is turned on
(see "Controls" paragraph in this
chapter) the electric power steering
assistance is altered, increasing the
sensitivity of the steering wheel.
54) 55)
IMPORTANT During parking
manoeuvres requiring a lot of steering,
the steering may become harder: this is
normal and is due to the intervention
of the system to protect the electric
steering motor from overheating, so no
repair is required. When the car is
used again later on, the power steering
will work normally.
WARNING
54) It is absolutely forbidden to carry
out any after-market operation
involving steering system or
steering column modifications
(e.g. installation of anti-theft
device) that could adversely affect
performance and safety,
invalidate the warranty and also
result in the car not meeting
type-approval requirements.
55) Before servicing the car, switch
off the engine and remove the key
from the ignition switch to
activate the steering lock. This is
especially important when the car
wheels are not touching the
ground. If this is not possible (for
example if the key needs to be
turned to MAR-ON or the engine
must be running), remove the
main fuse that protects the
electric power steering.
59