mirror Acura MDX 2002 Owner's Manual
[x] Cancel search | Manufacturer: ACURA, Model Year: 2002, Model line: MDX, Model: Acura MDX 2002Pages: 372, PDF Size: 5.48 MB
Page 63 of 372

This section gives inf ormation about
the controls and displays that
contribute to the daily operation of
your Acura. All the essential controls
are within easy reach............................
Control Locations .60
...............................
Indicator Lights .61
.............................................
Gauges .67
Controls Near the Steering
.......................................
Wheel .71
...................................
Headlights .72 Automatic Lighting Off
.....................................
Feature .73
............
Daytime Running Lights .73
....
Instrument Panel Brightness .73
................................
Turn Signals .74
.....................
Windshield Wipers .74
..................
Windshield Washers .76
Rear Window Wiper and
.....................................
Washer .76
..........................
Hazard Warning .76
.............
Rear Window Def ogger .77
.....................................
Fog Light .77
......
Steering Wheel Adjustment .78
...............................
Keys and Locks .79
..............................................
Keys .79
....................
Immobilizer System .80
............................
Ignition Switch .81
......................
Power Door Locks .82
...................
Remote Transmitter .84
..............
Childproof Door Locks .88
........................................
Tailgate .88
....................................
Glove Box .89
.................................................
Seats .90
............
Power Seat Adjustments .90
...........
Driver’s Lumbar Support .91
..........
Manual Seat Adjustments .92 Second and Third Row seat
............................
Adjustments .93
..........................
Head Restraints .94
........................
Rear Seat Access .95
............
Folding the Second Seat .95
...............
Folding the Third Seat .96
...................
Detachable Anchors .98
....................................
Seat Heaters .99
............................
Power Windows .100
.......................................
Moonroof .103
...........................................
Mirrors .104
...............................
Parking Brake .106
Driving Position Memory
........................................
System .107
...........................
Beverage Holder .110
.................
Console Compartment .112
.......................
Rear Compartment .112
.................................
Cargo Hooks .112
........................
Sunglasses Holder .113
........................................
Sun Visor .114
................................
Vanity Mirror .114
............
Accessory Power Sockets .115
........................................
Coin Box .116
......................................
Coat Hook .116
...............................
Interior Lights .117
Instruments and Controls
Inst rument s and Cont rols59
01/09/07 12:04:59 31S3V610_064
Page 91 of 372

Theremotetransmitterswillalso
activate the Driving Position
Memory System (see page ).
When you open the driver’s door
after unlocking it with the remote
transmitter, you will hear a beep.
The driver’s seat and outside mirrors
move to the positions stored in that
memory location. You will hear two
beeps when the movement iscomplete.
If the seat and mirrors are already in
the proper positions, you will hear
three beeps when you open the door.
The driving position memory
activated (Memory 1, Memory 2) is
shownonthebackof each
transmitter. Make sure you store
your desired driving position in the
memory that is activated by the
transmitter you normally carry.
To turn it back on, repeat this
procedure. The LED will come on
f or one second to indicate the
f eature has been turned on. You can turn the driving position
memory activation off and on. To
turn it of f , press and hold the LOCK
and UNLOCK buttons at the same
time f or about one second. The LED
in the remote transmitter will blink
twice. Then release the buttons.
107
On Touring Model
Recalling a Memorized Driving
Position
Keys and Locks
Inst rument s and Cont rols87
W Wi itth h M
M e
emm o
or
ryy 2
2
W
Wi itth h M
M e
emm o
or
ryy 1
1
01/09/07 12:09:40 31S3V610_092
Page 108 of 372

The inside mirror can automatically
darken to reduce glare. To turn on
this feature, press the button on the
bottom of the mirror. The AUTO
indicator comes on as a reminder.
When it is on, the mirror darkens
when it senses the headlights of a
vehicle behind you, then returns to
normal visibility when the lights are
gone. Press the button again to turn
of f this sensing.
Keeptheinsideandoutsidemirrors
clean and adjusted f or best visibility.
Be sure to adjust the mirrors bef ore
you start driving.
Mirrors
Inst rument s and Cont rols104
S SE
EN
NS SOOR R I
INND DI
ICCA A T
TO
OR R
A
A U
UT TO
O S
SWWI ITT C
CH H
01/09/07 12:12:08 31S3V610_109
Page 109 of 372

Adjust the outside mirrors with the
adjustment switch on the lef t side of
the dashboard:Turn the ignition switch ON (II).
Move the selector switch to L
(driver’s side) or R (passenger’s
side). Push the appropriate edge of the
adjustment switch to move the
mirrorright,left,up,ordown.
When you f inish, move the
selector switch to the center (off)
position. This turns of f the
adjustment switch so you can’t
move a mirror out of position by
accidentally bumping the switch.With the selector switch in the
center (of f ) position, the passenger’s
side mirror will pivot downward
slightly when you shif t the
transmission into reverse. This gives
you a better view of the side of the
vehicle while parallel parking. The
mirror returns to its original position
when you take the transmission out
of reverse.
1.
2. 3.
4.
CONT INUED
Touring ModelAdjusting the Power Mirrors
Mirrors
Inst rument s and Cont rols105
S SE
EL
LEE C
CT TO
OR R S
SWWI ITT C
CH H A
AD
DJ
JUUS STTM
M E
EN
NT T S
SWWI ITT C
CH H
01/09/07 12:12:21 31S3V610_110
Page 110 of 372

To apply the parking brake, push the
parking brake pedal down with your
f oot. To release the parking brake,
push on the pedal again. The parking
brake light on the instrument panel
should go out when the parking
brake is f ully released with the
engine running. (see page .)
The outside mirrors are heated to re-
move fog and frost. With the ignition
switchON(II),turnontheheaters
by pressing the button. The light in
the button comes on as a reminder.
Press the button again to turn the
heaters off.
63
Parking Brake
Mirrors, Parking Brake
Inst rument s and Cont rols106
P P
A
A R
RKKIINNG G B
BRRAA K
KEE P
PE
ED
D A
AL
L
H
H E
EA
A T
TE
ED
D M
MI
IRRR ROOR R B
BUUT TT
TO
ON N
Driving the vehicle with the parking
brake applied can damage the rear
brakes and axles.
01/09/07 12:12:30 31S3V610_111
Page 111 of 372

Turn the ignition switch ON (II).
You cannot add a new driving
position in the memory unless the
ignition switch is ON (II). You can
recall a memorized position with
the ignition switch in any position.
Seat and outside mirror positions, f or
two dif f erent drivers or driving
conditions,canbestoredinseparate
memories. You select a memorized
position by pushing the appropriate
button or using the appropriate
remote transmitter (Memory 1 or
Memory 2). Store a driving position as explained
in this section only when the vehicle
is parked.
Adjust the seat to a comfortable
position (see page ).
Adjust the outside mirrors f or best
visibility (see page ). Press and release the MEMO
buttononthecontrolpanel.You
will hear a beep. Immediately
press and hold one of the memory
buttons (1 or 2) until you hear two
beeps. The indicator light in the
memory button will come on. The
current positions of the driver’s
seat and outside mirrors are now
stored.
Your Acura has a memory f eature
f or the driver’s seat and outside
mirror positions.
3.
1.
2.
90
105
CONT INUED
Touring Model St oring a Driving Posit ion in Memory
Driving Posit ion Memory Syst em
Inst rument s and Cont rols107
M ME
EM
M O
O B
BUUT TT
TO
ON N
01/09/07 12:12:42 31S3V610_112
Page 112 of 372

Doing any of the f ollowing af ter
pressing the MEMO button will
cancel the storing procedure.Not pressing a memory button
within 5 seconds.
You can select memorized positions
as f ollows.Make sure the parking brake is set
and the shif t lever is in Park.
Readjusting the seat position.
Readjusting the outside mirror
position.
Each memory button stores only one
driving position. Storing a new
position erases the previous setting
stored in that button’s memory. If
you want to add a new position while
retaining the current one, use the
other memory button. Press the desired memory button
(1 or 2) until you hear a beep, then
release the button.The system will move the seat and
outside mirrors to the memorized
positions. The indicator light in the
selected memory button will f lash
during movement. When the
adjustments are complete, you will
hear two beeps and the indicator
light will remain on.
All stored driving positions will be
lost if your vehicle’s battery goes
dead or is disconnected. 1.
2.Select ing a Memorized Posit ion
Driving Posit ion Memory Syst em
Inst rument s and Cont rols108
M M
E
EM
M O
ORRYY B
BUUT TT
TO
ON NSS
01/09/07 12:12:54 31S3V610_113
Page 113 of 372

Press any button on the control
panel: MEMO, 1 or 2.
To stop the system’s automatic ad-
justment;
Push any of the adjustment
switches f or the seat.
Shif t out of Park.
Adjust the outside mirrors. If desired, you can use the
adjustment switches to change the
positions of the seat or outside
mirrors af ter they are in their
memorized position. If you change
the memorized position, the
indicator light in the memory button
will go out. To keep this driving
position f or later use, you must store
it in the driving position memory.
Driving Posit ion Memory Syst em
Inst rument s and Cont rols109
01/09/07 12:13:02 31S3V610_114
Page 118 of 372

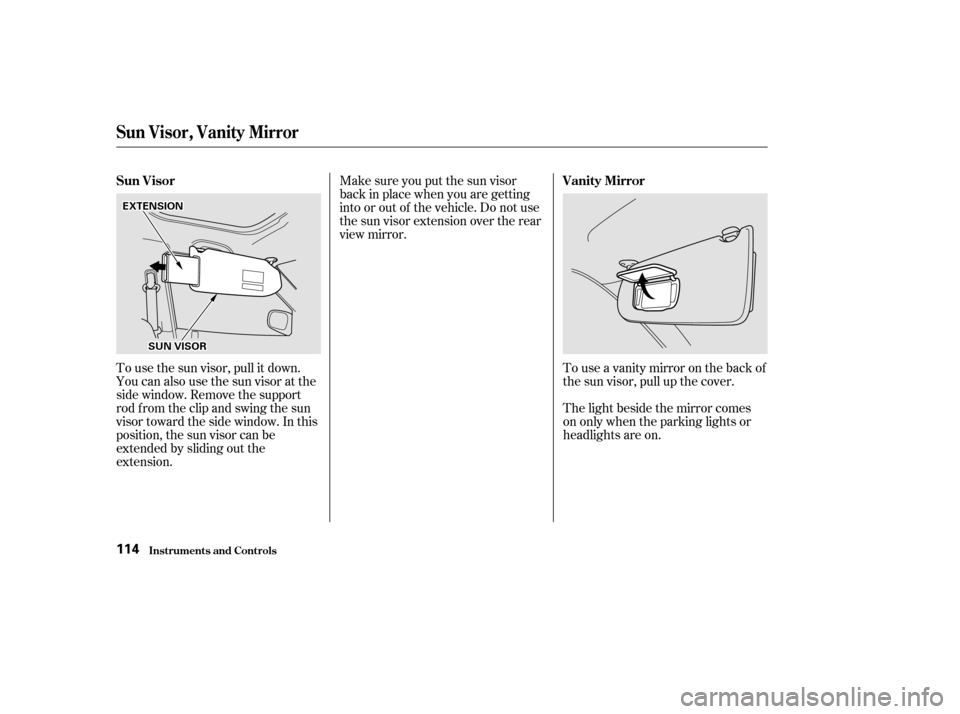
To use the sun visor, pull it down.
You can also use the sun visor at the
side window. Remove the support
rod f rom the clip and swing the sun
visor toward the side window. In this
position, the sun visor can be
extended by sliding out the
extension.Touseavanitymirroronthebackof
the sun visor, pull up the cover.
Make sure you put the sun visor
back in place when you are getting
into or out of the vehicle. Do not use
the sun visor extension over the rear
view mirror.
The light beside the mirror comes
on only when the parking lights or
headlights are on.
Sun Visor
Vanity Mirror
Sun Visor, Vanit y Mirror
Inst rument s and Cont rols114
S SUUN N V
VI
ISSO OR R
E
E
X
X T
TE
EN
NS SIIOON N
01/09/07 12:13:46 31S3V610_119
Page 213 of 372

Youshoulddothefollowingchecks
and adjustments every day bef ore
you drive your vehicle.Make sure all windows, mirrors,
and outside lights are clean and
unobstructed. Remove f rost, snow,
or ice. Check the adjustment of the seat
(see page ).
Check the adjustment of the
inside and outside mirrors (see
page ).
Check the adjustment of the
steering wheel (see page ).
Fasten your seat belt. Check that
your passengers have f astened
their seat belts (see page ).Turn the ignition switch ON (II).
Check the indicator lights in the
instrument panel.
Start the engine (see page ).
Check the gauges and indicator
lights in the instrument panel (see
page ).
Check that any items you may be
carrying with you inside are stored
properly or f astened down
securely. Visually check the tires. If a tire
looks low, use a gauge to check its
pressure. Check that the hood and tailgate
arefullyclosed. Makesurethedoorsandtailgate are securely closed and locked.
3. 2.
1.
4. 5.
6.
7.
8.
9. 11.
12. 10.
15
92
104 78 61 210
Preparing to Drive
Driving209
01/09/07 12:28:24 31S3V610_214