usb Acura MDX 2011 Owner's Guide
[x] Cancel search | Manufacturer: ACURA, Model Year: 2011, Model line: MDX, Model: Acura MDX 2011Pages: 609, PDF Size: 12.7 MB
Page 298 of 609
To Stop Playing a USB Flash
Memory Device
To play the radio, press the AM/FM,
or XM button. Press the DISC button
to switch to the disc mode. Press the
HDD button to switch to HDD
Audio.
If you reconnect the same USB flash
memory device, the system will
begin playing where it left off.
Disconnecting a USB Flash MemoryDeviceYou can disconnect the USB flash
memory device at any time even if
the USB mode is selected on the
audio system. Always follow the USB
flash memory device's instructions
when you remove it.
When you disconnect the USB flash
memory device while it is playing,
the audio display and the navigation
screen (if selected) show NO DATA.
Playing a USB Flash Memory Device (Models with navigation system)
293
Features
10/06/29 11:59:04 11 ACURA MDX MMC North America Owner's M 50 31STX640 enu
Page 299 of 609
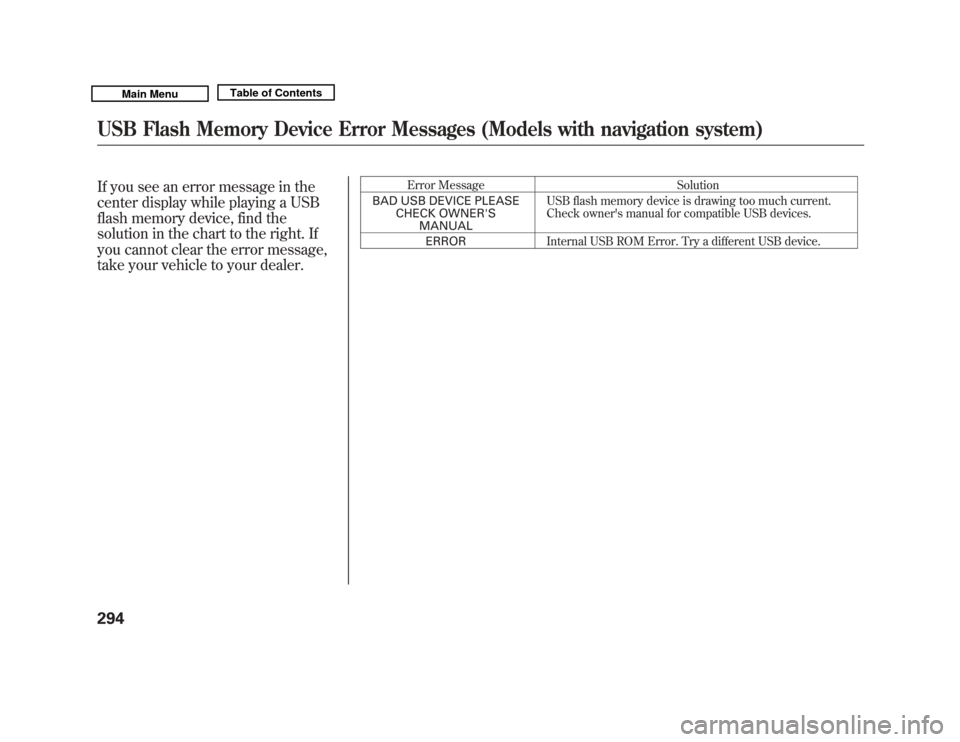
If you see an error message in the
center display while playing a USB
flash memory device, find the
solution in the chart to the right. If
you cannot clear the error message,
take your vehicle to your dealer.
Error MessageSolution
BAD USB DEVICE PLEASE CHECK OWNER'SMANUAL USB flash memory device is drawing too much current.
Check owner's manual for compatible USB devices.
ERROR Internal USB ROM Error. Try a different USB device.
USB Flash Memory Device Error Messages (Models with navigation system)29410/06/29 11:59:04 11 ACURA MDX MMC North America Owner's M 50 31STX640 enu
Page 300 of 609
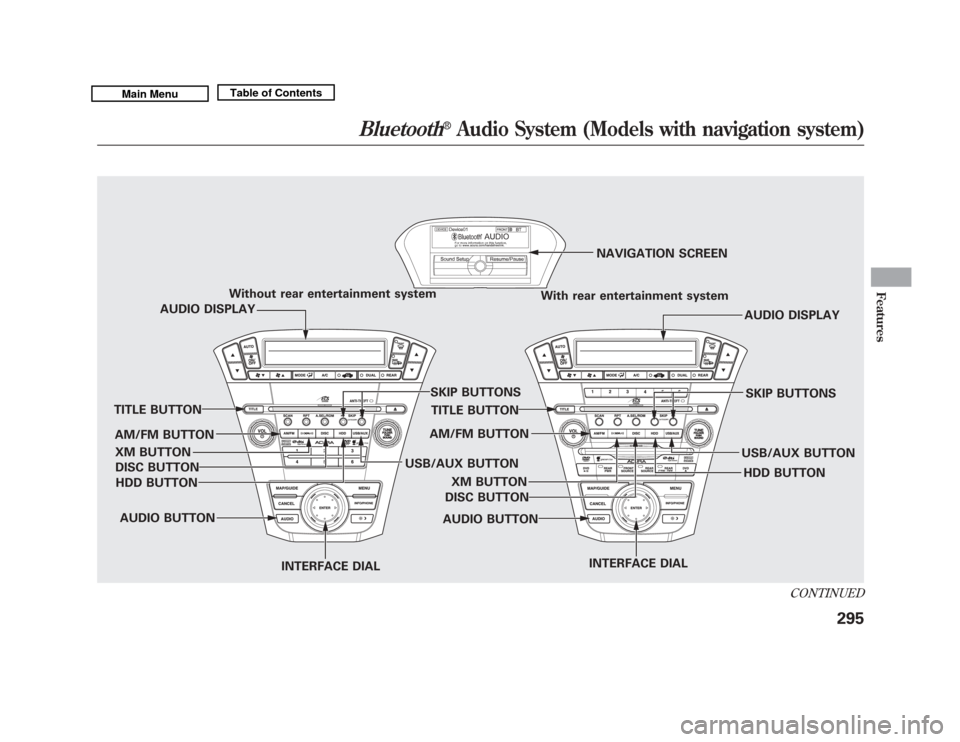
Without rear entertainment systemWith rear entertainment systemNAVIGATION SCREEN
AUDIO DISPLAY
TITLE BUTTON
AUDIO BUTTON INTERFACE DIAL INTERFACE DIAL
USB/AUX BUTTON
SKIP BUTTONS
AUDIO BUTTON
TITLE BUTTON
AUDIO DISPLAY
SKIP BUTTONS
USB/AUX BUTTON
AM/FM BUTTON
XM BUTTON
HDD BUTTON
DISC BUTTON
HDD BUTTON
AM/FM BUTTON
XM BUTTON
DISC BUTTON
CONTINUED
Bluetooth
®
Audio System (Models with navigation system)
295
Features
10/06/29 11:59:04 11 ACURA MDX MMC North America Owner's M 50 31STX640 enu
Page 301 of 609
Your vehicle is equipped with aBluetooth
®audio system, which
allows you to listen to streaming
audio from your
Bluetooth
®audio
compatible phone. This function is
only available on
Bluetooth
®Audio
Compatible phones that are paired
and linked to the vehicle's
Bluetooth
®HandsFreeLink
®(HFL)
system (see page 386).
Not all Bluetooth-enabled phones
with streaming audio capabilities are
compatible with the system. You can
find an approved phone by visiting
www.acura.com/handsfreelink
,orby
calling the HandsFreeLink
®
consumer support at 1-888-528-7876.
In Canada, visit
www.acura.ca
, or call
1-888-9-ACURA-9.
NOTE: In some states, provinces,
and territories it may be illegal to
perform some data device functions
while driving. To Play
Bluetooth
®Audio Files
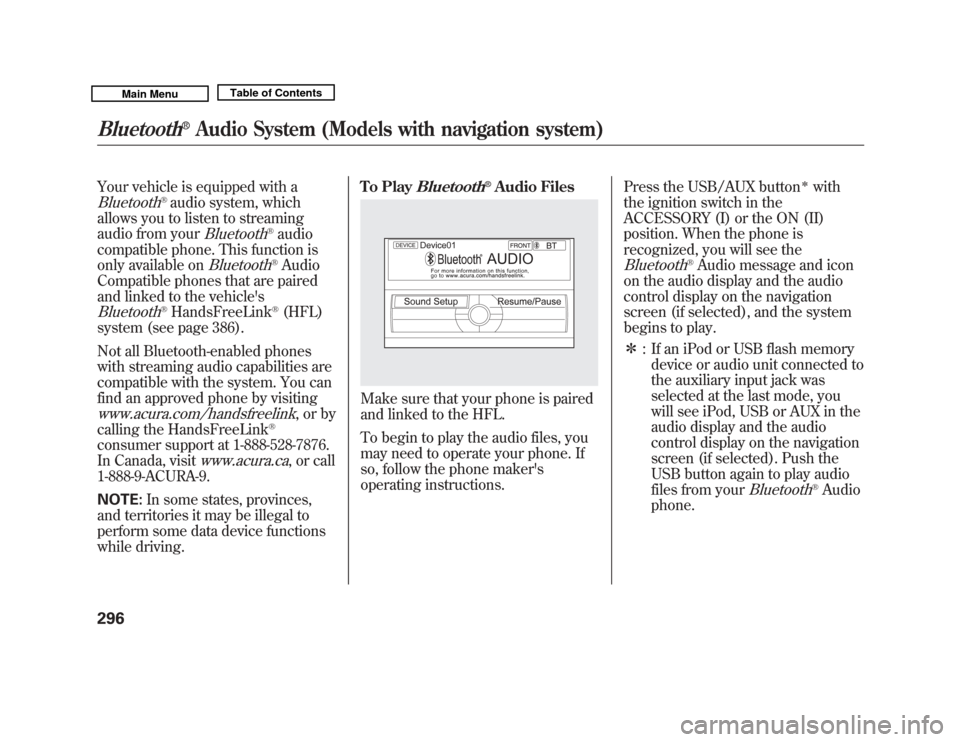
Make sure that your phone is paired
and linked to the HFL.
To begin to play the audio files, you
may need to operate your phone. If
so, follow the phone maker's
operating instructions.
Press the USB/AUX button
ꭧ
with
the ignition switch in the
ACCESSORY (I) or the ON (II)
position. When the phone is
recognized, you will see the
Bluetooth
®Audio message and icon
on the audio display and the audio
control display on the navigation
screen (if selected), and the system
begins to play.
ꭧ : If an iPod or USB flash memory
device or audio unit connected to
the auxiliary input jack was
selected at the last mode, you
will see iPod, USB or AUX in the
audio display and the audio
control display on the navigation
screen (if selected). Push the
USB button again to play audio
files from your
Bluetooth
®Audio
phone.
Bluetooth
®
Audio System (Models with navigation system)
29610/06/29 11:59:04 11 ACURA MDX MMC North America Owner's M 50 31STX640 enu
Page 307 of 609
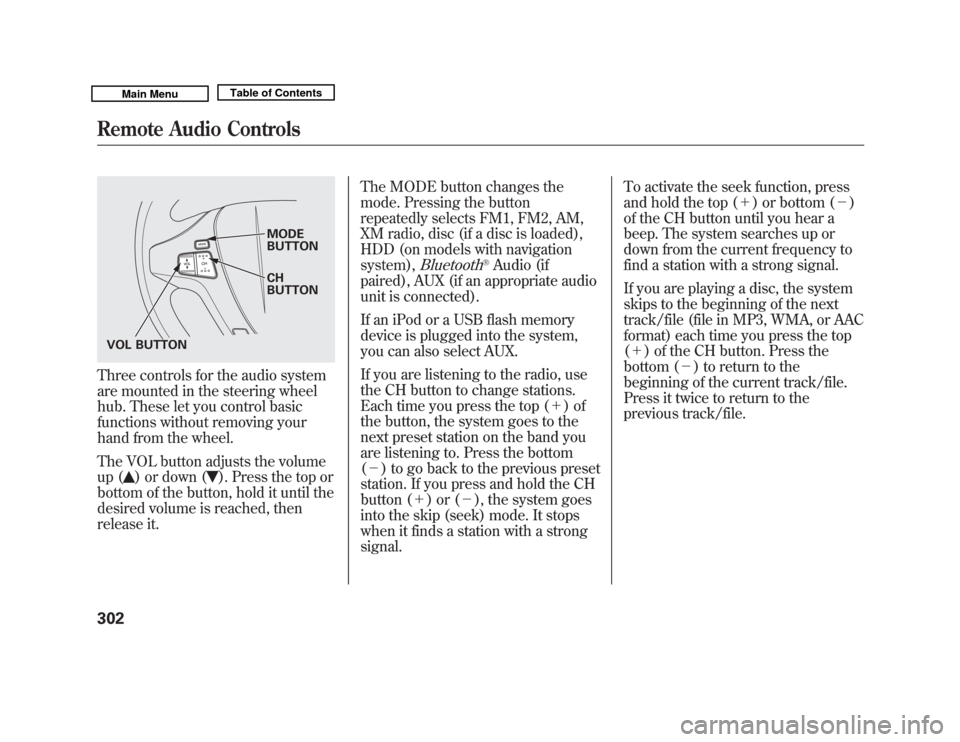
Three controls for the audio system
are mounted in the steering wheel
hub. These let you control basic
functions without removing your
hand from the wheel.
The VOL button adjusts the volume
up (
) or down (
). Press the top or
bottom of the button, hold it until the
desired volume is reached, then
release it. The MODE button changes the
mode. Pressing the button
repeatedly selects FM1, FM2, AM,
XM radio, disc (if a disc is loaded),
HDD (on models with navigation
system),
Bluetooth
®Audio (if
paired), AUX (if an appropriate audio
unit is connected).
If an iPod or a USB flash memory
device is plugged into the system,
you can also select AUX.
If you are listening to the radio, use
the CH button to change stations.
Each time you press the top (+ )of
the button, the system goes to the
next preset station on the band you
are listening to. Press the bottom
(- ) to go back to the previous preset
station. If you press and hold the CH
button (+ )or(-), the system goes
into the skip (seek) mode. It stops
when it finds a station with a strong
signal. To activate the seek function, press
and hold the top (+
) or bottom (-)
of the CH button until you hear a
beep. The system searches up or
down from the current frequency to
find a station with a strong signal.
If you are playing a disc, the system
skips to the beginning of the next
track/file (file in MP3, WMA, or AAC
format) each time you press the top
(+ ) of the CH button. Press the
bottom (- ) to return to the
beginning of the current track/file.
Press it twice to return to the
previous track/file.
MODE
BUTTON
CH
BUTTON
VOL BUTTON
Remote Audio Controls30210/06/29 11:59:04 11 ACURA MDX MMC North America Owner's M 50 31STX640 enu
Page 308 of 609
You will see the track/file number
and the elapsed time. If the disc has
text data or is compressed inMP3 or
WMA, you can also see any other
information (track title, file name,
folder name, etc.).
In MP3 or WMA mode, you can use
the seek function to select folders.
Press and hold the top (+) of the CH
button until you hear a beep, to skip
forward to the first file of the next
folder. Press the bottom (- ) to skip
backward to the previous folder.
If you are playing a USB flash
memory device or iPod with the USB
adapter cable, press and release the
top (+ ) of the CH button to skip
forward to the beginning of the next
file. Press the bottom (- ) to skip
backward to the beginning to the
current file. Press it twice to return to
the previous file. When playing a USB flash memory
device, you can also use the seek
function to skip the folder. To
activate this, press and hold either
side of the CH button until you hear
a beep.
On models without navigation
systemIf you are playing a conventional CD
(without the text data and not
compressed in MP3 or WMA), you
can use the skip function to select
discs. Press and hold the top (+ )of
the CH button until you hear a beep,
to skip forward to the next disc.
Press and hold the bottom (- )to
skip backward to the previous disc.
Remote Audio Controls
303
Features
10/06/29 11:59:04 11 ACURA MDX MMC North America Owner's M 50 31STX640 enu
Page 309 of 609

Auxiliary Input JackThe auxiliary input jack is inside the
console compartment. The system
will accept auxiliary input from
standard audio accessories using a
1/8 inch (3.5 mm) stereo miniplug.
When a compatible audio unit is
connected to the jack, press the
USB/AUX button (DISC/AUX
button on models without navigation
system) to select it.
On models with Rear EntertainmentSystemAuxiliary input jacks and headphone
connectors for the rear
entertainment system are on the
back of the center console
compartment.
For more information, see page 336.
Auxiliary Input Jack30410/06/29 11:59:04 11 ACURA MDX MMC North America Owner's M 50 31STX640 enu
Page 312 of 609
U.S. Technology Package withEntertainment, Advance Package withEntertainment, Canadian Technology,
and Elite PackagesYour vehicle is equipped with a rear
entertainment system that includes a
DVD player for the enjoyment of the
rear passengers.
With this system, the rear
passengers can enjoy a different
entertainment source (radio, disc,
HDD, USB, iPod
®, DVD player, or
XM Radio) than the front seat
occupants. The audio is broadcast
through the supplied wireless
headphones.
The ignition switch must be in the
ACCESSORY (I) or the ON (II)
position to operate the rear
entertainment system.
This vehicle's overhead mounted video
display, if so equipped, includes
mercury-containing components. Upon
removal, please reuse, recycle, or
dispose of as hazardous waste. To Turn On the System
Press the REAR PWR button. The
overhead screen will open to the
position it was last set. The indicator
on the REAR PWR button will come
on, as well as the indicator on the
FRONT SOURCE button. The rear
seat passengers can then operate the
rear system from the control panel in
the ceiling. The rear control panel
can also be detached and used as a
remote control, by pushing the
RELEASE button, and pulling the
remote toward you.
CONTINUED
Rear Entertainment System
307
Features
10/06/29 11:59:04 11 ACURA MDX MMC North America Owner's M 50 31STX640 enu
Page 319 of 609
To Play a Disc, HDD, USB, or
iPod
®from the Rear Control Panel
Press the MENU button to display
the Audio Menu on the overhead
screen. Use the interface dial to
highlight REPEAT, RANDOM, or
SCAN on the screen. You can enter
the highlighted function by pressing
the ENTER button. These functions
have the same features as those of
the front audio system.
When TITLE/SCROLL button is
pressed, the title scrolls. When it's
pushed again, scrolling stops. To Play a DVD from the Rear
Control Panel
The video screen is for use by rear
seat passengers only. The driver and
front seat passenger should not try to
view the screen while driving.
Press the REAR PWR button in the
front panel or press the
button in
the rear control panel when REAR
PWR is on. The overhead screen will
open to the position it was last set.
You can tilt the screen at nine
different angles from 90 to 130
degrees using the tilt button in the
rear control panel. The default
setting is 100 degrees.
Press the
button when you want
to pause the DVD. Press this button
again to go back to PLAY.
Press thebutton to skip to the
beginning of the next chapter. Press
the
button to return to the
beginning of the current chapter. Press the
button again quickly to
go to the previous chapter.
To move rapidly within a chapter,
press and hold the
or
button.
The system will continue to move
through the chapter. Press the
button to move forward, or thebutton to move backward. Release
the button when the system reaches
the point you want.
To select the menu on the DVD,
press the MENU button. Use the
interface dial to turn to the desired
menu selection, then press the
ENTER button to enter your
selection.
Rear Entertainment System31410/06/29 11:59:04 11 ACURA MDX MMC North America Owner's M 50 31STX640 enu
Page 603 of 609
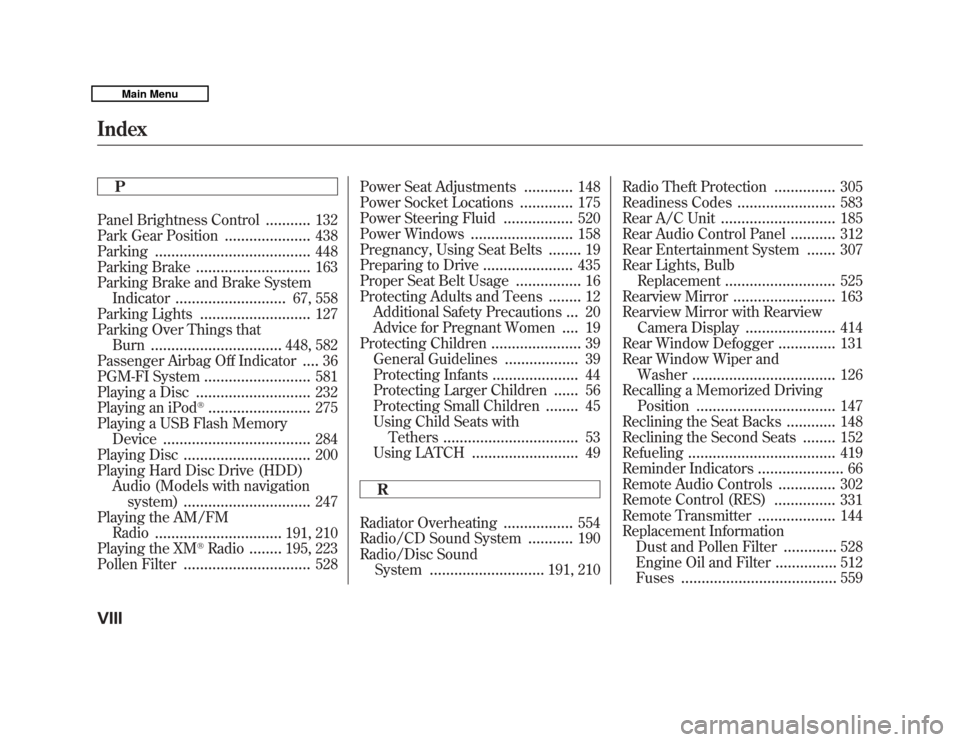
P
Panel Brightness Control
...........
132
Park Gear Position
.....................
438
Parking
......................................
448
Parking Brake
............................
163
Parking Brake and Brake System Indicator
...........................
67, 558
Parking Lights
...........................
127
Parking Over Things that Burn
................................
448, 582
Passenger Airbag Off Indicator
....
36
PGM-FI System
..........................
581
Playing a Disc
............................
232
Playing an iPod
®.........................
275
Playing a USB Flash Memory Device
....................................
284
Playing Disc
...............................
200
Playing Hard Disc Drive (HDD) Audio (Models with navigationsystem)
...............................
247
Playing the AM/FM Radio
...............................
191, 210
Playing the XM
®Radio
........
195, 223
Pollen Filter
...............................
528 Power Seat Adjustments
............
148
Power Socket Locations
.............
175
Power Steering Fluid
.................
520
Power Windows
.........................
158
Pregnancy, Using Seat Belts
........
19
Preparing to Drive
......................
435
Proper Seat Belt Usage
................
16
Protecting Adults and Teens
........
12
Additional Safety Precautions
...
20
Advice for Pregnant Women
....
19
Protecting Children
......................
39
General Guidelines
..................
39
Protecting Infants
.....................
44
Protecting Larger Children
......
56
Protecting Small Children
........
45
Using Child Seats with Tethers
.................................
53
Using LATCH
..........................
49
R
Radiator Overheating
.................
554
Radio/CD Sound System
...........
190
Radio/Disc Sound System
............................
191, 210 Radio Theft Protection
...............
305
Readiness Codes
........................
583
Rear A/C Unit
............................
185
Rear Audio Control Panel
...........
312
Rear Entertainment System
.......
307
Rear Lights, Bulb Replacement
...........................
525
Rearview Mirror
.........................
163
Rearview Mirror with Rearview Camera Display
......................
414
Rear Window Defogger
..............
131
Rear Window Wiper and
Washer
...................................
126
Recalling a Memorized Driving Position
..................................
147
Reclining the Seat Backs
............
148
Reclining the Second Seats
........
152
Refueling
....................................
419
Reminder Indicators
.....................
66
Remote Audio Controls
..............
302
Remote Control (RES)
...............
331
Remote Transmitter
...................
144
Replacement Information Dust and Pollen Filter
.............
528
Engine Oil and Filter
...............
512
Fuses
......................................
559
IndexVIII10/06/29 11:59:04 11 ACURA MDX MMC North America Owner's M 50 31STX640 enu