clock Acura MDX 2011 Owner's Manual
[x] Cancel search | Manufacturer: ACURA, Model Year: 2011, Model line: MDX, Model: Acura MDX 2011Pages: 609, PDF Size: 12.7 MB
Page 131 of 609
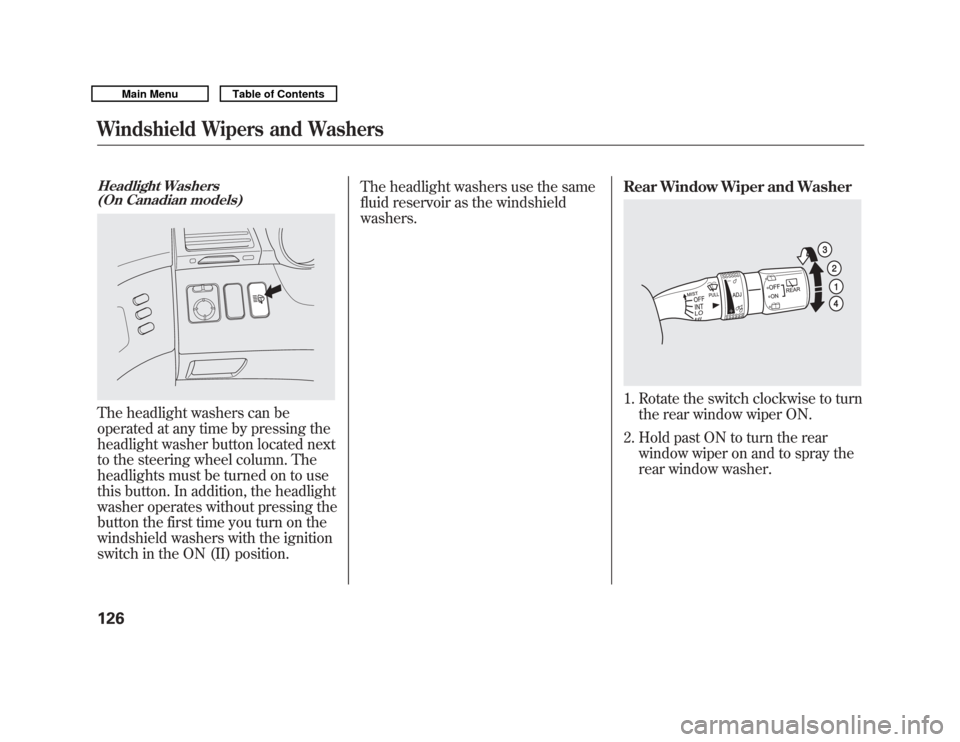
Headlight Washers(On Canadian models)The headlight washers can be
operated at any time by pressing the
headlight washer button located next
to the steering wheel column. The
headlights must be turned on to use
this button. In addition, the headlight
washer operates without pressing the
button the first time you turn on the
windshield washers with the ignition
switch in the ON (II) position. The headlight washers use the same
fluid reservoir as the windshield
washers.
Rear Window Wiper and Washer
1. Rotate the switch clockwise to turn
the rear window wiper ON.
2. Hold past ON to turn the rear window wiper on and to spray the
rear window washer.
Windshield Wipers and Washers12610/06/29 11:59:04 11 ACURA MDX MMC North America Owner's M 50 31STX640 enu
Page 132 of 609
3. When you turn the wiper switch tothe ‘‘OFF ’’position, the wiper will
return to its parked position.
4. Rotate the switch counterclockwise to spray the
window washer.
When you shift the transmission to
the reverse position with the front
windshield wipers activated, the
rear window wiper operates
automatically.
When the wiper control lever
position is INT, the rear wiper
operates intermittently. When it is
LO or HI, the rear wiper operates
continuously.
The rear window washer uses the
same fluid reservoir as the
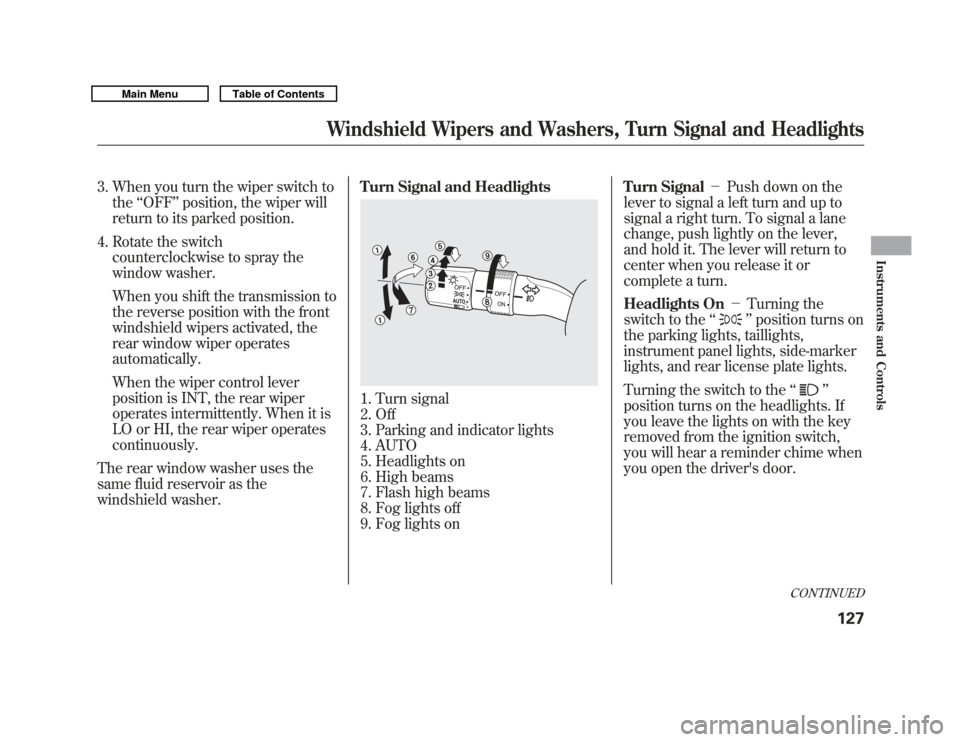
windshield washer. Turn Signal and Headlights
1. Turn signal
2. Off
3. Parking and indicator lights
4. AUTO
5. Headlights on
6. High beams
7. Flash high beams
8. Fog lights off
9. Fog lights onTurn Signal
-Push down on the
lever to signal a left turn and up to
signal a right turn. To signal a lane
change, push lightly on the lever,
and hold it. The lever will return to
center when you release it or
complete a turn.
Headlights On -Turning the
switch to the ‘‘
’’position turns on
the parking lights, taillights,
instrument panel lights, side-marker
lights, and rear license plate lights.
Turning the switch to the ‘‘
’’
position turns on the headlights. If
you leave the lights on with the key
removed from the ignition switch,
you will hear a reminder chime when
you open the driver's door.
CONTINUED
Windshield Wipers and Washers, Turn Signal and Headlights
127
Instruments and Controls
10/06/29 11:59:04 11 ACURA MDX MMC North America Owner's M 50 31STX640 enu
Page 165 of 609
If your vehicle's battery is
disconnected or goes dead, or the
driver's window fuse is removed, the
AUTO function may be disabled. If
the AUTO function is disabled, the
power window system will need to be
reset after reconnecting the battery
or installing the fuse.1. Start the engine. Push down and hold the driver's window switch
until the window is fully open.
2. Pull and hold the driver's window switch to close the window
completely, then hold the switch
for about 2 seconds.
If the power windows do not operate
properly after resetting, have your
vehicle checked by your dealer. Opening the Windows and
Moonroof with the Remote
Transmitter
You can open all of the windows and
the moonroof from outside with the
remote transmitter.
1. Press the UNLOCK button once to
unlock the driver's door.
2. Press the UNLOCK button a second time, and hold it. All the
doors unlock, and all four windows
and moonroof start to open. To
stop the windows and moonroof,
release the button.
3. To open the windows and moonroof further, press the button
again (within 10 seconds of step 1)
and hold it. If the windows and the
moonroof stop before the desired
position, repeat steps 1 and 2.
You cannot close the windows or the
moonroof with the remote
transmitter. Opening/Closing the Windows
and Moonroof with the Key
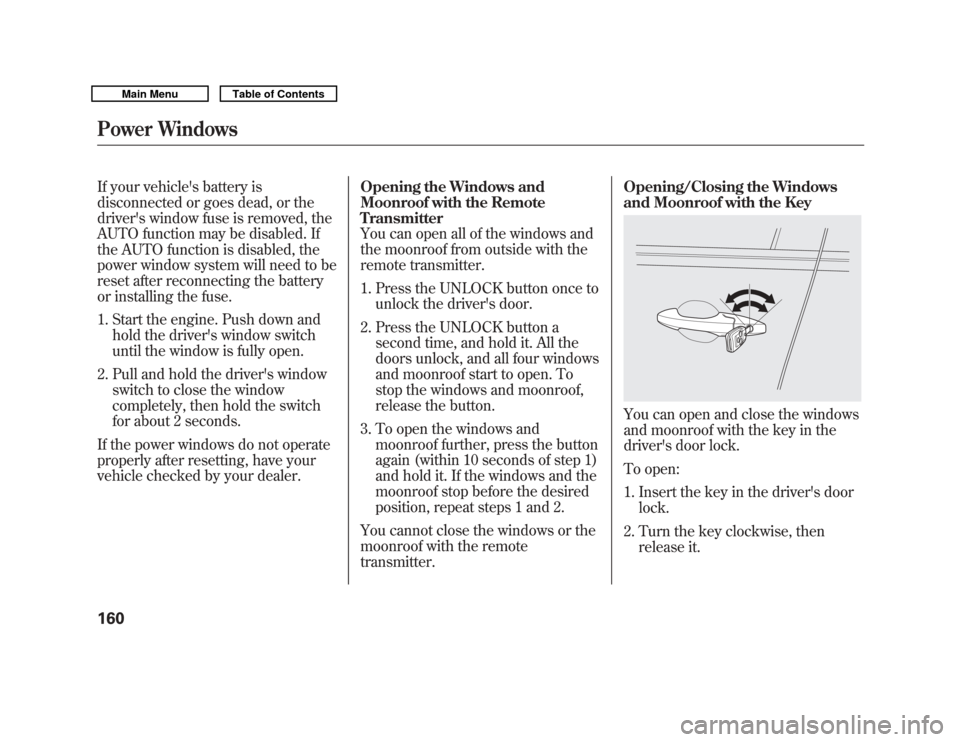
You can open and close the windows
and moonroof with the key in the
driver's door lock.
To open:
1. Insert the key in the driver's door
lock.
2. Turn the key clockwise, then release it.
Power Windows16010/06/29 11:59:04 11 ACURA MDX MMC North America Owner's M 50 31STX640 enu
Page 166 of 609
3. Turn the key clockwise again, andhold it. All four windows and the
moonroof start to open. To stop
the windows and the moonroof,
release the key.
4. To open the windows and the moonroof further, turn and hold
the key again (within 10 seconds
of step 2).
To close: 1. Insert the key in the driver's door lock.
2. Turn the key counterclockwise, then release it.
3. Turn the key counterclockwise again, and hold it. All four windows
and the moonroof start to close. To
stop the windows and the
moonroof, release the key. 4. To close the windows and the
moonroof further, turn and hold
the key again (within 10 seconds
of step 2).
Auto reverse does not work when
closing the windows and moonroof
with the key.
NOTE: If the windows and the
moonroof stop before the desired
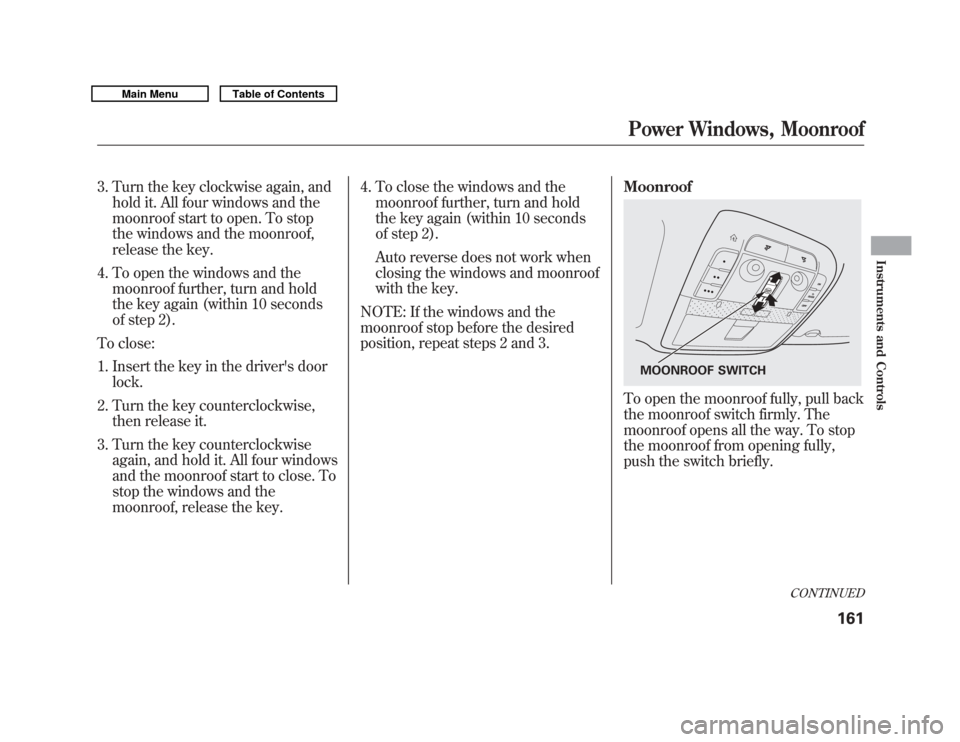
position, repeat steps 2 and 3. Moonroof
To open the moonroof fully, pull back
the moonroof switch firmly. The
moonroof opens all the way. To stop
the moonroof from opening fully,
push the switch briefly.
MOONROOF SWITCH
CONTINUED
Power Windows, Moonroof
161
Instruments and Controls
10/06/29 11:59:04 11 ACURA MDX MMC North America Owner's M 50 31STX640 enu
Page 181 of 609
Each socket is intended to supply
power for 12 volt DC accessories that
are rated 120 watts or less (10 amps).
None of the sockets will power an
automotive type cigarette lighter
element.AC Power Outlet
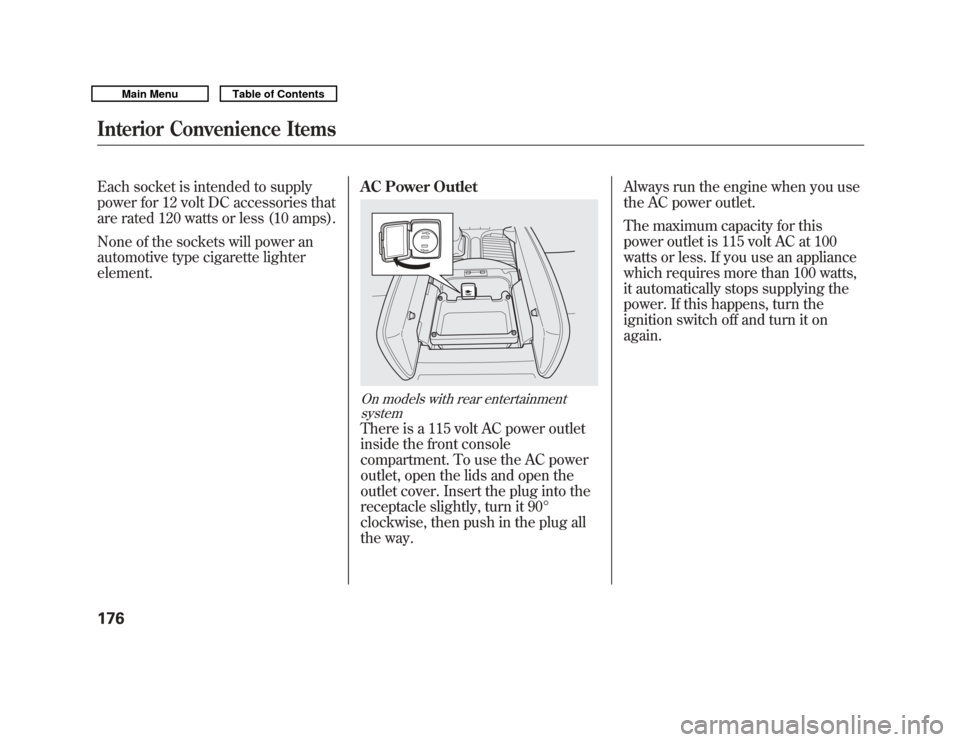
On models with rear entertainment
systemThere is a 115 volt AC power outlet
inside the front console
compartment. To use the AC power
outlet, open the lids and open the
outlet cover. Insert the plug into the
receptacle slightly, turn it 90°
clockwise, then push in the plug all
the way. Always run the engine when you use
the AC power outlet.
The maximum capacity for this
power outlet is 115 volt AC at 100
watts or less. If you use an appliance
which requires more than 100 watts,
it automatically stops supplying the
power. If this happens, turn the
ignition switch off and turn it on
again.
Interior Convenience Items17610/06/29 11:59:04 11 ACURA MDX MMC North America Owner's M 50 31STX640 enu
Page 184 of 609
The climate control system in your
vehicle provides a comfortable driving
environment in all weather conditions.
The standard audio system has many
features. This section describes those
features and how to use them.
Your vehicle has an anti-theft audio
system that requires a code number to
enable it.
The security system helps do
discourage vandalism and theft to
your vehicle.
Climate Control System
...............
180
Rear Climate Controls
..............
185
Audio System
..............................
190
Playing the AM/FM Radio (Models without navigation
system)
................................
191
Playing the XM
®Radio (Models
without navigation system)
......
195 Playing Discs (Models without
navigation system)
...................
200
Disc Changer Error Message (Models without navigation
system)
................................
208
Audio System (Models with navigation system)
...................
209
Playing the AM/FM Radio (Models with navigationsystem)
................................
210
Playing the XM
®Radio (Models
with navigation system)
...........
223
Playing a Disc (Models with
navigation system)
...................
232
Disc Player Error Messages (Models with navigation
system)
................................
243
Protecting Your Discs
..................
244
Playing Hard Disc Drive (HDD)
Audio (Models with navigationsystem)
................................
247
Playing an iPod
®(Models with
navigation system)
...................
275
iPod
®Error Messages (Models
with navigation system)
...........
283 Playing a USB Flash Memory
Device (Models with navigationsystem)
................................
284
USB Flash Memory Device Error
Messages (Models withnavigation system)
...............
294
Bluetooth
®Audio System (Models
with navigation system)
...........
295
AM/FM Radio Reception
.............
300
Remote Audio Controls
................
302
Auxiliary Input Jack
.....................
304
Radio Theft Protection
.................
305
Setting the Clock and Calendar
....
306
Rear Entertainment System
..........
307
Security System
...........................
337
Compass
......................................
338
Cruise Control
.............................
342
Adaptive Cruise Control (ACC)
....
345
HomeLink
®Universal
Transceiver
.............................
360
Bluetooth
®HandsFreeLink
®.........
362
AcuraLink
®(U.S. models only)
.....
398
Rearview Mirror with Rearview Camera Display
.......................
414
Features
179
Features
10/06/29 11:59:04 11 ACURA MDX MMC North America Owner's M 50 31STX640 enu
Page 311 of 609
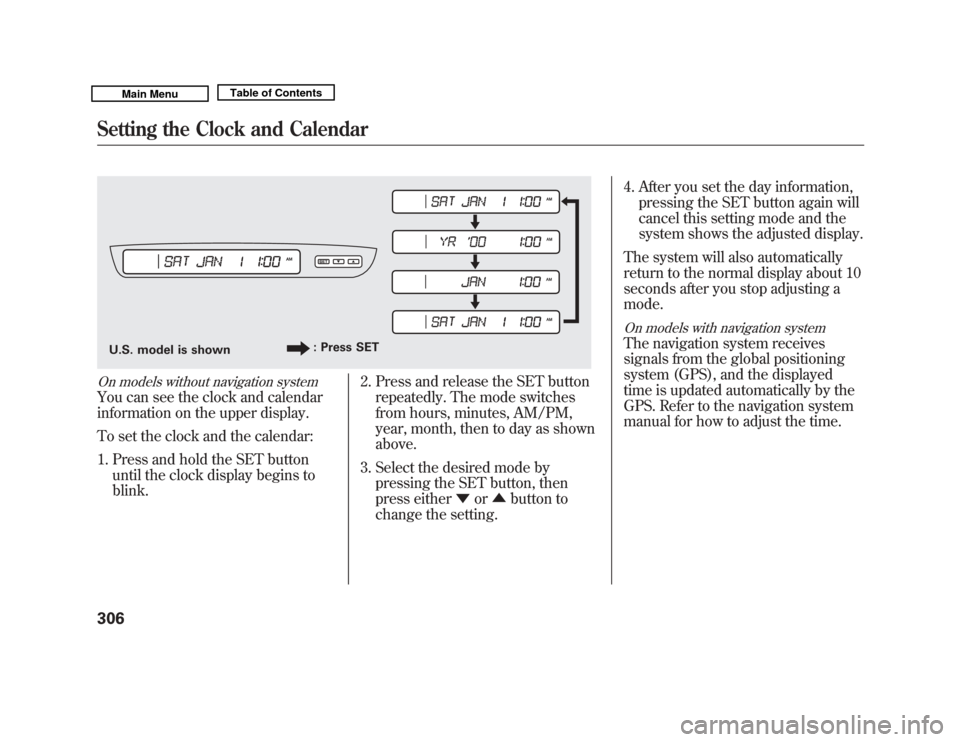
On models without navigation systemYou can see the clock and calendar
information on the upper display.
To set the clock and the calendar:1. Press and hold the SET button until the clock display begins to
blink. 2. Press and release the SET button
repeatedly. The mode switches
from hours, minutes, AM/PM,
year, month, then to day as shown
above.
3. Select the desired mode by pressing the SET button, then
press either ▼or▲ button to
change the setting. 4. After you set the day information,
pressing the SET button again will
cancel this setting mode and the
system shows the adjusted display.
The system will also automatically
return to the normal display about 10
seconds after you stop adjusting a
mode.
On models with navigation systemThe navigation system receives
signals from the global positioning
system (GPS), and the displayed
time is updated automatically by the
GPS. Refer to the navigation system
manual for how to adjust the time.
U.S. model is shown : Press SETSetting the Clock and Calendar30610/06/29 11:59:04 11 ACURA MDX MMC North America Owner's M 50 31STX640 enu
Page 344 of 609
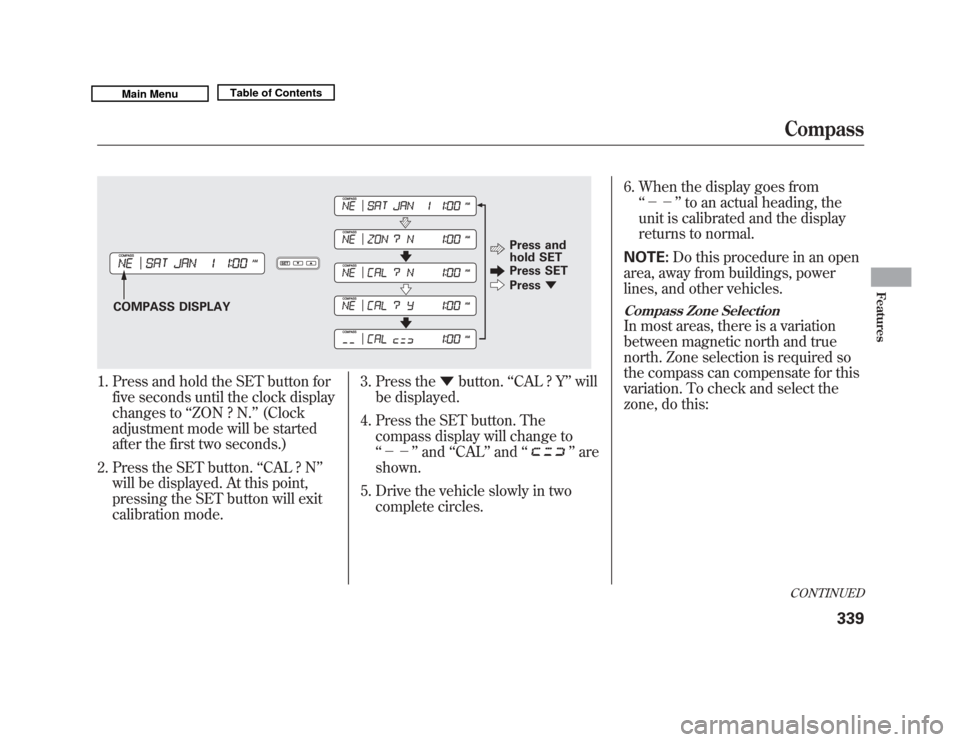
1. Press and hold the SET button forfive seconds until the clock display
changes to ‘‘ZON ? N. ’’(Clock
adjustment mode will be started
after the first two seconds.)
2. Press the SET button. ‘‘CAL ? N ’’
will be displayed. At this point,
pressing the SET button will exit
calibration mode. 3. Press the
▼button. ‘‘CAL ? Y ’’will
be displayed.
4. Press the SET button. The compass display will change to
‘‘-- ’’and ‘‘CAL ’’and ‘‘
’’are
shown.
5. Drive the vehicle slowly in two complete circles. 6. When the display goes from
‘‘-- ’’to an actual heading, the
unit is calibrated and the display
returns to normal.
NOTE: Do this procedure in an open
area, away from buildings, power
lines, and other vehicles.
Compass Zone SelectionIn most areas, there is a variation
between magnetic north and true
north. Zone selection is required so
the compass can compensate for this
variation. To check and select the
zone, do this:
COMPASS DISPLAY Press and
hold SET
Press SET
Press
▼
CONTINUEDCompass
339
Features
10/06/29 11:59:04 11 ACURA MDX MMC North America Owner's M 50 31STX640 enu
Page 345 of 609
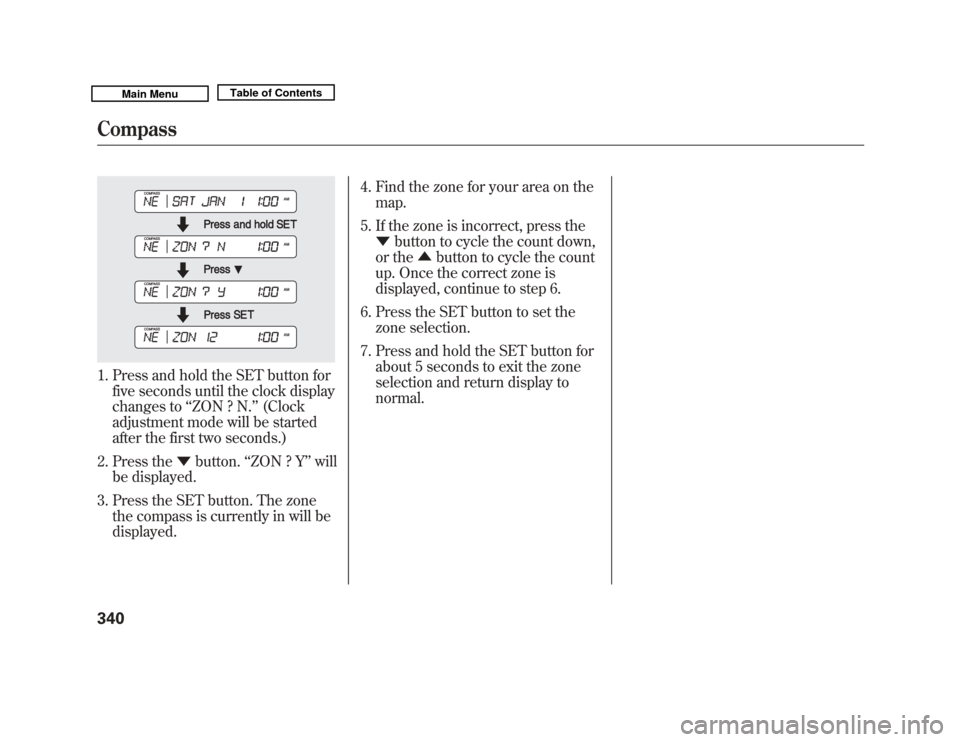
1. Press and hold the SET button forfive seconds until the clock display
changes to ‘‘ZON ? N. ’’(Clock
adjustment mode will be started
after the first two seconds.)
2. Press the ▼button. ‘‘ZON ? Y ’’will
be displayed.
3. Press the SET button. The zone the compass is currently in will be
displayed. 4. Find the zone for your area on the
map.
5. If the zone is incorrect, press the ▼ button to cycle the count down,
or the ▲button to cycle the count
up. Once the correct zone is
displayed, continue to step 6.
6. Press the SET button to set the zone selection.
7. Press and hold the SET button for about 5 seconds to exit the zone
selection and return display to
normal.Compass34010/06/29 11:59:04 11 ACURA MDX MMC North America Owner's M 50 31STX640 enu
Page 520 of 609
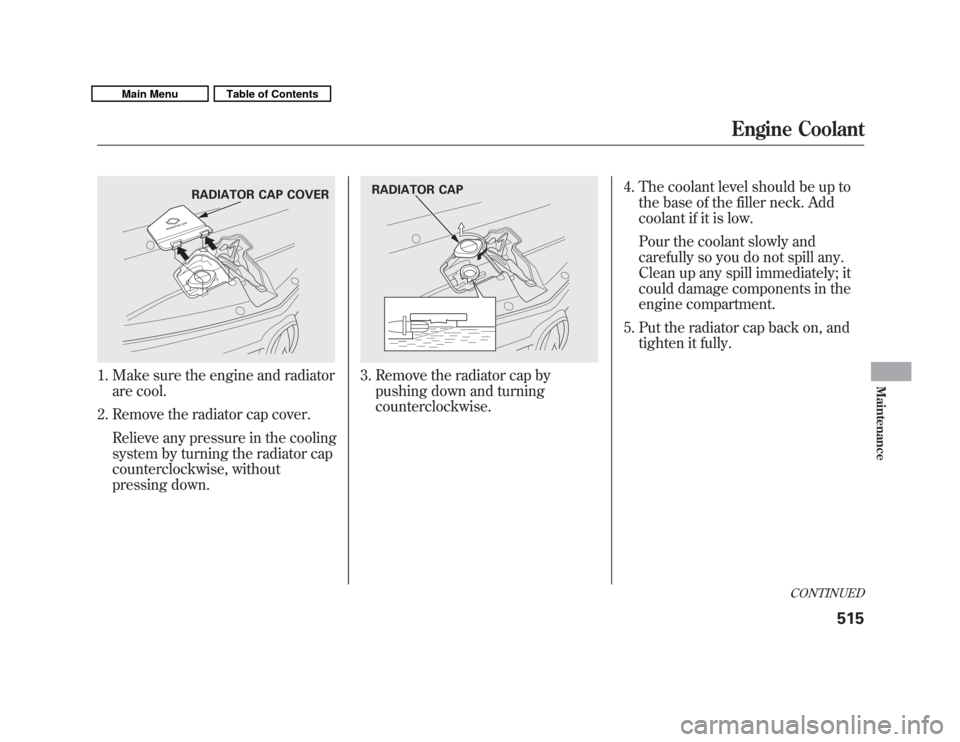
1. Make sure the engine and radiatorare cool.
2. Remove the radiator cap cover. Relieve any pressure in the cooling
system by turning the radiator cap
counterclockwise, without
pressing down.
3. Remove the radiator cap bypushing down and turning
counterclockwise. 4. The coolant level should be up to
the base of the filler neck. Add
coolant if it is low.
Pour the coolant slowly and
carefully so you do not spill any.
Clean up any spill immediately; it
could damage components in the
engine compartment.
5. Put the radiator cap back on, and tighten it fully.
RADIATOR CAP COVER
RADIATOR CAP
CONTINUED
Engine Coolant
515
Maintenance
10/06/29 11:59:04 11 ACURA MDX MMC North America Owner's M 50 31STX640 enu