ECU Acura MDX 2011 Owner's Guide
[x] Cancel search | Manufacturer: ACURA, Model Year: 2011, Model line: MDX, Model: Acura MDX 2011Pages: 609, PDF Size: 12.7 MB
Page 290 of 609
To Play a USB Flash Memory
Device
This audio system can select and
play the audio files on a USB flash
memory device with the same
controls used for the disc player. To
play a USB flash memory device,
connect it to the USB adapter cable
in the console compartment, then
press the USB/AUX button until you
see‘‘USB’’ in the display. The
ignition switch must be in
ACCESSORY (I) or ON (II) position. The audio system reads and plays
the audio files on the USB flash
memory device in MP3, WMA or
ACC
ꭧ
formats. The USB flash
memory device limit is up to 700
folders or up to 15000 files.
ꭧ : Only AAC format files recorded
with iTunes are playable on this
audio unit.
The recommended USB flash
memory devices are 256 MB or
higher, and formatted with the FAT
file system. Some digital audio
players may be compatible as well.
Some USB flash memory devices
(such as devices with security
lockout features, etc.) will not work
in this audio unit.
NOTE:
●
Do not use a device such as a card
reader or hard drive as it or your
files may be damaged.
●
Do not connect your USB flash
memory device using a hub.
●
Do not use an extension cable to
the USB adapter cable equipped
with your vehicle.
●
Do not keep a USB flash memory
device in the vehicle. Direct
sunlight and high heat will damage
it.
●
We recommend backing up your
data before playing a USB flash
memory device.
●
Some devices cannot be powered
or charged via the USB adapter, if
this is the case use the accessory
adapter to supply power to your
device.
●
Depending on the type and
number of files, it may take some
time before they begin to play.
CONTINUED
Playing a USB Flash Memory Device (Models with navigation system)
285
Features
10/06/29 11:59:04 11 ACURA MDX MMC North America Owner's M 50 31STX640 enu
Page 292 of 609
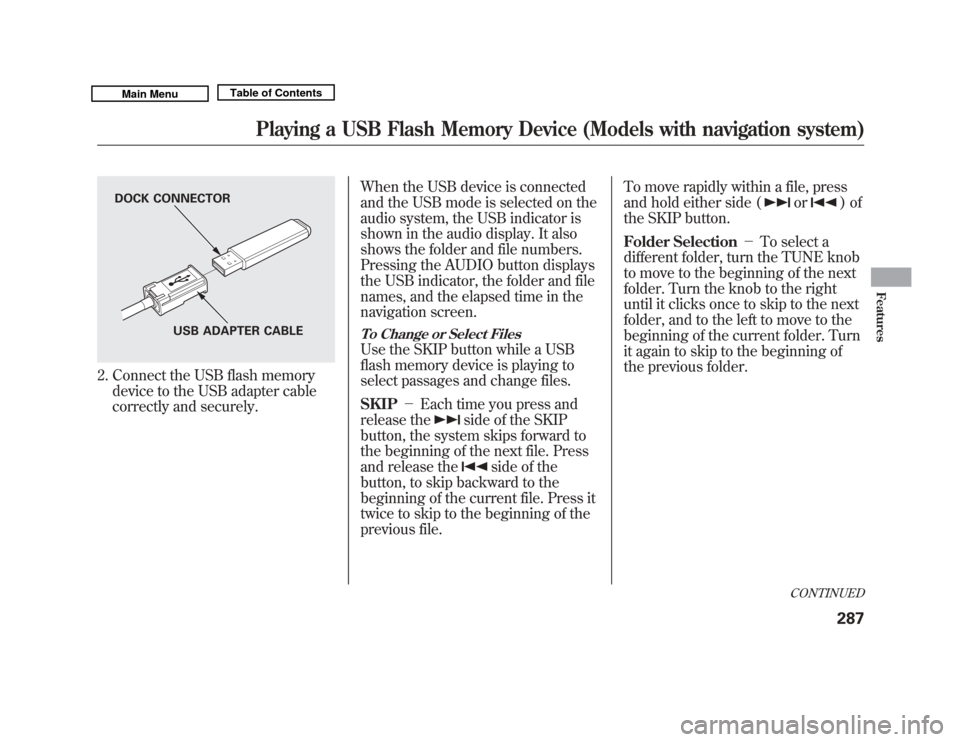
2. Connect the USB flash memorydevice to the USB adapter cable
correctly and securely. When the USB device is connected
and the USB mode is selected on the
audio system, the USB indicator is
shown in the audio display. It also
shows the folder and file numbers.
Pressing the AUDIO button displays
the USB indicator, the folder and file
names, and the elapsed time in the
navigation screen.
To Change or Select FilesUse the SKIP button while a USB
flash memory device is playing to
select passages and change files.
SKIP
-Each time you press and
release the
side of the SKIP
button, the system skips forward to
the beginning of the next file. Press
and release the
side of the
button, to skip backward to the
beginning of the current file. Press it
twice to skip to the beginning of the
previous file. To move rapidly within a file, press
and hold either side (
or
)of
the SKIP button.
Folder Selection -To select a
different folder, turn the TUNE knob
to move to the beginning of the next
folder. Turn the knob to the right
until it clicks once to skip to the next
folder, and to the left to move to the
beginning of the current folder. Turn
it again to skip to the beginning of
the previous folder.
DOCK CONNECTOR
USB ADAPTER CABLE
CONTINUED
Playing a USB Flash Memory Device (Models with navigation system)
287
Features
10/06/29 11:59:04 11 ACURA MDX MMC North America Owner's M 50 31STX640 enu
Page 342 of 609
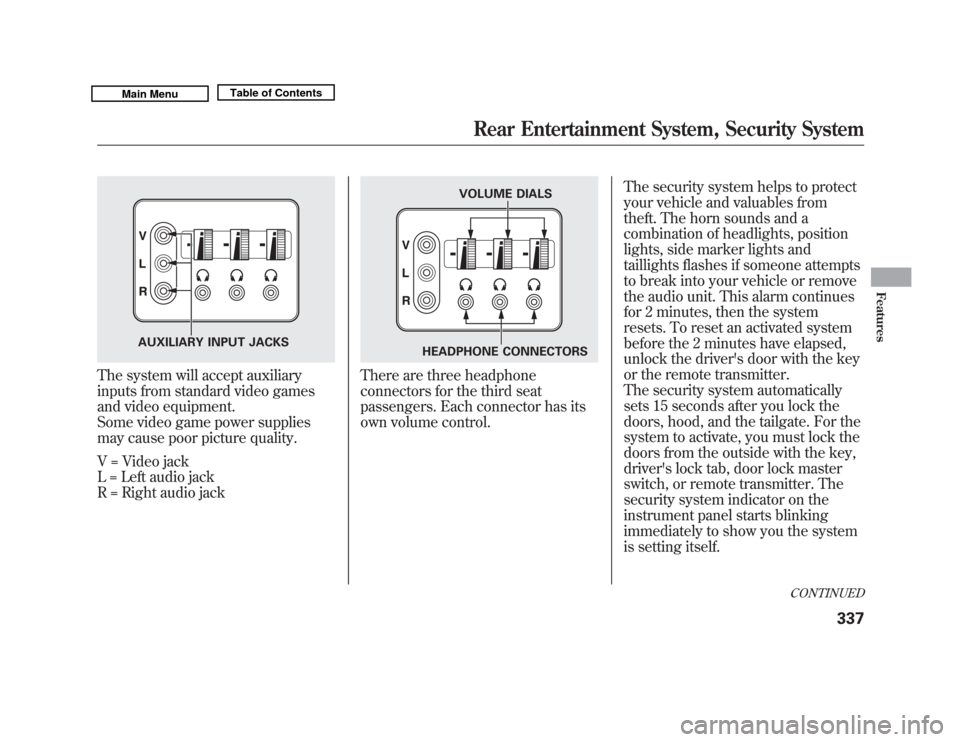
The system will accept auxiliary
inputs from standard video games
and video equipment.
Some video game power supplies
may cause poor picture quality.
V = Video jack
L = Left audio jack
R = Right audio jack
There are three headphone
connectors for the third seat
passengers. Each connector has its
own volume control.The security system helps to protect
your vehicle and valuables from
theft. The horn sounds and a
combination of headlights, position
lights, side marker lights and
taillights flashes if someone attempts
to break into your vehicle or remove
the audio unit. This alarm continues
for 2 minutes, then the system
resets. To reset an activated system
before the 2 minutes have elapsed,
unlock the driver's door with the key
or the remote transmitter.
The security system automatically
sets 15 seconds after you lock the
doors, hood, and the tailgate. For the
system to activate, you must lock the
doors from the outside with the key,
driver's lock tab, door lock master
switch, or remote transmitter. The
security system indicator on the
instrument panel starts blinking
immediately to show you the system
is setting itself.
AUXILIARY INPUT JACKS
VOLUME DIALS
HEADPHONE CONNECTORS
CONTINUED
Rear Entertainment System, Security System
337
Features
10/06/29 11:59:04 11 ACURA MDX MMC North America Owner's M 50 31STX640 enu
Page 343 of 609
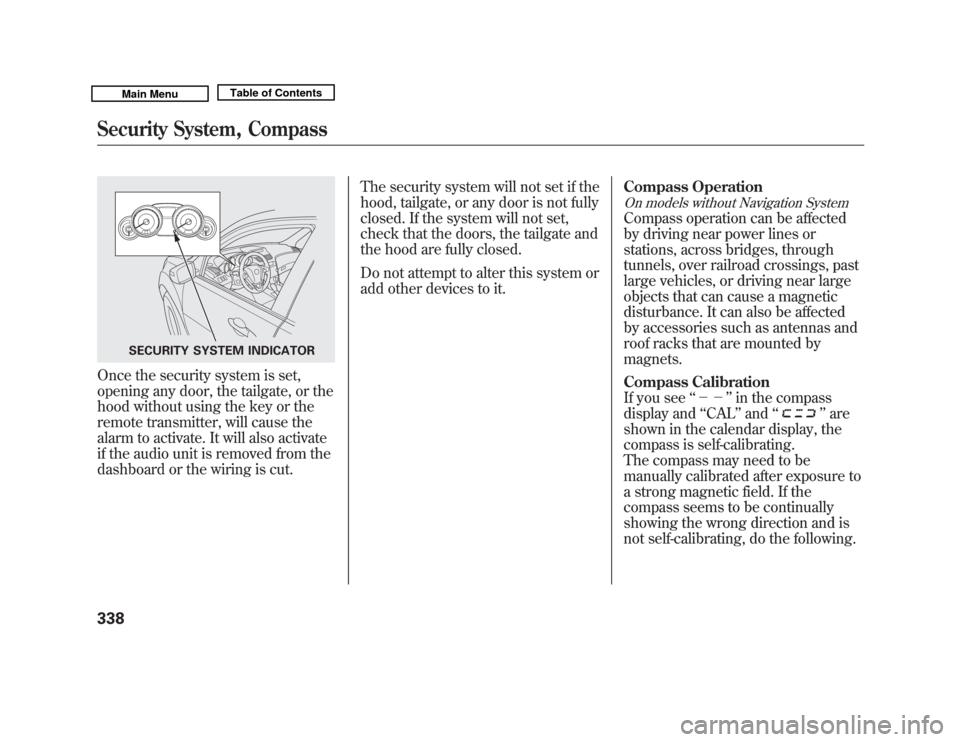
Once the security system is set,
opening any door, the tailgate, or the
hood without using the key or the
remote transmitter, will cause the
alarm to activate. It will also activate
if the audio unit is removed from the
dashboard or the wiring is cut.The security system will not set if the
hood, tailgate, or any door is not fully
closed. If the system will not set,
check that the doors, the tailgate and
the hood are fully closed.
Do not attempt to alter this system or
add other devices to it.
Compass Operation
On models without Navigation SystemCompass operation can be affected
by driving near power lines or
stations, across bridges, through
tunnels, over railroad crossings, past
large vehicles, or driving near large
objects that can cause a magnetic
disturbance. It can also be affected
by accessories such as antennas and
roof racks that are mounted by
magnets.
Compass Calibration
If you see
‘‘-- ’’in the compass
display and ‘‘CAL ’’and ‘‘
’’are
shown in the calendar display, the
compass is self-calibrating.
The compass may need to be
manually calibrated after exposure to
a strong magnetic field. If the
compass seems to be continually
showing the wrong direction and is
not self-calibrating, do the following.
SECURITY SYSTEM INDICATOR
Security System, Compass33810/06/29 11:59:04 11 ACURA MDX MMC North America Owner's M 50 31STX640 enu
Page 365 of 609

The HomeLink
®Universal
Transceiver built into your vehicle can
be programmed to operate up to three
remote controlled devices around
your home, such as garage doors,
lighting, or home security systems.
General Safety InformationBefore programming your HomeLink
to operate a garage door opener,
confirm that the opener has an
external entrapment protection
system, such as an ‘‘electronic eye, ’’or
other safety and reverse stop features.
If your garage door was manufactured
before April 1, 1982, you may not be
able to program HomeLink to operate
it. These units do not have safety
features that cause the motor to stop
and reverse it if an obstacle is
detected during closing, increasing
the risk of injury. Do not use
HomeLink with any garage door
opener that lacks safety stop and
reverse features. Units manufactured between April 1,
1982 and January 1, 1993 may be
equipped with safety stop and reverse
features. If your unit does not have an
external entrapment protection
system, an easy test to confirm the
function and performance of the safety
stop and reverse feature is to lay a 2
╳
4 under the closing door. The door
should stop and reverse upon
contacting the piece of wood.
As an additional safety feature, garage
door openers manufactured after
January 1, 1993 are required to have
external entrapment protection
systems, such as an electronic eye,
which detect an object obstructing the
door.
Important Safety PrecautionsRefer to the safety information that came
with your garage door opener to test that
the safety features are functioning
properly. If you do not have this
information, contact the manufacturer of
the equipment.
Before programming HomeLink to a
garage door or gate opener, make sure
that people and objects are out of the way
of the device to prevent potential injury or
damage.
When programming a garage door opener,
park just outside the garage.Training HomeLinkBefore you begin
- If you just
received your vehicle and have not
trained any of the buttons in
HomeLink before, you should erase
any previously learned codes before
training the first button.
To do this, press and hold the two
outside buttons on the HomeLink
transceiver for about 20 seconds,
until the red indicator flashes.
Release the buttons, then proceed to
step 1.
HomeLink
®
Universal Transceiver
36010/06/29 11:59:04 11 ACURA MDX MMC North America Owner's M 50 31STX640 enu
Page 373 of 609

Press and release the HFL Talk button each time you give a command.‘‘
System
Set up ’’
ꭧ : Canadian modelsPress HFL
Talk button
‘‘
Security ’’
‘‘ Change Passcode ’’
‘‘ Call Notification ’’
‘‘ Auto Transfer ’’
‘‘ Clear ’’
‘‘ Change Language ’’
‘‘ Tutorial ’’
‘‘ Hands Free Help ’’Change language from English to French (See page 378)
ꭧ
Hear a list of available commands and additional information describing each
command (See page 364)
Hear a tutorial for general rules on using the system (See page 364) Clear the system of all paired phones, phonebook entries and security
passcode (See page 377)
Set calls to automatically transfer from your phone to HFL when
you enter the vehicle (See page 377)
Set how you would like to be notified of an incoming call
(See page 376)
Change your security passcode (See page 376)
Apply a security passcode to the system that must be input at each
key cycle to access the system (See page 376)
Bluetooth
®
HandsFreeLink
®
36810/06/29 11:59:04 11 ACURA MDX MMC North America Owner's M 50 31STX640 enu
Page 381 of 609

To set a 4-digit passcode to lock theHFL system for security purposes:Press and release the HFL Talk
button before a command.
1. Say ‘‘System setup .’’
2. Say ‘‘Security ’’after the prompts.
3. Follow the HFL prompts and say the 4-digit passcode you want to
set.
4. Follow the HFL prompts to confirm the number. NOTE:
Once a passcode is set, you
will need to enter it to use HFL each
time you start the vehicle. If you
forget the code, your dealer will have
to reset it for you, or you will have to
clear the entire system (see page
377).
To change your security pass code:Press and release the HFL Talk
button before a command.
1. Say ‘‘System setup .’’
2. Say ‘‘Change passcode ’’after the
prompts.
3. Follow the HFL prompts and say the new 4-digit passcode.
4. Follow the HFL prompts to confirm the number.
Bluetooth
®
HandsFreeLink
®
37610/06/29 11:59:04 11 ACURA MDX MMC North America Owner's M 50 31STX640 enu
Page 426 of 609
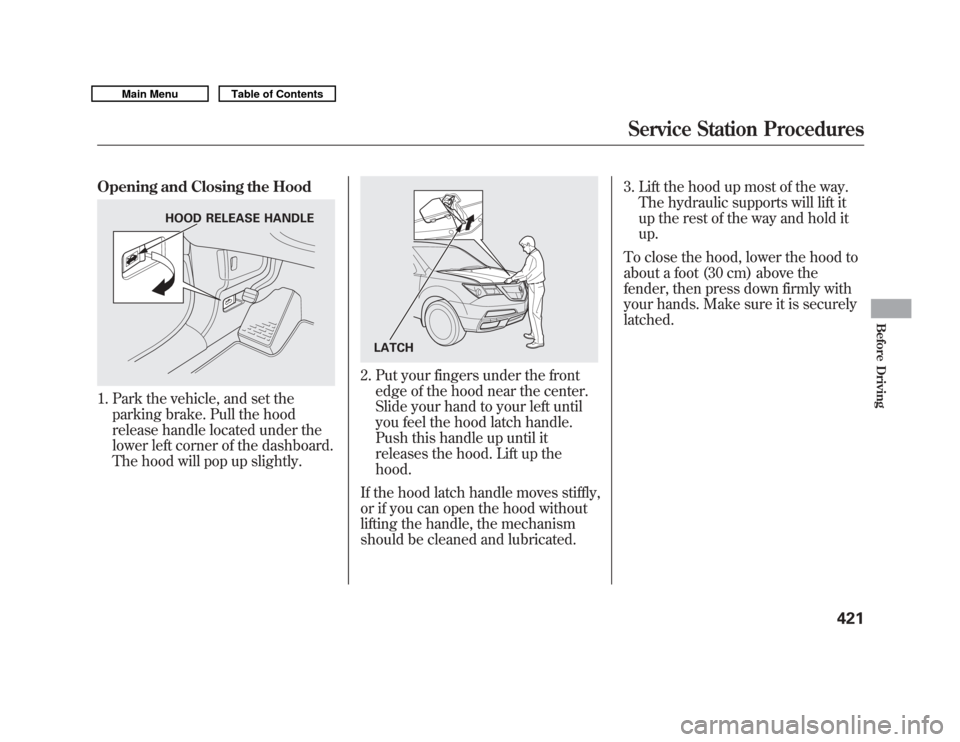
Opening and Closing the Hood1. Park the vehicle, and set theparking brake. Pull the hood
release handle located under the
lower left corner of the dashboard.
The hood will pop up slightly.
2. Put your fingers under the frontedge of the hood near the center.
Slide your hand to your left until
you feel the hood latch handle.
Push this handle up until it
releases the hood. Lift up the
hood.
If the hood latch handle moves stiffly,
or if you can open the hood without
lifting the handle, the mechanism
should be cleaned and lubricated. 3. Lift the hood up most of the way.
The hydraulic supports will lift it
up the rest of the way and hold it
up.
To close the hood, lower the hood to
about a foot (30 cm) above the
fender, then press down firmly with
your hands. Make sure it is securely
latched.
HOOD RELEASE HANDLE
LATCH
Service Station Procedures
421
Before Driving
10/06/29 11:59:04 11 ACURA MDX MMC North America Owner's M 50 31STX640 enu
Page 436 of 609
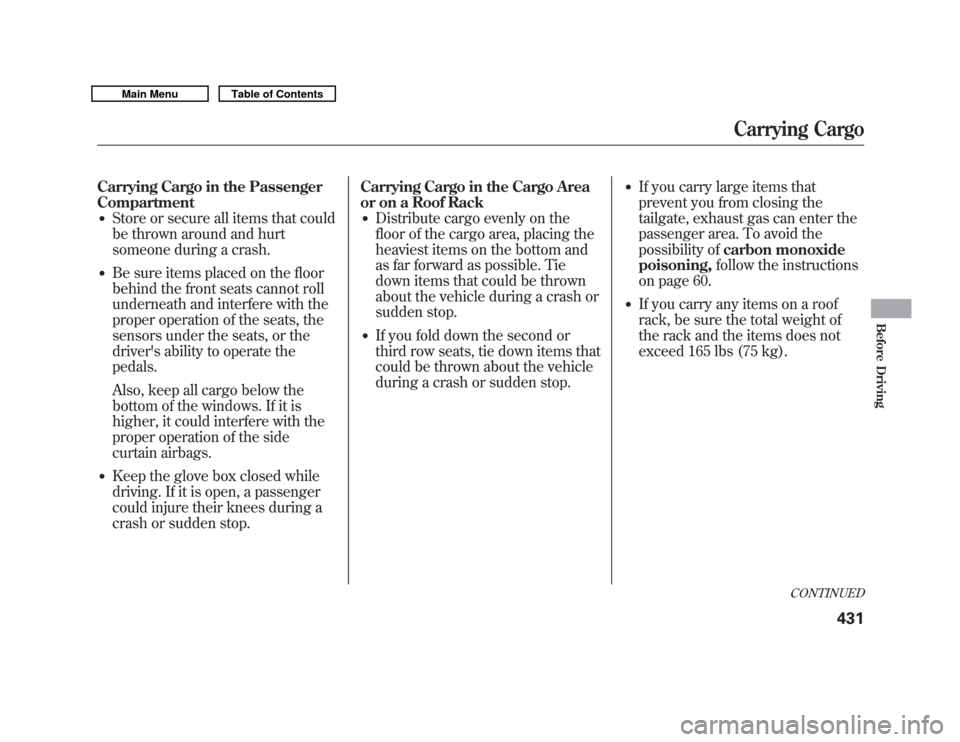
Carrying Cargo in the Passenger
Compartment●
Store or secure all items that could
be thrown around and hurt
someone during a crash.
●
Be sure items placed on the floor
behind the front seats cannot roll
underneath and interfere with the
proper operation of the seats, the
sensors under the seats, or the
driver's ability to operate the
pedals.
Also, keep all cargo below the
bottom of the windows. If it is
higher, it could interfere with the
proper operation of the side
curtain airbags.
●
Keep the glove box closed while
driving. If it is open, a passenger
could injure their knees during a
crash or sudden stop.Carrying Cargo in the Cargo Area
or on a Roof Rack
●
Distribute cargo evenly on the
floor of the cargo area, placing the
heaviest items on the bottom and
as far forward as possible. Tie
down items that could be thrown
about the vehicle during a crash or
sudden stop.
●
If you fold down the second or
third row seats, tie down items that
could be thrown about the vehicle
during a crash or sudden stop.
●
If you carry large items that
prevent you from closing the
tailgate, exhaust gas can enter the
passenger area. To avoid the
possibility of
carbon monoxide
poisoning, follow the instructions
on page 60.
●
If you carry any items on a roof
rack, be sure the total weight of
the rack and the items does not
exceed 165 lbs (75 kg).
CONTINUED
Carrying Cargo
431
Before Driving
10/06/29 11:59:04 11 ACURA MDX MMC North America Owner's M 50 31STX640 enu
Page 437 of 609
Optional Separation Net
The separation net can be used to
hold back soft, lightweight items
stored in the cargo area. Heavy items
should be tied down, as the net may
not prevent them from being thrown
about the vehicle in a crash or a
sudden stop.
Optional Cargo Cover
The cargo cover can be used to cover
the cargo area behind the third row
seats. When the third row seats are
folded down, the cargo cover can be
extended over the larger area. Do not
install the cover over the larger area
if the third row seats are not folded
down.Cargo Hooks
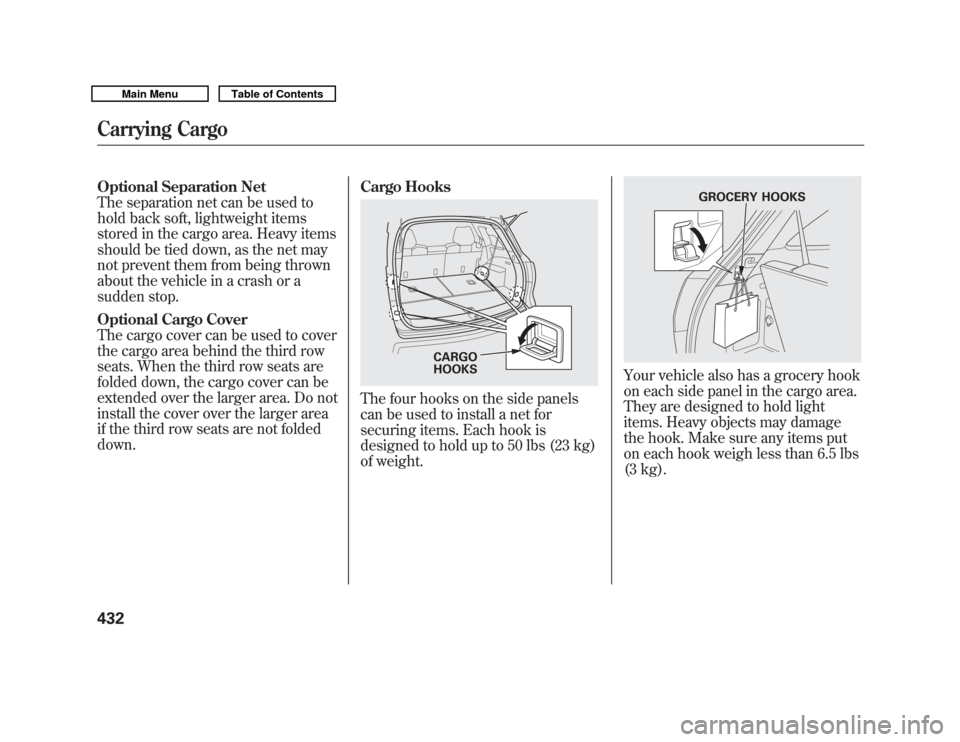
The four hooks on the side panels
can be used to install a net for
securing items. Each hook is
designed to hold up to 50 lbs (23 kg)
of weight.
Your vehicle also has a grocery hook
on each side panel in the cargo area.
They are designed to hold light
items. Heavy objects may damage
the hook. Make sure any items put
on each hook weigh less than 6.5 lbs
(3 kg).
CARGO
HOOKS
GROCERY HOOKS
Carrying Cargo43210/06/29 11:59:04 11 ACURA MDX MMC North America Owner's M 50 31STX640 enu