Address Acura MDX 2017 Navigation Manual
[x] Cancel search | Manufacturer: ACURA, Model Year: 2017, Model line: MDX, Model: Acura MDX 2017Pages: 369, PDF Size: 29.59 MB
Page 43 of 369
42
Personal InformationAddress Book
System Setup
The following items are available:
• Current Position: Select your current location.
• Address: Enter an address on the character input screen when prompted.
2
Address P. 90
• Previous Destinations: Select a previous destination.
2
Previous Destination P. 97
• Place Name: Enter the name of a place/landmark.
2
Place Name P. 102
• Local Search: Sets a destination by using Local Search.
2
Local Search P. 100
• Place Category: Select a category to search for a place/landmark (e.g., Banking,
Lodging).
2
Place Category P. 98
• More Search Methods : Displays additional search method entries.
2
Entering a Destination P. 88
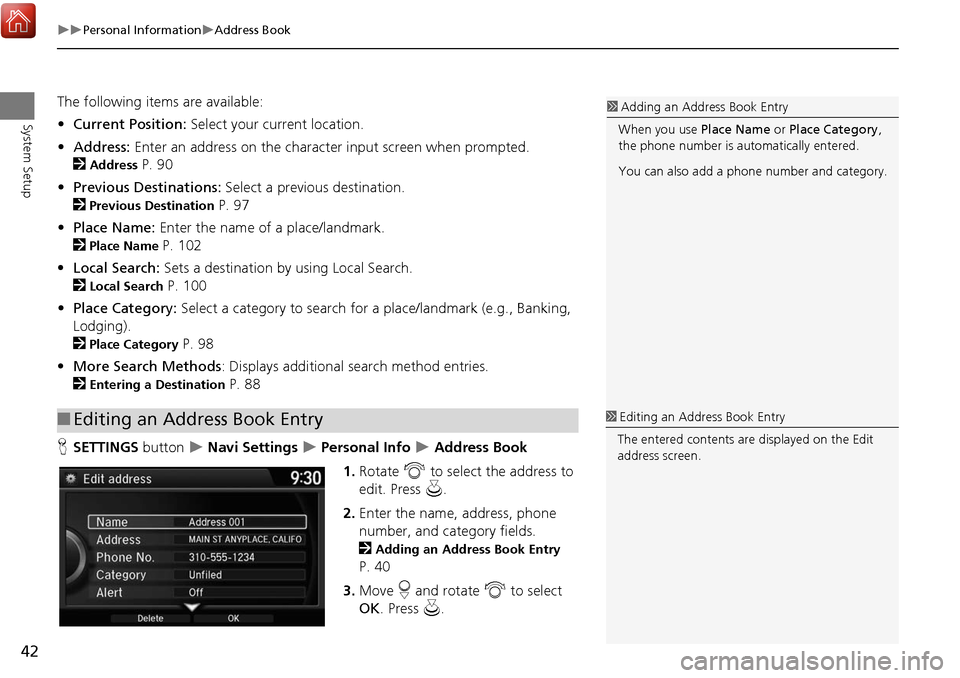
H SETTINGS button
Navi Settings Personal Info Address Book
1. Rotate i to select the address to
edit. Press u.
2. Enter the name, address, phone
number, and category fields.
2
Adding an Address Book Entry
P. 40
3. Move r and rotate i to select
OK . Press u.
■Editing an Address Book Entry
1 Adding an Address Book Entry
When you use Place Name or Place Category ,
the phone number is au tomatically entered.
You can also add a phone number and category.
1 Editing an Address Book Entry
The entered contents are displayed on the Edit
address screen.
Page 44 of 369
43
Personal InformationAddress Book
System Setup
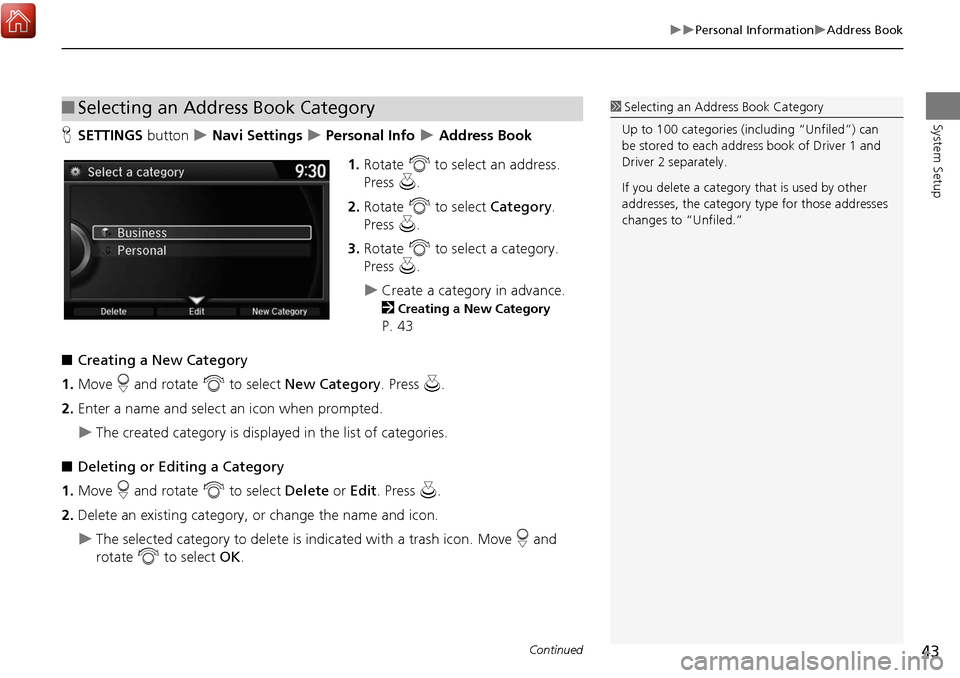
HSETTINGS button Navi Settings Personal Info Address Book
1. Rotate i to select an address.
Press u.
2. Rotate i to select Category .
Press u.
3. Rotate i to select a category.
Press u.
Create a category in advance.
2
Creating a New Category
P. 43
■ Creating a New Category
1. Move r and rotate i to select New Category . Press u.
2. Enter a name and select an icon when prompted.
The created category is displayed in the list of categories.
■ Deleting or Editing a Category
1. Move r and rotate i to select Delete or Edit. Press u.
2. Delete an existing category, or change the name and icon.
The selected category to delete is indicated with a trash icon. Move r and
rotate i to select OK .
■Selecting an Address Book Category1 Selecting an Addr ess Book Category
Up to 100 categories (inc luding “Unfiled”) can
be stored to each addr ess book of Driver 1 and
Driver 2 se parately.
If you delete a category that is used by other
addresses, the category type for those addresses
changes to “Unfiled.”
Continued
Page 45 of 369
44
Personal InformationAddress Book
System Setup
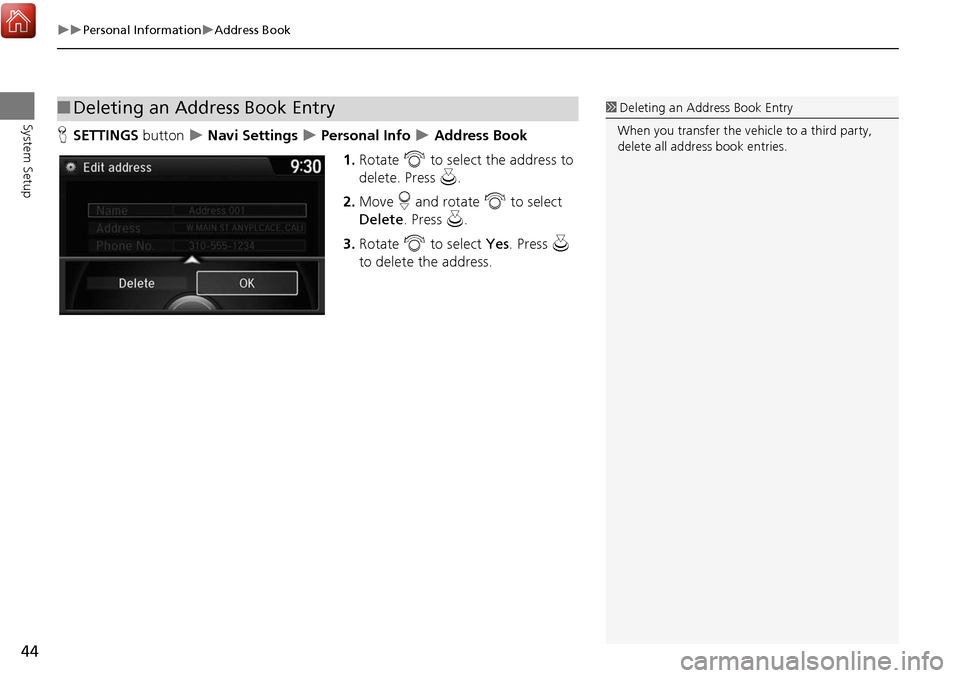
HSETTINGS button Navi Settings Personal Info Address Book
1. Rotate i to select the address to
delete. Press u.
2. Move r and rotate i to select
Delete . Press u .
3. Rotate i to select Yes . Press u
to delete the address.
■ Deleting an Address Book Entry1 Deleting an Address Book Entry
When you transfer the vehicle to a third party,
delete all address book entries.
Page 46 of 369
45
Personal InformationAddress Book
System Setup
You can store up to six addresses previously stored in your Address Book, and a
home address for your preset destinations.
■Storing an address on the Shortcut
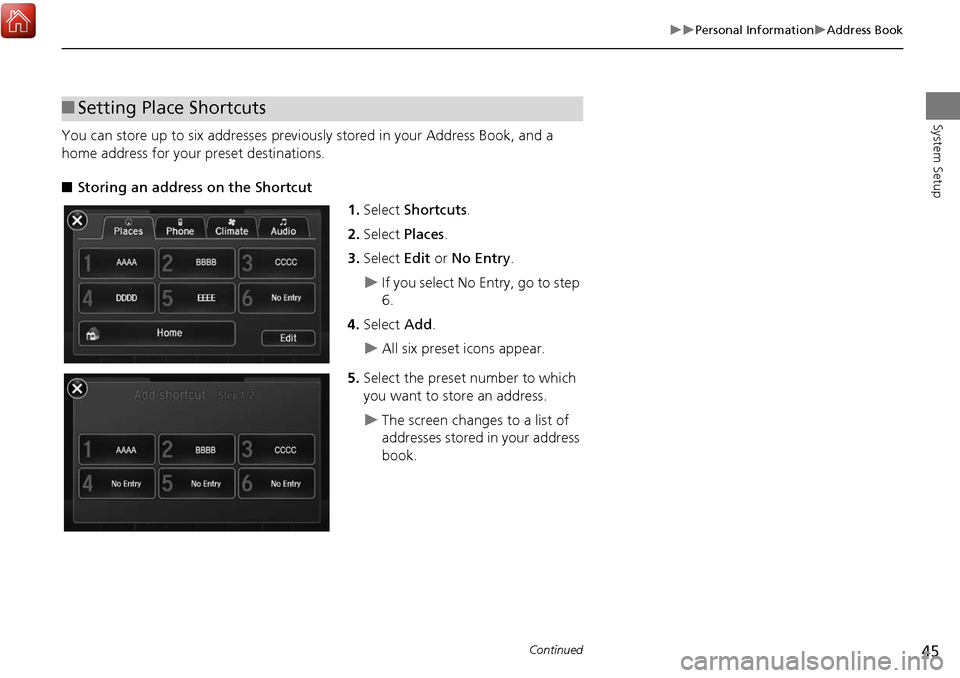
1.Select Shortcuts .
2. Select Places.
3. Select Edit or No Entry .
If you select No Entry, go to step
6.
4. Select Add.
All six preset icons appear.
5. Select the preset number to which
you want to store an address.
The screen changes to a list of
addresses stored in your address
book.
■Setting Place Shortcuts
Continued
Page 47 of 369
46
Personal InformationAddress Book
System Setup
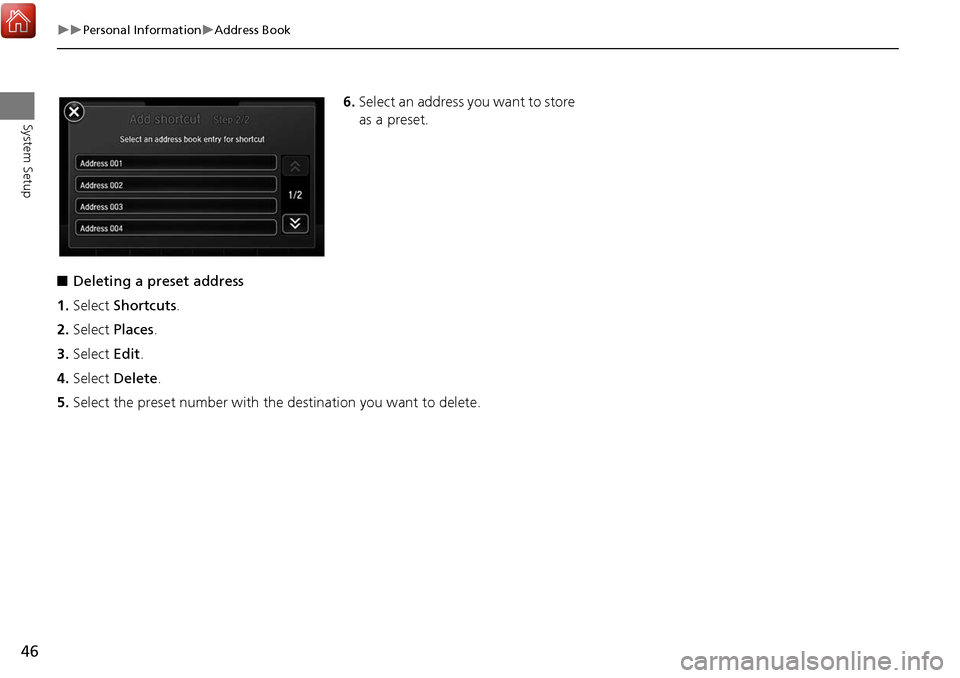
6.Select an address you want to store
as a preset.
■ Deleting a preset address
1. Select Shortcuts .
2. Select Places.
3. Select Edit.
4. Select Delete .
5. Select the preset number with the destination you want to delete.
Page 48 of 369
47
Personal InformationHome Address
System Setup
Home Address
HSETTINGS button Navi Settings Personal Info Edit Go Home
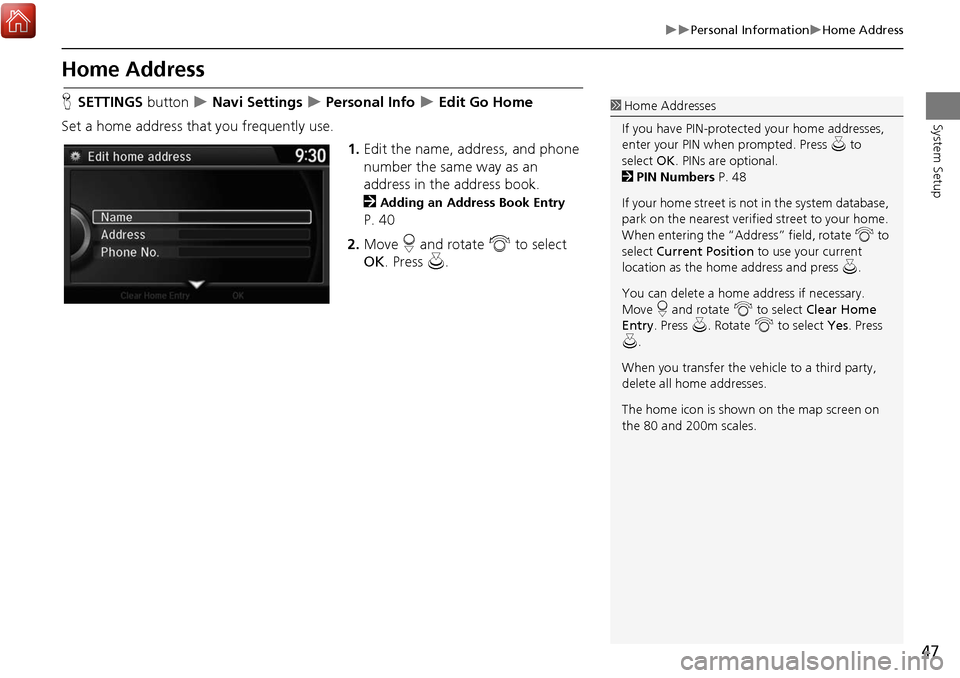
Set a home address that you frequently use. 1.Edit the name, address, and phone
number the same way as an
address in the address book.
2
Adding an Address Book Entry
P. 40
2. Move r and rotate i to select
OK . Press u.
1Home Addresses
If you have PIN-protecte d your home addresses,
enter your PIN when prompted. Press u to
select OK. PINs are optional.
2 PIN Numbers P. 48
If your home street is not in the system database,
park on the nearest verified street to your home.
When entering the “Address” field, rotate i to
select Current Position to use your current
location as the home address and press u.
You can delete a home address if necessary.
Move r and rotate i to select Clear Home
Entry . Press u . Rotate i to select Yes. Press
u .
When you transfer the vehicle to a third party,
delete all home addresses.
The home icon is shown on the map screen on
the 80 and 200m scales.
Page 49 of 369
48
Personal InformationPIN Numbers
System Setup
PIN Numbers
HSETTINGS button Navi Settings Personal Info PIN Number
Set a four-digit PIN for protecting persona l addresses and your home address. Once
you set a PIN, you are prompted to enter it whenever you access a personal address
or a home address.
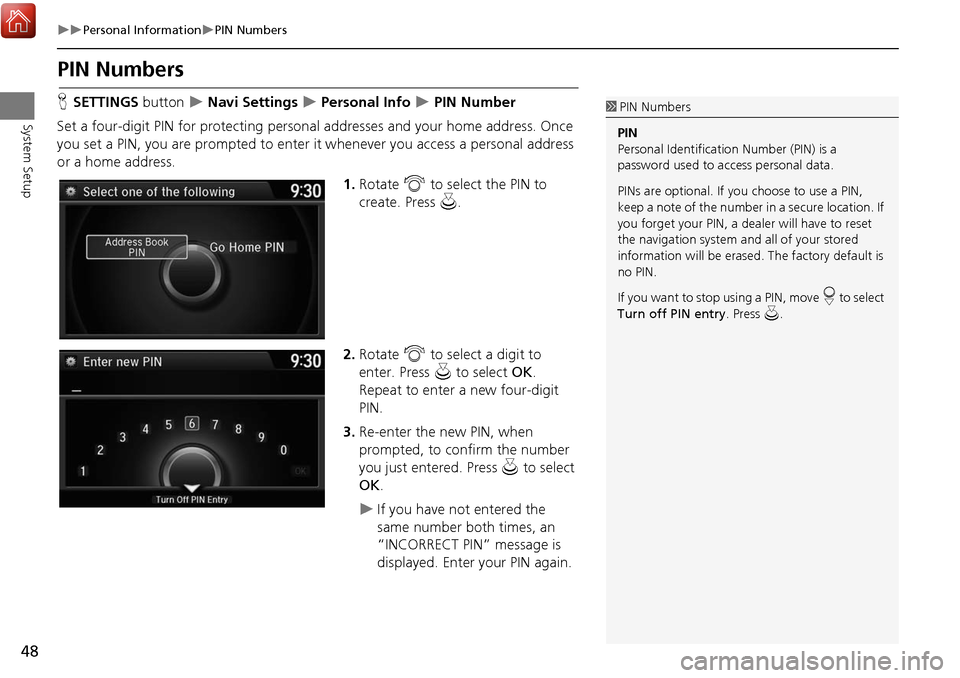
1.Rotate i to select the PIN to
create. Press u.
2. Rotate i to select a digit to
enter. Press u to select OK .
Repeat to enter a new four-digit
PIN.
3. Re-enter the new PIN, when
prompted, to confirm the number
you just entered. Press u to select
OK .
If you have not entered the
same number both times, an
“INCORRECT PIN” message is
displayed. Enter your PIN again.
1PIN Numbers
PIN
Personal Identification Number (PIN) is a
password used to access personal data.
PINs are optional. If you choose to use a PIN,
keep a note of the number in a secure location. If
you forget your PIN, a dealer will have to reset
the navigation system a nd all of your stored
information will be erased . The factory default is
no PIN.
If you want to stop using a PIN, move
r to select
Turn off PIN entry . Press u.
Page 58 of 369
57
RoutingUnverified Routing
System Setup
Unverified Routing
HSETTINGS button Navi Settings Routing Unverified Routing
Receive turn-by-turn map and voice guidance in unverified areas. Rotate i to select On or Off . Press
u .1Unverified Routing
Unverified roads are found in rural areas, and
typically include residential streets away from the
center of a town. They may not be accurate, and
can contain errors in location, naming, and
address range.
Unverified roads are s hown only when viewing
the map in the 80, 200, 400, 800 (m), 1.6 and
3.2 (km) map scales.
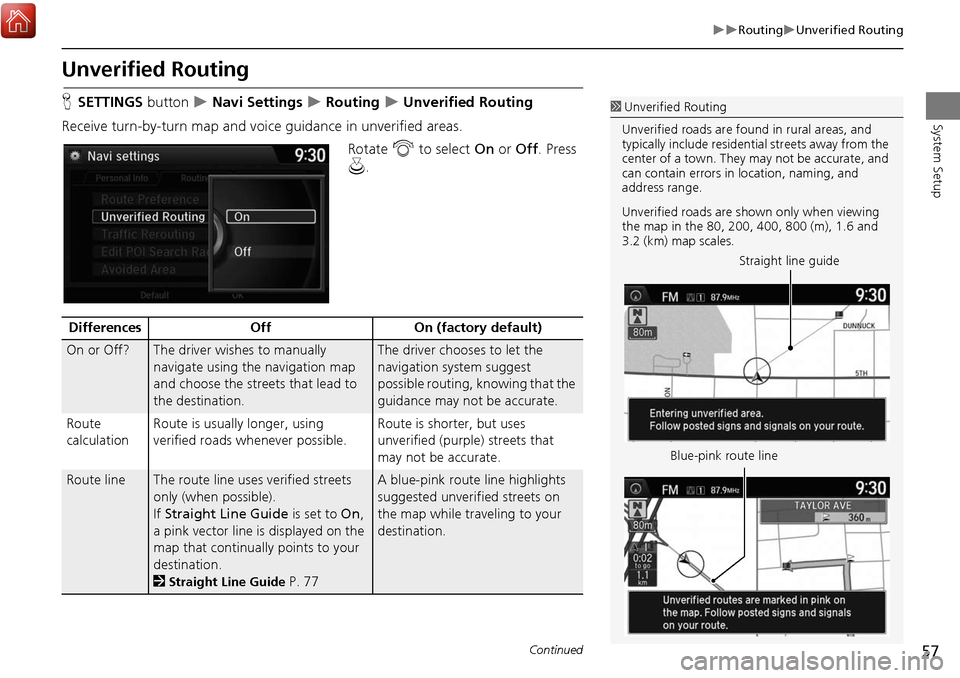
Straight line guide
Blue-pink route line
Differences OffOn (factory default)
On or Off?The driver wishes to manually
navigate using the navigation map
and choose the streets that lead to
the destination.The driver chooses to let the
navigation system suggest
possible routing, knowing that the
guidance may not be accurate.
Route
calculation Route is usually longer, using
verified roads whenever possible. Route is shorter, but uses
unverified (purple)
streets that
may not be accurate.
Route lineThe route line uses verified streets
only (when possible).
If Straight Line Guide is set to On,
a pink vector line is displayed on the
map that continually points to your
destination.
2
Straight Line Guide P. 77
A blue-pink route line highlights
suggested unverified streets on
the map while traveling to your
destination.
Continued
Page 63 of 369
62
RoutingAvoided Area
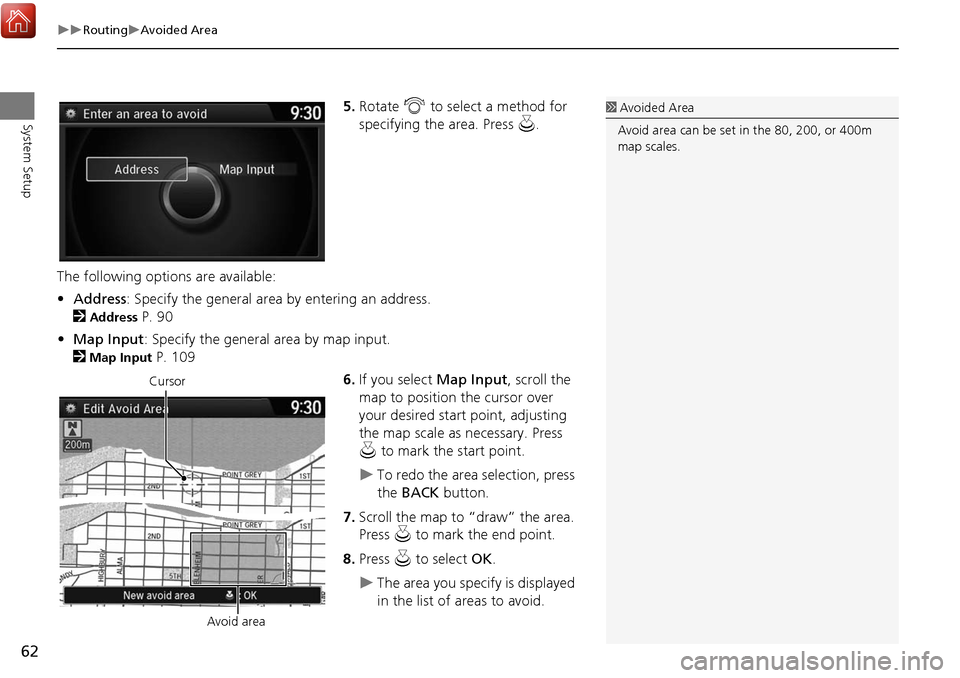
System Setup5.Rotate i to select a method for
specifying the area. Press u.
The following options are available:
• Address : Specify the general area by entering an address.
2
Address P. 90
• Map Input : Specify the general area by map input.
2
Map Input P. 109
6.If you select Map Input, scroll the
map to position the cursor over
your desired start point, adjusting
the map scale as necessary. Press
u to mark the start point.
To redo the area selection, press
the BACK button.
7. Scroll the map to “draw” the area.
Press u to mark the end point.
8. Press u to select OK.
The area you specify is displayed
in the list of areas to avoid.
1Avoided Area
Avoid area can be set in the 80, 200, or 400m
map scales.
Cursor
Avoid area
Page 72 of 369

71
MapShowing Icons on Map
System Setup
Showing Icons on Map
HSETTINGS button Navi Settings Map Show Icon on Map
Select the icons that are displayed on the map. 1.Rotate i to select an item. Press
u .
2. Rotate i to select an option.
Press u.
Repeat step 1 and 2 as
necessary.
3. Move r to select OK. Press u.
The following options are available:
• All On : Displays the landmark icons.
2
Map Screen Legend P. 9
• Customize : Fine-tunes the icon display.
2
Fine-tuning the Icons P. 72
• Off : Hides the landmark icons.
1Showing Icons on Map
If you have PIN-protec ted your address book,
enter your PIN when prompted. Move r to
select OK. PINs are optional.
2 PIN Numbers P. 48
Continued