Acura MDX 2017 Navigation Manual
Manufacturer: ACURA, Model Year: 2017,
Model line: MDX,
Model: Acura MDX 2017
Pages: 369, PDF Size: 29.59 MB
Acura MDX 2017 Navigation Manual
MDX 2017
Acura
Acura
https://www.carmanualsonline.info/img/32/9715/w960_9715-0.png
Acura MDX 2017 Navigation Manual
Trending: air condition, width, USB port, set clock, tow, trip computer, wheel size
Page 291 of 369
290
Rear Control Panel OperationDual Screen Mode (Ultrawide RES only)
Rear Entertainment System
■Single mode to Dual mode
■ Dual mode to Single mode
DVD
Press the DUAL
button. Select the side
(e.g., “Left”).
Select a source
(e.g., “REAR
AUX Video”).
Press the SWAP
button.
DVD REAR AUX Video REAR AUX Video DVD
REAR AUX Video DVD
Press the
SINGLE button. Select a source
(e.g., “DVD”).DVD
Page 292 of 369
291
Rear Control Panel OperationReplacing the Batteries
Rear Entertainment System
Replacing the Batteries
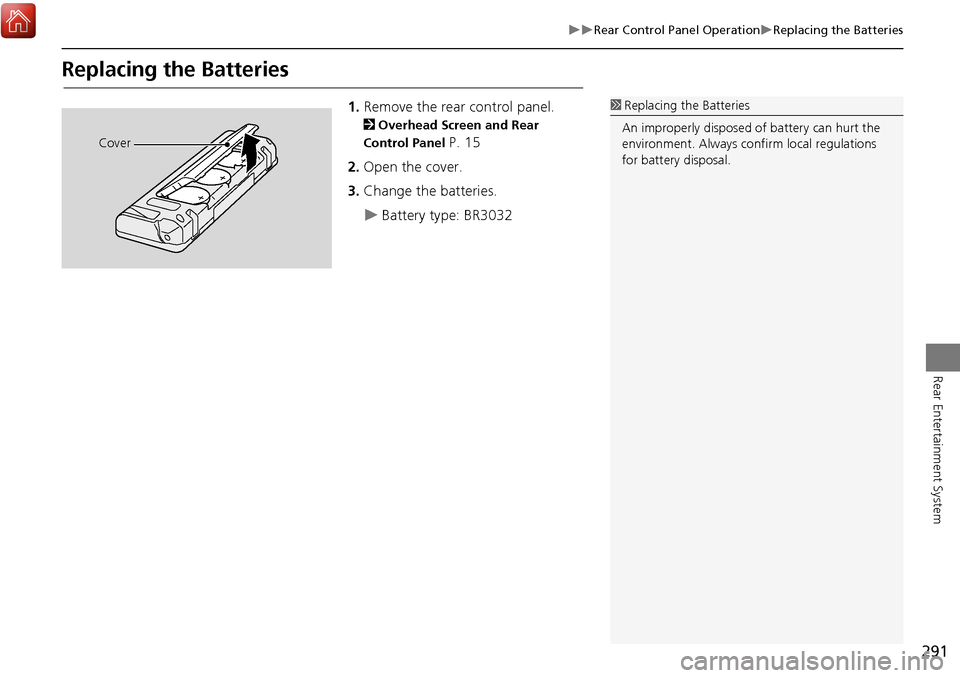
1.Remove the rear control panel.
2 Overhead Screen and Rear
Control Panel
P. 15
2. Open the cover.
3. Change the batteries.
Battery type: BR3032
1Replacing th e Batteries
An improperly disposed of battery can hurt the
environment. Always c onfirm local regulations
for battery disposal.
Cover
Page 293 of 369
292
Rear Entertainment System
Front Control Panel Operation
Operate the Rear Entertainment System (RES) from the front control panel.
Selecting the Audio Source using front control panel
1.Press the Rear 9 (Power) button
on the front control panel.
2. Press the REAR AUDIO button.
The rear source is displayed on
the front audio/information
screen and the On Demand
Multi-Use Display™.
The rear source is heard from
the front speakers.
3. Select Rear Source on the On
Demand Multi-Use Display™.
4. Select the audio source icon on the
On Demand Multi-Use Display™.
5. Select a station, channel, track, or
chapter in the same way as the
front audio system.
2 Audio P. 141
Page 294 of 369
293
Front Control Panel OperationRear System Setup
Rear Entertainment System
Rear System Setup
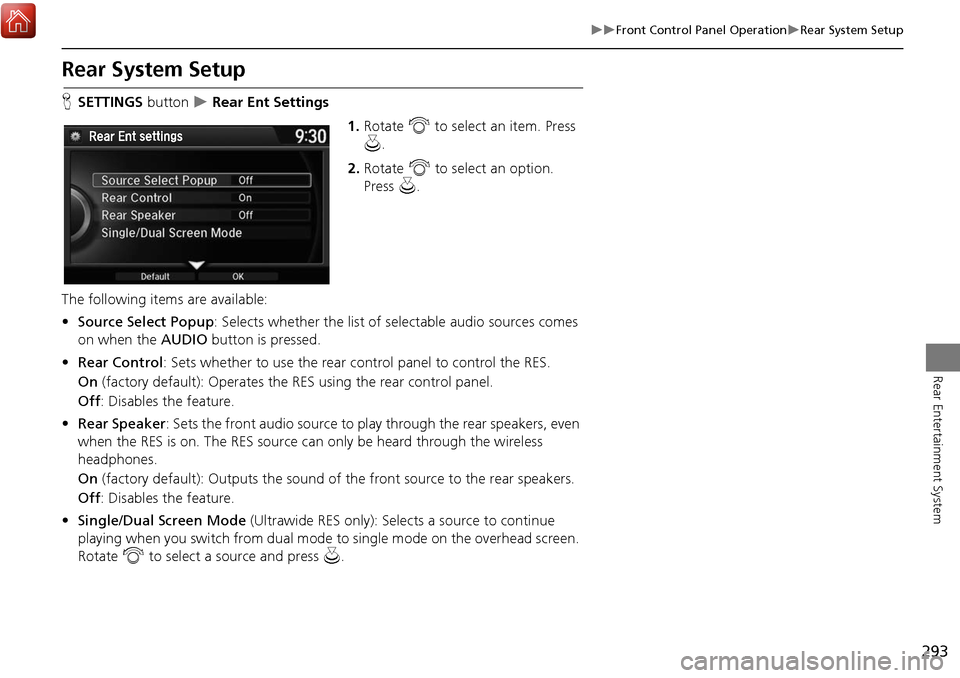
HSETTINGS button Rear Ent Settings
1.Rotate i to select an item. Press
u .
2. Rotate i to select an option.
Press u.
The following items are available:
• Source Select Popup : Selects whether the list of selectable audio sources comes
on when the AUDIO button is pressed.
• Rear Control: Sets whether to use the rear control panel to control the RES.
On (factory default): Operates the RES using the rear control panel.
Off : Disables the feature.
• Rear Speaker : Sets the front audio source to pl ay through the rear speakers, even
when the RES is on. The RES source can only be heard through the wireless
headphones.
On (factory default): Output s the sound of the front source to the rear speakers.
Off : Disables the feature.
• Single/Dual Screen Mode (Ultrawide RES only): Selects a source to continue
playing when you switch from dual mode to single mode on the overhead screen.
Rotate i to select a source and press u.
Page 295 of 369
294
Front Control Panel OperationSetting the DVD Menu
Rear Entertainment System
Setting the DVD Menu
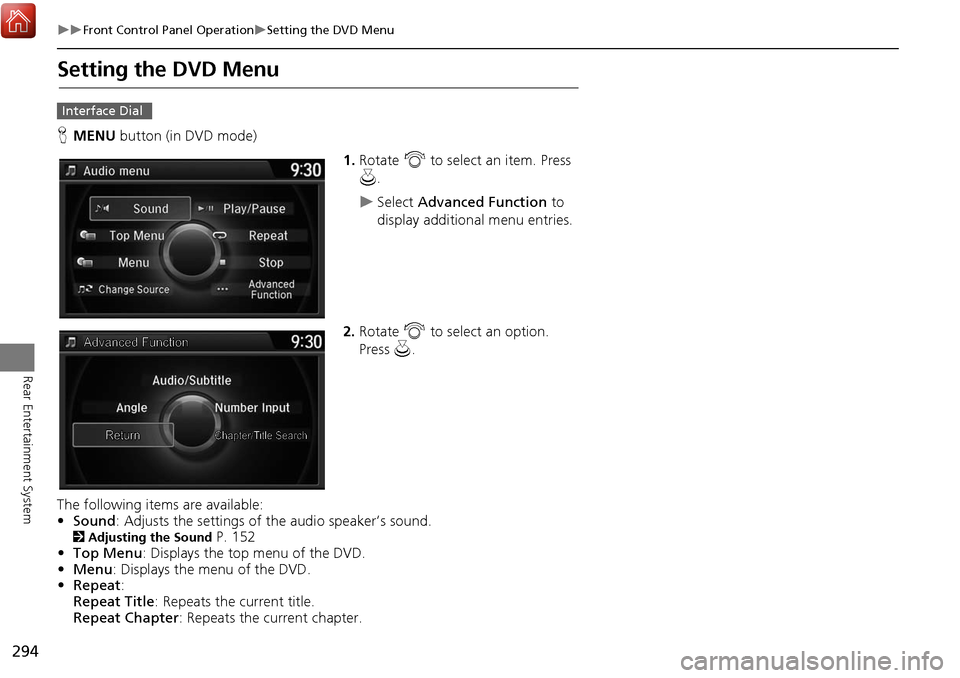
HMENU button (in DVD mode)
1.Rotate i to select an item. Press
u .
Select Advanced Function to
display additional menu entries.
2. Rotate i to select an option.
Press u.
The following item s are available:
• Sound : Adjusts the settings of the audio speaker’s sound.
2Adjusting the Sound P. 152
• Top Menu : Displays the top menu of the DVD.
• Menu : Displays the menu of the DVD.
• Repeat :
Repeat Title : Repeats the current title.
Repeat Chapter : Repeats the current chapter.
Interface Dial
Page 296 of 369
295
Front Control Panel OperationSetting the DVD Menu
Rear Entertainment System
•Change Source : Changes the audio source mode.
• Play/Pause: Pauses or resume the playback.
• Stop : Stops the playback.
• Audio/Subtitle : Selects the language of the DVD audio and the DVD subtitle.
• Angle : Selects the angle of a scene shot with multiple cameras.
• Return: Hides the DVD menu.
• Number Input : Enters a number of a title or chapter to skip.
• Chapter/Title Search : Skips to a title or chapter by Interface Dial.
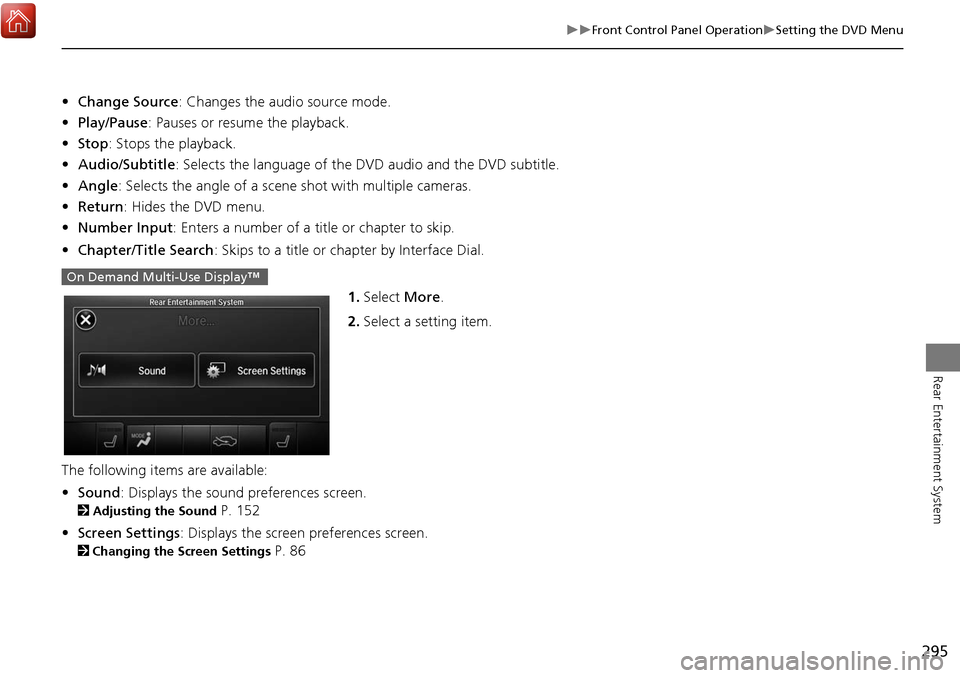
1.Select More.
2. Select a setting item.
The following items are available:
• Sound : Displays the sound preferences screen.
2Adjusting the Sound P. 152
• Screen Settings : Displays the screen preferences screen.
2Changing the Screen Settings P. 86
On Demand Multi-Use Display™
Page 297 of 369
296
Rear Entertainment System
Wireless Headphones
Using the Wireless Headphones
Audio for the Rear Entertainment System is sent to the wireless headphones that
come with the system.
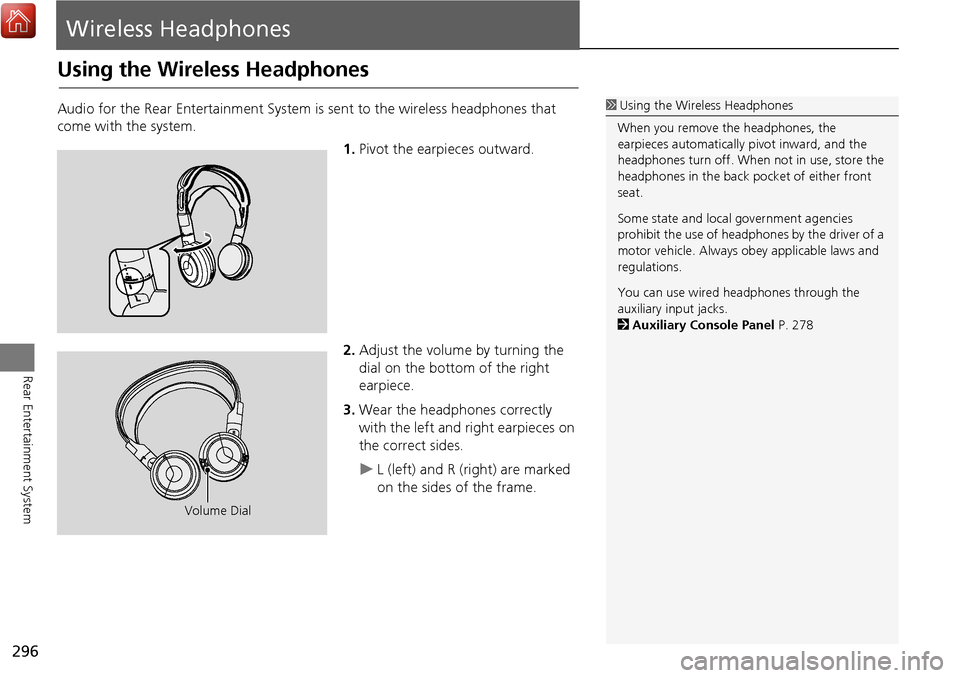
1.Pivot the earpieces outward.
2. Adjust the volume by turning the
dial on the bottom of the right
earpiece.
3. Wear the headphones correctly
with the left and right earpieces on
the correct sides.
L (left) and R (right) are marked
on the sides of the frame.
1Using the Wireless Headphones
When you remove the headphones, the
earpieces automatically pivot inward, and the
headphones turn off. When not in use, store the
headphones in the back pocket of either front
seat.
Some state and local government agencies
prohibit the use of headphones by the driver of a
motor vehicle. Always obey applicable laws and
regulations.
You can use wired headphones through the
auxiliary input jacks.
2 Auxiliary Console Panel P. 278
Volume Dial
Page 298 of 369
297
Wireless HeadphonesChanging the Sound Source (Ultrawide RES only)
Rear Entertainment System
Changing the Sound Source (Ultrawide RES only)
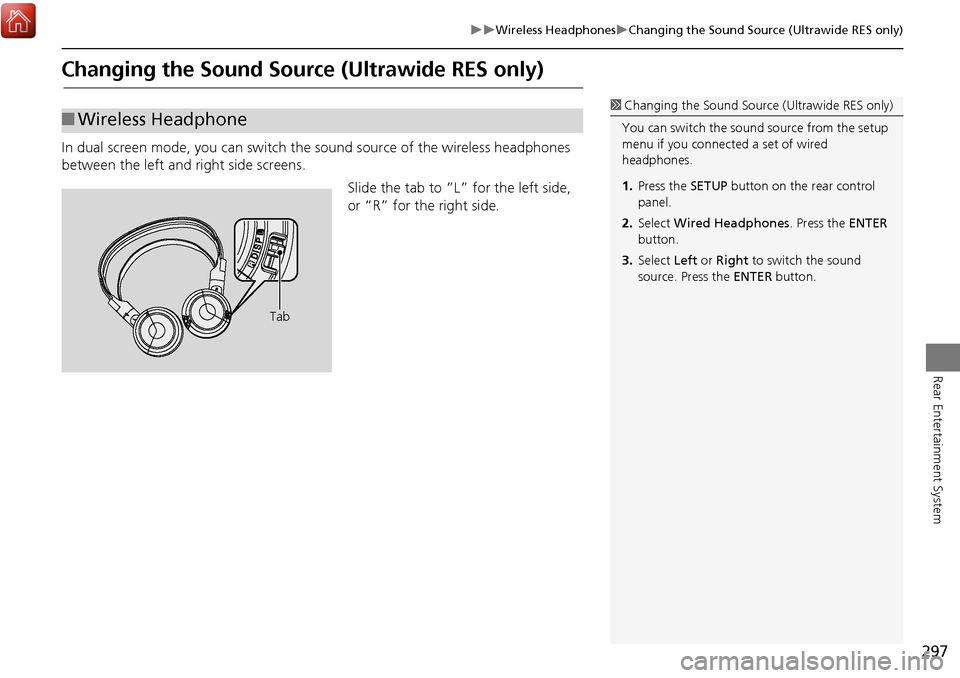
In dual screen mode, you can switch the sound source of the wireless headphones
between the left and right side screens.
Slide the tab to ”L” for the left side,
or “R” for the right side.
■Wireless Headphone1 Changing the Sound Source (Ultrawide RES only)
You can switch the sound source from the setup
menu if you connecte d a set of wired
headphones.
1. Press the SETUP button on the rear control
panel.
2. Select Wired Headphones . Press the ENTER
button.
3. Select Left or Right to switch the sound
source. Press the ENTER button.
Tab
Page 299 of 369
298
Wireless HeadphonesReplacing the Batteries
Rear Entertainment System
Replacing the Batteries
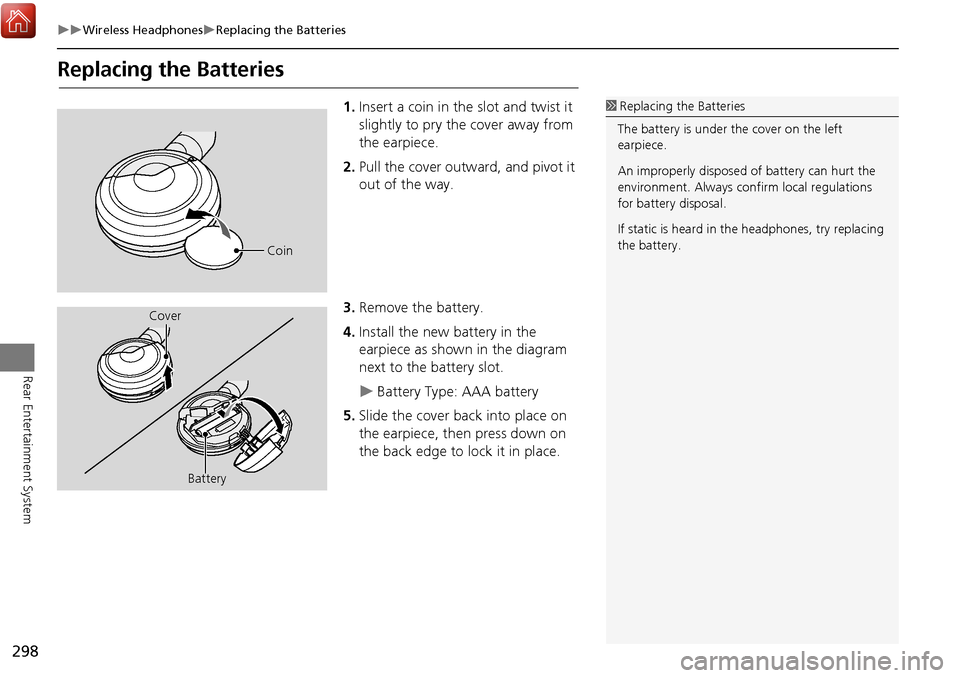
1.Insert a coin in the slot and twist it
slightly to pry the cover away from
the earpiece.
2. Pull the cover outward, and pivot it
out of the way.
3. Remove the battery.
4. Install the new battery in the
earpiece as shown in the diagram
next to the battery slot.
Battery Type: AAA battery
5. Slide the cover back into place on
the earpiece, then press down on
the back edge to lock it in place.
1Replacing th e Batteries
The battery is under the cover on the left
earpiece.
An improperly disposed of battery can hurt the
environment. Always c onfirm local regulations
for battery disposal.
If static is heard in th e headphones, try replacing
the battery.
Coin
Cover
Battery
Page 300 of 369
299
Other Features
This section describes the useful functions incorporated into the
navigation system to help make your journey easier and more enjoyable.
Trip Computer....................................... 300
Calendar ................................................ 301
Information Functions .......................... 302
System Device Information ................... 302
Map Data Update ................................ 302
Info Screen Preference ......................... 303
Multi-view Rear Camera* ..................... 304
Surround View Camera* ...................... 306
Troubleshooting ................................... 326
Trending: hard drive, radio code, climate control, dashboard, center console, audio, climate settings

