Acura RDX 2013 Owner's Manual
Manufacturer: ACURA, Model Year: 2013, Model line: RDX, Model: Acura RDX 2013Pages: 364, PDF Size: 12.54 MB
Page 181 of 364
uuAudio System Basic Operation uPlaying a USB Flash Drive
180Features
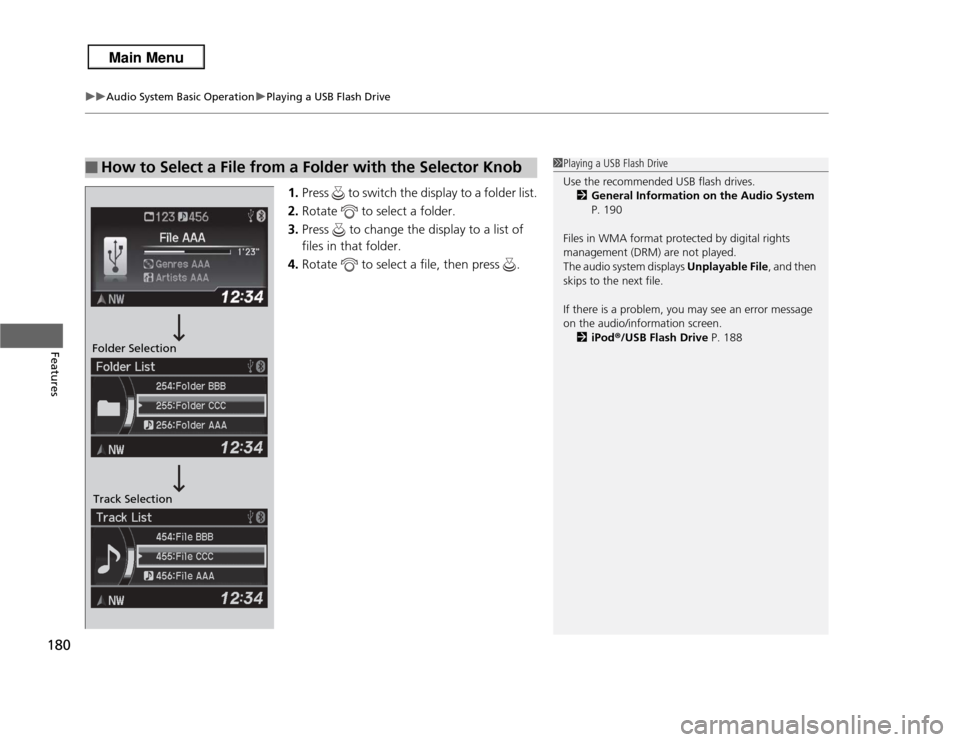
1. Press to switch the display to a folder list.
2. Rotate to select a folder.
3. Press to change the display to a list of
files in that folder.
4. Rotate to select a file, then press .
■
How to Select a File from a Folder with the Selector Knob
1Playing a USB Flash Drive
Use the recommended USB flash drives.
2 General Information on the Audio System
P. 190
Files in WMA format protected by digital rights
management (DRM) are not played.
The audio system displays Unplayable File , and then
skips to the next file.
If there is a problem, you may see an error message
on the audio/information screen.
2 iPod ®/USB Flash Drive P. 188
Folder Selection
Track Selection
Page 182 of 364
181
uuAudio System Basic Operation uPlaying a USB Flash Drive
Features
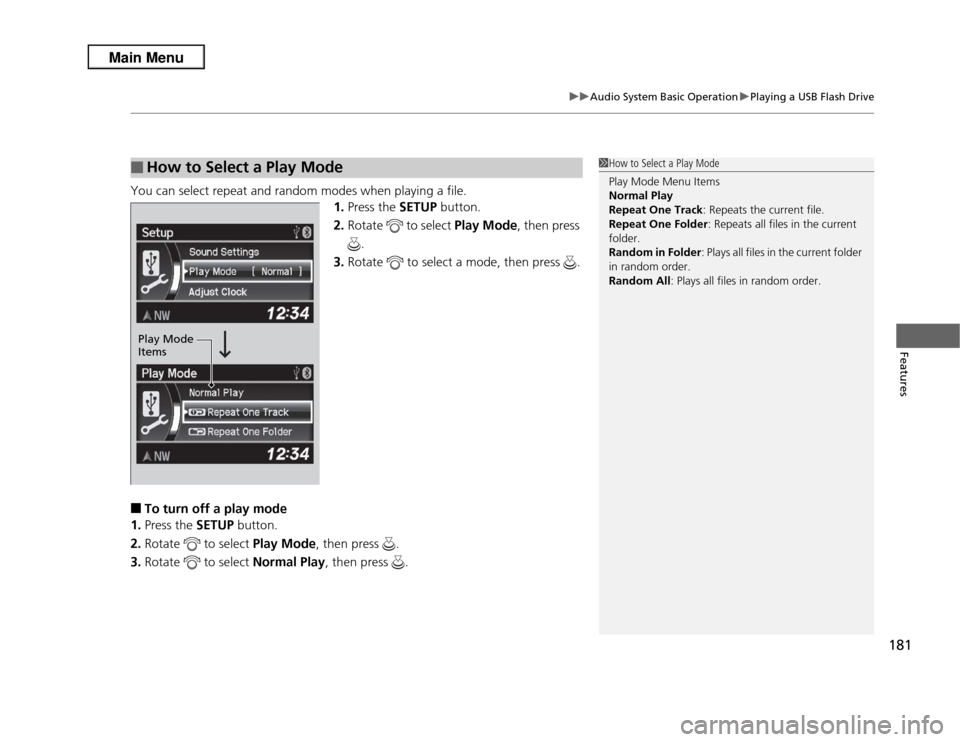
You can select repeat and random modes when playing a file.
1.Press the SETUP button.
2. Rotate to select Play Mode , then press
.
3. Rotate to select a mode, then press .■
To turn off a play mode
1. Press the SETUP button.
2. Rotate to select Play Mode, then press .
3. Rotate to select Normal Play, then press .
■
How to Select a Play Mode
1How to Select a Play Mode
Play Mode Menu Items
Normal Play
Repeat One Track : Repeats the current file.
Repeat One Folder : Repeats all files in the current
folder.
Random in Folder : Plays all files in the current folder
in random order.
Random All : Plays all files in random order.
Play Mode
Items
Page 183 of 364
182
uuAudio System Basic Operation uPlaying Bluetooth® Audio
Features
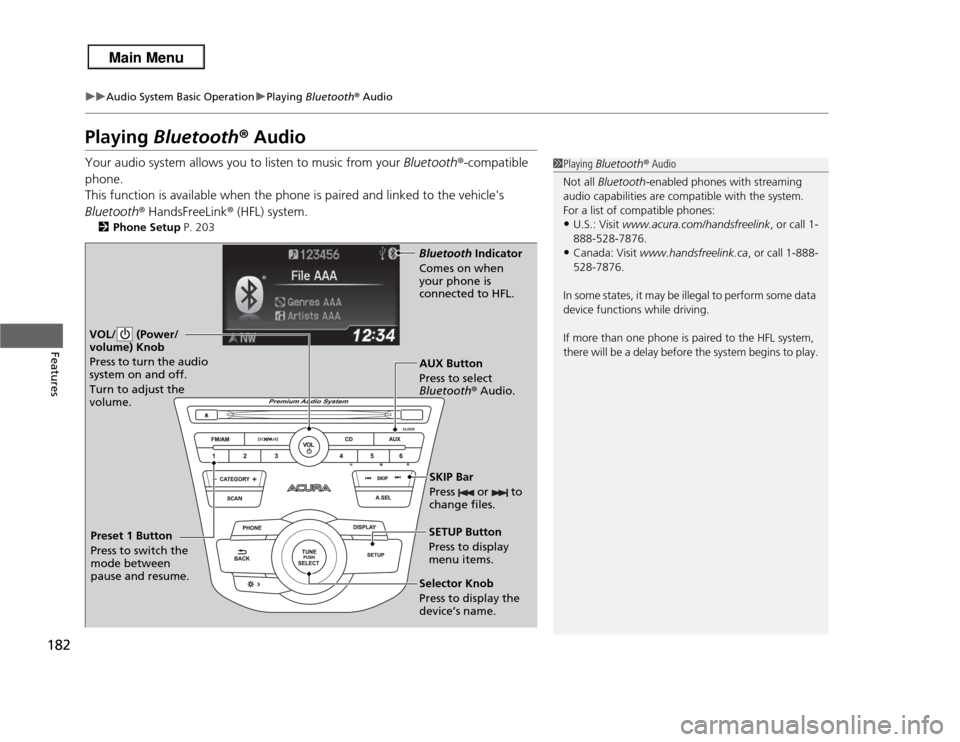
Playing Bluetooth ® AudioYour audio system allows you to listen to music from your Bluetooth®-compatible
phone.
This function is available when the phone is paired and linked to the vehicle's
Bluetooth ® HandsFreeLink ® (HFL) system.
2 Phone Setup P. 203
1Playing Bluetooth ® Audio
Not all Bluetooth -enabled phones with streaming
audio capabilities are compatible with the system.
For a list of compatible phones:•U.S.: Visit www.acura.com/handsfreelink, or call 1-
888-528-7876.•Canada: Visit www.handsfreelink.ca , or call 1-888-
528-7876.
In some states, it may be illegal to perform some data
device functions while driving.
If more than one phone is paired to the HFL system,
there will be a delay before the system begins to play.
VOL/ (Power/
volume) Knob
Press to turn the audio
system on and off.
Turn to adjust the
volume.
SETUP Button
Press to display
menu items.
Selector Knob
Press to display the
device’s name. AUX Button
Press to select
Bluetooth ® Audio.
SKIP Bar
Press or to
change files.Bluetooth Indicator
Comes on when
your phone is
connected to HFL.
Preset 1 Button
Press to switch the
mode between
pause and resume.
Page 184 of 364
183
uuAudio System Basic Operation uPlaying Bluetooth® Audio
Features
1.Make sure that your phone is paired and
linked to HFL.
2. Press the AUX button.
If the phone is not recognized, another HFL-
compatible phone, which is not compatible
for Bluetooth ® Audio, may be already linked.
■
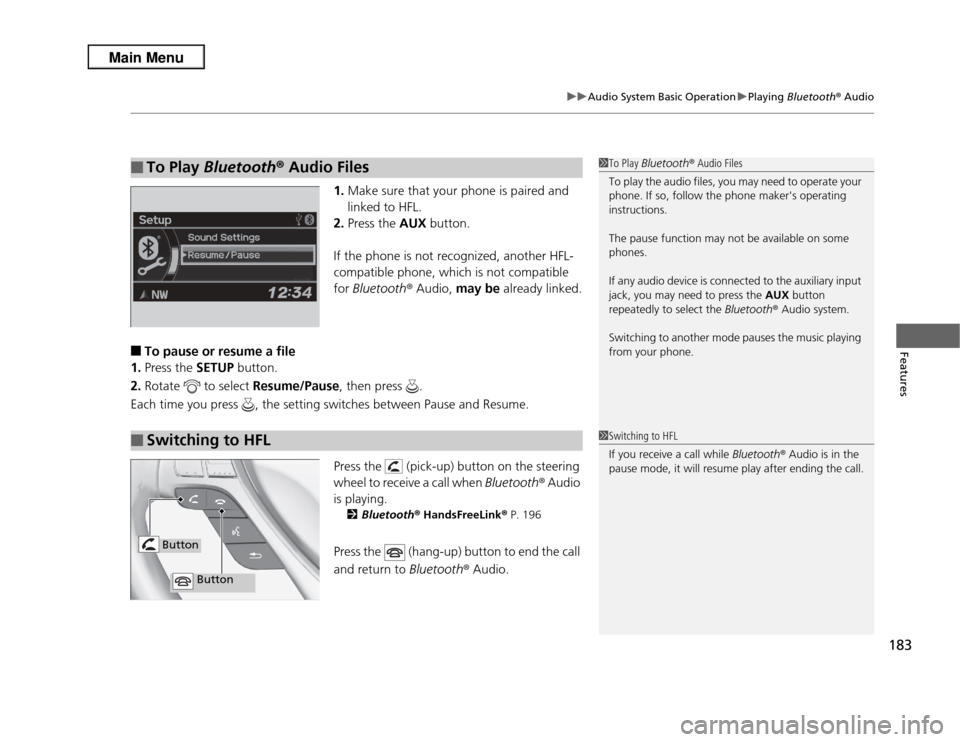
To pause or resume a file
1. Press the SETUP button.
2. Rotate to select Resume/Pause, then press .
Each time you press , the setting switches between Pause and Resume.
Press the (pick-up) button on the steering
wheel to receive a call when Bluetooth® Audio
is playing.
2 Bluetooth® HandsFreeLink ® P. 196
Press the (hang-up) button to end the call
and return to Bluetooth® Audio.
■
To Play Bluetooth ® Audio Files
1 To Play Bluetooth ® Audio Files
To play the audio files, you may need to operate your
phone. If so, follow the phone maker's operating
instructions.
The pause function may not be available on some
phones.
If any audio device is connected to the auxiliary input
jack, you may need to press the AUX button
repeatedly to select the Bluetooth® Audio system.
Switching to another mode pauses the music playing
from your phone.
■
Switching to HFL
1 Switching to HFL
If you receive a call while Bluetooth® Audio is in the
pause mode, it will resume play after ending the call.
Button
Button
Page 185 of 364
184
uuAudio System Basic Operation uWallpaper Setup
Features
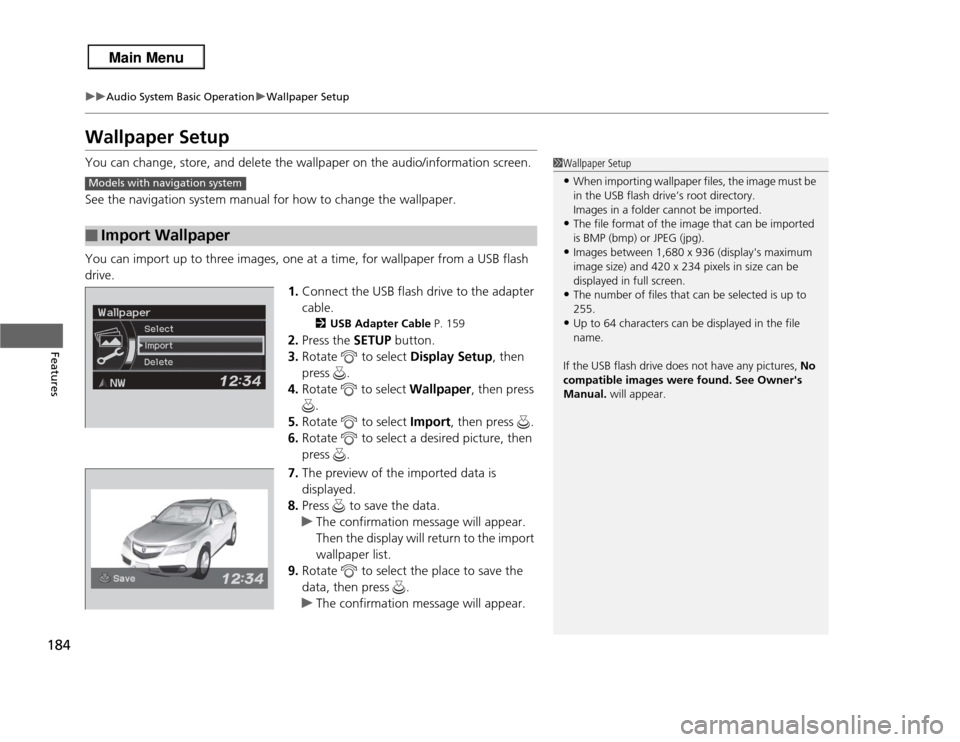
Wallpaper SetupYou can change, store, and delete the wallpaper on the audio/information screen.
See the navigation system manual for how to change the wallpaper.
You can import up to three images, one at a time, for wallpaper from a USB flash
drive.
1.Connect the USB flash drive to the adapter
cable.
2 USB Adapter Cable P. 159
2.Press the SETUP button.
3. Rotate to select Display Setup, then
press .
4. Rotate to select Wallpaper, then press
.
5. Rotate to select Import, then press .
6. Rotate to select a desired picture, then
press .
7. The preview of the imported data is
displayed.
8. Press to save the data.
u The confirmation message will appear.
Then the display will return to the import
wallpaper list.
9. Rotate to select the place to save the
data, then press .
u The confirmation message will appear.
■
Import Wallpaper
1Wallpaper Setup•When importing wallpaper files, the image must be
in the USB flash drive’s root directory.
Images in a folder cannot be imported.•The file format of the image that can be imported
is BMP (bmp) or JPEG (jpg).•Images between 1,680 x 936 (display's maximum
image size) and 420 x 234 pixels in size can be
displayed in full screen.•The number of files that can be selected is up to
255.•Up to 64 characters can be displayed in the file
name.
If the USB flash drive does not have any pictures, No
compatible images were found. See Owner's
Manual. will appear.
Models with navigation system
Page 186 of 364
185
uuAudio System Basic Operation uWallpaper Setup
Features
1. Rotate to select Select on the wallpaper setup menu, then press .
u The screen will change to the wallpaper list.
2. Rotate to select desired wallpaper and press .
u The confirmation message will appear. Then the display will return to the
wallpaper setup menu.
1. Rotate to select Delete on the wallpaper setup menu, then press .
u The screen will change to the delete wallpaper list.
2. Rotate to select wallpaper that you want to delete and press .
u The confirmation message will appear.
3. Rotate to select OK, then press to delete completely.
u The confirmation message will appear.■
Select Wallpaper
■
Delete Wallpaper
Page 187 of 364
186
uuAudio System Basic Operation uDisplay Setup
Features
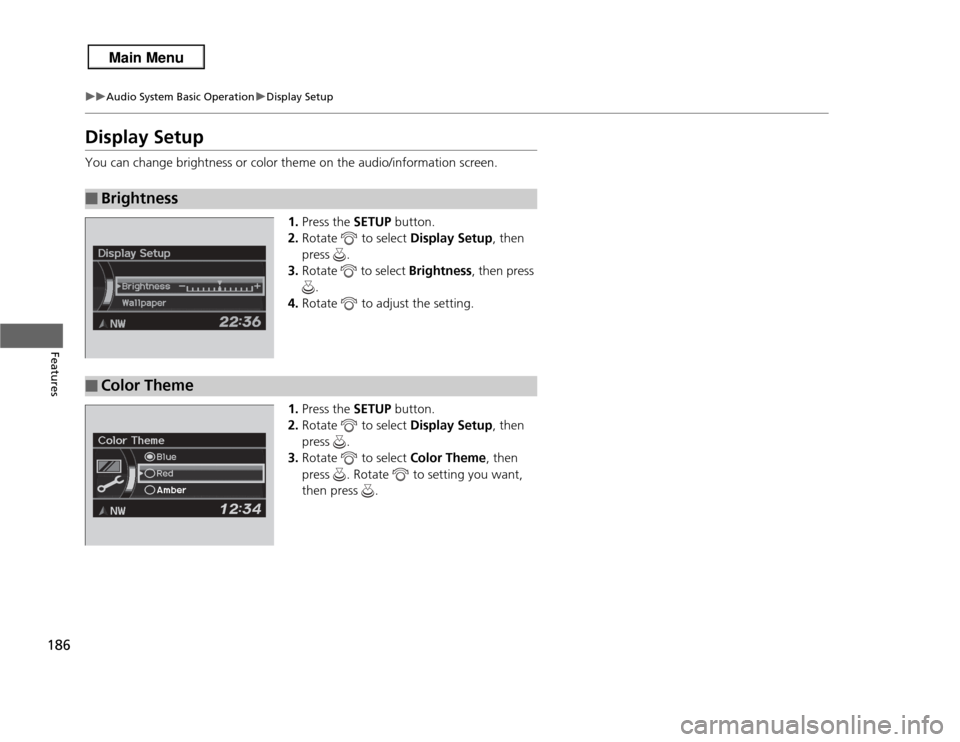
Display SetupYou can change brightness or color theme on the audio/information screen.
1.Press the SETUP button.
2. Rotate to select Display Setup, then
press .
3. Rotate to select Brightness, then press
.
4. Rotate to adjust the setting.
1. Press the SETUP button.
2. Rotate to select Display Setup, then
press .
3. Rotate to select Color Theme, then
press . Rotate to setting you want,
then press .■
Brightness
■
Color Theme
Page 188 of 364

187Features
Audio Error MessagesCD PlayerIf a disc error occurs, you may see the following error messages.
Error Message
Cause
Solution
Unplayable File
Track/file format not supported
●Current track/file will be skipped. The next supported track/file
plays automatically.
Bad Disc Please check
owners manual. Push Eject
Mechanical error
●Press the (eject) button and remove the disc, and check that the
error message is cleared.●Check that the disc is not damaged or deformed, and insert the
disc again.
2Protecting CDs P. 192
●If the error message reappears, press the button, and pull out
the disc.●Insert a different disc.
If the new disc plays, there is a problem with the first disc.●If the error message repeats, or the disc cannot be removed,
contact a dealer.
Do not try to force the disc out of the player.
Mecha ErrorBad Disc Please check
owners manual.
Servo error
Check Disc
Disc error
●Check that the disc is not damaged or deformed.
2Protecting CDs P. 192
Page 189 of 364
188
uuAudio Error Messages uiPod ®/USB Flash Drive
Features
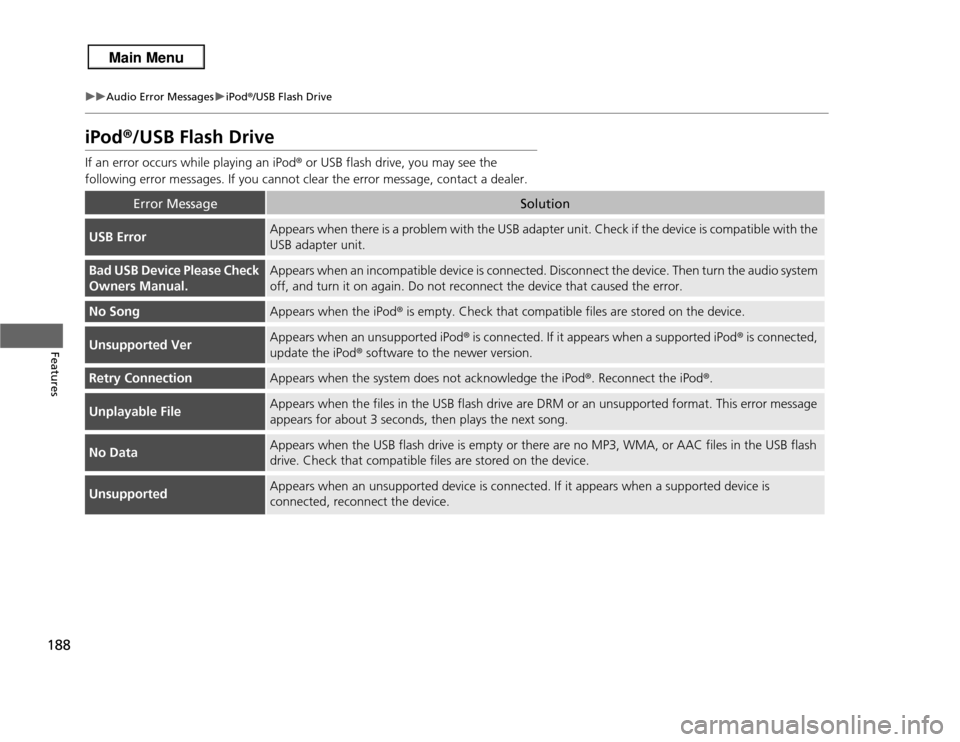
iPod®/USB Flash DriveIf an error occurs while playing an iPod ® or USB flash drive, you may see the
following error messages. If you cannot clear the error message, contact a dealer.
Error Message
Solution
USB Error
Appears when there is a problem with the USB adapter unit. Check if the device is compatible with the
USB adapter unit.
Bad USB Device Please Check
Owners Manual.
Appears when an incompatible device is connected. Disconnect the device. Then turn the audio system
off, and turn it on again. Do not reconnect the device that caused the error.
No Song
Appears when the iPod ® is empty. Check that compatible files are stored on the device.
Unsupported Ver
Appears when an unsupported iPod ® is connected. If it appears when a supported iPod ® is connected,
update the iPod ® software to the newer version.
Retry Connection
Appears when the system does not acknowledge the iPod ®. Reconnect the iPod ®.
Unplayable File
Appears when the files in the USB flash drive are DRM or an unsupported format. This error message
appears for about 3 seconds, then plays the next song.
No Data
Appears when the USB flash drive is empty or there are no MP3, WMA, or AAC files in the USB flash
drive. Check that compatible files are stored on the device.
Unsupported
Appears when an unsupported device is connected. If it appears when a supported device is
connected, reconnect the device.
Page 190 of 364
189
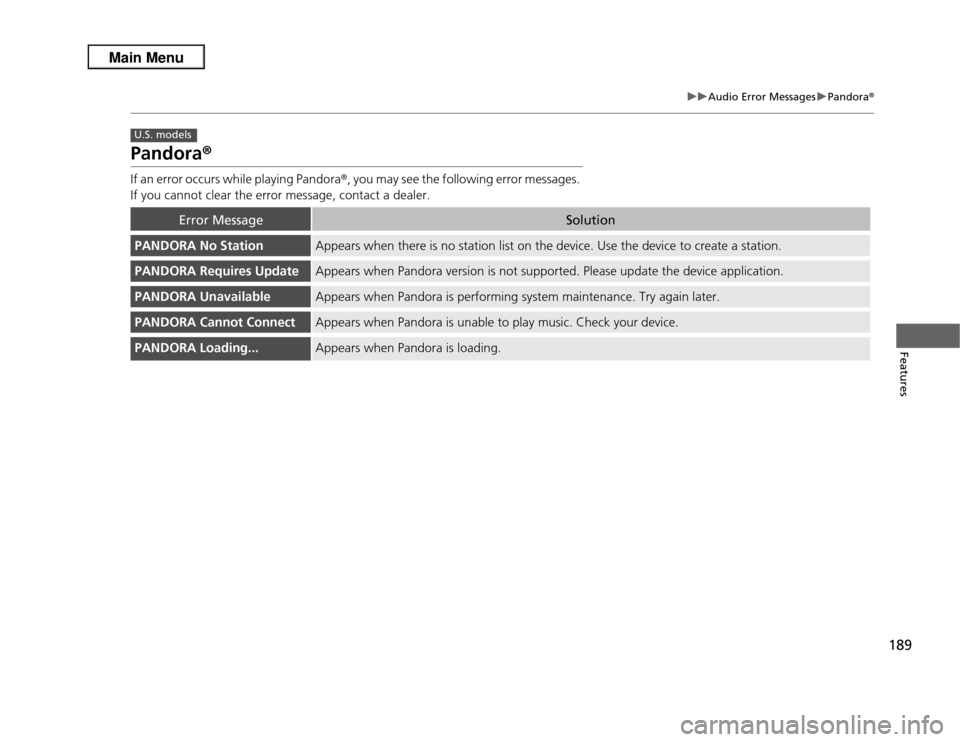
uuAudio Error Messages uPandora®
Features
Pandora ®If an error occurs while playing Pandora ®, you may see the following error messages.
If you cannot clear the error message, contact a dealer.
Error Message
Solution
PANDORA No Station
Appears when there is no station list on the device. Use the device to create a station.
PANDORA Requires Update
Appears when Pandora version is not supported. Please update the device application.
PANDORA Unavailable
Appears when Pandora is performing system maintenance. Try again later.
PANDORA Cannot Connect
Appears when Pandora is unable to play music. Check your device.
PANDORA Loading...
Appears when Pandora is loading.
U.S. models