spare tire Acura RDX 2013 Owner's Manual
[x] Cancel search | Manufacturer: ACURA, Model Year: 2013, Model line: RDX, Model: Acura RDX 2013Pages: 364, PDF Size: 12.54 MB
Page 18 of 364
Quick Reference Guide17
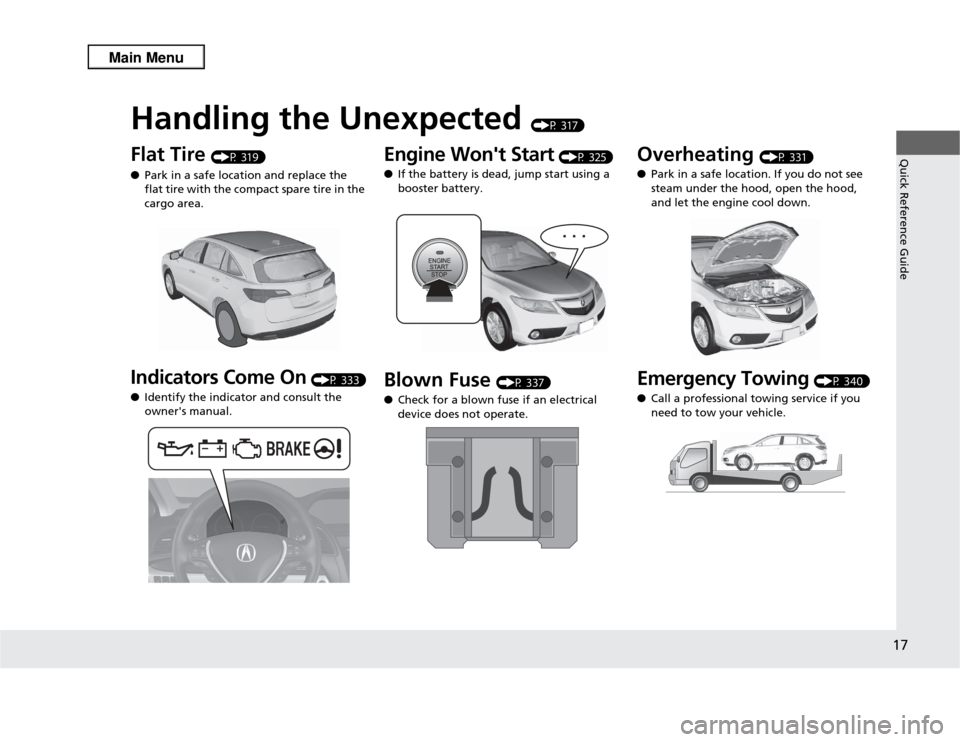
Handling the Unexpected
(P 317)
Flat Tire
(P 319)
● Park in a safe location and replace the
flat tire with the compact spare tire in the
cargo area.
Indicators Come On
(P 333)
● Identify the indicator and consult the
owner's manual.
Engine Won't Start
(P 325)
● If the battery is dead, jump start using a
booster battery.
Blown Fuse
(P 337)
● Check for a blown fuse if an electrical
device does not operate.
Overheating
(P 331)
● Park in a safe location. If you do not see
steam under the hood, open the hood,
and let the engine cool down.
Emergency Towing
(P 340)
● Call a professional towing service if you
need to tow your vehicle.
Page 75 of 364
74
uuIndicators u
Instrument Panel
Indicator
Name
On/Blinking
Explanation
Message
EPS (Electric
Power Steering)
System Indicator
●Comes on when you set the power
mode to ON, and goes off when
the engine starts.●Comes on if there is a problem with
the EPS (Electric Power Steering)
System.
●Stays on constantly or does not come
on at all - Have the vehicle checked by a
dealer.
2If the EPS System Indicator Comes On
P. 335
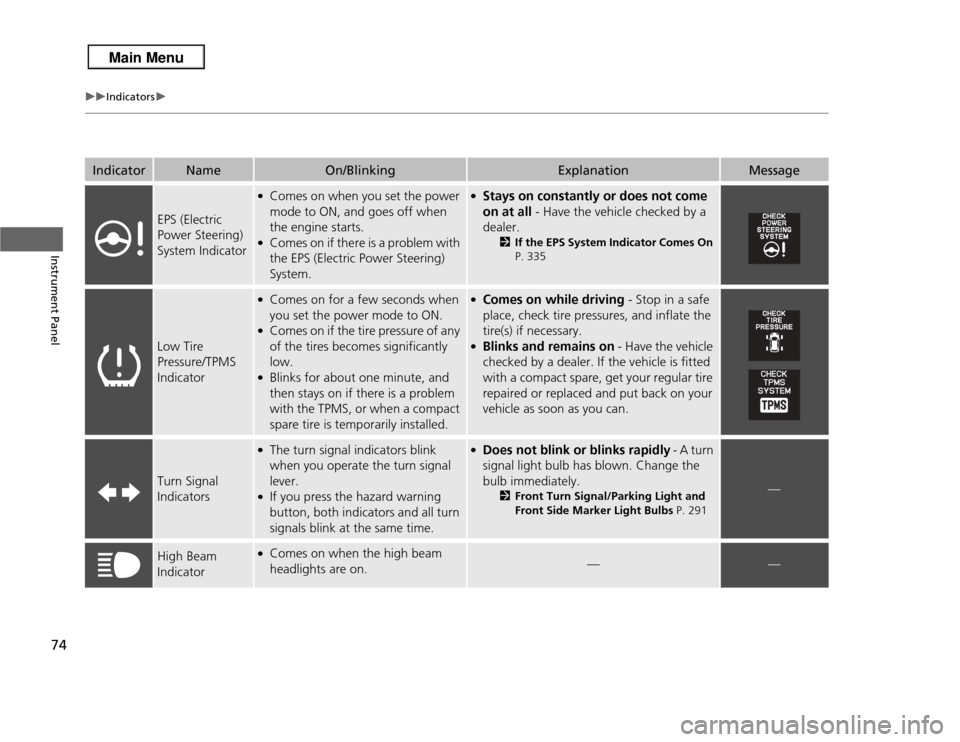
Low Tire
Pressure/TPMS
Indicator
●Comes on for a few seconds when
you set the power mode to ON.●Comes on if the tire pressure of any
of the tires becomes significantly
low.●Blinks for about one minute, and
then stays on if there is a problem
with the TPMS, or when a compact
spare tire is temporarily installed.
●Comes on while driving - Stop in a safe
place, check tire pressures, and inflate the
tire(s) if necessary.●Blinks and remains on - Have the vehicle
checked by a dealer. If the vehicle is fitted
with a compact spare, get your regular tire
repaired or replaced and put back on your
vehicle as soon as you can.
Turn Signal
Indicators
●The turn signal indicators blink
when you operate the turn signal
lever.●If you press the hazard warning
button, both indicators and all turn
signals blink at the same time.
●Does not blink or blinks rapidly - A turn
signal light bulb has blown. Change the
bulb immediately.
2 Front Turn Signal/Parking Light and
Front Side Marker Light Bulbs P. 291
—
High Beam
Indicator
●Comes on when the high beam
headlights are on.
—
—
Page 237 of 364
236
uuTowing a Trailer uDriving Safely with a Trailer
Driving
Driving Safely with a Trailer• Have the trailer properly serviced and keep it in good condition.
• Make sure that all the weights and load in the vehicle and trailer are within limits.
2 Towing Load Limits P. 233
•Securely attach the hitch, safety chains, and other necessary parts to the trailer.
• Securely store all the items in and on the trailer so that they do not shift while
driving.
• Check if the lights and brakes on the trailer are working properly.
• Check the pressures of the trailer tires, including the spare.
• Drive slower than normal.
• Obey posted speed limits for vehicles with trailers.
• Use the
(D
position when towing a trailer on level roads.
• Turn more slowly and with a wider turning arc than normal.
• Allow more time and distance for braking.
• Do not brake or turn suddenly.
• Monitor your temperature gauge. If it nears the red (Hot) mark, turn off the
climate control system and reduce speed. Pull to the side of the road safely to cool
down the engine if necessary.
• Shift to the (S
position if the transmission shifts frequently.
■
Things You Need To Know Before Towing a Trailer
■
Towing Speeds and Gears
■
Turning and Braking
■
Driving in Hilly Terrain
1Driving Safely with a Trailer
Parking
In addition to the normal precautions, place wheel
chocks at each of the trailer's tires.
Page 255 of 364
uuWhen Driving uTPMS (Tire Pressure Monitoring System)
254Driving
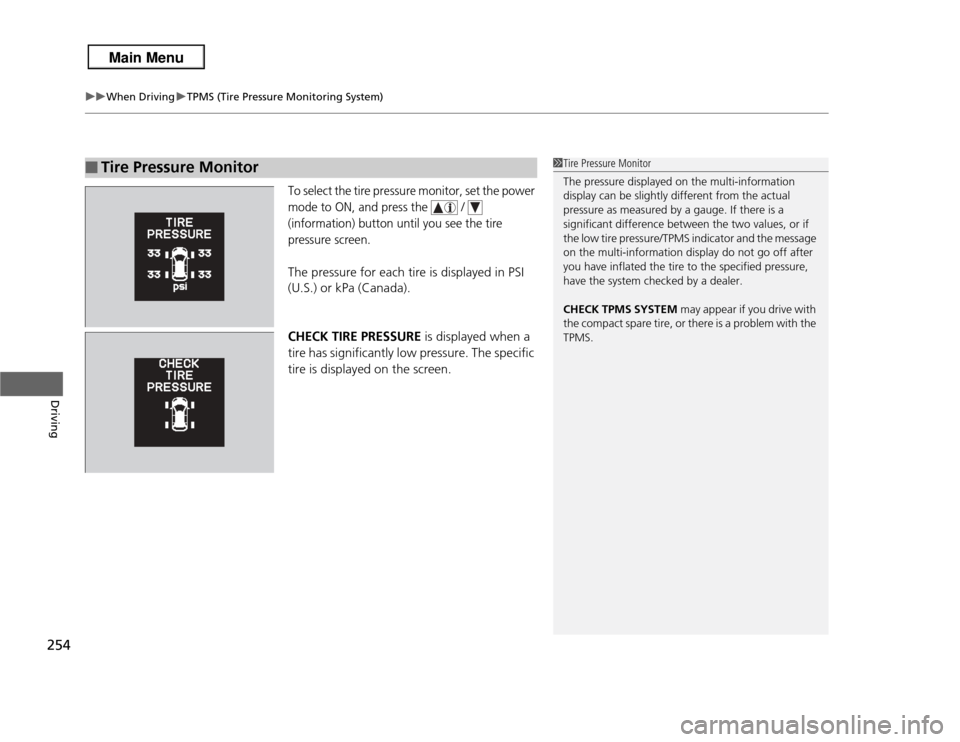
To select the tire pressure monitor, set the power
mode to ON, and press the /
(information) button until you see the tire
pressure screen.The pressure for each tire is displayed in PSI
(U.S.) or kPa (Canada).
CHECK TIRE PRESSURE is displayed when a
tire has significantly low pressure. The specific
tire is displayed on the screen.
■
Tire Pressure Monitor
1 Tire Pressure Monitor
The pressure displayed on the multi-information
display can be slightly different from the actual
pressure as measured by a gauge. If there is a
significant difference between the two values, or if
the low tire pressure/TPMS indicator and the message
on the multi-information display do not go off after
you have inflated the tire to the specified pressure,
have the system checked by a dealer.
CHECK TPMS SYSTEM may appear if you drive with
the compact spare tire, or there is a problem with the
TPMS.
Page 256 of 364
255
uuWhen Driving uTire Pressure Monitoring System (TPMS) - Required Federal Explanation
Continued
Driving
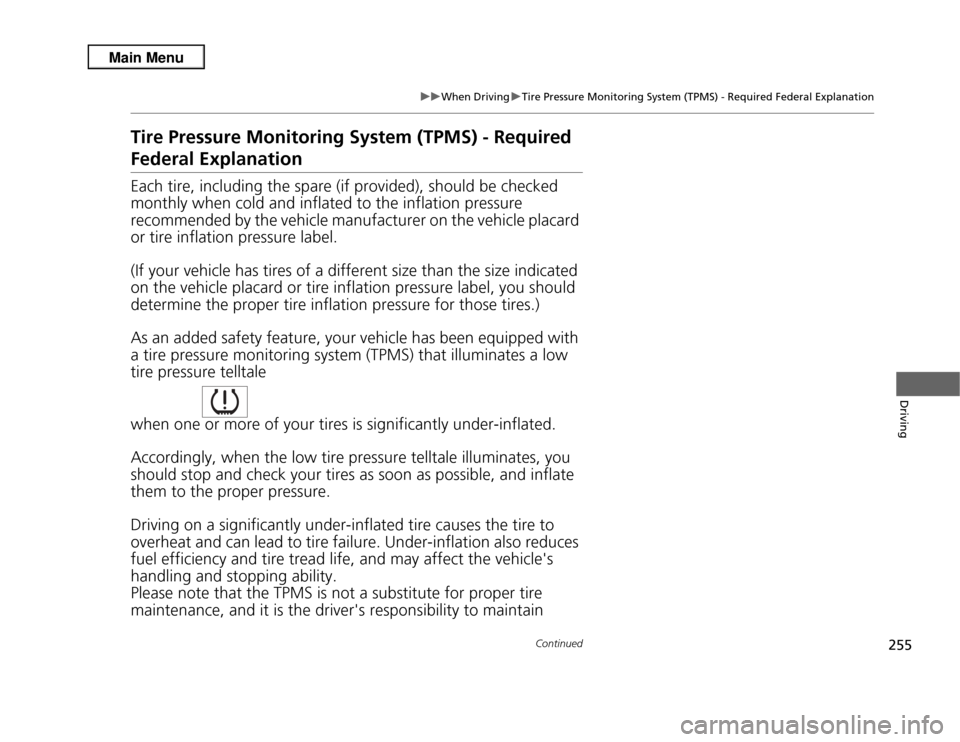
Tire Pressure Monitoring System (TPMS) - Required Federal ExplanationEach tire, including the spare (if provided), should be checked
monthly when cold and inflated to the inflation pressure
recommended by the vehicle manufacturer on the vehicle placard
or tire inflation pressure label.
(If your vehicle has tires of a different size than the size indicated
on the vehicle placard or tire inflation pressure label, you should
determine the proper tire inflation pressure for those tires.)
As an added safety feature, your vehicle has been equipped with
a tire pressure monitoring system (TPM S) that illuminates a low
tire pressure telltale
when one or more of your tires is significantly under-inflated.
Accordingly, when the low tire pressure telltale illuminates, you
should stop and check your tires as soon as possible, and inflate
them to the proper pressure.
Driving on a significantly under-inflated tire causes the tire to
overheat and can lead to tire fail ure. Under-inflation also reduces
fuel efficiency and tire tread life, and may affect the vehicle's
handling and stopping ability.
Please note that the TPMS is not a substitute for proper tire
maintenance, and it is the driv er's responsibility to maintain
Page 302 of 364
301Maintenance
Checking and Maintaining TiresChecking TiresTo safely operate your vehicle, your tires must be of the proper type and size, in
good condition with adequate tread, and properly inflated.■
Inflation guidelines
Properly inflated tires provide the best combination of handling, tread life, and comfort.
Refer to the driver’s doorjamb label or specification’s page for the specified pressure.
Underinflated tires wear unevenly, adversely affect handling and fuel economy, and
are more likely to fail from overheating.
Overinflated tires make your vehicle ride harshly, are more prone to road hazards,
and wear unevenly.
Every day before you drive, look at each of the tires. If one looks lower than the
others, check the pressure with a tire gauge.
At least once a month and before long trips, use a gauge to measure the pressure in
all tires, including the spare. Even tires in good condition can lose 1 to 2 psi (10 to
20 kPa, 0.1 to 0.2 kgf/cm
2) per month.
■
Inspection guidelines
Every time you check inflation, also examine the tires and valve stems.
Look for:
• Bumps or bulges on the side or in the tread. Replace the tire if you find any cuts,
splits, or cracks in the side of the tire. Replace it if you see fabric or cord.
• Remove any foreign objects and inspect for air leaks.
• Uneven tread wear. Have a dealer check the wheel alignment.
• Excessive tread wear.
2 Wear Indicators P. 306
•Cracks or other damage around valve stem.
1Checking Tires
Measure the air pressure when tires are cold. This
means the vehicle has been parked for at least three
hours, or driven less than 1 mile (1.6 km). If
necessary, add or release air until the specified
pressure is reached.
If checked when hot, tire pressure can be as much as
4–6 psi (30–40 kPa, 0.3–0.4 kgf/cm
2) higher than if
checked when cold.
Have a dealer check the tires if you feel a consistent
vibration while driving. New tires and any that have
been removed and reinstalled should be properly
balanced.
3
WARNING
Using tires that are excessively worn or
improperly inflated can cause a crash in
which you can be seriously hurt or killed.
Follow all instruction s in this owner’s
manual regarding tire inflation and
maintenance.
Page 303 of 364
302
uuChecking and Maintaining Tires uTire and Loading Information Label
Maintenance
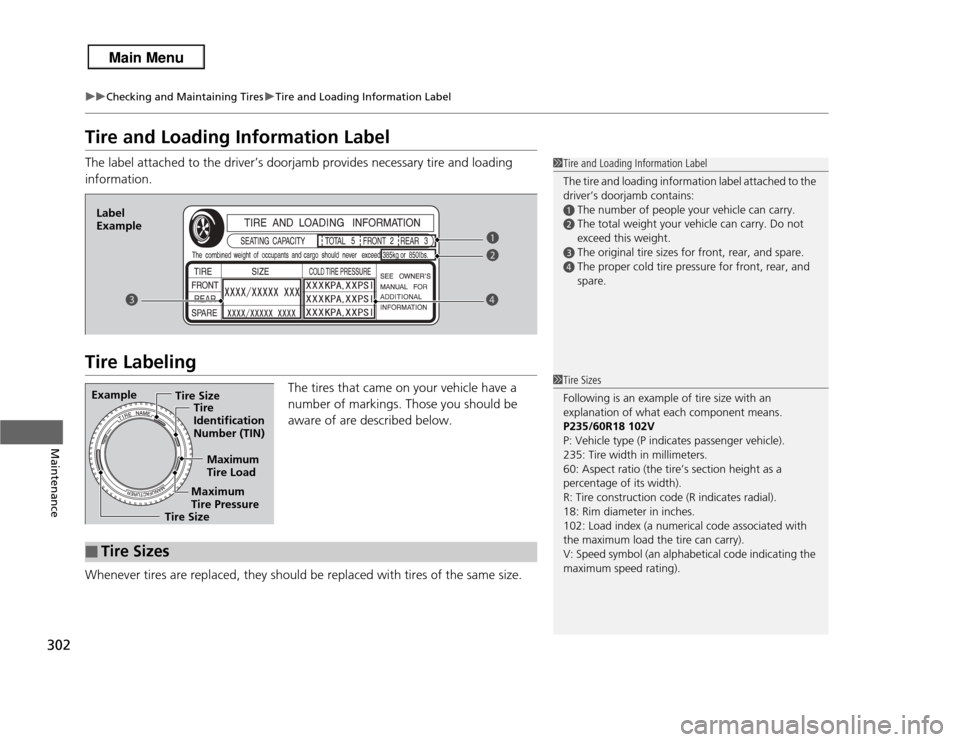
Tire and Loading Information LabelThe label attached to the driver’s doorjamb provides necessary tire and loading
information.Tire Labeling
The tires that came on your vehicle have a
number of markings. Those you should be
aware of are described below.
Whenever tires are replaced, they should be replaced with tires of the same size.
1 Tire and Loading Information Label
The tire and loading information label attached to the
driver’s doorjamb contains:a
The number of people your vehicle can carry.
b
The total weight your vehicle can carry. Do not
exceed this weight.
c
The original tire sizes for front, rear, and spare.
d
The proper cold tire pressure for front, rear, and
spare.
a
Label
Example
b
c d
Example
Tire Size
Tire
Identification
Number (TIN)
Maximum
Tire Load
Maximum
Tire Pressure
Tire Size■
Tire Sizes
1 Tire Sizes
Following is an example of tire size with an
explanation of what each component means.
P235/60R18 102V
P: Vehicle type (P indicates passenger vehicle).
235: Tire width in millimeters.
60: Aspect ratio (the tire’s section height as a
percentage of its width).
R: Tire construction code (R indicates radial).
18: Rim diameter in inches.
102: Load index (a numerical code associated with
the maximum load the tire can carry).
V: Speed symbol (an alphabetical code indicating the
maximum speed rating).
Page 307 of 364
306
uuChecking and Maintaining Tires uWear Indicators
Maintenance
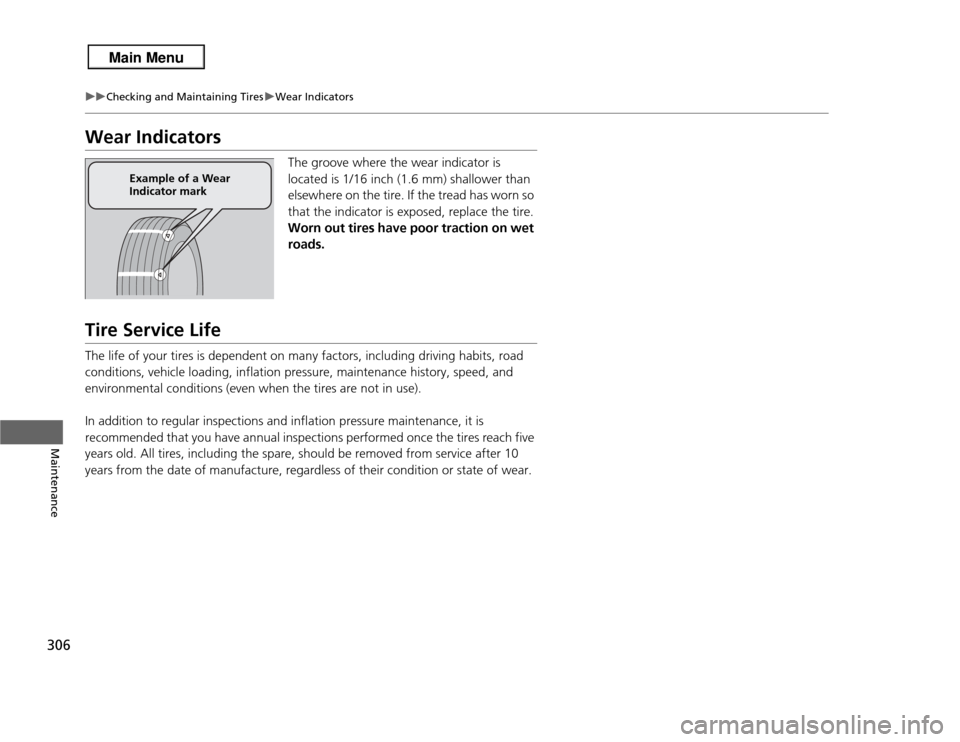
Wear Indicators
The groove where the wear indicator is
located is 1/16 inch (1.6 mm) shallower than
elsewhere on the tire. If the tread has worn so
that the indicator is exposed, replace the tire.
Worn out tires have poor traction on wet
roads.
Tire Service LifeThe life of your tires is dependent on many factors, including driving habits, road
conditions, vehicle loading, inflation pressure, maintenance history, speed, and
environmental conditions (even when the tires are not in use).
In addition to regular inspections and inflation pressure maintenance, it is
recommended that you have annual inspections performed once the tires reach five
years old. All tires, including the spare, should be removed from service after 10
years from the date of manufacture, regardless of their condition or state of wear.
Example of a Wear
Indicator mark
Page 320 of 364
319
Continued
Handling the Unexpected
If a Tire Goes FlatChanging a Flat TireIf a tire goes flat while driving, grasp the steering wheel firmly, and brake gradually
to reduce speed. Then, stop in a safe place. Replace the flat tire with a compact
spare tire. Go to a dealer as soon as possible to have the full-size tire repaired or
replaced.
1.Park the vehicle on firm, level, non-slippery surface and apply the parking brake.
2. Move the shift lever to
(P
.
3. Set the parking brake.
4. Turn on the hazard warning lights and set the power mode to VEHICLE OFF
(LOCK).
1Changing a Flat Tire
Periodically check the tire pressure of the compact
spare. It should be set to the specified pressure.
Specified Pressure: 60 psi (420 kPa, 4.2 kgf/cm
2)
When driving with the compact spare tire, keep the
vehicle speed under 50 mph (80 km/h). Replace with
a full-size tire as soon as possible.
The compact spare tire and wheel in your vehicle are
specifically for this model.
Do not use them with another vehicle.
Do not use another type of compact spare tire or
wheel with your vehicle.
Do not mount tire chains on a compact spare tire.
If a chain-mounted front tire goes flat, remove one of
the full-size rear tires and replace it with the compact
spare tire. Remove the flat front tire and replace it
with the full-size tire that was removed from the rear.
Mount the tire chains on the front tire.
Do not use a puncture-repairing agent on a flat tire,
as it can damage the tire pressure sensor.
Page 321 of 364
320
uuIf a Tire Goes Flat uChanging a Flat Tire
Handling the Unexpected
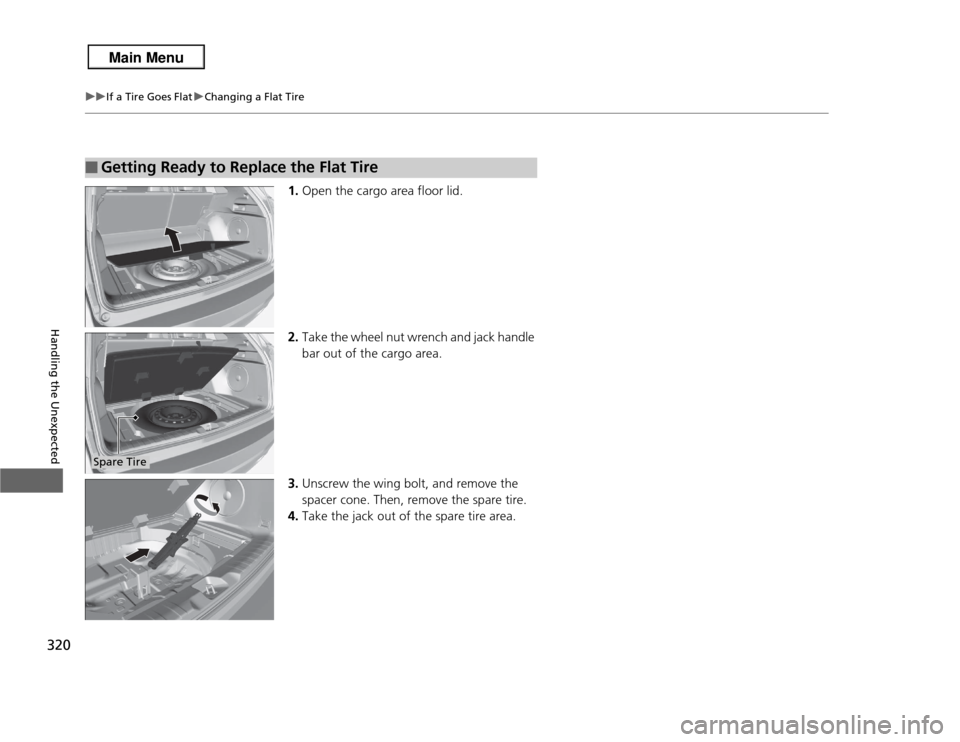
1. Open the cargo area floor lid.
2. Take the wheel nut wrench and jack handle
bar out of the cargo area.
3. Unscrew the wing bolt, and remove the
spacer cone. Then, remove the spare tire.
4. Take the jack out of the spare tire area.
■
Getting Ready to Re place the Flat TireSpare Tire