display Acura RDX 2015 Navigation Manual
[x] Cancel search | Manufacturer: ACURA, Model Year: 2015, Model line: RDX, Model: Acura RDX 2015Pages: 258, PDF Size: 11.1 MB
Page 16 of 258
15
Quick Reference GuideAcuraLink®
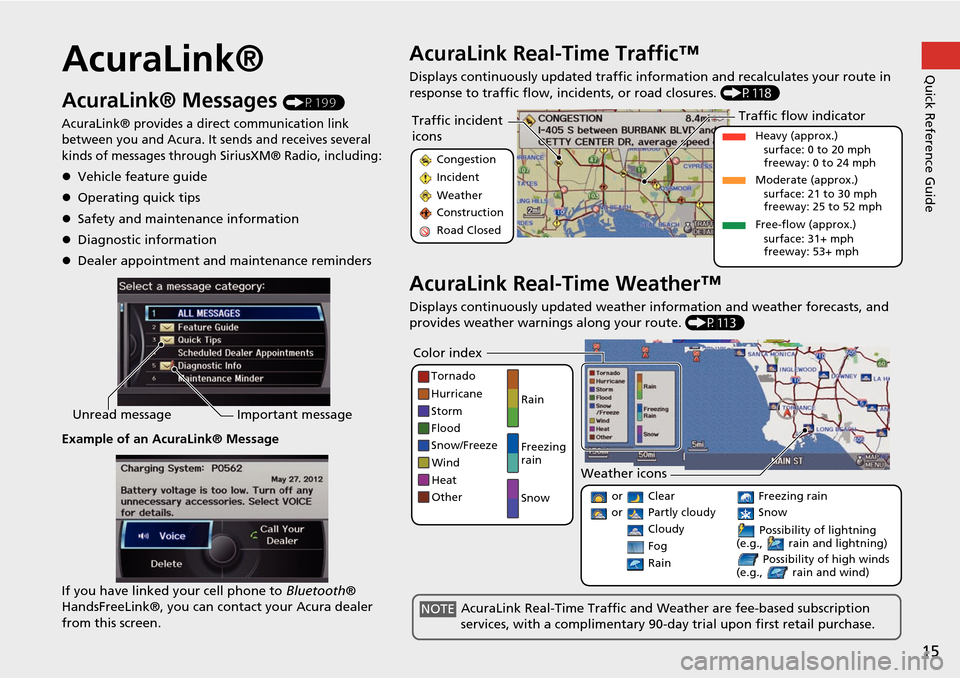
AcuraLink® Messages (P199)
AcuraLink® provides a direct communication link
between you and Acura. It sends and receives several
kinds of messages through SiriusXM® Radio, including:
Vehicle feature guide
Operating quick tips
Safety and maintenance information
Diagnostic information
Dealer appointment and maintenance reminders
Example of an AcuraLink® Message
If you have linked your cell phone to Bluetooth®
HandsFreeLink®, you can contact your Acura dealer
from this screen.
Unread message Important message
AcuraLink Real-Time Traffic™
Displays continuously updated traffic info rmation and recalculates your route in
response to traffic flow, in cidents, or road closures. (P118)
AcuraLink Real-Time Weather™
Displays continuously updated weather information and weather forecasts, and
provides weather warnings along your route. (P113)
Traffic incident
icons
Congestion
Incident
Weather
Construction
Road Closed
Traffic flow indicator
Heavy (approx.)
surface: 0 to 20 mph
freeway: 0 to 24 mph
Moderate (approx.) surface: 21 to 30 mph
freeway: 25 to 52 mph
Free-flow (approx.) surface: 31+ mph
freeway: 53+ mph
Color index
Tornado
Hurricane
Storm
Flood
Snow/Freeze
Wind
Heat
Other Rain
Freezing
rain
Snow
Weather icons
or Clear
or Partly cloudy
Cloudy Possibility of lightning
(e.g., rain and lightning)
Possibility of high winds
(e.g., rain and wind) Fog
Rain
Freezing rain
Snow
AcuraLink Real-Time Traffic and Weather are fee-based subscription
services, with a complimentary 90-day trial upon first retail purchase.NOTE
Page 17 of 258
16
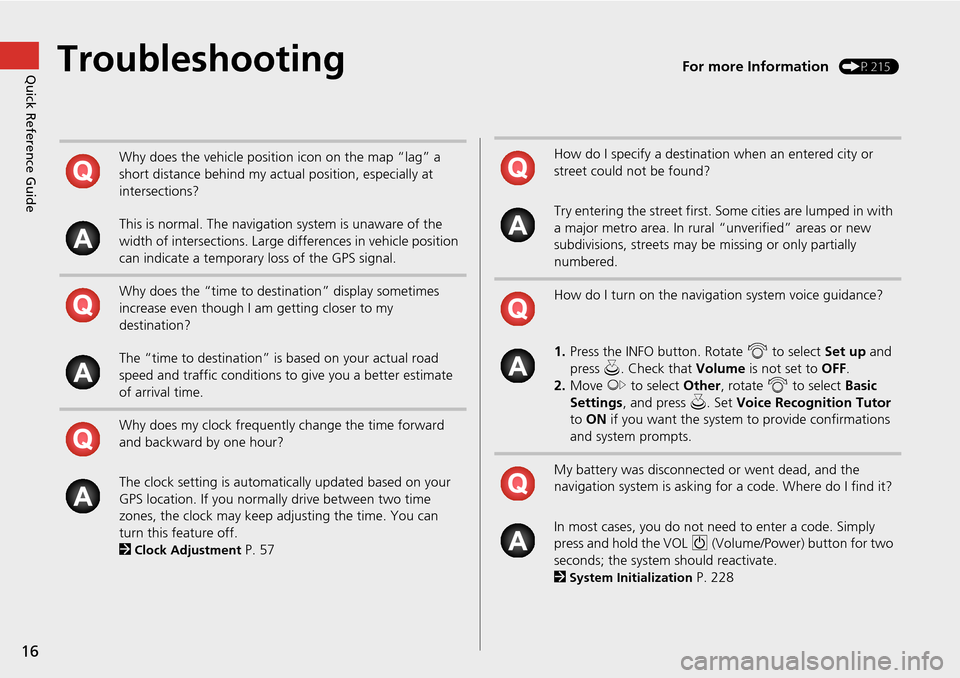
Quick Reference GuideTroubleshootingFor more Information (P215)
Why does the vehicle position icon on the map “lag” a
short distance behind my actual position, especially at
intersections?
This is normal. The navigation system is unaware of the
width of intersections. Large differences in vehicle position
can indicate a temporary loss of the GPS signal.
Why does the “time to destination” display sometimes
increase even though I am getting closer to my
destination?
The “time to destination” is based on your actual road
speed and traffic conditions to give you a better estimate
of arrival time.
Why does my clock frequently change the time forward
and backward by one hour?
The clock setting is automatically updated based on your
GPS location. If you normally drive between two time
zones, the clock may keep adjusting the time. You can
turn this feature off.
2
Clock Adjustment P. 57
How do I specify a destination when an entered city or
street could not be found?
Try entering the street first. Some cities are lumped in with
a major metro area. In rural “unverified” areas or new
subdivisions, streets may be missing or only partially
numbered.
How do I turn on the navigation system voice guidance?
1. Press the INFO button. Rotate i to select Set up and
press u. Check that Volume is not set to OFF.
2. Move y to select Other, rotate i to select Basic
Settings , and press u. Set Voice Recognition Tutor
to ON if you want the system to provide confirmations
and system prompts.
My battery was disconnected or went dead, and the
navigation system is asking for a code. Where do I find it?
In most cases, you do not need to enter a code. Simply
press and hold the VOL 9 (Volume/Power) button for two
seconds; the system should reactivate.
2
System Initialization P. 228
Page 18 of 258
17
How to Use This Manual
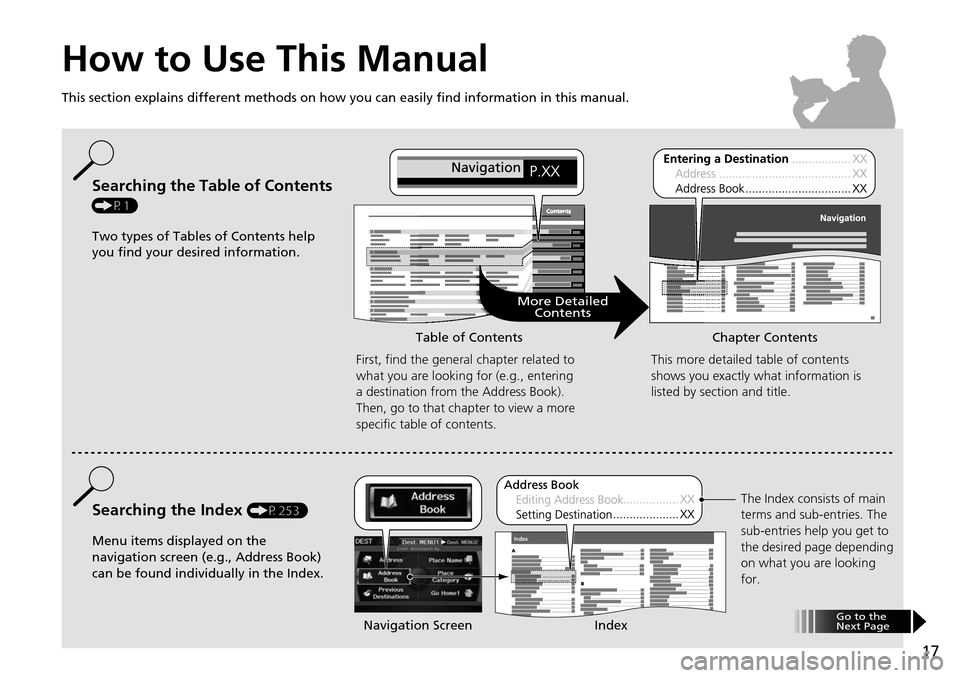
This section explains different methods on how you can easily find information in this manual.
ContentsContents
More DetailedContents
Go to the
Next Page
Searching the Table of Contents
(P1)
Two types of Tables of Contents help
you find your desired information.
First, find the general chapter related to
what you are looking for (e.g., entering
a destination from the Address Book).
Then, go to that chapter to view a more
specific table of contents.
Searching the Index (P253)
Menu items displayed on the
navigation screen (e.g., Address Book)
can be found individually in the Index. This more detailed table of contents
shows you exactly what information is
listed by section and title.
The Index consists of main
terms and sub-entries. The
sub-entries help you get to
the desired page depending
on what you are looking
for.
Table of Contents Chapter Contents
Navigation Screen Index
Page 20 of 258
19
System Setup
This section describes the start-up procedure and the navigation andsetup functions.
Start-up................................................... 20
Voice Control System ............................. 22
Command Input .................................... 22
Voice Recognition .................................. 23
Interface Settings ................................... 24
Display and Volume Settings .................. 24
Interface Dial Feedback .......................... 25
Basic Settings ......................................... 26
Color ..................................................... 27
Language............................................... 31
Wallpapers Setting ................................. 32
Personal Information .............................. 36
Address Book ......................................... 37
Home Addresses .................................... 41 PIN Numbers ...........................................42
Previous Destinations ..............................43
Music Search Setup .................................44
Song By Voice™ (SBV) ............................45
Phonetic Modification .............................46
Routing & Guidance ................................48
Rerouting................................................49
Unverified Area Routing ..........................50
Traffic Rerouting .....................................52
Edit Avoid Area .......................................53
Edit Waypoint Search Area ......................55
Street Name Guidance ............................56
Clock Adjustment ....................................57
Adjust Time ............................................58 Resetting the Clock Settings ................... 58
Vehicle ..................................................... 59
Off-road Tracking ................................... 60
Correct Vehicle Position ......................... 61
AcuraLink® .............................................. 62
AcuraLink/Messages ............................... 62
Traffic and Weather Status .................... 63
Data Reset ............................................... 64
Reset Factory Default Settings ................ 64
Clear Personal Data ................................ 65
Page 21 of 258
20
System Setup
Start-up
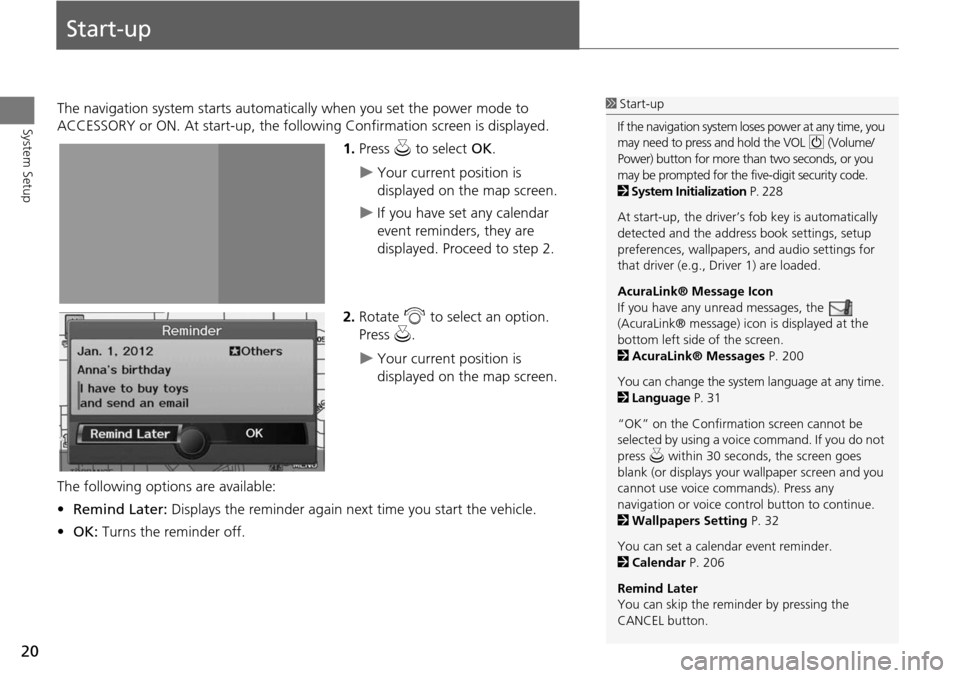
The navigation system starts automatically when you set the power mode to
ACCESSORY or ON. At start-up, the follow ing Confirmation screen is displayed.
1.Press u to select OK.
Your current position is
displayed on the map screen.
If you have set any calendar
event reminders, they are
displayed. Proceed to step 2.
2. Rotate i to select an option.
Press u.
Your current position is
displayed on the map screen.
The following options are available:
• Remind Later: Displays the reminder again next time you start the vehicle.
• OK: Turns the reminder off.
1Start-up
If the navigation system lo ses power at any time, you
may need to press and hold the VOL 9 (Volume/
Power) button for more than two seconds, or you
may be prompted for the five-digit security code.
2 System Initialization P. 228
At start-up, the driver’s fob key is automatically
detected and the addres s book settings, setup
preferences, wallpapers, and audio settings for
that driver (e.g., Driver 1) are loaded.
AcuraLink® Message Icon
If you have any unread messages, the
(AcuraLink® message) icon is displayed at the
bottom left side of the screen.
2 AcuraLink® Messages P. 200
You can change the system language at any time.
2 Language P. 31
“OK” on the Confirmati on screen cannot be
selected by using a voice command. If you do not
press u within 30 seconds, the screen goes
blank (or displays your wallpaper screen and you
cannot use voice commands). Press any
navigation or voice cont rol button to continue.
2 Wallpapers Setting P. 32
You can set a calendar event reminder.
2 Calendar P. 206
Remind Later
You can skip the reminder by pressing the
CANCEL button.
Page 23 of 258
22
System Setup
Voice Control System
Your vehicle has a voice control system that allows hands-free operation of most of
the navigation system functions. You can also control the audio and climate control
system, and make and rece ive phone calls using Bluetooth ® HandsFreeLink®.
The voice control system uses the d (Talk) and K (Back) buttons on the steering
wheel and a microphone near the map lights on the ceiling.
A “Voice Info” feature provides a tutorial that explains how to use the voice control
system.
2 Voice Help P. 5
Command Input
If the system does not understand a command or you wait too long to give a
command, the system asks y ou to repeat the command.
When you give a command, the system ge nerally either repeats the command as a
confirmation or asks you for further informa tion. If you do not wish to hear this
feedback, you can turn it off. However, list ening to the feedback will help familiarize
you with the way the system expe cts commands to be phrased.
2Basic Settings P. 26
If the system cannot perform a command or the command is not appropriate for the
screen you are on, the system beeps.
On character input screens, a list of possi ble characters is displayed if the system
does not recognize your command.
You can find out which voice commands are available for a particular screen using
the d Help command. The system will disp lay and read the list of available
commands to you.
1 d (Talk) Button
When you press the d (Talk) button, a helpful
prompt asks what you would like to do. Press
and release the d (Talk) button again to bypass
this prompt and give a command.
1 Command Input
The audio system is muted while using the voice
control system.
Page 25 of 258
24
System Setup
Interface Settings
Display and Volume Settings
HINFO button Set up
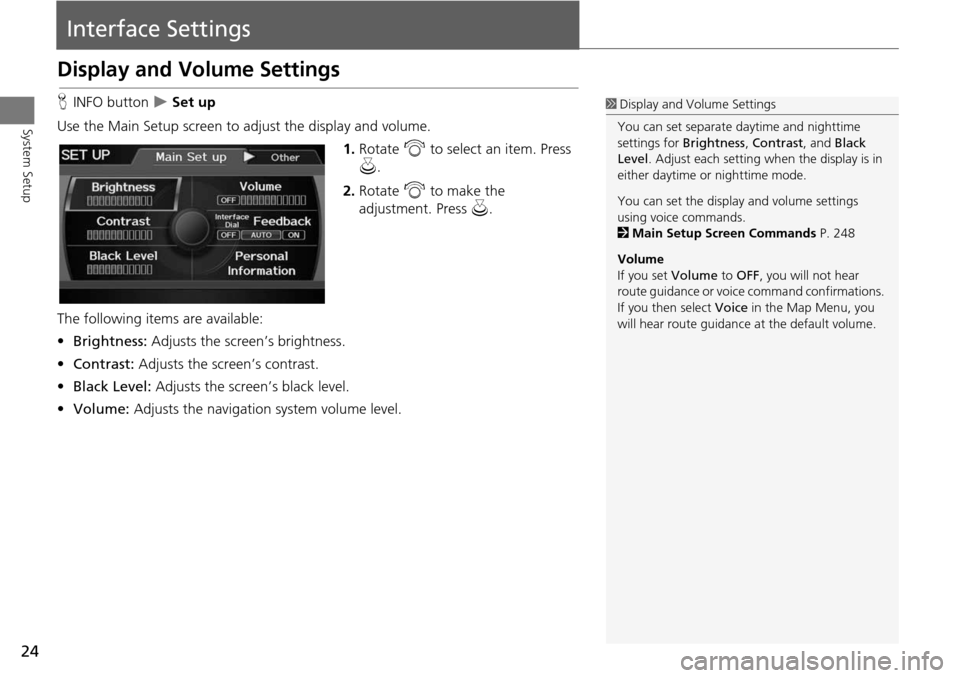
Use the Main Setup screen to ad just the display and volume.
1.Rotate i to select an item. Press
u .
2. Rotate i to make the
adjustment. Press u.
The following item s are available:
• Brightness: Adjusts the screen’s brightness.
• Contrast: Adjusts the screen’s contrast.
• Black Level: Adjusts the screen’s black level.
• Volume: Adjusts the navigation system volume level.1Display and Volume Settings
You can set separate daytime and nighttime
settings for Brightness, Contrast, and Black
Level . Adjust each setting when the display is in
either daytime or nighttime mode.
You can set the display and volume settings
using voice commands.
2 Main Setup Screen Commands P. 248
Volume
If you set Volume to OFF, you will not hear
route guidance or voic e command confirmations.
If you then select Voice in the Map Menu, you
will hear route guidance at the default volume.
Page 27 of 258
26
Interface SettingsBasic Settings
System Setup
Basic Settings
HINFO button Set up Other Basic Settings
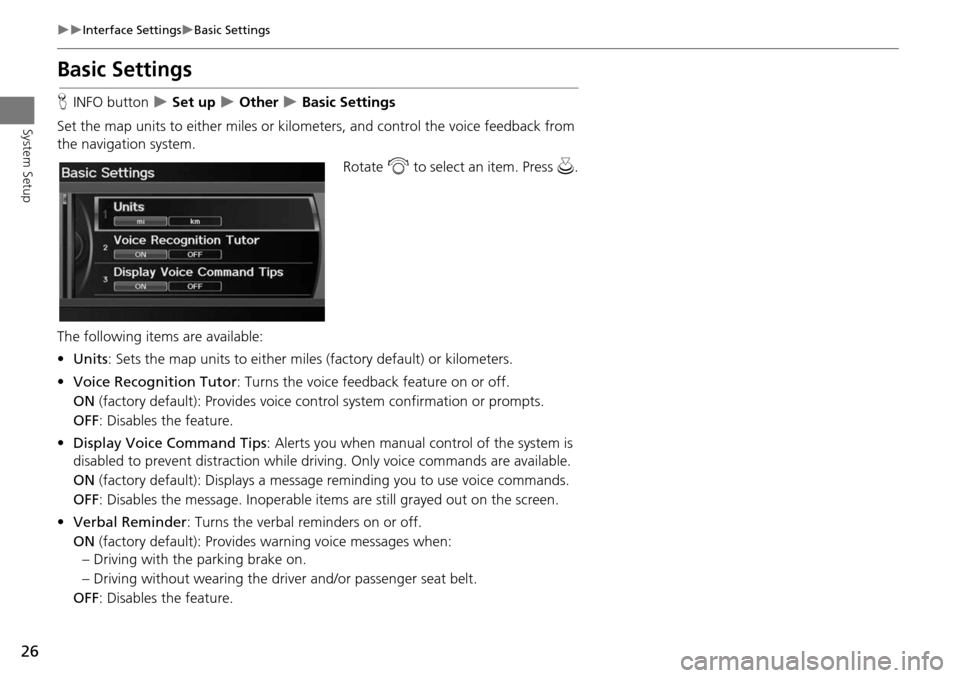
Set the map units to either miles or kilo meters, and control the voice feedback from
the navigation system.
Rotate i to select an item. Press u .
The following item s are available:
• Units : Sets the map units to ei ther miles (factory default) or kilometers.
• Voice Recognition Tutor : Turns the voice feedback feature on or off.
ON (factory default): Provides voice control system confirmation or prompts.
OFF : Disables the feature.
• Display Voice Command Tips : Alerts you when manual control of the system is
disabled to prevent distraction while driv ing. Only voice commands are available.
ON (factory default): Displays a messag e reminding you to use voice commands.
OFF : Disables the message. Inoperable items are still grayed out on the screen.
• Verbal Reminder : Turns the verbal reminders on or off.
ON (factory default): Provides warning voice messages when:
– Driving with the parking brake on.
– Driving without wearing the driv er and/or passenger seat belt.
OFF : Disables the feature.
Page 30 of 258
29
Interface SettingsColor
System Setup
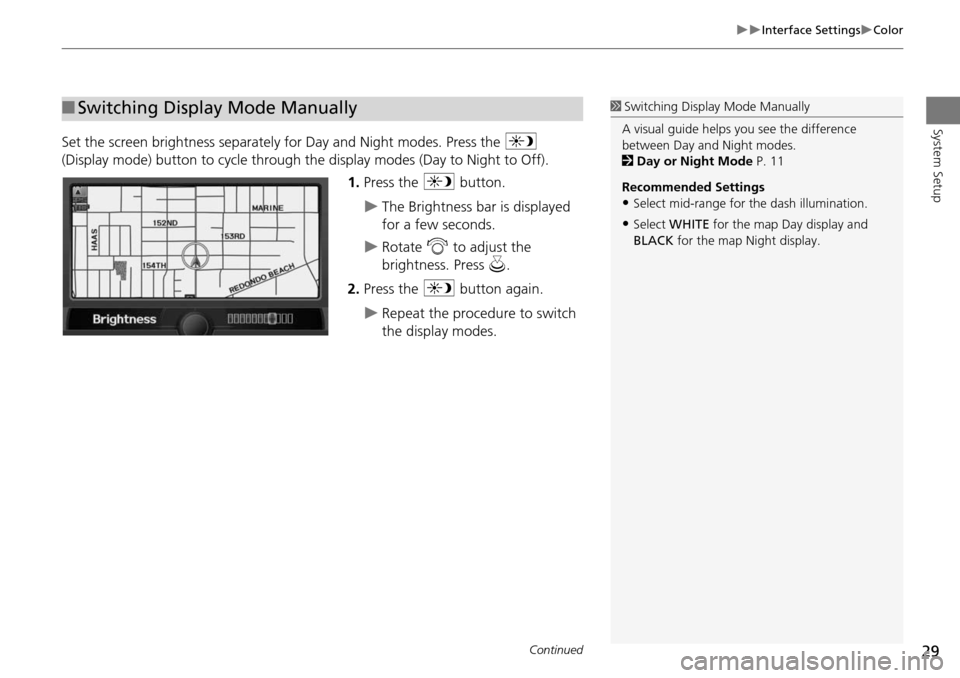
Set the screen brightness separately for Day and Night modes. Press the a
(Display mode) button to cycle through the display modes (Day to Night to Off).
1. Press the a button.
The Brightness bar is displayed
for a few seconds.
Rotate i to adjust the
brightness. Press u.
2. Press the a button again.
Repeat the procedure to switch
the display modes.
■Switching Display Mode Manually1 Switching Display Mode Manually
A visual guide helps y ou see the difference
between Day an d Night modes.
2 Day or Night Mode P. 11
Recommended Settings
•Select mid-range for the dash illumination.
•Select WHITE for the map Day display and
BLACK for the map Night display.
Continued
Page 31 of 258
30
Interface SettingsColor
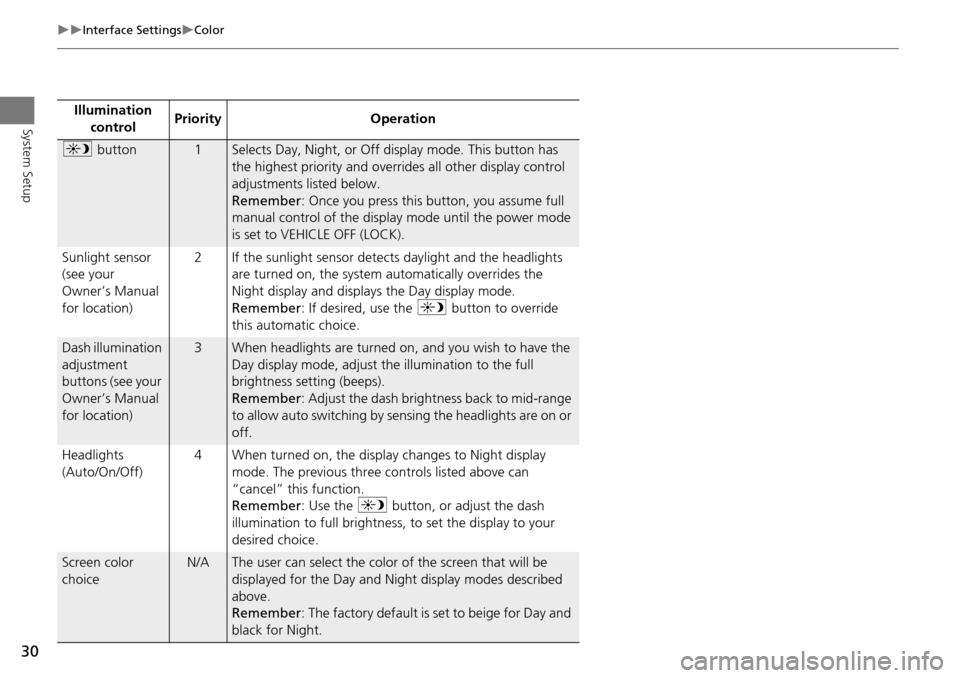
System SetupIllumination control Priority Operation
a
button1Selects Day, Night, or Off display mode. This button has
the highest priority and overrides all other display control
adjustments listed below.
Remember : Once you press this button, you assume full
manual control of the display mode until the power mode
is set to VEHICLE OFF (LOCK).
Sunlight sensor
(see your
Owner’s Manual
for location) 2 If the sunlight sensor detects daylight and the headlights
are turned on, the system automatically overrides the
Night display and displays the Day display mode.
Remember : If desired, use the a button to override
this automatic choice.
Dash illumination
adjustment
buttons (see your
Owner’s Manual
for location)3When headlights are turned on, and you wish to have the
Day display mode, adjust the illumination to the full
brightness setting (beeps).
Remember : Adjust the dash brightness back to mid-range
to allow auto switching by sensing the headlights are on or
off.
Headlights
(Auto/On/Off) 4 When turned on, the display changes to Night display
mode. The previous three controls listed above can
“cancel” this function.
Remember : Use the a button, or adjust the dash
illumination to full brightness, to set the display to your
desired choice.
Screen color
choiceN/AThe user can select the color of the screen that will be
displayed for the Day and Night display modes described
above.
Remember : The factory default is set to beige for Day and
black for Night.