audio Acura RL 2000 3.5 Owner's Manual
[x] Cancel search | Manufacturer: ACURA, Model Year: 2000, Model line: RL, Model: Acura RL 2000Pages: 330, PDF Size: 4.53 MB
Page 1 of 330

2000 RL Online Reference Owner's Manual
Use these links (and links throughout this manual) to navigate through\
this reference.
For a printed owner's manual, click on authorized manuals or go to www.h\
elminc.com.
Contents
Owner's Identification Form
Introduction ........................................................................\
................................................................. i
A Few Words About Safety........................................................................\
........................................ .ii
Your Vehicle at a Glance........................................................................\
............................................ .2
Driver and Passenger Safety ........................................................................\
..................................... .5
Proper use and care of your vehicle's seat belts, and Supplemental Restr\
aint System.
Instruments and Controls........................................................................\
........................................ .51
Instrument panel indicator and gauge, and how to use dashboard and steering colu\
mn controls.
Comfort and Convenience Features ........................................................................\
..................... .119
How to operate the climate control system, the audio system, and other c\
onvenience features.
Before Driving........................................................................\
..........................................................165
What gasoline to use, how to break-in your new vehicle, and how to load luggage and other cargo.
Driving ........................................................................\
..................................................................... .177
The proper way to start the engine, shift the transmission, and park, pl\
us towing a trailer.
Maintenance........................................................................\
.............................................................201
The Maintenance Schedule shows you when you need to take your vehicle to the dealer.
Appearance Care........................................................................\
..................................................... .261
Tips on cleaning and protecting your vehicle. Things to look for if your\
vehicle ever needs body repairs.
Taking Care of the Unexpected........................................................................\
..............................269
This section covers several problems motorists sometimes experience, a nd how to handle them.
Technical Information........................................................................\
............................................ .295
ID numbers, dimensions, capacities, and technical information.
Warranty and Customer Relations (U.S. and Canada)................................................................309
A summary of the warranties covering your new Acura, and how to contact \
us.
Authorized Manuals (U.S. only)........................................................................\
..............................315
How to order manuals and other technical literature.
Index........................................................................\
........................................................................\
...... I
Service Information Summary
A summary of information you need when you pull up to the fuel pump.
Page 54 of 330
Instrument
s an d Control s
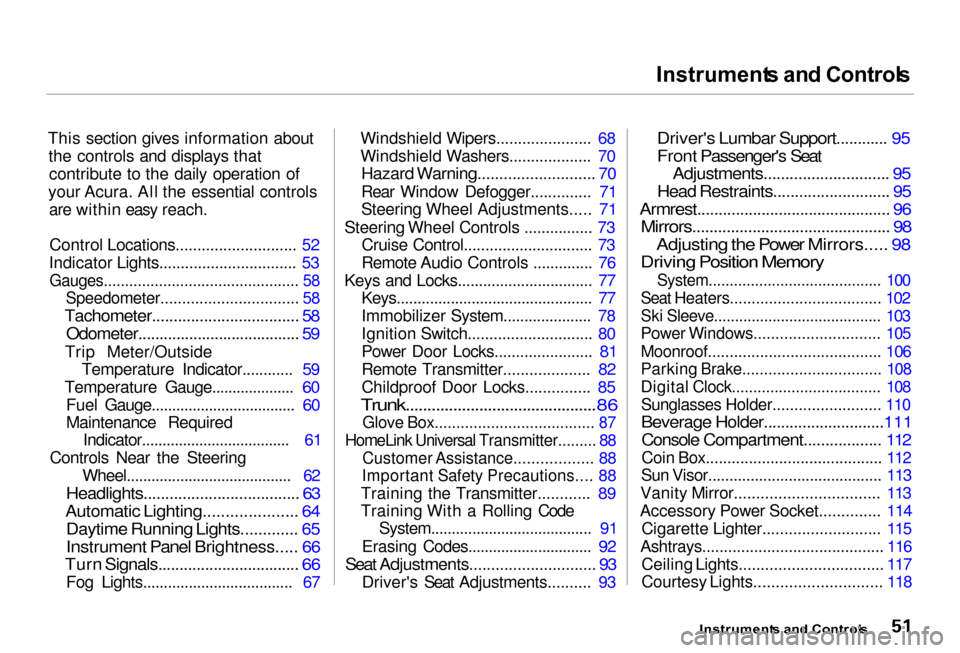
This section gives information about the controls and displays thatcontribute to the daily operation of
your Acura. All the essential controls are within easy reach.
Control Locations............................ 52
Indicator Lights................................ 53
Gauges.............................................. 58
Speedometer................................ 58
Tachometer.................................. 58
Odometer...................................... 59
Trip Meter/Outside Temperature Indicator............ 59
Temperature Gauge.................... 60 Fuel Gauge................................... 60
Maintenance Required Indicator.................................... 61
Controls Near the Steering Wheel........................................ 62
Headlights.................................... 63
Automatic Lighting..................... 64
Daytime Running Lights............. 65
Instrument Panel Brightness..... 66
Turn Signals................................. 66
Fog Lights.................................... 67 Windshield Wipers...................... 68
Windshield Washers................... 70
Hazard Warning........................... 70
Rear Window Defogger.............. 71
Steering Wheel Adjustments..... 71
Steering Wheel Controls ................ 73 Cruise Control.............................. 73
Remote Audio Controls .............. 76
Keys and Locks................................ 77 Keys............................................... 77
Immobilizer System..................... 78
Ignition Switch............................. 80
Power Door Locks....................... 81
Remote Transmitter.................... 82
Childproof Door Locks............... 85
Trunk............................................86
Glove Box..................................... 87
HomeLink Universal Transmitter......... 88
Customer Assistance.................. 88
Important Safety Precautions.... 88
Training the Transmitter............ 89
Training With a Rolling Code System....................................... 91
Erasing Codes.............................. 92
Seat Adjustments............................. 93
Driver's Seat Adjustments.......... 93
Driver's Lumbar Support............ 95
Front Passenger's Seat
Adjustments............................. 95
Head Restraints........................... 95
Armrest............................................. 96
Mirrors.............................................. 98
Adjusting the Power Mirrors..... 98
Driving Position Memory
System......................................... 100
Seat Heaters................................... 102
Ski Sleeve........................................ 103
Power Windows............................. 105
Moonroof........................................ 106
Parking Brake................................ 108
Digital Clock................................... 108
Sunglasses Holder......................... 110
Beverage Holder............................111
Console Compartment.................. 112
Coin Box......................................... 112
Sun Visor......................................... 113
Vanity Mirror................................. 113
Accessory Power Socket.............. 114 Cigarette Lighter........................... 115
Ashtrays.......................................... 116
Ceiling Lights................................. 117
Courtesy Lights............................. 118
Instrument s an d Control s
Page 65 of 330
Control
s Nea r th e Steerin g Whee l
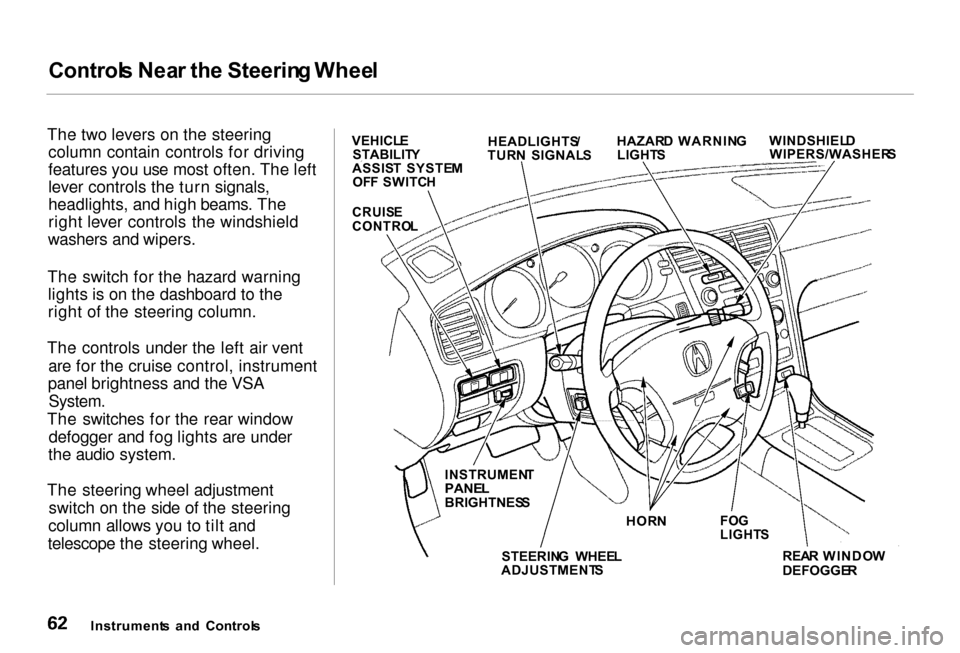
The two levers on the steering column contain controls for driving
features you use most often. The left
lever controls the turn signals,
headlights, and high beams. The
right lever controls the windshield
washers and wipers.
The switch for the hazard warning lights is on the dashboard to the
right of the steering column.
The controls under the left air vent are for the cruise control, instrument
panel brightness and the VSA
System.
The switches for the rear window defogger and fog lights are under
the audio system.
The steering wheel adjustment switch on the side of the steering
column allows you to tilt and
telescope the steering wheel.
Instrument s an d Control s WINDSHIEL
D
WIPERS/WASHER S
HAZAR
D WARNIN G
LIGHT S
HEADLIGHTS
/
TUR N SIGNAL S
VEHICL
E
STABILIT Y
ASSIS T SYSTE M
OF F SWITC H
CRUIS E
CONTRO L
REAR WINDO W
DEFOGGE R
FO
G
LIGHT S
HOR
N
INSTRUMEN
T
PANE L
BRIGHTNES S
STEERIN G WHEE L
ADJUSTMENT S
Page 79 of 330
Steerin
g Whee l Control s
When you push the CANCEL button, or tap the brake pedal, the CRUISE
CONTROL light on the instrument
panel will go out and the car will
begin to slow down. You can use the accelerator pedal in the normal way.
The system remembers the previously-set cruising speed. To
return to that speed, accelerate toabove 25 mph (40 km/h) and then
press and release the RESUME/ accel button. The CRUISE
CONTROL light comes on. The car
will accelerate to the same cruising speed as before. Pressing the Cruise Control Master
Switch turns the system completely
off and erases the previous cruising
speed from memory. To use the
system again, refer to Using the
Cruise Control.
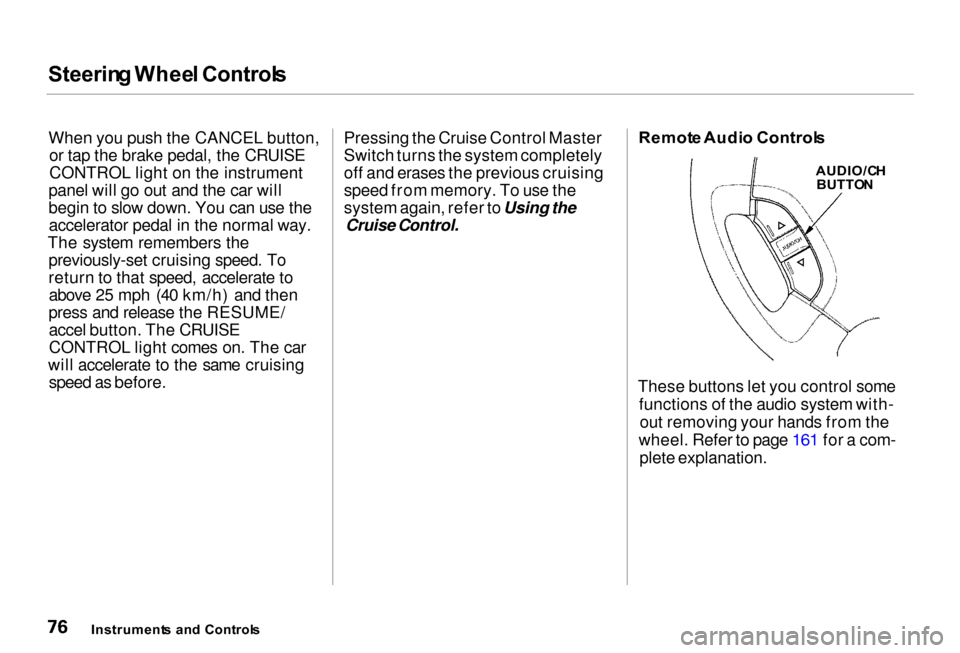
Remot
e Audi o Control s
AUDIO/C H
BUTTO N
These buttons let you control some functions of the audio system with-out removing your hands from the
wheel. Refer to page 161 for a com- plete explanation.
Instrument s an d Control s
Page 83 of 330

Key
s an d Lock s
Ignitio n Switc h
The ignition switch is on the right side of the steering column. It has
four positions: LOCK (0)
ACCESSORY (I)
ON (II)
START (III) LOC
K (0 ) — You can insert or
remove the key only in this position.
To switch from ACCESSORY to LOCK, you must push the key inslightly as you turn it. The shift lever
must also be in Park. The anti-theft
lock will lock the steering column
when you remove the key.
If the front wheels are turned, the
anti-theft lock may sometimes make
it difficult to turn the key from
LOCK to ACCESSORY. Firmly turn
the steering wheel to the left or to
the right as you turn the key.
ACCESSOR Y (I ) — In this position,
you can operate the audio system and the cigarette lighter.
O N (II ) — This is the normal key
position when driving. All features
and accessories on the car are usable.
Several of the lights on the instru-
ment panel come on as a test when
you turn the ignition switch from ACCESSORY to ON.
STAR T (III ) — Use this position
only to start the engine. The switch
returns to ON (II) when you let go of
the key.
The engine will not start if the Immobilizer System does not
recognize the key's coding (see page 78).
You will hear a reminder beeper if you leave the key in the ignition switch in the LOCK (0) or
ACCESSORY (I) position and open the driver's door. Remove the key to
turn off the beeper.
Instrument s an d Control s
Page 122 of 330
Comfor
t an d Convenienc e Feature s
The climate control system in your
Acura provides a comfortable driving
environment in all weather condi-
tions.
The standard audio system has
many features. This section de-
scribes those features and how to
use them.
Your Acura has an anti-theft audio
system that requires a code number
to enable it.
The security system helps to dis-
courage vandalism and theft of your
Acura. Climate Control System................ 120
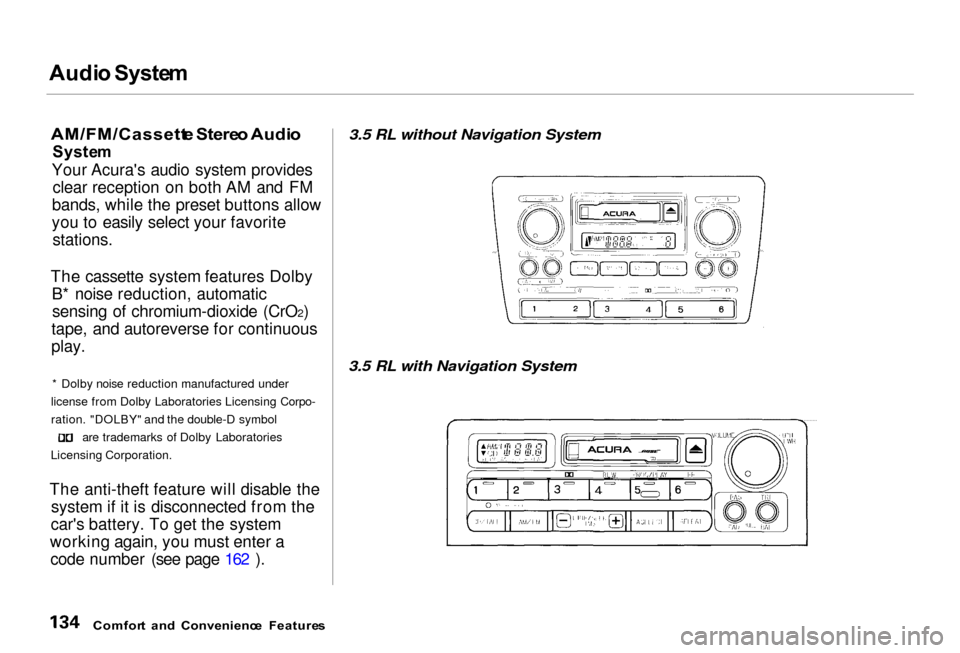
3.5 RL without Navigation System
Fully-automatic Operation........ 122
Semi-automatic Operation........ 123
3.5 RL with Navigation System
Fully-automatic Operation ........ 127
Semi-automatic Operation ........ 128
Rear Ventilation ......................... 132
Sunlight Sensor/ Temperature Sensor.............
133
Audio System ................................. 134
AM/FM/Cassette Stereo
Audio System......................... 134
3.5 RL without Navigation System
Operating the Radio.................. 135
Adjusting the Sound.................. 138
Audio System Lighting............. 139 Operating the Cassette Player...................................... 139
Tape Search Functions............. 140 Operating the CD Changer...... 142
3.5 RL with Navigation System
Operating the Radio.................. 145
Adjusting the Sound.................. 148
Audio System Lighting............. 149 Radio Frequencies..................... 149
Radio Reception......................... 149Operating the Cassette
Player...................................... 151
Tape Search Functions............. 151 Caring for the Cassette Player...................................... 154
Operating the CD Changer...... 155
Loading the CD Changer ......... 157
Protecting Compact Discs........ 159 CD Changer Error Indications.............................. 160
Remote Audio Controls ............ 161
Theft Protection........................ 162
Security System............................. 163
Comfor t an d Convenienc e Feature s
Page 137 of 330
Audi
o Syste m
AM/FM/Cassett e Stere o Audi o
Syste m
Your Acura's audio system provides clear reception on both AM and FM
bands, while the preset buttons allow
you to easily select your favorite stations.
The cassette system features Dolby B* noise reduction, automatic
sensing of chromium-dioxide (CrO2)
tape, and autoreverse for continuous
play.
* Dolby noise reduction manufactured under
license from Dolby Laboratories Licensing Corpo-
ration. "DOLBY" and the double-D symbol are trademarks of Dolby Laboratories
Licensing Corporation.
The anti-theft feature will disable the system if it is disconnected from the
car's battery. To get the system
working again, you must enter a code number (see page 162 ).
3.5 RL without Navigation System
3.5 RL with Navigation System
Comfor t an d Convenienc e Feature s
Page 138 of 330

Audi
o Syste m
3.5 RL without Navigation System
Operatin g th e Radi o
The ignition switch must be inACCESSORY (I) or ON (II) to operate the audio system. Turn thesystem on by pushing the PWR/
VOL knob or the AM/FM button.
Adjust the volume by turning the
knob.
The band and frequency that the ra-
dio was last tuned to is displayed. To
change bands, press the AM/FM but-
ton. On the FM band, ST will be dis-
played if the station is broadcasting
in stereo. ST will flash if you are driv-
ing in an area where the radio signal
is weak. Stereo reproduction on AM
is not available. You can use any of three methods to
find radio stations on the selected
band: TUNE, SEEK, or the Preset
buttons.
TUN E — Use the TUNE knob to
tune the radio to a desired frequency.
Turn the TUNE knob to the right to tune to a higher frequency, or to the
left to tune to a lower frequency.
Turn the knob right or left until the
display reaches the desired frequen-
cy.
SEE K — The SEEK function
searches the band for a station with
a strong signal. To activate it, push ei-
ther of the SEEK/SKIP buttons (— or +). Push the + button to scan up
from the current frequency, and the — button to scan down. It stops
when it finds a station with a strong
signal.
Prese
t — You can store the
frequencies of your favorite radio stations in the six preset buttons.
Each button will store one frequency
on the AM band, and two
frequencies on the FM band.
CONTINUED
Comfor t an d Convenienc e Feature s
Page 142 of 330
Audi
o Syste m
Audi o Syste m Lightin g
You can use the instrument panel brightness control dial to adjust the il-
lumination of the audio system (see
page 66 ). The audio system illuminates when the parking lights
are on, even if the radio is turned off.
Radi o Frequencie s an d Reception
For information, See page 149 .
Operatin
g th e Cassett e Playe r
The ignition switch must be in
ACCESSORY (I) or ON (II). Make sure the tape opening on the
cassette is facing to the right, then
insert the cassette most of the way
into the slot. The system will pull it
in the rest of the way, and begin to
play.
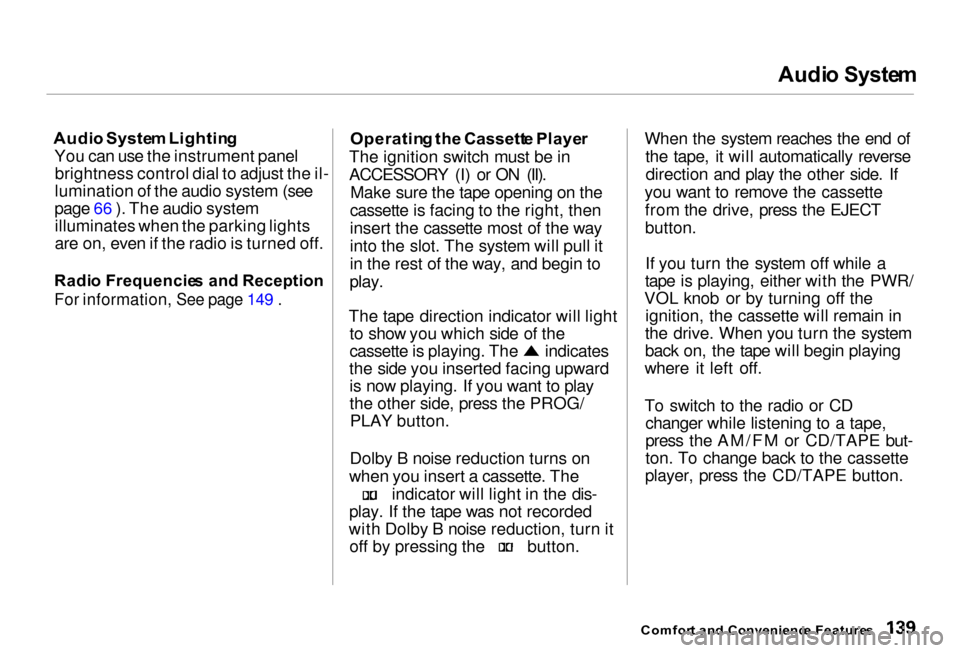
The tape direction indicator will light to show you which side of the cassette is playing. The indicates
the side you inserted facing upward is now playing. If you want to play
the other side, press the PROG/PLAY button.
Dolby B noise reduction turns on
when you insert a cassette. The indicator will light in the dis-
play. If the tape was not recorded
with Dolby B noise reduction, turn it off by pressing the button.When the system reaches the end of
the tape, it will automatically reversedirection and play the other side. If
you want to remove the cassette from the drive, press the EJECT
button.
If you turn the system off while a
tape is playing, either with the PWR/
VOL knob or by turning off the ignition, the cassette will remain in
the drive. When you turn the system
back on, the tape will begin playing
where it left off.
To switch to the radio or CD changer while listening to a tape,
press the AM/FM or CD/TAPE but-
ton. To change back to the cassette
player, press the CD/TAPE button.
Comfor t an d Convenienc e Feature s
Page 148 of 330

Audi
o Syste m
3.5 RL with Navigation System
Operatin g th e Radi oThe ignition switch must be in
ACCESSORY (I) or ON (II) to
operate the audio system. Turn the
system on by pushing the PWR/
VOL knob or the AM/FM button.
Adjust the volume by turning the knob.
The band and frequency that the ra-
dio was last tuned to is displayed. To
change bands, press the AM/FM but-
ton. On the FM band, ST will be dis-
played if the station is broadcastingin stereo. ST will flash if you are driv-
ing in an area where the radio signal
is weak. Stereo reproduction on AM
is not available. You can use any of three methods to
find radio stations on the selectedband: TUNE, SEEK, or the Preset
buttons.
TUN E — Use the TUNE bar to tune
the radio to a desired frequency.
Push and release the appropriate side of the bar quickly. The
frequency numbers will change in small increments.
SEE K — The SEEK function
searches the band for a station with
a strong signal. To activate it, push either of the SEEK bar ( — or +)
until you hear a beep. Push the bar on the + side to scan up from the
current frequency, and on the —
side to scan down. It stops when it
finds a station with a strong signal. Prese
t — You can store the
frequencies of your favorite radio stations in the six preset buttons.
Each button will store one frequency
on the AM band, and two
frequencies on the FM band.
CONTINUED
Comfor t an d Convenienc e Feature s