lights Acura RL 2001 3.5 User Guide
[x] Cancel search | Manufacturer: ACURA, Model Year: 2001, Model line: RL, Model: Acura RL 2001Pages: 333, PDF Size: 4.28 MB
Page 68 of 333

Controls Near the Steering Wheel
Do not leave the light switch in
AUTO if you will not be driving the car for an extended period (a week
or more). You should also turn off
the lights if you plan to leave the
engine idling or the engine off for a
long time. This will prevent the
battery from discharging.
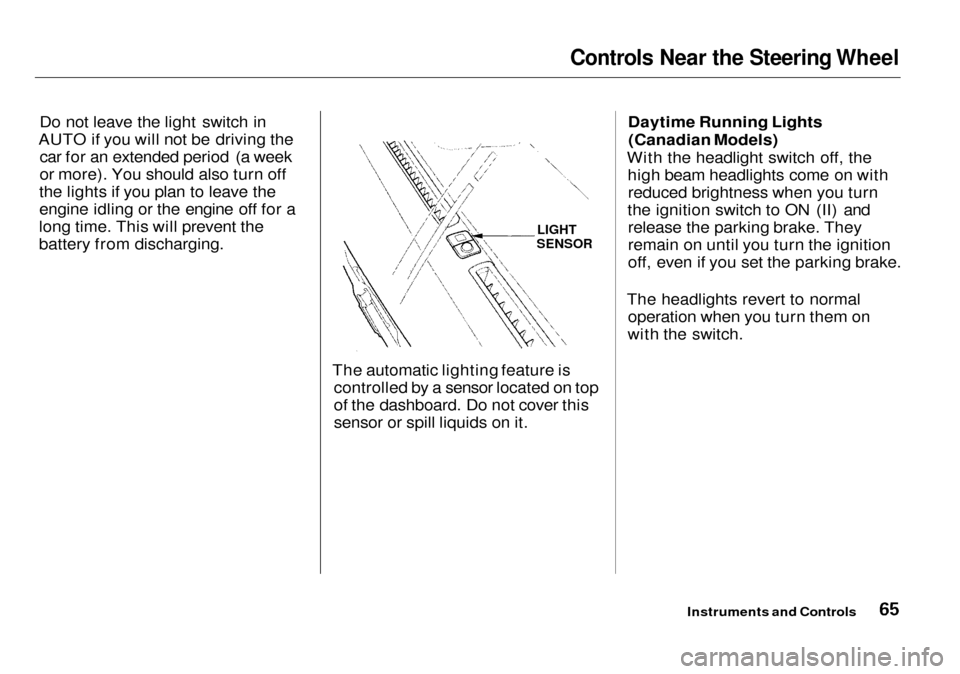
The automatic lighting feature iscontrolled by a sensor located on top
of the dashboard. Do not cover this
sensor or spill liquids on it. Daytime Running Lights
(Canadian Models)
With the headlight switch off, the high beam headlights come on withreduced brightness when you turn
the ignition switch to ON (II) and release the parking brake. They
remain on until you turn the ignition
off, even if you set the parking brake.
The headlights revert to normal operation when you turn them on
with the switch.
Instruments and Controls
LIGHT
SENSOR
Page 69 of 333

Controls Near the Steering Wheel
Instrument Panel Brightness
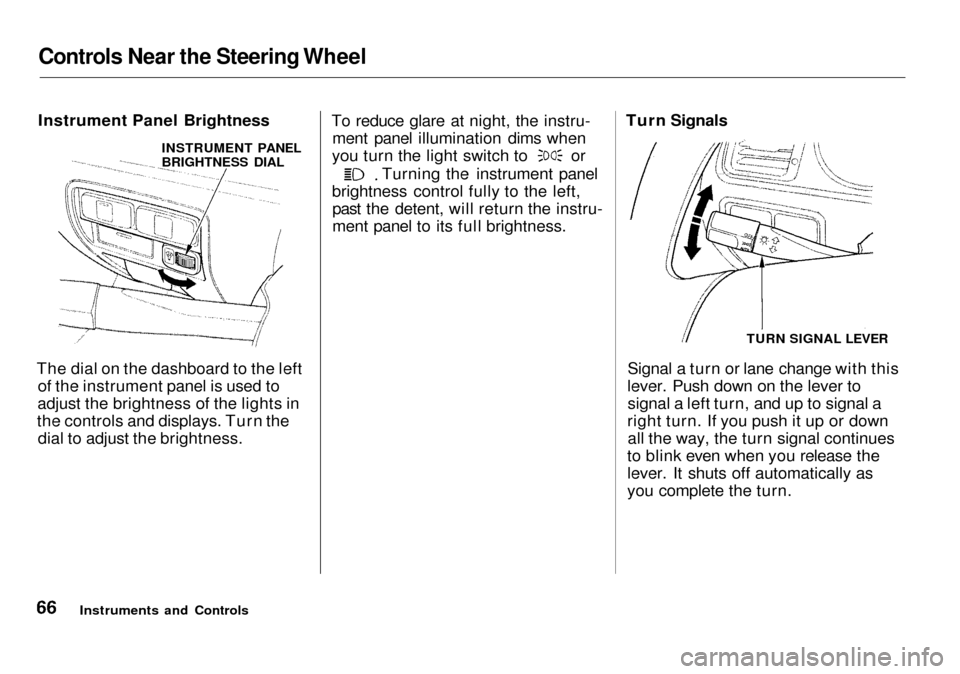
The dial on the dashboard to the left of the instrument panel is used to
adjust the brightness of the lights in
the controls and displays. Turn the dial to adjust the brightness. To reduce glare at night, the instru-
ment panel illumination dims when you turn the light switch to or
Turning the instrument panel
brightness control fully to the left, past the detent, will return the instru-
ment panel to its full brightness.
Signal a turn or lane change with this
lever. Push down on the lever to signal a left turn, and up to signal a
right turn. If you push it up or down all the way, the turn signal continues
to blink even when you release the
lever. It shuts off automatically as
you complete the turn.
Instruments and Controls Turn Signals
TURN SIGNAL LEVER
INSTRUMENT PANEL
BRIGHTNESS DIAL
Page 70 of 333

Controls Near the Steering Wheel
To signal a lane change, push lightly on the turn signal lever in the proper
direction and hold it. The lever will
return to the center position as soon as you release it. Fog Lights
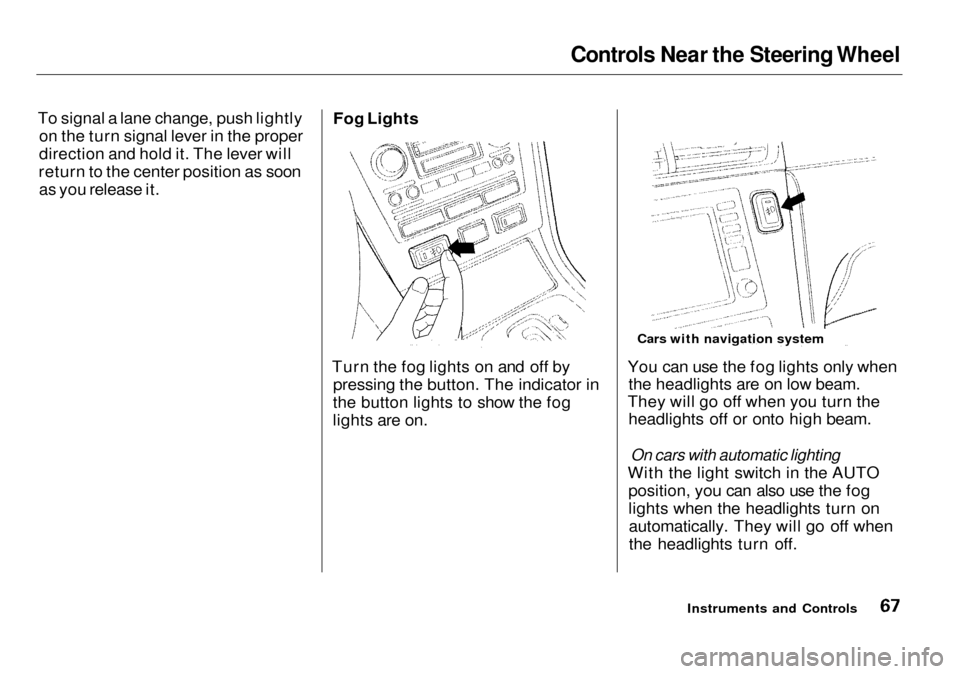
Turn the fog lights on and off by pressing the button. The indicator in
the button lights to show the fog
lights are on. You can use the fog lights only when
the headlights are on low beam.
They will go off when you turn the headlights off or onto high beam.
On cars with automatic lighting
With the light switch in the AUTO position, you can also use the fog
lights when the headlights turn onautomatically. They will go off when
the headlights turn off.
Instruments and Controls
Cars with navigation system
Page 73 of 333

Controls Near the Steering Wheel
Windshield Washers
To clean the windshield, pull back on the wiper control lever. The washersspray until you release the lever. The
wipers run at low speed while you're pulling the lever, then complete one
more sweep of the windshield after
you release it. Hazard Warning
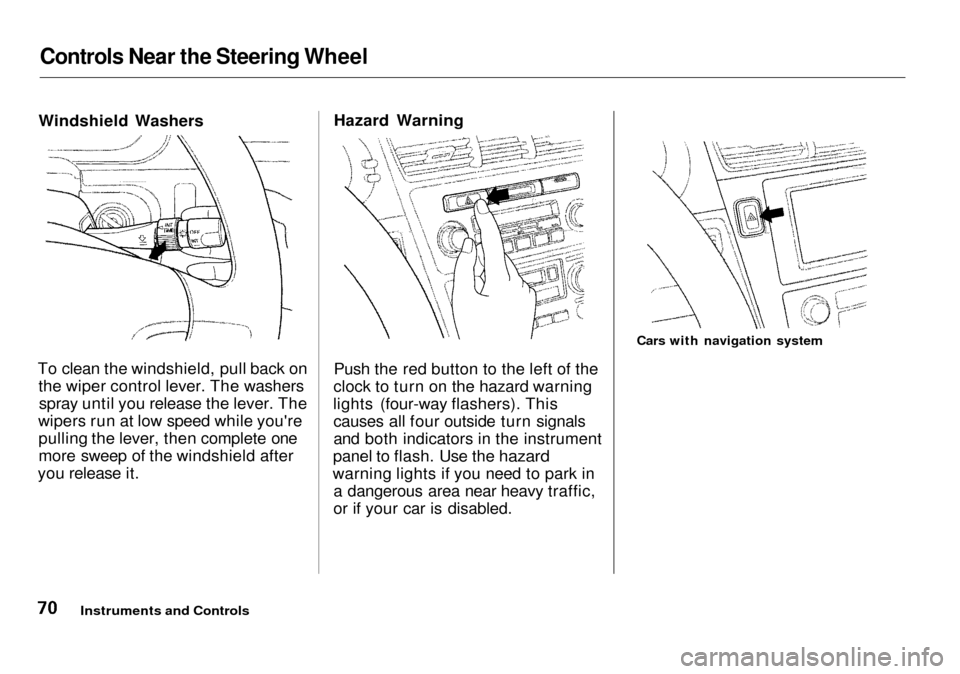
Push the red button to the left of the
clock to turn on the hazard warning
lights (four-way flashers). This causes all four outside turn signals
and both indicators in the instrument
panel to flash. Use the hazard
warning lights if you need to park in a dangerous area near heavy traffic,
or if your car is disabled.
Instruments and Controls
Cars with navigation system
Page 74 of 333

Controls Near the Steering Wheel
Rear Window Defogger
Th
e rear window defogger will clear
fog
, frost, and thin ice from the
window. Push the defogger button to turn it on and off. The light in the
button lights to show the
defogger is
on. If
you do not turn it off, the
defogger will shut itself off after
about
25 minutes. It also shuts off
when you turn off the ignition. You have to turn it on again when you
restart the car. Make sure the rear window is clear
an
d you have good visibilit
y before
starting to drive.
The defogger and antenna wires on the inside of the rear window
can be
accidentally damaged. When
cleaning
the glass, always wipe side
to side. Steerin
g Wheel Adjustments
See page 17 for important safety
information about how to properly
position the steering wheel.
You
r Acura's
steering wheel is
electrically-adjustable
for angle and
distance. The adjustment switch is
on the left side of
the steering
column.
Always adjust the steering
wheel before you begin driving.
CONTINUED
Instruments and Controls
Adjusting the steering wheel
position while driving may
caus
e you to lose control o
f the
car
and be seriously injured in a
crash.
Adjust the steering wheel only
when
the car is stopped.
Cars with navigation system
Page 75 of 333

Controls Near the Steering Wheel
1. Locate the adjustment switch on the left side of the steering column.Move the steering wheel, in, out,
up, or down by pushing and
holding the adjustment switch in
that direction. 2. Release the switch when the
steering wheel reaches the
desired position. Make sure the
steering wheel points towards
your chest, not toward your face, and that you can see the
instrument panel gauges and
warning lights. The AUTO switch controls automat-
ic movement of the steering wheel.
When this switch is in the ON posi- tion, the steering wheel automatical-
ly moves fully in and up when you re-
move the key from the ignitionswitch.
Instruments and Controls
Automatic Movement
AUTO SWITCH
Page 83 of 333

Keys and Locks
Ignition Switch
The ignition switch is on the right side of the steering column. It has
four positions:
LOCK (0)
ACCESSORY (I) ON (II)
START (III) LOCK (0) — You can insert or
remove the key only in this position.
To switch from ACCESSORY to LOCK, you must push the key in
slightly as you turn it. The shift lever
must also be in Park. The anti-theft
lock will lock the steering column
when you remove the key.
If the front wheels are turned, theanti-theft lock may sometimes make
it difficult to turn the key from LOCK to ACCESSORY. Firmly turn
the steering wheel to the left or to
the right as you turn the key.
ACCESSORY (I) — In this position, you can operate the audio systemand the cigarette lighter.
ON (II) — This is the normal key
position when driving. All features and accessories on the car are usable.
Several of the lights on the instru-
ment panel come on as a test when
you turn the ignition switch from ACCESSORY to ON.
START (III) — Use this positiononly to start the engine. The switch
returns to ON (II) when you let go of
the key.
The engine will not start if the Immobilizer System does not
recognize the key's coding (see page 78).
You will hear a reminder beeper if
you leave the key in the ignition switch in the LOCK (0) or
ACCESSORY (I) position and open the driver's door. Remove the key to
turn off the beeper.
Instruments and Controls
Page 85 of 333

Keys and Locks
Lockout Prevention
If you forget and leave the key in the
ignition switch, Lockout Prevention
will not allow you to lock the driver's door. With the driver's door open
and the key in the ignition, both
master door lock switches are disabled. However, if the driver's
door is not open, the master door
lock switches are not disabled. Pushing the switch down on the
open passenger's door will lock all
doors. If you try to lock an open
driver's door by pushing in the lock
tab, the tabs on all doors pop out. Pushing in the lock tab on the
passenger's door only locks that door. Remote Transmitter
You can lock and unlock your car with the remote transmitter. When
you push the LOCK button, all doorslock. You will hear a beep, and the
parking lights, taillights and license
plate lights will flash once. When you push the UNLOCK button
once, only the driver's door unlocks.
The remaining doors unlock when you push the button a second time.
You will hear two beeps, and the outside lights will flash twice, each
time you push the button.
The ceiling lights (if the ceiling light switch is in the center position) and
the door courtesy lights will come on
when you press the UNLOCK button. If you do not open any door, the
lights stay on for about 10 seconds,
then fade out. If you relock the doors with the remote transmitter before 10 seconds have elapsed, the lights
will go off immediately.
Instruments and Controls
LED
UNLOCK
BUTTON
LOCK
BUTTON
TRUNK
RELEASE
BUTTON
PANIC
BUTTON
Page 86 of 333

Keys and Locks
If you unlock the doors with the
remote transmitter, but do not open any of the doors within 30 seconds,
the doors automatically relock and
the security system sets.
You cannot lock any of the doors
with the remote transmitter if any door is not fully closed or the key is
in the ignition switch. You cannot
unlock any of the doors with the key
in the ignition switch.
To open the trunk, push the Trunk Release button for approximately
one second.
You can open the trunk with the remote transmitter regardless of the
position of the main switch in the
glove box. The trunk will not open if
the key is in the ignition switch. Turning the Beep Off and On
You can program the keyless entry system so it does not beep when you
lock and unlock the doors. This
procedure only turns off the beep;
the exterior lights will still flash.
To turn this feature off, stand near the car with the remote transmitter.Press and hold the Trunk Release
button, then press the Lock button
within one second. You should see
the LED on the remote transmitter come on for one second. Release the
buttons after the LED goes out.
To turn this feature on, repeat the above procedure. You should see the
LED blink twice.
After you program the remote transmitter, make sure the trunk lidis closed. Panic Mode
Panic mode allows you to remotely
activate your car's security system to
attract attention. When activated, the
horn will sound, and the exterior
lights will flash, for about 30 seconds.
To activate panic mode, press and hold the PANIC button for about two
seconds.
To cancel Panic mode before 30 seconds, press any button on the
remote transmitter. You can also
turn the ignition switch to ON (II).
Panic mode will not activate if the
ignition switch is in the ON (II)
position.
CONTINUED
Instruments and Controls
Page 91 of 333

Keys and Locks
Glove Box
Open the glove box by pulling the
bottom of the handle. Close it with a
firm push. Lock or unlock the glove box with the master key.
The glove box light comes on only when the parking lights are on.
Instruments and Controls
An open glove box can cause
serious injury to your passenger
in a crash, even if the
passenger is wearing the seat
belt.
Always keep the glove box closed while driving.