Call Acura RLX 2014 Service Manual
[x] Cancel search | Manufacturer: ACURA, Model Year: 2014, Model line: RLX, Model: Acura RLX 2014Pages: 518, PDF Size: 15.83 MB
Page 165 of 518

uuInterior Lights/Interior Convenience ItemsuInterior Convenience Items
164Controls
Your vehicle has a multi-function center
console. It includes a storage compartment,
an armrest, and a sliding tray.
Push the button on either side of the console
compartment to open the console
compartment.
You can put small items in the sliding tray
located in the console compartment lid. To
use the tray, push the button, then slide the
console compartment lid out fully. To close
the lid, push the button. It is automatically slid
back.
■
Console Compartment
1Console Compartment
The console compartment light comes on when the
parking lights are on.
Button
Sliding
Tray
Button
Page 166 of 518

165
uuInterior Lights/Interior Convenience ItemsuInterior Convenience Items
Continued
Controls
Slide the lid using release knob to use the
center pocket.
To close it, push the release knob. It is
automatically slid back.
■
Center Pocket
Knob
Page 178 of 518

177
Continued
Controls
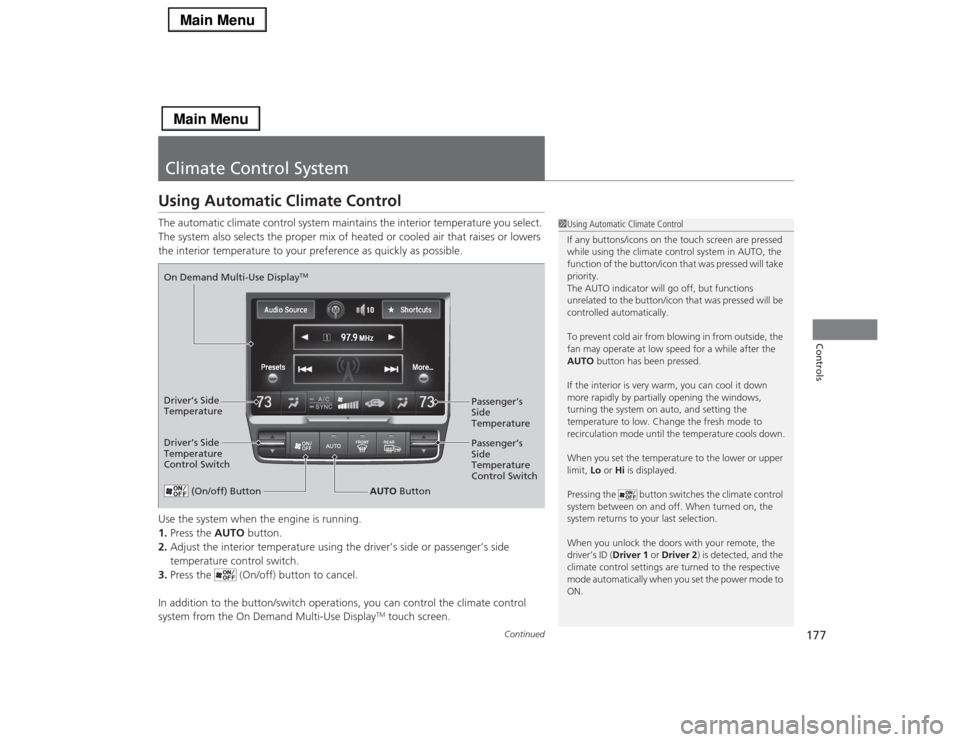
Climate Control SystemUsing Automatic Climate ControlThe automatic climate control system maintains the interior temperature you select.
The system also selects the proper mix of heated or cooled air that raises or lowers
the interior temperature to your preference as quickly as possible.
Use the system when the engine is running.
1.Press the AUTO button.
2.Adjust the interior temperature using the driver’s side or passenger’s side
temperature control switch.
3.Press the (On/off) button to cancel.
In addition to the button/switch operations, you can control the climate control
system from the On Demand Multi-Use Display
TM touch screen.
1Using Automatic Climate Control
If any buttons/icons on the touch screen are pressed
while using the climate control system in AUTO, the
function of the button/icon that was pressed will take
priority.
The AUTO indicator will go off, but functions
unrelated to the button/icon that was pressed will be
controlled automatically.
To prevent cold air from blowing in from outside, the
fan may operate at low speed for a while after the
AUTO button has been pressed.
If the interior is very warm, you can cool it down
more rapidly by partially opening the windows,
turning the system on auto, and setting the
temperature to low. Change the fresh mode to
recirculation mode until the temperature cools down.
When you set the temperature to the lower or upper
limit, Lo or Hi is displayed.
Pressing the button switches the climate control
system between on and off. When turned on, the
system returns to your last selection.
When you unlock the doors with your remote, the
driver’s ID (Driver 1 or Driver 2) is detected, and the
climate control settings are turned to the respective
mode automatically when you set the power mode to
ON.
(On/off) Button
AUTO Button On Demand Multi-Use Display
TM
Driver’s Side
Temperature
Control SwitchPassenger’s
Side
Temperature
Control Switch Passenger’s
Side
Temperature Driver’s Side
Temperature
Page 179 of 518

uuClimate Control SystemuUsing Automatic Climate Control
178Controls
■
Operating from the On Demand Multi-Use Display
TM
1Using Automatic Climate Control
You can store two customized climate control
settings to the system and recall them from the On
Demand Multi-Use Display
TM.
2Shortcuts P. 195
On Demand Multi-Use Display
TM
A/C (Air Conditioning) and
SYNC (Synchronized) Icon
Driver’s Side
Vent Mode Icon
Driver’s Side
Temperature Control
IconRecirculation/
Fresh Air mode
Icon
Passenger’s Side
Vent Mode Icon
Fan Control IconPassenger’s Side
Temperature Control
Icon
Page 181 of 518

uuClimate Control SystemuUsing Automatic Climate Control
180Controls
■Switching the vent mode
1.Select the driver’s or passenger’s side vent
mode.
2.Select a desired vent mode icon, or Driver
Mode Auto (driver’s side)/Passenger
Mode Auto (passenger’s side): The system
automatically selects the vent mode most
suitable to the ambient environment.
Vent mode
: Dashboard vents and back of the center
console
: Dashboard and floor vents, and back of
the center console
: Floor vents
: Floor and defroster vents (driver’s side
only)■A/C on and off
1.Select A/C.
2.Select ON or OFF.
1Switching the vent mode
While the climate control system is in AUTO, Driver
Mode Auto or Passenger Mode Auto is
highlighted.
The side you selected.
Page 182 of 518

Continued
181
uuClimate Control SystemuUsing Automatic Climate Control
Controls
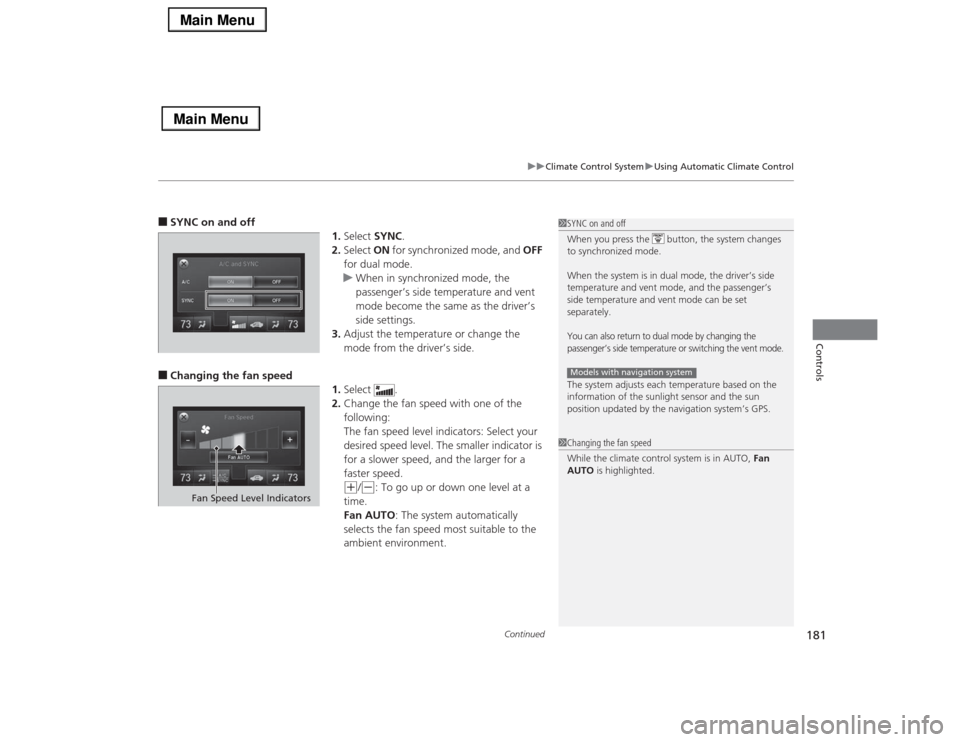
■SYNC on and off
1.Select SYNC.
2.Select ON for synchronized mode, and OFF
for dual mode.
uWhen in synchronized mode, the
passenger’s side temperature and vent
mode become the same as the driver’s
side settings.
3.Adjust the temperature or change the
mode from the driver’s side.■Changing the fan speed
1.Select .
2.Change the fan speed with one of the
following:
The fan speed level indicators: Select your
desired speed level. The smaller indicator is
for a slower speed, and the larger for a
faster speed.
(+
/(-
: To go up or down one level at a
time.
Fan AUTO: The system automatically
selects the fan speed most suitable to the
ambient environment.
1SYNC on and off
When you press the button, the system changes
to synchronized mode.
When the system is in dual mode, the driver’s side
temperature and vent mode, and the passenger’s
side temperature and vent mode can be set
separately.You can also return to dual mode by changing the
passenger’s side temperature or switching the vent mode.The system adjusts each temperature based on the
information of the sunlight sensor and the sun
position updated by the navigation system’s GPS.Models with navigation system1Changing the fan speed
While the climate control system is in AUTO, Fan
AUTO is highlighted.
Fan Speed Level Indicators
Page 183 of 518

uuClimate Control SystemuUsing Automatic Climate Control
182Controls
■Switching between the recirculation and fresh air modes
1.Select , or currently
shown.
2.Switch the mode depending on
environmental conditions to the following:
(Recirculation Mode): Recirculates air
from the vehicle’s interior through the system.
(Auto Mode): Automatically switch
between the recirculation and fresh air modes
most suitable to environmental conditions. If
the ambient temperature is low, the mode
may not change to recirculation to keep the
windows from fogging up.
(Fresh Air Mode): Maintains outside
ventilation. Keep the system in fresh air mode
in normal situations.
1Switching between the recirculation and fresh air modes
While the climate control system is in AUTO, is
highlighted.
Page 184 of 518

Continued
183
uuClimate Control SystemuUsing Automatic Climate Control
Controls
Pressing the button turns the air
conditioning system on and automatically
switches the system to fresh air mode.
Press the button again to turn off, the
system returns to the previous settings.
■To rapidly defrost the windows
1.Press the button.
2.Select the recirculation mode.
2Switching between the recirculation
and fresh air modes P. 182
■
Defrosting the Windshield and Windows
1Defrosting the Windshield and Windows
For your safety, make sure you have a clear view
through all the windows before driving.
Do not set the temperature near the upper or lower
limit.
When cold air hits the windshield, the outside of the
windshield may fog up.
If the side windows fog up, adjust the vents so that
the air hits the side windows.1To rapidly defrost the windows
After defrosting the windows, switch over to fresh air
mode.
If you keep the system in recirculation mode, the
windows may fog up from humidity. This impedes
visibility.
Page 191 of 518

190
uuAudio SystemuAuxiliary Input Jack
Features
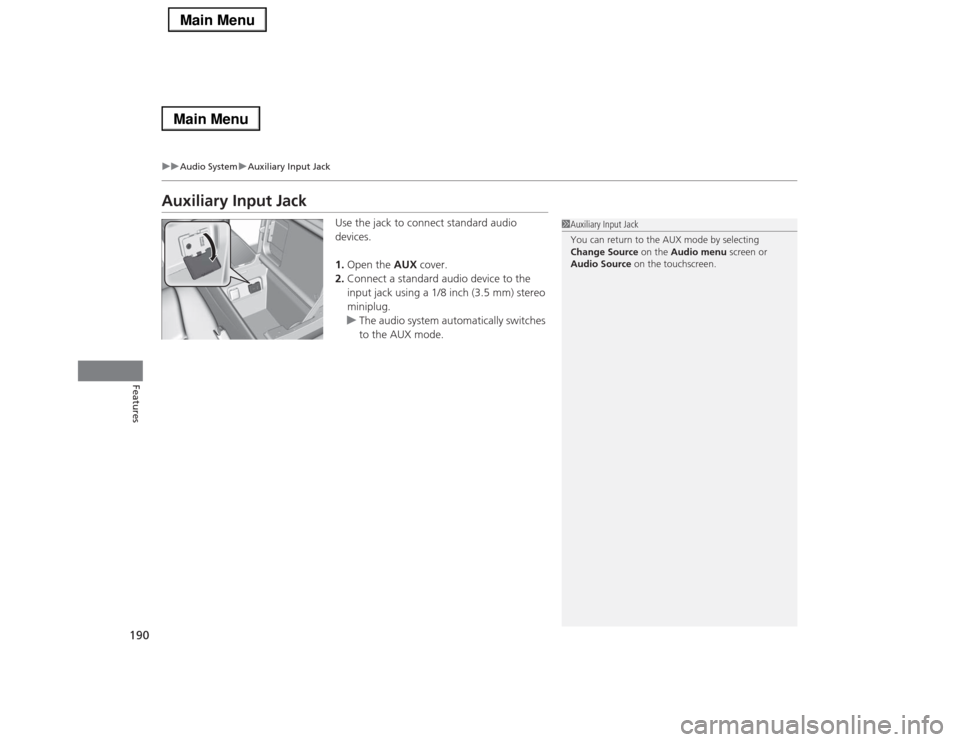
Auxiliary Input Jack
Use the jack to connect standard audio
devices.
1.Open the AUX cover.
2.Connect a standard audio device to the
input jack using a 1/8 inch (3.5 mm) stereo
miniplug.
uThe audio system automatically switches
to the AUX mode.
1Auxiliary Input Jack
You can return to the AUX mode by selecting
Change Source on the Audio menu screen or
Audio Source on the touchscreen.
Page 194 of 518

193Features
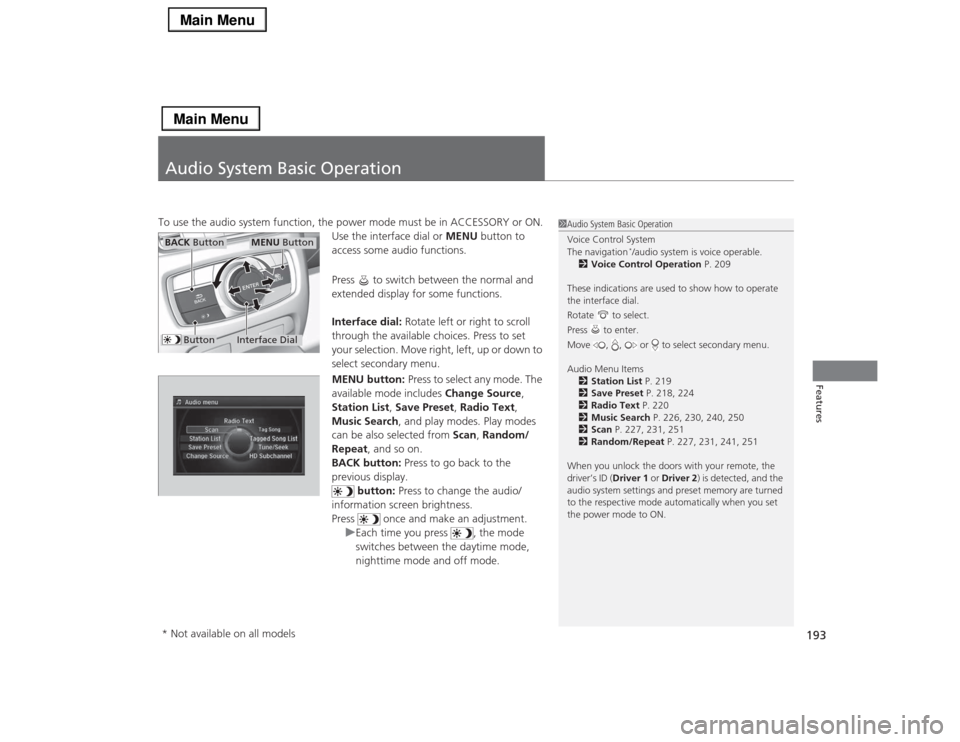
Audio System Basic OperationTo use the audio system function, the power mode must be in ACCESSORY or ON.
Use the interface dial or MENU button to
access some audio functions.
Press to switch between the normal and
extended display for some functions.
Interface dial: Rotate left or right to scroll
through the available choices. Press to set
your selection. Move right, left, up or down to
select secondary menu.
MENU button: Press to select any mode. The
available mode includes Change Source,
Station List, Save Preset, Radio Text,
Music Search, and play modes. Play modes
can be also selected from Scan, Random/
Repeat, and so on.
BACK button: Press to go back to the
previous display.
button: Press to change the audio/
information screen brightness.
Press once and make an adjustment.
uEach time you press , the mode
switches between the daytime mode,
nighttime mode and off mode.
1Audio System Basic Operation
Voice Control System
The navigation
*/audio system is voice operable.
2Voice Control Operation P. 209
These indications are used to show how to operate
the interface dial.
Rotate to select.
Press to enter.
Move , , or to select secondary menu.
Audio Menu Items
2Station List P. 219
2Save Preset P. 218, 224
2Radio Text P. 220
2Music Search P. 226, 230, 240, 250
2Scan P. 227, 231, 251
2Random/Repeat P. 227, 231, 241, 251
When you unlock the doors with your remote, the
driver’s ID (Driver 1 or Driver 2) is detected, and the
audio system settings and preset memory are turned
to the respective mode automatically when you set
the power mode to ON.
Interface Dial
MENU Button
BACK Button
Button
* Not available on all models