instrument panel Acura TSX 2004 User Guide
[x] Cancel search | Manufacturer: ACURA, Model Year: 2004, Model line: TSX, Model: Acura TSX 2004Pages: 364, PDF Size: 5.35 MB
Page 78 of 364
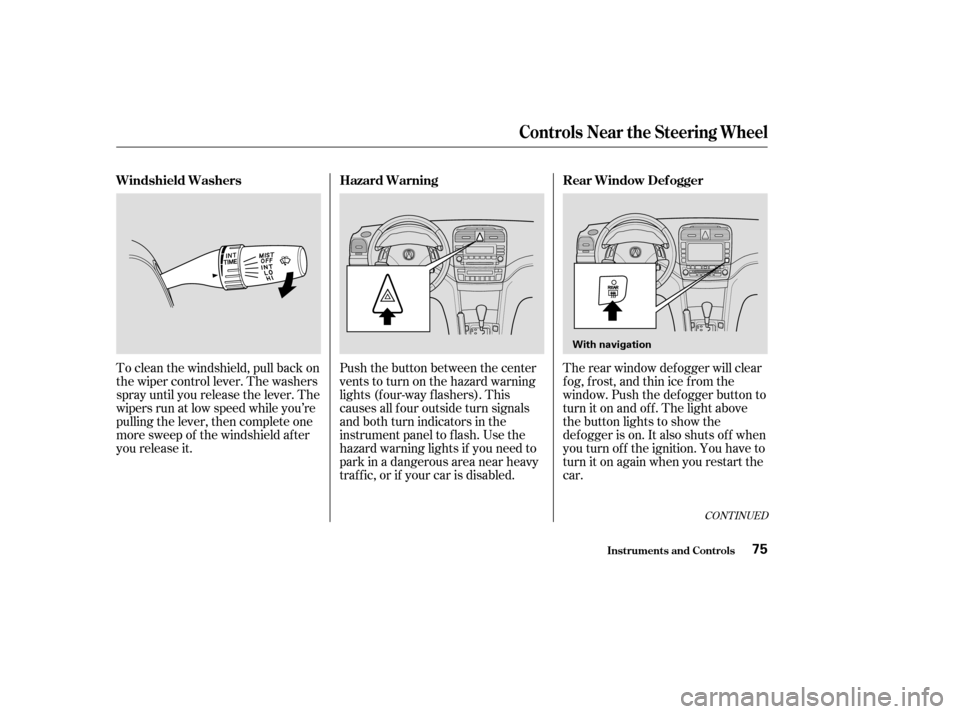
To clean the windshield, pull back on
the wiper control lever. The washers
spray until you release the lever. The
wipers run at low speed while you’re
pulling the lever, then complete one
more sweep of the windshield af ter
you release it.Push the button between the center
vents to turn on the hazard warning
lights (f our-way f lashers). This
causes all f our outside turn signals
and both turn indicators in the
instrument panel to f lash. Use the
hazard warning lights if you need to
park in a dangerous area near heavy
traf f ic, or if your car is disabled.The rear window def ogger will clear
fog, frost, and thin ice from the
window. Push the def ogger button to
turn it on and of f . The light above
the button lights to show the
def ogger is on. It also shuts of f when
you turn off the ignition. You have to
turn it on again when you restart the
car.
CONT INUED
Windshield Washers
Hazard WarningRear Window Def ogger
Controls Near the Steering Wheel
Inst rument s and Cont rols75
With navigation
Page 80 of 364
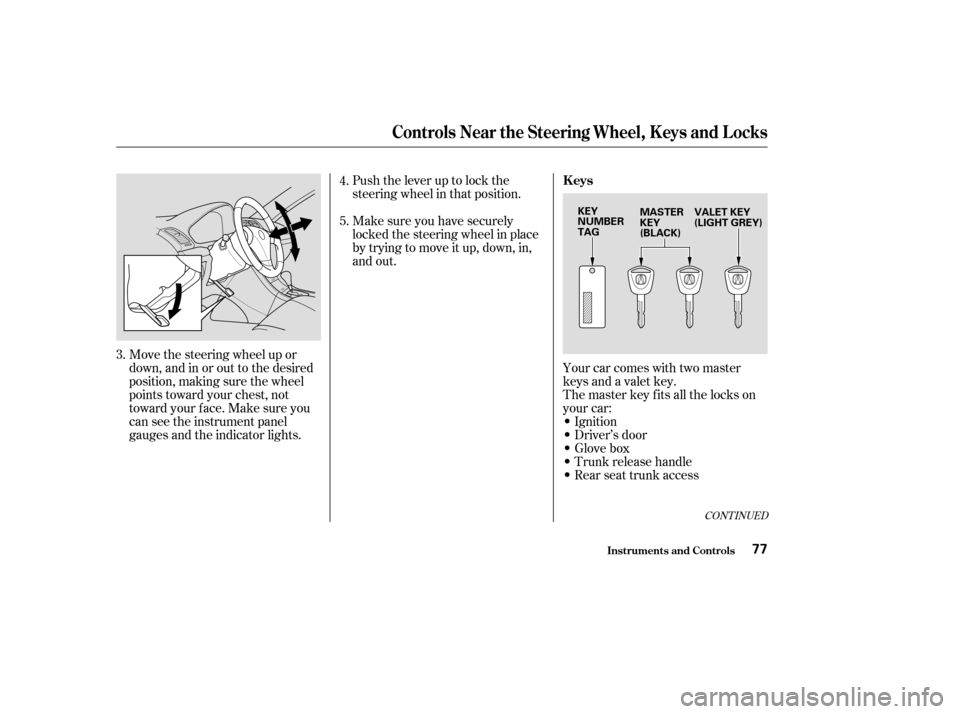
Push the lever up to lock the
steering wheel in that position.
Move the steering wheel up or
down, and in or out to the desired
position, making sure the wheel
points toward your chest, not
toward your f ace. Make sure you
can see the instrument panel
gauges and the indicator lights. Make sure you have securely
locked the steering wheel in place
by trying to move it up, down, in,
and out.
Your car comes with two master
keys and a valet key.
The master key fits all the locks on
your car:
Ignition
Driver’s door
Glovebox
Trunk release handle
Rear seat trunk access
3. 4.
5.
CONT INUED
Keys
Controls Near the Steering Wheel, K eys and L ocks
Inst rument s and Cont rols77
VALET KEY
(LIGHT GREY)
MASTER
KEY
(BLACK)
KEY
NUMBER
TAG
Page 86 of 364
CONT INUED
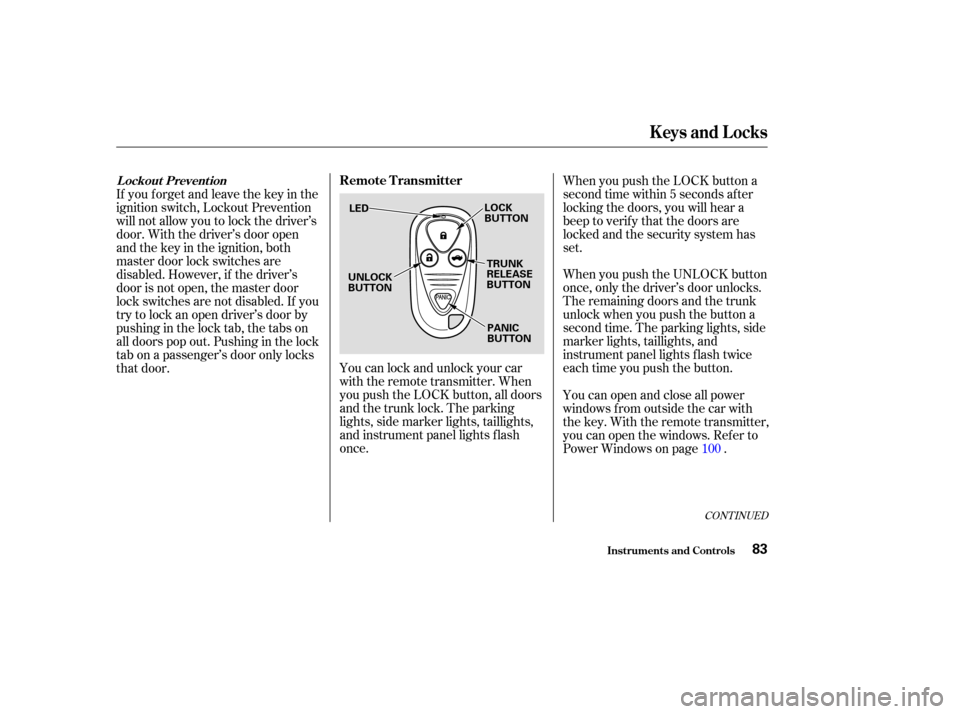
You can lock and unlock your car
with the remote transmitter. When
you push the LOCK button, all doors
and the trunk lock. The parking
lights, side marker lights, taillights,
and instrument panel lights f lash
once.When you push the UNLOCK button
once, only the driver’s door unlocks.
The remaining doors and the trunk
unlock when you push the button a
second time. The parking lights, side
marker lights, taillights, and
instrument panel lights f lash twice
each time you push the button.
If you f orget and leave the key in the
ignition switch, Lockout Prevention
will not allow you to lock the driver’s
door. With the driver’s door open
andthekeyintheignition,both
master door lock switches are
disabled. However, if the driver’s
door is not open, the master door
lock switches are not disabled. If you
try to lock an open driver’s door by
pushinginthelocktab,thetabson
all doors pop out. Pushing in the lock
tab on a passenger’s door only locks
that door. When you push the LOCK button a
second time within 5 seconds after
locking the doors, you will hear a
beep to verify that the doors are
locked and the security system has
set.
You can open and close all power
windows from outside the car with
the key. With the remote transmitter,
you can open the windows. Ref er to
Power Windows on page .
100
L ockout Prevent ionRemote Transmitter
Keys and Locks
Inst rument s and Cont rols83
TRUNK
RELEASE
BUTTON
LOCK
BUTTON
UNLOCK
BUTTON PANIC
BUTTON
LED
Page 107 of 364
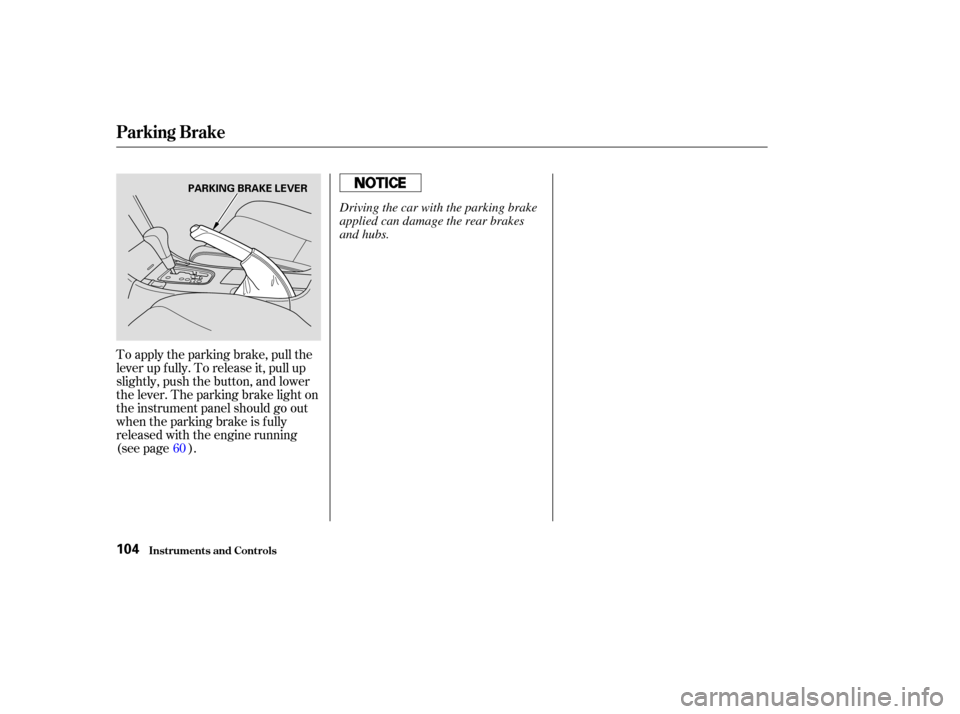
To apply the parking brake, pull the
lever up f ully. To release it, pull up
slightly, push the button, and lower
the lever. The parking brake light on
the instrument panel should go out
when the parking brake is f ully
released with the engine running
(see page ).60
Parking Brake
Inst rument s and Cont rols104
PARKING BRAKE LEVER
Driving the car with the parking brake
applied can damage the rear brakes
and hubs.
Page 114 of 364
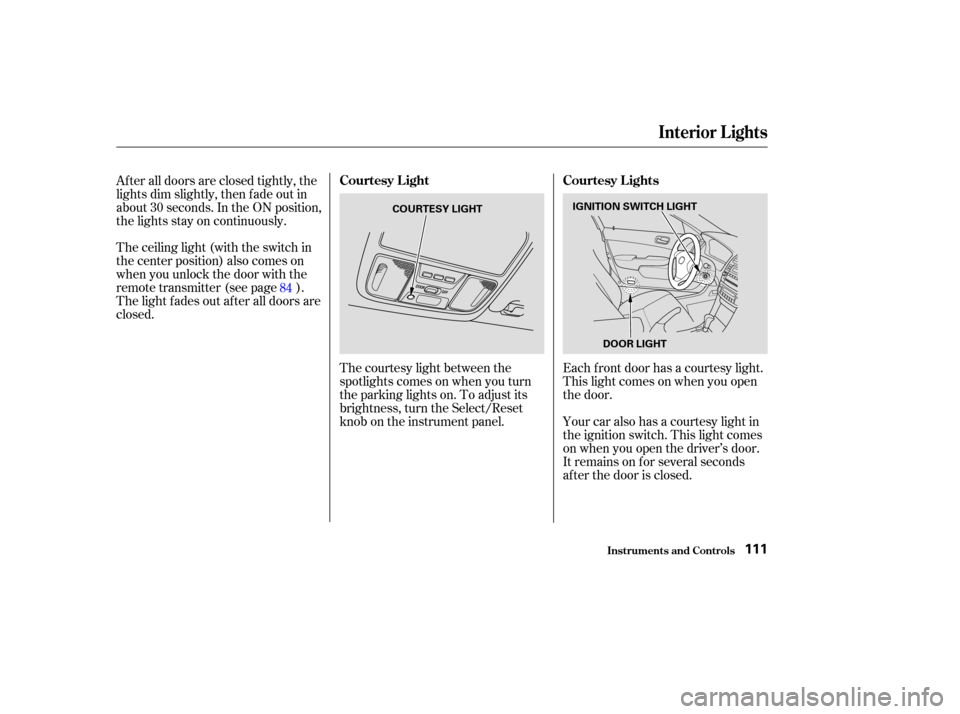
The courtesy light between the
spotlights comes on when you turn
the parking lights on. To adjust its
brightness, turn the Select/Reset
knob on the instrument panel.
After all doors are closed tightly, the
lights dim slightly, then f ade out in
about 30 seconds. In the ON position,
the lights stay on continuously.
The ceiling light (with the switch in
the center position) also comes on
when you unlock the door with the
remote transmitter (see page ).
The light f ades out af ter all doors are
closed.
Each f ront door has a courtesy light.
This light comes on when you open
the door.
Your car also has a courtesy light in
the ignition switch. This light comes
on when you open the driver’s door.
It remains on f or several seconds
af ter the door is closed.
84
Interior Lights
Inst rument s and Cont rols
Courtesy L ight
Courtesy L ights
111
COURTESY LIGHTIGNITION SWITCH LIGHT
DOOR LIGHT
Page 176 of 364
Do not attempt to alter this system
or add other devices to it.
Once the security system is set,
opening any door (without using the
key or the remote transmitter), the
hood, or the trunk will cause it to
sound. It also sounds if the radio is
removed f rom the dashboard or the
wiring is cut.
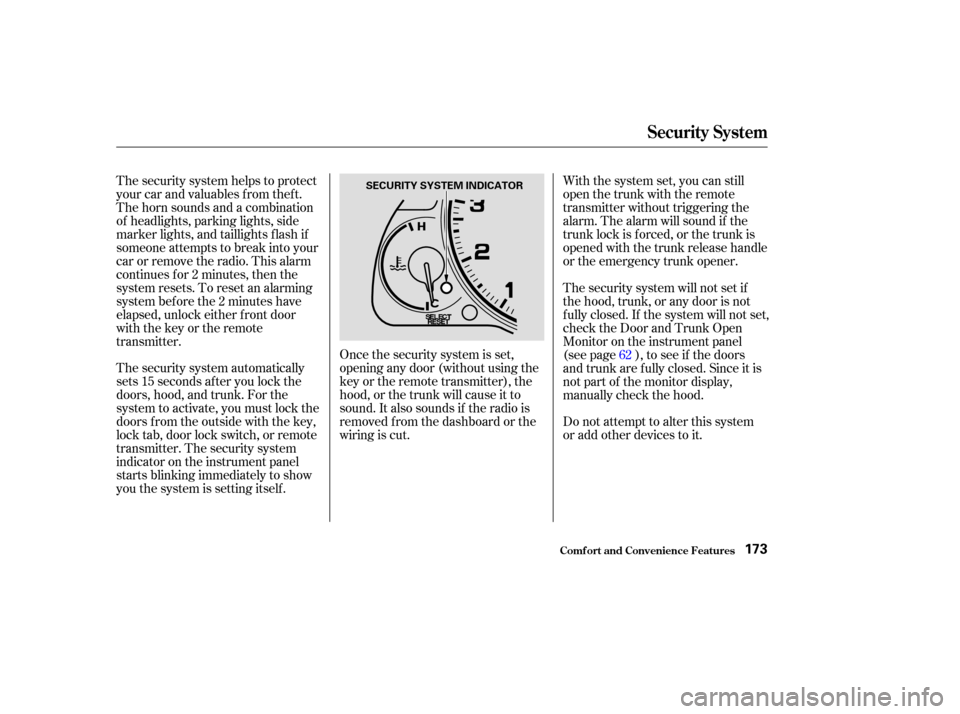
The security system automatically
sets 15 seconds after you lock the
doors, hood, and trunk. For the
system to activate, you must lock the
doors f rom the outside with the key,
lock tab, door lock switch, or remote
transmitter. The security system
indicator on the instrument panel
starts blinking immediately to show
you the system is setting itself . With the system set, you can still
open the trunk with the remote
transmitter without triggering the
alarm. The alarm will sound if the
trunk lock is f orced, or the trunk is
opened with the trunk release handle
or the emergency trunk opener.
The security system will not set if
the hood, trunk, or any door is not
f ully closed. If the system will not set,
check the Door and Trunk Open
Monitor on the instrument panel
(see page ), to see if the doors
and trunk are f ully closed. Since it is
notpartofthemonitordisplay,
manually check the hood.
The security system helps to protect
your car and valuables f rom thef t.
The horn sounds and a combination
of headlights, parking lights, side
marker lights, and taillights f lash if
someone attempts to break into your
carorremovetheradio.Thisalarm
continues f or 2 minutes, then the
system resets. To reset an alarming
system bef ore the 2 minutes have
elapsed, unlock either f ront door
with the key or the remote
transmitter.
62
Security System
Comf ort and Convenience Feat ures173
SECURITY SYSTEM INDICATOR
Page 177 of 364
Accelerate to the desired cruising
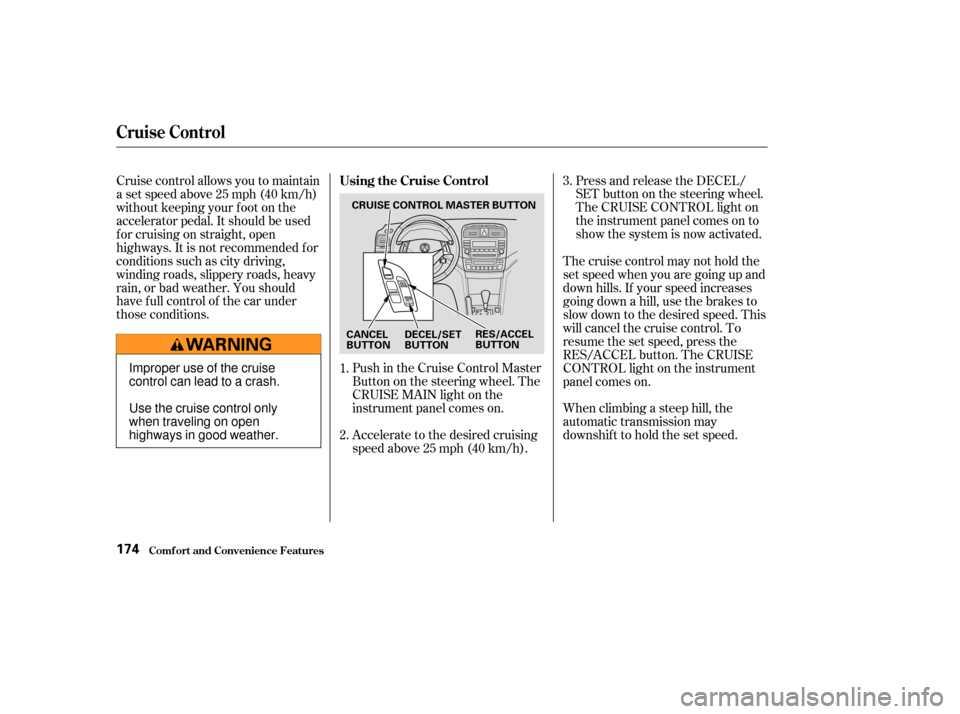
speedabove25mph(40km/h). Push in the Cruise Control Master
Buttononthesteeringwheel.The
CRUISE MAIN light on the
instrument panel comes on.Press and release the DECEL/
SET button on the steering wheel.
The CRUISE CONTROL light on
the instrument panel comes on to
show the system is now activated.
Cruise control allows you to maintain
asetspeedabove25mph(40km/h)
without keeping your f oot on the
accelerator pedal. It should be used
f or cruising on straight, open
highways. It is not recommended f or
conditions such as city driving,
winding roads, slippery roads, heavy
rain, or bad weather. You should
have f ull control of the car under
those conditions. The cruise control may not hold the
set speed when you are going up and
down hills. If your speed increases
going down a hill, use the brakes to
slow down to the desired speed. This
will cancel the cruise control. To
resume the set speed, press the
RES/ACCEL button. The CRUISE
CONTROL light on the instrument
panel comes on.
When climbing a steep hill, the
automatic transmission may
downshifttoholdthesetspeed.
1.
2. 3.
Using the Cruise Control
Cruise Control
Comf ort and Convenience Feat ures174
CRUISE CONTROL MASTER BUTTON
CANCEL
BUTTON RES/ACCEL
BUTTON
DECEL/SET
BUTTON
Improper use of the cruise
control can lead to a crash.
Use the cruise control only
when traveling on open
highways in good weather.
Page 178 of 364

You can increase the set cruising
speed in any of these ways:Press and hold the RES/ACCEL
button. The car will accelerate.
When you reach the desired
cruising speed, release the button.
Push on the accelerator pedal. Ac-
celerate to the desired cruising
speed and press the DECEL/SET
button.
To increase your speed in very
small amounts, tap the RES/
ACCEL button repeatedly. Each
time you do this, your car will
speed up about 1 mph (1.6 km/h). You can decrease the set cruising
speed in any of these ways:
Press and hold the DECEL/SET
button. The car will decelerate.
Release the button when you
reach the desired speed.
To slow down in very small
amounts, tap the DECEL/SET
button repeatedly. Each time you
do this, your car will slow down
about 1 mph (1.6 km/h).
Tap the brake or clutch pedal
lightly with your f oot. The
CRUISE CONTROL light on the
instrument panel will go out.
When the car slows to the desired
speed, press the DECEL/SET
button. The car will then maintain
the desired speed. Even with the cruise control turned
on, you can still use the accelerator
pedal to speed up f or passing. Af ter
completing the pass, take your foot
of f the accelerator pedal. The car
will return to the set cruising speed.
Resting your f oot on the brake or
clutch pedal will cause the cruise
control to cancel.
Changing the Set Speed
Cruise Control
Comf ort and Convenience Feat ures175
Page 179 of 364

Push the CANCEL button on the
steering wheel. Tap the brake or clutch pedal.
Youcancancelthecruisecontrolin
any of these ways: When you push the CANCEL button,
or tap the brake or clutch pedal, the
CRUISE CONTROL light on the
instrument panel will go out and the
car will begin to slow down. You can
use the accelerator pedal in the
normal way.
The system remembers the
previously-set cruising speed. To
return to that speed, accelerate to
above25mph(40km/h),thenpress
and release the RES/ACCEL button.
The CRUISE CONTROL light comes
on, and the car will accelerate to the
same cruising speed as bef ore.
Press the Cruise Control Master
button on the steering wheel. Pressing the Cruise Control Master
button turns the system completely
of f and erases the previous cruising
speed f rom memory. To use the
system again, ref er to
.
Cancelling the Cruise Control
Using t he
Cruise Cont rol
Cruise Control
Comf ort and Convenience Feat ures176
CANCEL BUTTON
CRUISE CONTROL MASTER BUTTON
Page 187 of 364
During this period:Avoid full-throttle starts and rapid
acceleration. We recommend gasolines containing
detergent additives that help prevent
f uel system and engine deposits.
Avoidhardbraking.Newbrakes
need to be broken-in by moderate
use f or the f irst 200 miles (300
km).
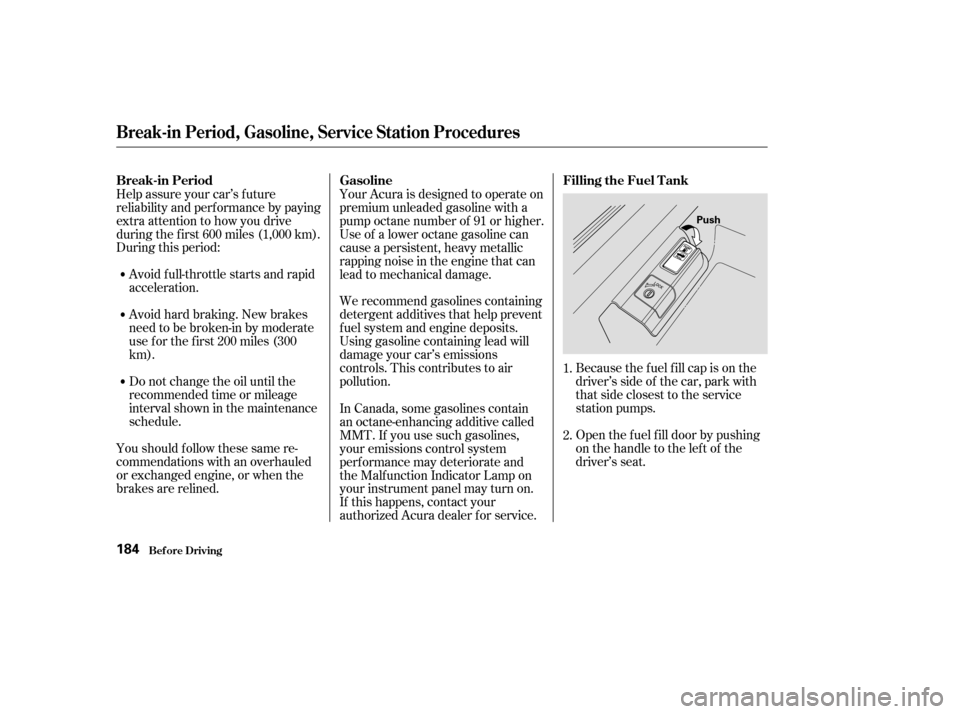
Open the f uel f ill door by pushing
onthehandletotheleftof the
driver’s seat.
Help assure your car’s f uture
reliability and perf ormance by paying
extra attention to how you drive
during the f irst 600 miles (1,000 km).
Because the f uel f ill cap is on the
driver’s side of the car, park with
that side closest to the service
station pumps.
Using gasoline containing lead will
damage your car’s emissions
controls. This contributes to air
pollution.
Youshouldfollowthesesamere-
commendations with an overhauled
or exchanged engine, or when the
brakes are relined. Do not change the oil until the
recommended time or mileage
intervalshowninthemaintenance
schedule. Your Acura is designed to operate on
premium unleaded gasoline with a
pump octane number of 91 or higher.
Useof aloweroctanegasolinecan
cause a persistent, heavy metallic
rapping noise in the engine that can
lead to mechanical damage.
In Canada, some gasolines contain
an octane-enhancing additive called
MMT. If you use such gasolines,
your emissions control system
perf ormance may deteriorate and
the Malf unction Indicator Lamp on
your instrument panel may turn on.
If this happens, contact your
authorized Acura dealer f or service.
1.
2.
Bef ore Driving
Break-in Period
GasolineFilling the Fuel Tank
Break-in Period, Gasoline, Service Station Procedures
184
Push