clock Acura ZDX 2012 User Guide
[x] Cancel search | Manufacturer: ACURA, Model Year: 2012, Model line: ZDX, Model: Acura ZDX 2012Pages: 645, PDF Size: 16.36 MB
Page 562 of 645
Replacing Front Fog Light Bulbs
Your vehicle uses halogen light
bulbs. When replacing a bulb, handle
it by its plastic case, and protect the
glass from contact with your skin or
hard objects. If you touch the glass,
clean it with denatured alcohol and a
clean cloth.Halogen bulbs get very hot when lit.
Oil, perspiration, or a scratch on the
glass can cause the bulb to overheat
and shatter.
The fog lights were properly aimed
when your vehicle was new. If you
regularly carry heavy items in the
cargo area or pull a trailer,
readjustment may be required.
Adjustment should be done by your
dealer or other qualified technician.
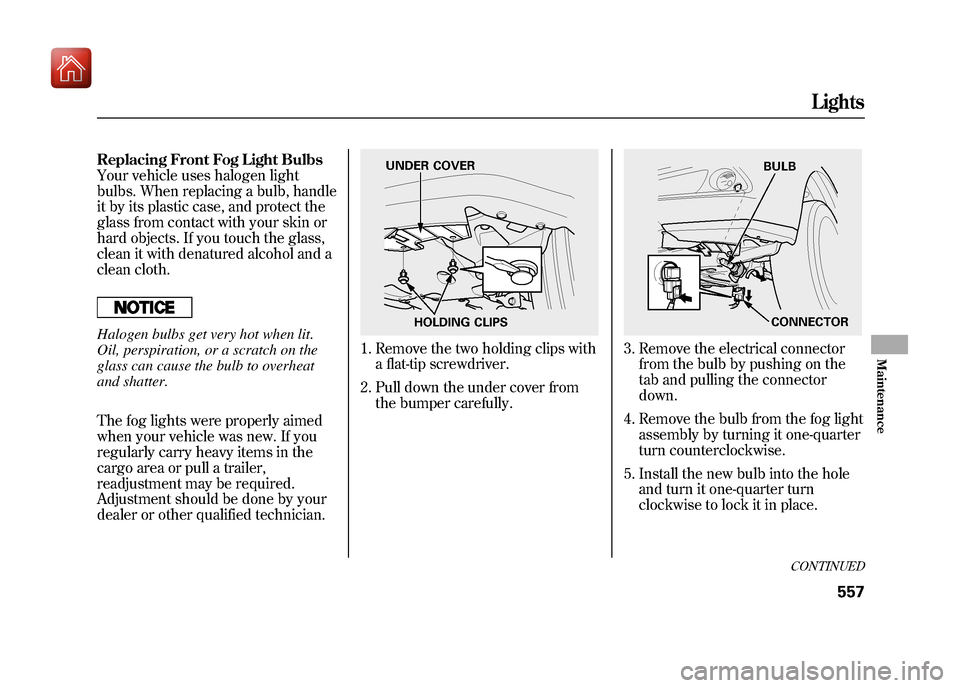
1. Remove the two holding clips witha flat-tip screwdriver.
2. Pull down the under cover from the bumper carefully.
3. Remove the electrical connectorfrom the bulb by pushing on the
tab and pulling the connector
down.
4. Remove the bulb from the fog light assembly by turning it one-quarter
turn counterclockwise.
5. Install the new bulb into the hole and turn it one-quarter turn
clockwise to lock it in place.
HOLDING CLIPS
UNDER COVER
BULB
CONNECTOR
CONTINUED
Lights
557
Maintenance
09/10/28 17:15:37 10 ACURA ZDX KA KC New North America Own 50 31SZN600 enu
Page 564 of 645
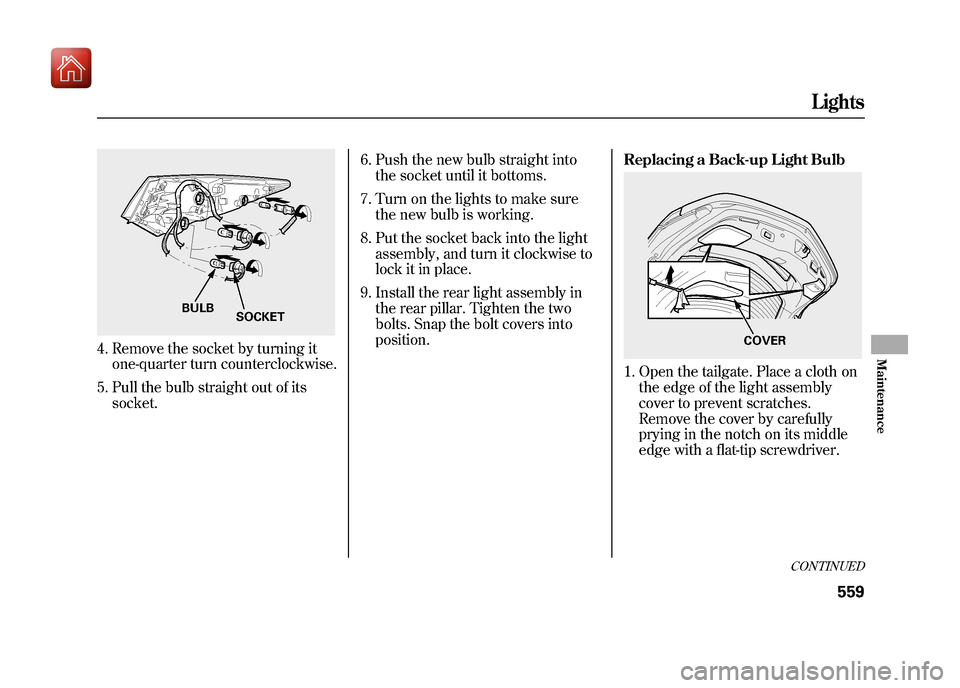
4. Remove the socket by turning itone-quarter turn counterclockwise.
5. Pull the bulb straight out of its socket. 6. Push the new bulb straight into
the socket until it bottoms.
7. Turn on the lights to make sure the new bulb is working.
8. Put the socket back into the light assembly, and turn it clockwise to
lock it in place.
9. Install the rear light assembly in the rear pillar. Tighten the two
bolts. Snap the bolt covers into
position. Replacing a Back-up Light Bulb
1. Open the tailgate. Place a cloth on
the edge of the light assembly
cover to prevent scratches.
Remove the cover by carefully
prying in the notch on its middle
edge with a flat-tip screwdriver.
BULB SOCKET
COVER
CONTINUED
Lights
559
Maintenance
09/10/28 17:15:37 10 ACURA ZDX KA KC New North America Own 50 31SZN600 enu
Page 565 of 645
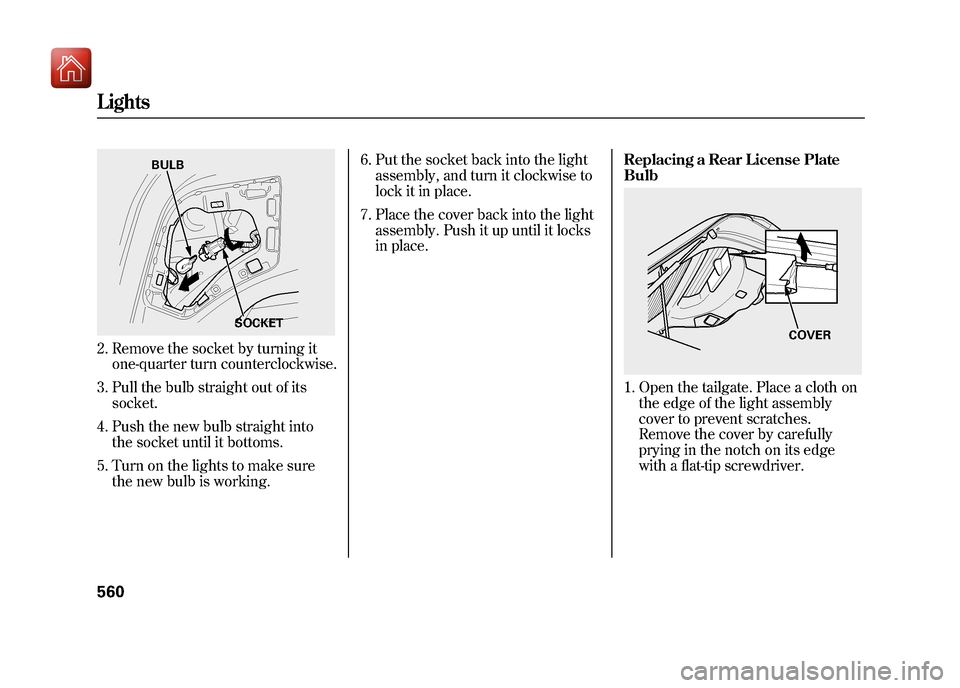
2. Remove the socket by turning itone-quarter turn counterclockwise.
3. Pull the bulb straight out of its socket.
4. Push the new bulb straight into the socket until it bottoms.
5. Turn on the lights to make sure the new bulb is working. 6. Put the socket back into the light
assembly, and turn it clockwise to
lock it in place.
7. Place the cover back into the light assembly. Push it up until it locks
in place. Replacing a Rear License Plate
Bulb
1. Open the tailgate. Place a cloth on
the edge of the light assembly
cover to prevent scratches.
Remove the cover by carefully
prying in the notch on its edge
with a flat-tip screwdriver.
BULB
SOCKET
COVER
Lights56009/10/28 17:15:37 10 ACURA ZDX KA KC New North America Own 50 31SZN600 enu
Page 566 of 645
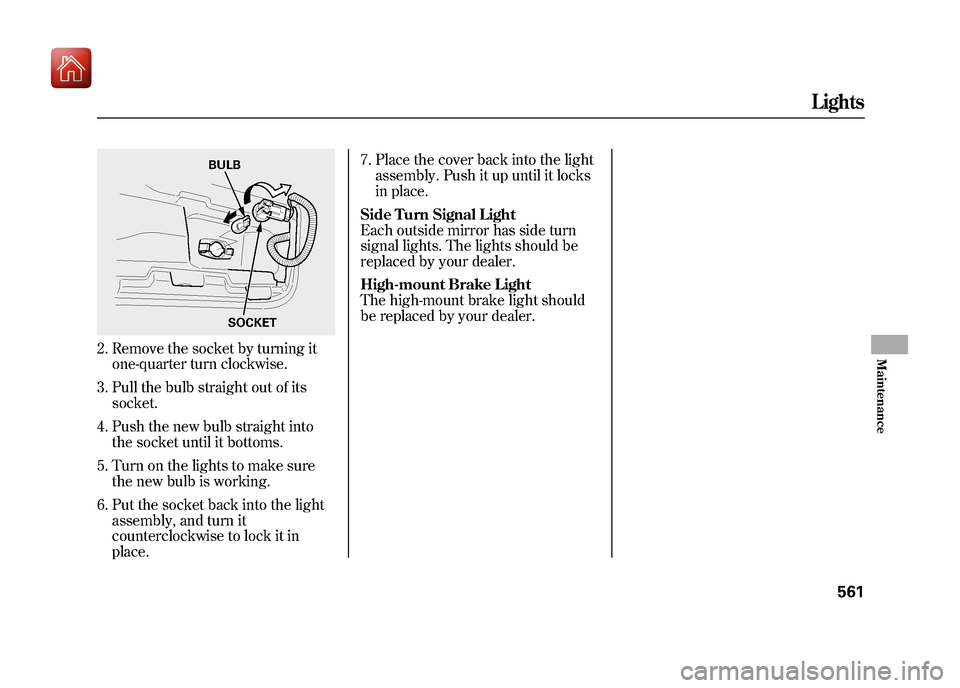
2. Remove the socket by turning itone-quarter turn clockwise.
3. Pull the bulb straight out of its socket.
4. Push the new bulb straight into the socket until it bottoms.
5. Turn on the lights to make sure the new bulb is working.
6. Put the socket back into the light assembly, and turn it
counterclockwise to lock it in
place. 7. Place the cover back into the light
assembly. Push it up until it locks
in place.
Side Turn Signal Light
Each outside mirror has side turn
signal lights. The lights should be
replaced by your dealer.
High-mount Brake Light
The high-mount brake light should
be replaced by your dealer.
BULB
SOCKET
Lights
561
Maintenance
09/10/28 17:15:37 10 ACURA ZDX KA KC New North America Own 50 31SZN600 enu
Page 586 of 645
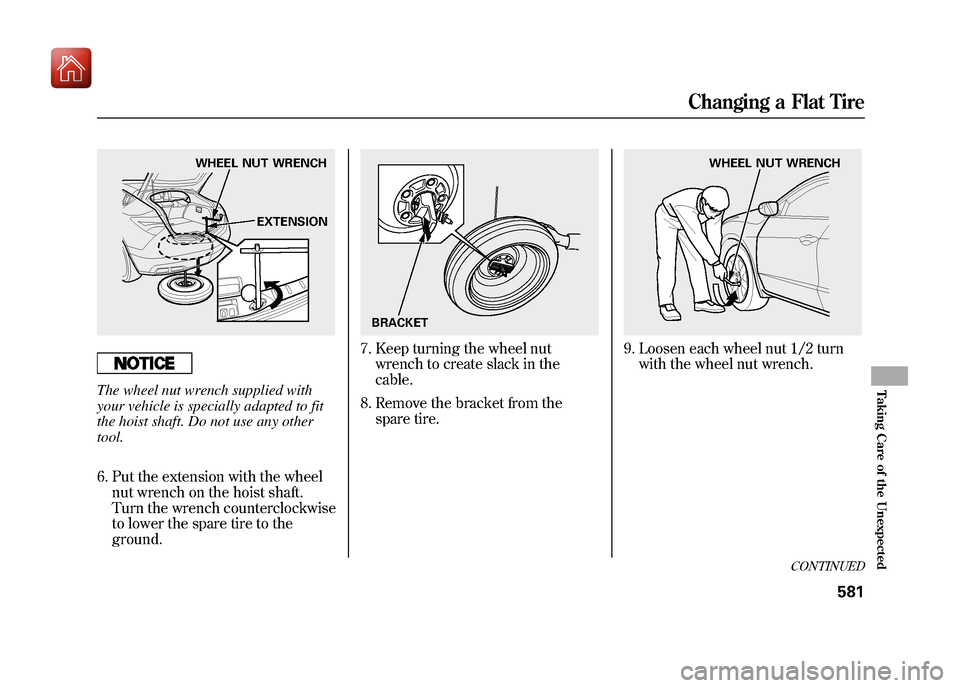
The wheel nut wrench supplied with
your vehicle is specially adapted to fit
the hoist shaft. Do not use any other
tool.6. Put the extension with the wheel nut wrench on the hoist shaft.
Turn the wrench counterclockwise
to lower the spare tire to the
ground.
7. Keep turning the wheel nutwrench to create slack in the
cable.
8. Remove the bracket from the spare tire.
9. Loosen each wheel nut 1/2 turnwith the wheel nut wrench.
WHEEL NUT WRENCH
EXTENSION
BRACKET
WHEEL NUT WRENCH
CONTINUED
Changing a Flat Tire
581
Taking Care of the Unexpected
09/10/28 17:15:37 10 ACURA ZDX KA KC New North America Own 50 31SZN600 enu
Page 587 of 645
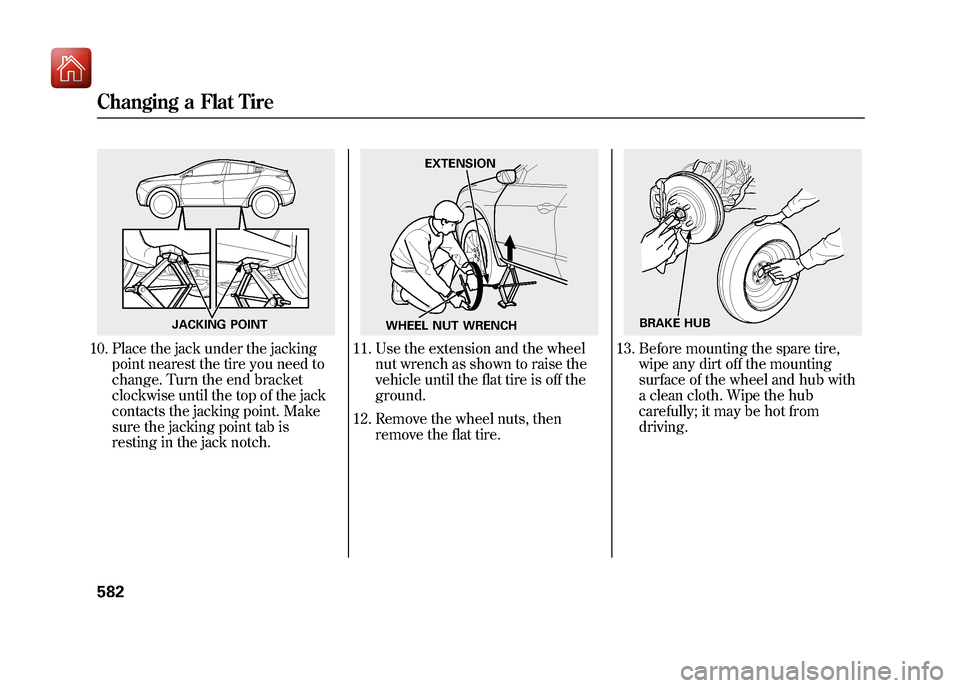
10. Place the jack under the jackingpoint nearest the tire you need to
change. Turn the end bracket
clockwise until the top of the jack
contacts the jacking point. Make
sure the jacking point tab is
resting in the jack notch.
11. Use the extension and the wheelnut wrench as shown to raise the
vehicle until the flat tire is off the
ground.
12. Remove the wheel nuts, then remove the flat tire.
13. Before mounting the spare tire,wipe any dirt off the mounting
surface of the wheel and hub with
a clean cloth. Wipe the hub
carefully; it may be hot from
driving.
JACKING POINT
WHEEL NUT WRENCH EXTENSION
BRAKE HUB
Changing a Flat Tire58209/10/28 17:15:37 10 ACURA ZDX KA KC New North America Own 50 31SZN600 enu
Page 589 of 645
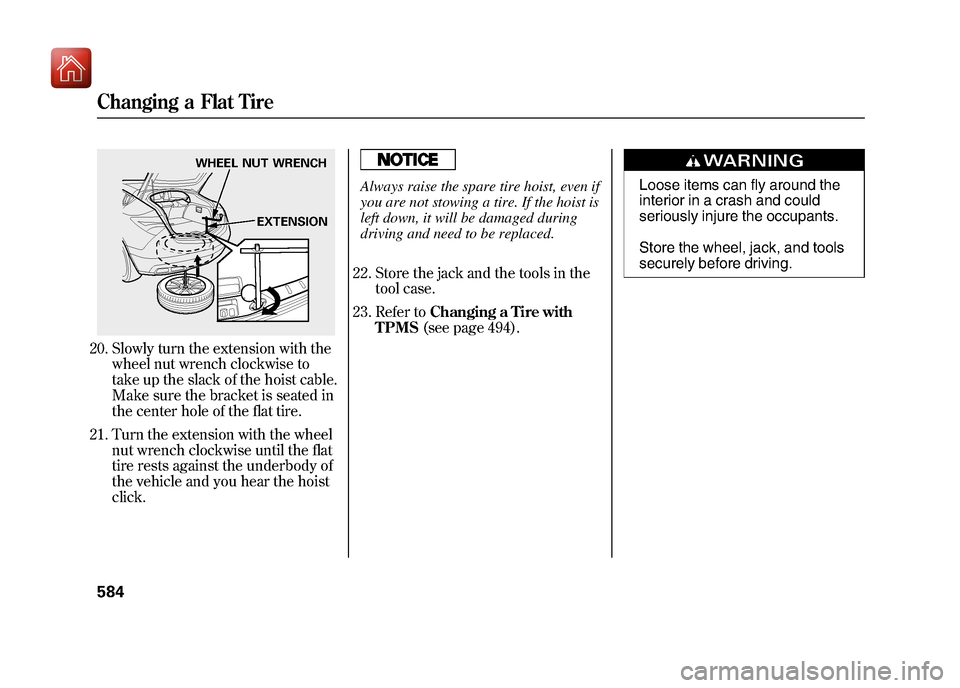
20. Slowly turn the extension with thewheel nut wrench clockwise to
take up the slack of the hoist cable.
Make sure the bracket is seated in
the center hole of the flat tire.
21. Turn the extension with the wheel nut wrench clockwise until the flat
tire rests against the underbody of
the vehicle and you hear the hoist
click.
Always raise the spare tire hoist, even if
you are not stowing a tire. If the hoist is
left down, it will be damaged during
driving and need to be replaced.
22. Store the jack and the tools in the tool case.
23. Refer to Changing a Tire with
TPMS (see page 494).
Loose items can fly around the
interior in a crash and could
seriously injure the occupants.
Store the wheel, jack, and tools
securely before driving.
WHEEL NUT WRENCH
EXTENSION
Changing a Flat Tire58409/10/28 17:15:37 10 ACURA ZDX KA KC New North America Own 50 31SZN600 enu
Page 595 of 645
4. If the temperature gauge stays atthe red mark, turn off the engine.
5. Look for any obvious coolant leaks, such as a split radiator hose.
Everything is still extremely hot,
so use caution. If you find a leak, it
must be repaired before you
continue driving (see Emergency
Towing on page 602).
6. If you do not find an obvious leak, check the coolant level in the
radiator reserve tank. Add coolant
if the level is below the MIN mark.
7. If there was no coolant in the reserve tank, you may need to add
coolant to the radiator. Let the
engine cool down until the pointer
reaches the middle of the
temperature gauge, or lower,
before checking the radiator.
Removing the radiator cap
while the engine is hot can
cause the coolant to spray out,
seriously scalding you.
Always let the engine and
radiator cool down before
removing the radiator cap.
8. Using gloves or a large heavy cloth, turn the radiator cap
counterclockwise, without pushing
down, to the first stop. After the
pressure releases, push down on
the cap, and turn it until it comes
off. 9. Start the engine and set the
climate control to AUTO at ‘‘Hi. ’’
Add coolant to the radiator up to
the base of the filler neck. If you
do not have the proper coolant
mixture available, you can add
plain water. Remember to have the
cooling system drained and refilled
with the proper mixture as soon as
you can.
10. Put the radiator cap back on tightly. Run the engine, and check
the temperature gauge. If it goes
back to the red mark, the engine
needs repair (see Emergency
Towing on page 602).
11. If the temperature stays normal, check the coolant level in the
radiator reserve tank. If it has gone
down, add coolant to the MAX
mark. Put the cap back on tightly.
If the Engine Overheats59009/10/28 17:15:37 10 ACURA ZDX KA KC New North America Own 50 31SZN600 enu
Page 633 of 645
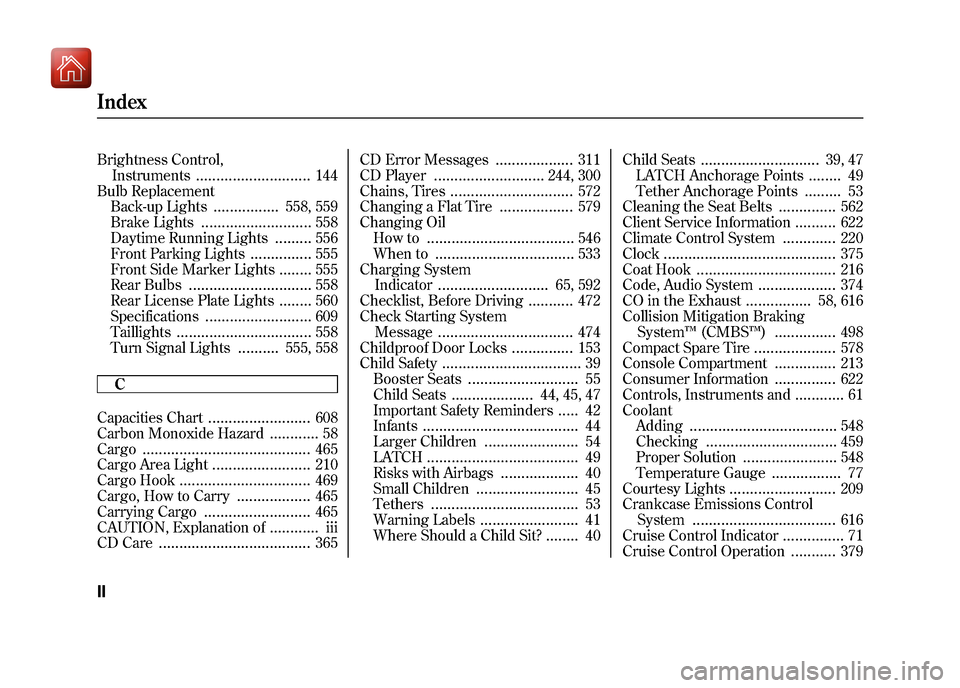
Brightness Control,Instruments
............................
144
Bulb Replacement Back-up Lights
................
558, 559
Brake Lights
...........................
558
Daytime Running Lights
.........
556
Front Parking Lights
...............
555
Front Side Marker Lights
........
555
Rear Bulbs
..............................
558
Rear License Plate Lights
........
560
Specifications
..........................
609
Taillights
.................................
558
Turn Signal Lights
..........
555, 558
C
Capacities Chart
.........................
608
Carbon Monoxide Hazard
............
58
Cargo
.........................................
465
Cargo Area Light
........................
210
Cargo Hook
................................
469
Cargo, How to Carry
..................
465
Carrying Cargo
..........................
465
CAUTION, Explanation of
............
iii
CD Care
.....................................
365 CD Error Messages
...................
311
CD Player
...........................
244, 300
Chains, Tires
..............................
572
Changing a Flat Tire
..................
579
Changing Oil How to
....................................
546
When to
..................................
533
Charging System Indicator
...........................
65, 592
Checklist, Before Driving
...........
472
Check Starting System Message
.................................
474
Childproof Door Locks
...............
153
Child Safety
..................................
39
Booster Seats
...........................
55
Child Seats
....................
44, 45, 47
Important Safety Reminders
.....
42
Infants
......................................
44
Larger Children
.......................
54
LATCH
.....................................
49
Risks with Airbags
...................
40
Small Children
.........................
45
Tethers
....................................
53
Warning Labels
........................
41
Where Should a Child Sit?
........
40 Child Seats
.............................
39, 47
LATCH Anchorage Points
........
49
Tether Anchorage Points
.........
53
Cleaning the Seat Belts
..............
562
Client Service Information
..........
622
Climate Control System
.............
220
Clock
..........................................
375
Coat Hook
..................................
216
Code, Audio System
...................
374
CO in the Exhaust
................
58, 616
Collision Mitigation Braking System ™(CMBS ™)
...............
498
Compact Spare Tire
....................
578
Console Compartment
...............
213
Consumer Information
...............
622
Controls, Instruments and
............
61
Coolant Adding
....................................
548
Checking
................................
459
Proper Solution
.......................
548
Temperature Gauge
.................
77
Courtesy Lights
..........................
209
Crankcase Emissions Control System
...................................
616
Cruise Control Indicator
...............
71
Cruise Control Operation
...........
379
IndexII09/10/28 17:15:37 10 ACURA ZDX KA KC New North America Own 50 31SZN600 enu
Page 640 of 645
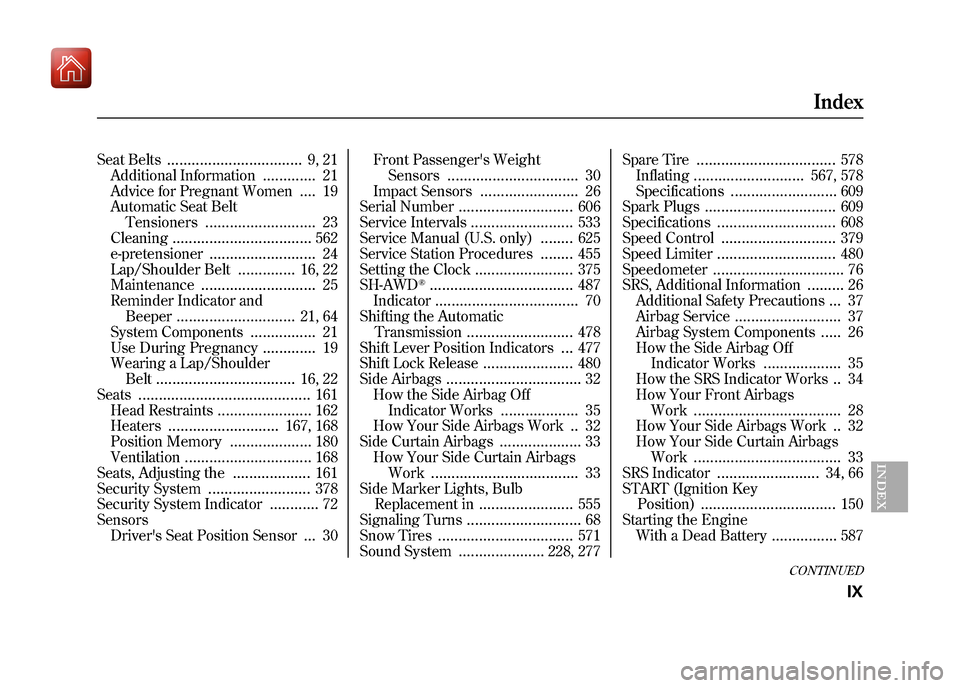
Seat Belts
.................................
9, 21
Additional Information
.............
21
Advice for Pregnant Women
....
19
Automatic Seat Belt
Tensioners
...........................
23
Cleaning
..................................
562
e-pretensioner
..........................
24
Lap/Shoulder Belt
..............
16, 22
Maintenance
............................
25
Reminder Indicator and Beeper
.............................
21, 64
System Components
................
21
Use During Pregnancy
.............
19
Wearing a Lap/Shoulder Belt
..................................
16, 22
Seats
..........................................
161
Head Restraints
.......................
162
Heaters
...........................
167, 168
Position Memory
....................
180
Ventilation
...............................
168
Seats, Adjusting the
...................
161
Security System
.........................
378
Security System Indicator
............
72
Sensors Driver's Seat Position Sensor
...
30 Front Passenger's Weight
Sensors
................................
30
Impact Sensors
........................
26
Serial Number
............................
606
Service Intervals
.........................
533
Service Manual (U.S. only)
........
625
Service Station Procedures
........
455
Setting the Clock
........................
375
SH-AWD
®...................................
487
Indicator
...................................
70
Shifting the Automatic Transmission
..........................
478
Shift Lever Position Indicators
...
477
Shift Lock Release
......................
480
Side Airbags
.................................
32
How the Side Airbag Off Indicator Works
...................
35
How Your Side Airbags Work..32
Side Curtain Airbags
....................
33
How Your Side Curtain Airbags Work
....................................
33
Side Marker Lights, Bulb Replacement in
.......................
555
Signaling Turns
............................
68
Snow Tires
.................................
571
Sound System
.....................
228, 277 Spare Tire
..................................
578
Inflating
...........................
567, 578
Specifications
..........................
609
Spark Plugs
................................
609
Specifications
.............................
608
Speed Control
............................
379
Speed Limiter
.............................
480
Speedometer
................................
76
SRS, Additional Information
.........
26
Additional Safety Precautions
...
37
Airbag Service
..........................
37
Airbag System Components
.....
26
How the Side Airbag Off Indicator Works
...................
35
How the SRS Indicator Works..34
How Your Front Airbags Work
....................................
28
How Your Side Airbags Work..32
How Your Side Curtain Airbags Work
....................................
33
SRS Indicator
.........................
34, 66
START (Ignition Key Position)
.................................
150
Starting the Engine With a Dead Battery
................
587
CONTINUED
Index
IX
INDEX
09/10/28 17:15:37 10 ACURA ZDX KA KC New North America Own 50 31SZN600 enu