clock Acura ZDX 2012 Owner's Manual
[x] Cancel search | Manufacturer: ACURA, Model Year: 2012, Model line: ZDX, Model: Acura ZDX 2012Pages: 645, PDF Size: 16.36 MB
Page 178 of 645

3. To open the windows andpanoramic glass roof further, press
the button again (within 20
seconds of step 1) and hold it. If
the windows and panoramic glass
roof stop before the desired
position, repeat steps 1 and 2.
You cannot close the windows,
panoramic glass roof, and sunshades
with the remote transmitter/keyless
access remote. Opening/Closing the Windows,
Panoramic Glass Roof, and
Sunshades with the Key or the
Built-in Key
You can open and close the windows,
panoramic glass roof, and sunshades
with the key in the driver's door lock.To open:
1. Insert the key in the driver's door
lock.
2. Turn the key clockwise, then release it.
3. Turn the key clockwise again, and hold it. All four windows,
panoramic glass roof, and
sunshades start to open. To stop
the windows and panoramic glass
roof release the key. The
sunshades will not stop opening
and will continue moving to the full
open position.
4. To open the windows and panoramic glass roof further, turn
and hold the key again (within 20
seconds of step 2).
Close Open
On models without keyless
access system
CONTINUED
Power Windows
173
Instruments and Controls
09/10/28 17:15:37 10 ACURA ZDX KA KC New North America Own 50 31SZN600 enu
Page 179 of 645
To close:1. Insert the key in the driver's door lock.
2. Turn the key counterclockwise, then release it.
3. Turn the key counterclockwise again, and hold it. All four windows
and panoramic glass roof start to
close. The sunshades will start to
close about 1 second after the
panoramic glass roof has fully
closed. To stop the windows,
panoramic glass roof, and
sunshades, release the key. 4. To close the windows, panoramic
glass roof, and sunshades further,
turn and hold the key again
(within 20 seconds of step 2).
Auto reverse does not work when
closing the windows, panoramic
glass roof, and sunshades with the
key.
NOTE: If the windows, panoramic
glass roof, and sunshades stop
before the desired position, repeat
steps 2 and 3. Panoramic Glass Roof
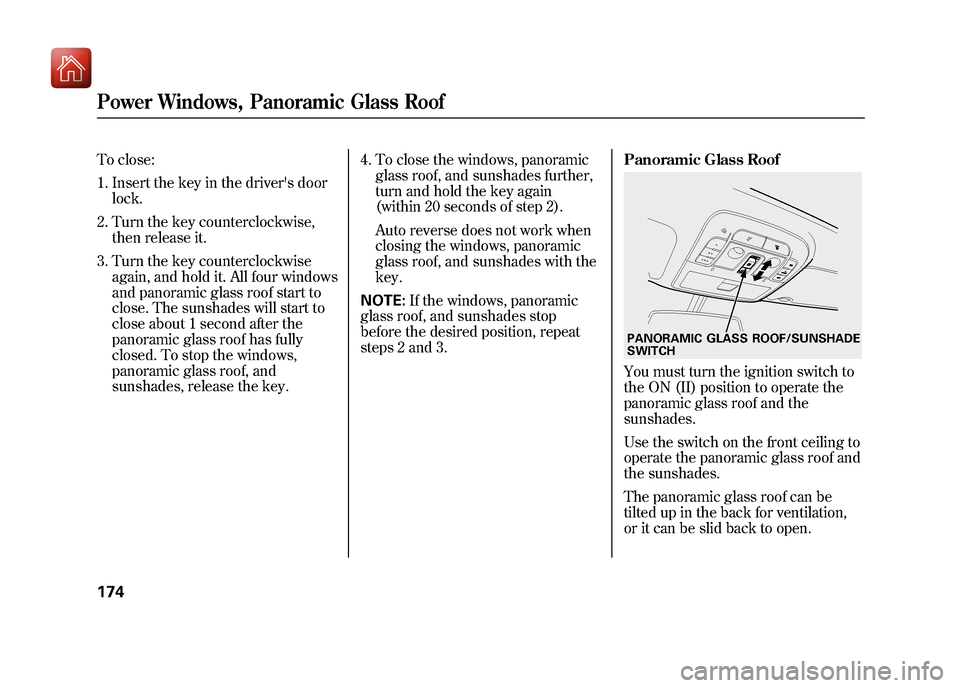
You must turn the ignition switch to
the ON (II) position to operate the
panoramic glass roof and the
sunshades.
Use the switch on the front ceiling to
operate the panoramic glass roof and
the sunshades.
The panoramic glass roof can be
tilted up in the back for ventilation,
or it can be slid back to open.PANORAMIC GLASS ROOF/SUNSHADE
SWITCH
Power Windows, Panoramic Glass Roof17409/10/28 17:15:37 10 ACURA ZDX KA KC New North America Own 50 31SZN600 enu
Page 224 of 645
The climate control system in your
vehicle provides a comfortable driving
environment in all weather conditions.
The standard audio system has many
features. This section describes those
features and how to use them.
Your vehicle has an anti-theft audio
system that requires a code number to
enable it.
Climate Control System
..................
220
Audio System
................................
228
Audio System (Models without Navigation System)
....................
229
Playing the AM/FM Radio (Models
without navigation system)
..........
230
Playing the XM
®Radio (Models
without navigation system)
..........
238
Playing Discs (Models without navigation system)
.....................
244
Disc Changer Error Message (Models without navigationsystem)
.................................
254 Playing an iPod
®(Models without
navigation system)
.....................
255
iPod
®Error Messages (Models
without navigation system)
..........
263
Playing a USB Flash Memory Device
(Models without navigationsystem)
.................................
264
USB Flash Memory Device Error
Messages (Models withoutnavigation system)
.................
271
Bluetooth
®Audio System (Models
without navigation system)
..........
272
Audio System (Models with navigation system)
.....................
277
Playing the AM/FM Radio (Models with navigation system)
..............
278
Playing the XM
®Radio (Models with
navigation system)
.....................
291
Playing a Disc (Models with navigation system)
.....................
300
Disc Player Error Messages (Models with navigation system)
..............
311
Playing Hard Disc Drive (HDD)
Audio (Models with navigationsystem)
.................................
312
Playing an iPod
®(Models with
navigation system)
.....................
340 iPod
®Error Messages (Models with
navigation system)
.....................
348
Playing a USB Flash Memory Device (Models with navigationsystem)
.................................
349
USB Flash Memory Device Error Messages (Models with navigationsystem)
.................................
359
Bluetooth
®Audio System (Models
with navigation system)
..............
360
Protecting Your Discs
.....................
365
FM/AM Radio Reception
................
369
Auxiliary Input Jack
........................
371
Remote Audio Controls
...................
371
Radio Theft Protection
....................
374
Setting the Clock
...........................
375
Security System
.............................
378
Cruise Control
...............................
379
Adaptive Cruise Control (ACC)
........
382
HomeLink
®Universal Transceiver
....
396
Bluetooth
®HandsFreeLink
®(Models
without navigation system)..........
399
Bluetooth
®HandsFreeLink
®(Models
with navigation system)..............
416
AcuraLink
®(U.S. models only)
.........
435
Rearview Mirror with Rearview
Camera Display
.........................
451
Features
219
Features
09/10/28 17:15:37 10 ACURA ZDX KA KC New North America Own 50 31SZN600 enu
Page 234 of 645
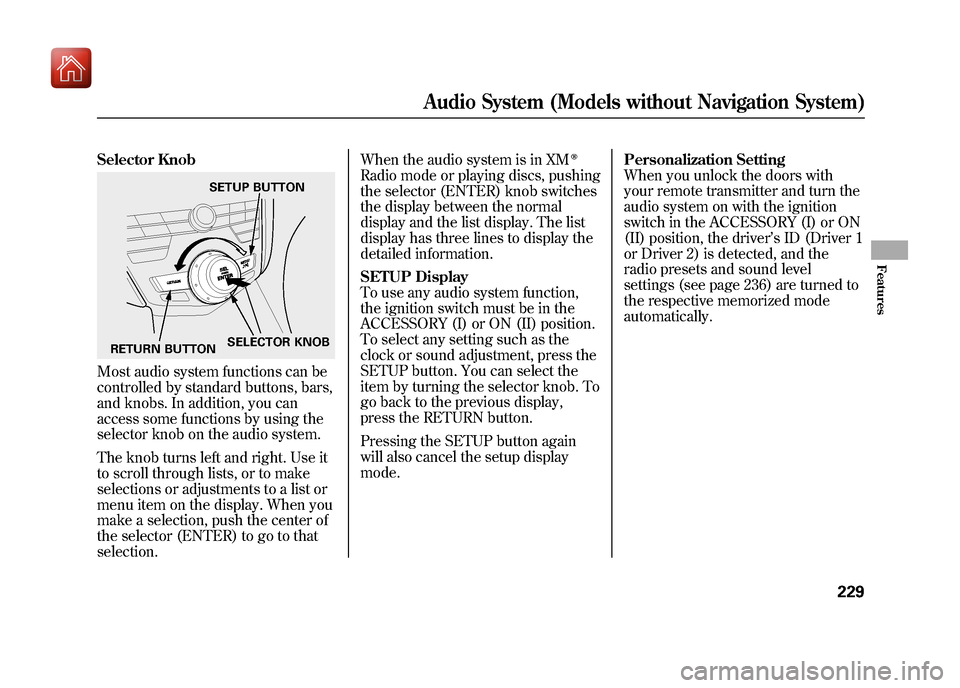
Selector KnobMost audio system functions can be
controlled by standard buttons, bars,
and knobs. In addition, you can
access some functions by using the
selector knob on the audio system.
The knob turns left and right. Use it
to scroll through lists, or to make
selections or adjustments to a list or
menu item on the display. When you
make a selection, push the center of
the selector (ENTER) to go to that
selection.When the audio system is in XM
ꭂ
Radio mode or playing discs, pushing
the selector (ENTER) knob switches
the display between the normal
display and the list display. The list
display has three lines to display the
detailed information.
SETUP Display
To use any audio system function,
the ignition switch must be in the
ACCESSORY (I) or ON (II) position.
To select any setting such as the
clock or sound adjustment, press the
SETUP button. You can select the
item by turning the selector knob. To
go back to the previous display,
press the RETURN button.
Pressing the SETUP button again
will also cancel the setup display
mode.
Personalization Setting
When you unlock the doors with
your remote transmitter and turn the
audio system on with the ignition
switch in the ACCESSORY (I) or ON
(II) position, the driver
’s ID (Driver 1
or Driver 2) is detected, and the
radio presets and sound level
settings (see page 236) are turned to
the respective memorized mode
automatically.
SETUP BUTTON
RETURN BUTTON SELECTOR KNOB
Audio System (Models without Navigation System)
229
Features
09/10/28 17:15:37 10 ACURA ZDX KA KC New North America Own 50 31SZN600 enu
Page 380 of 645
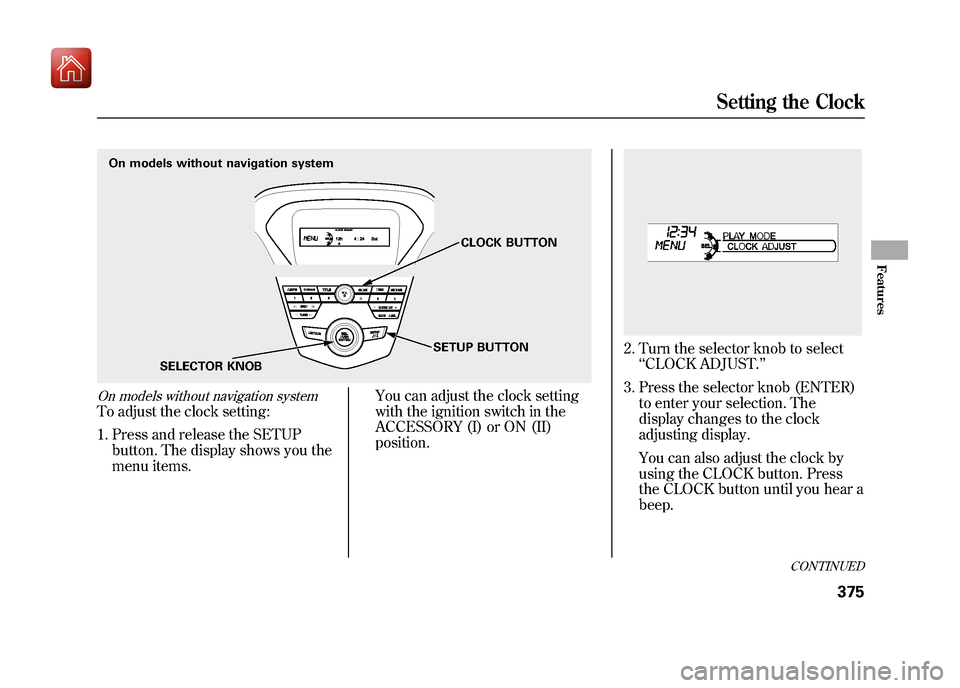
On models without navigation systemTo adjust the clock setting:1. Press and release the SETUP button. The display shows you the
menu items. You can adjust the clock setting
with the ignition switch in the
ACCESSORY (I) or ON (II)
position.
2. Turn the selector knob to select
‘‘CLOCK ADJUST. ’’
3. Press the selector knob (ENTER) to enter your selection. The
display changes to the clock
adjusting display.
You can also adjust the clock by
using the CLOCK button. Press
the CLOCK button until you hear a
beep.
On models without navigation system
SELECTOR KNOB CLOCK BUTTON
SETUP BUTTON
CONTINUED
Setting the Clock
375
Features
09/10/28 17:15:37 10 ACURA ZDX KA KC New North America Own 50 31SZN600 enu
Page 381 of 645
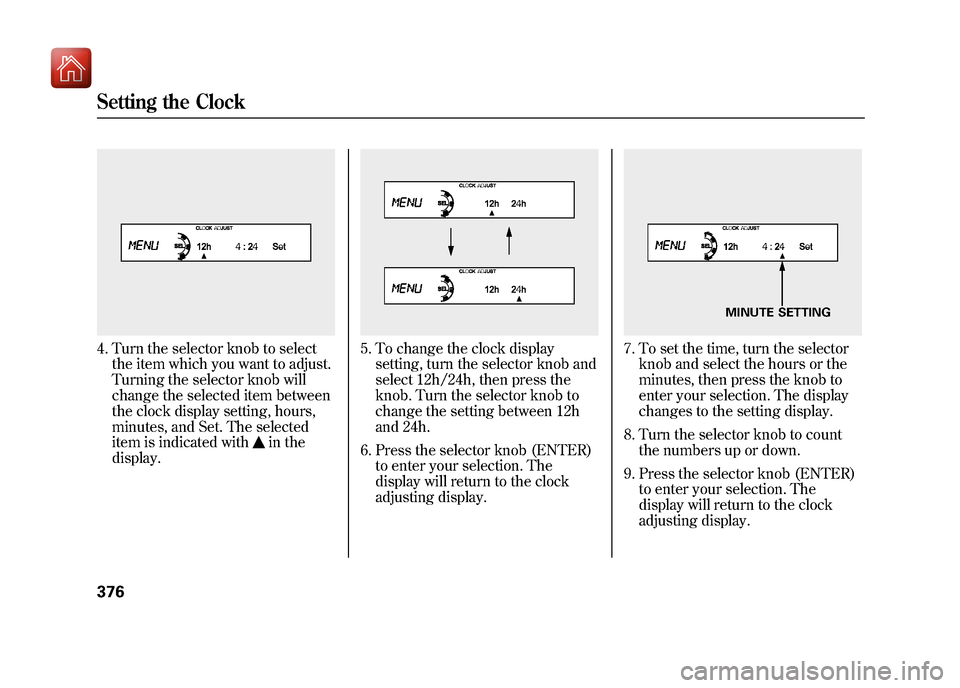
4. Turn the selector knob to selectthe item which you want to adjust.
Turning the selector knob will
change the selected item between
the clock display setting, hours,
minutes, and Set. The selected
item is indicated with
in the
display.
5. To change the clock display setting, turn the selector knob and
select 12h/24h, then press the
knob. Turn the selector knob to
change the setting between 12h
and 24h.
6. Press the selector knob (ENTER) to enter your selection. The
display will return to the clock
adjusting display.
7. To set the time, turn the selectorknob and select the hours or the
minutes, then press the knob to
enter your selection. The display
changes to the setting display.
8. Turn the selector knob to count the numbers up or down.
9. Press the selector knob (ENTER) to enter your selection. The
display will return to the clock
adjusting display.
MINUTE SETTING
Setting the Clock37609/10/28 17:15:37 10 ACURA ZDX KA KC New North America Own 50 31SZN600 enu
Page 382 of 645
While setting the clock, pressing
the RETURN button will go back
to the previous display.
Pressing the SETUP button again
will cancel this setting mode.
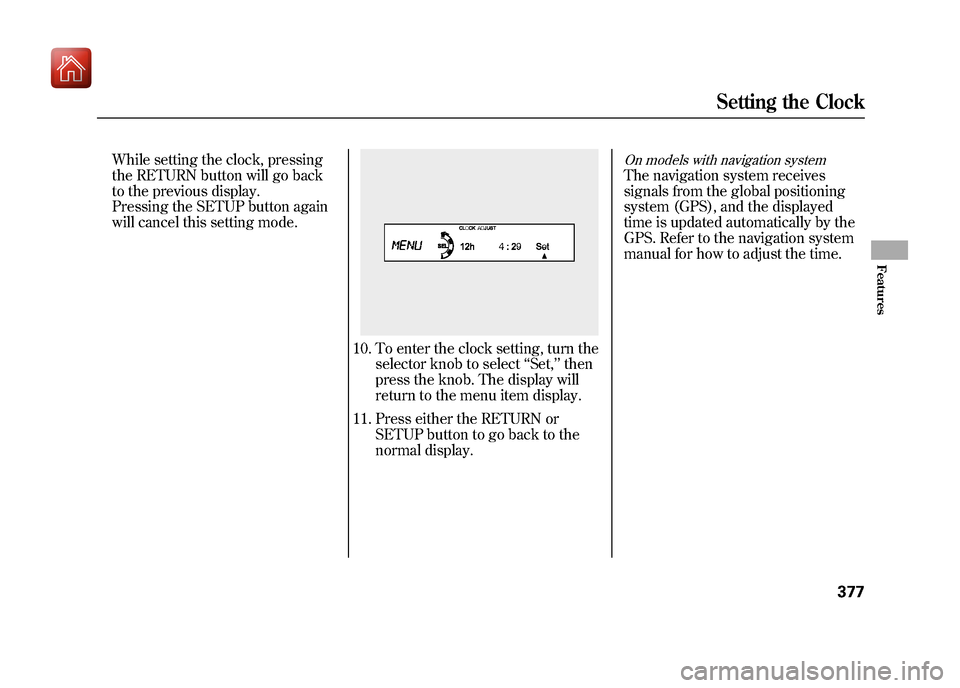
10. To enter the clock setting, turn theselector knob to select ‘‘Set, ’’then
press the knob. The display will
return to the menu item display.
11. Press either the RETURN or SETUP button to go back to the
normal display.
On models with navigation systemThe navigation system receives
signals from the global positioning
system (GPS), and the displayed
time is updated automatically by the
GPS. Refer to the navigation system
manual for how to adjust the time.
Setting the Clock
377
Features
09/10/28 17:15:37 10 ACURA ZDX KA KC New North America Own 50 31SZN600 enu
Page 554 of 645
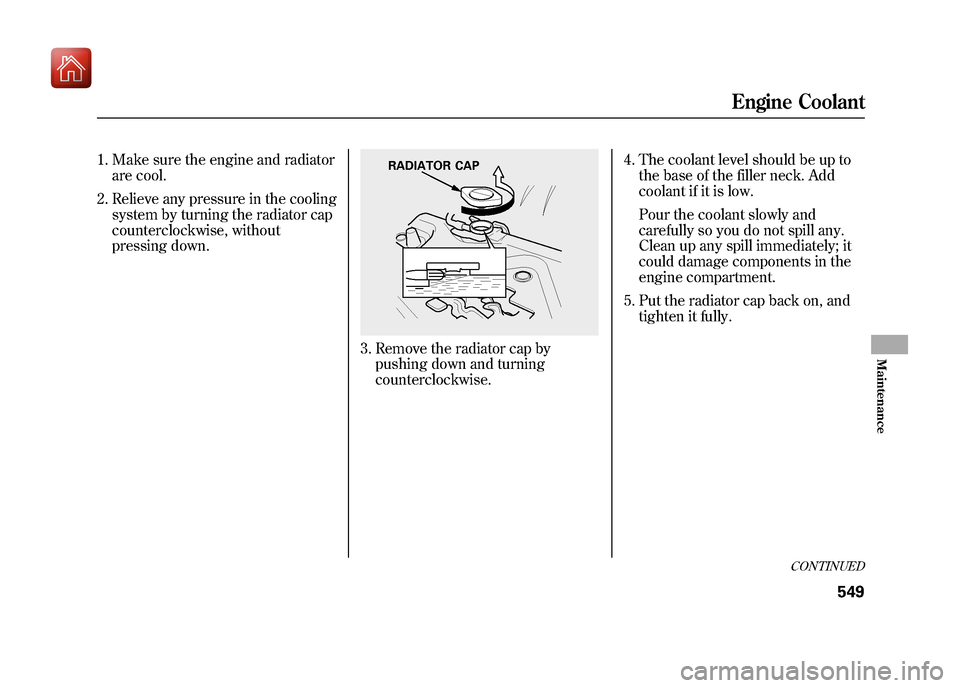
1. Make sure the engine and radiatorare cool.
2. Relieve any pressure in the cooling system by turning the radiator cap
counterclockwise, without
pressing down.
3. Remove the radiator cap bypushing down and turning
counterclockwise. 4. The coolant level should be up to
the base of the filler neck. Add
coolant if it is low.
Pour the coolant slowly and
carefully so you do not spill any.
Clean up any spill immediately; it
could damage components in the
engine compartment.
5. Put the radiator cap back on, and tighten it fully.
RADIATOR CAP
CONTINUED
Engine Coolant
549
Maintenance
09/10/28 17:15:37 10 ACURA ZDX KA KC New North America Own 50 31SZN600 enu
Page 560 of 645
Headlight Aiming
The headlights were properly aimed
when your vehicle was new. If you
regularly carry heavy items in the
cargo area or pull a trailer,
readjustment may be required.
Adjustments should be done by your
dealer or another qualified
technician.
Low/High Beam Headlight Bulb
Replacement
The low/high beam headlight bulbs
are a type of high voltage discharge
tube. High voltage can remain in the
circuit even with the light switch off
and the key removed (or the vehicle
is in VEHICLE OFF (LOCK) mode
on models with keyless access
system). Because of this, you should
not attempt to examine or change a
low/high beam headlight bulb
yourself. If a low/high beam
headlight bulb fails, take the vehicle
to your dealer to have it replaced.Replacing Front Turn Signal/
Parking and Side Marker Light
Bulbs
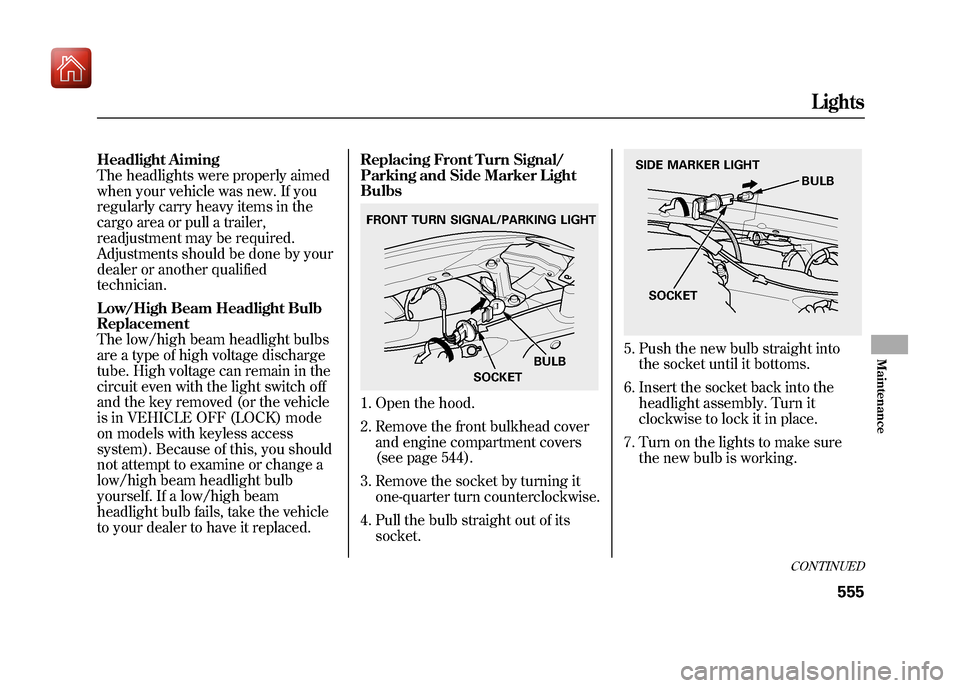
1. Open the hood.
2. Remove the front bulkhead cover
and engine compartment covers
(see page 544).
3. Remove the socket by turning it one-quarter turn counterclockwise.
4. Pull the bulb straight out of its socket.
5. Push the new bulb straight intothe socket until it bottoms.
6. Insert the socket back into the headlight assembly. Turn it
clockwise to lock it in place.
7. Turn on the lights to make sure the new bulb is working.
FRONT TURN SIGNAL/PARKING LIGHT
SOCKETBULB
SIDE MARKER LIGHT
SOCKET BULB
CONTINUED
Lights
555
Maintenance
09/10/28 17:15:37 10 ACURA ZDX KA KC New North America Own 50 31SZN600 enu
Page 561 of 645
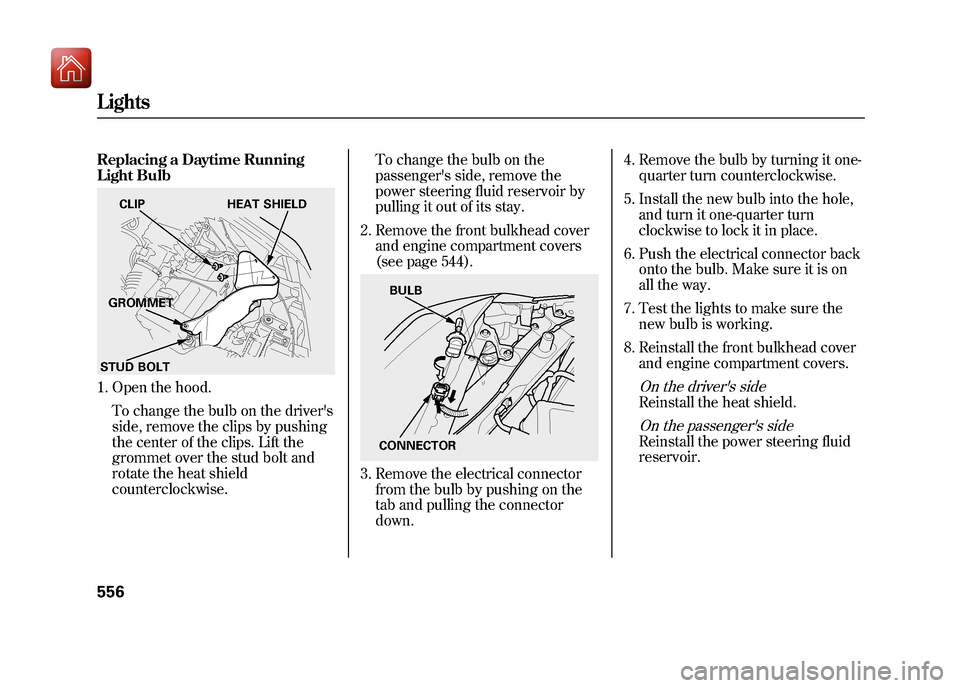
Replacing a Daytime Running
Light Bulb1. Open the hood.To change the bulb on the driver's
side, remove the clips by pushing
the center of the clips. Lift the
grommet over the stud bolt and
rotate the heat shield
counterclockwise. To change the bulb on the
passenger's side, remove the
power steering fluid reservoir by
pulling it out of its stay.
2. Remove the front bulkhead cover and engine compartment covers
(see page 544).
3. Remove the electrical connectorfrom the bulb by pushing on the
tab and pulling the connector
down. 4. Remove the bulb by turning it one-
quarter turn counterclockwise.
5. Install the new bulb into the hole, and turn it one-quarter turn
clockwise to lock it in place.
6. Push the electrical connector back onto the bulb. Make sure it is on
all the way.
7. Test the lights to make sure the new bulb is working.
8. Reinstall the front bulkhead cover and engine compartment covers.
On the driver's sideReinstall the heat shield.On the passenger's sideReinstall the power steering fluid
reservoir.
CLIP HEAT SHIELD
GROMMET
STUD BOLT
CONNECTOR BULB
Lights55609/10/28 17:15:37 10 ACURA ZDX KA KC New North America Own 50 31SZN600 enu